
Fun Free Crochet Goose Fridge Magnet Pattern for Quick Décor
Brighten your kitchen space with the Free Crochet Goose Fridge Magnet Pattern, a playful and practical project that adds charm to any metallic surface.
A stroke of handmade charm can turn a kitchen plain into a gallery of personality, and this little feathered friend does just that. The Crochet Goose Fridge Magnet Pattern brings a whimsical touch to your space through a compact, feather-textured goose ready to perch on any magnetic surface. This charming magnet does more than decorate: it's both practical and delightful.
Quick Crochet Goose Fridge Magnet Pattern Perfect for Gifts
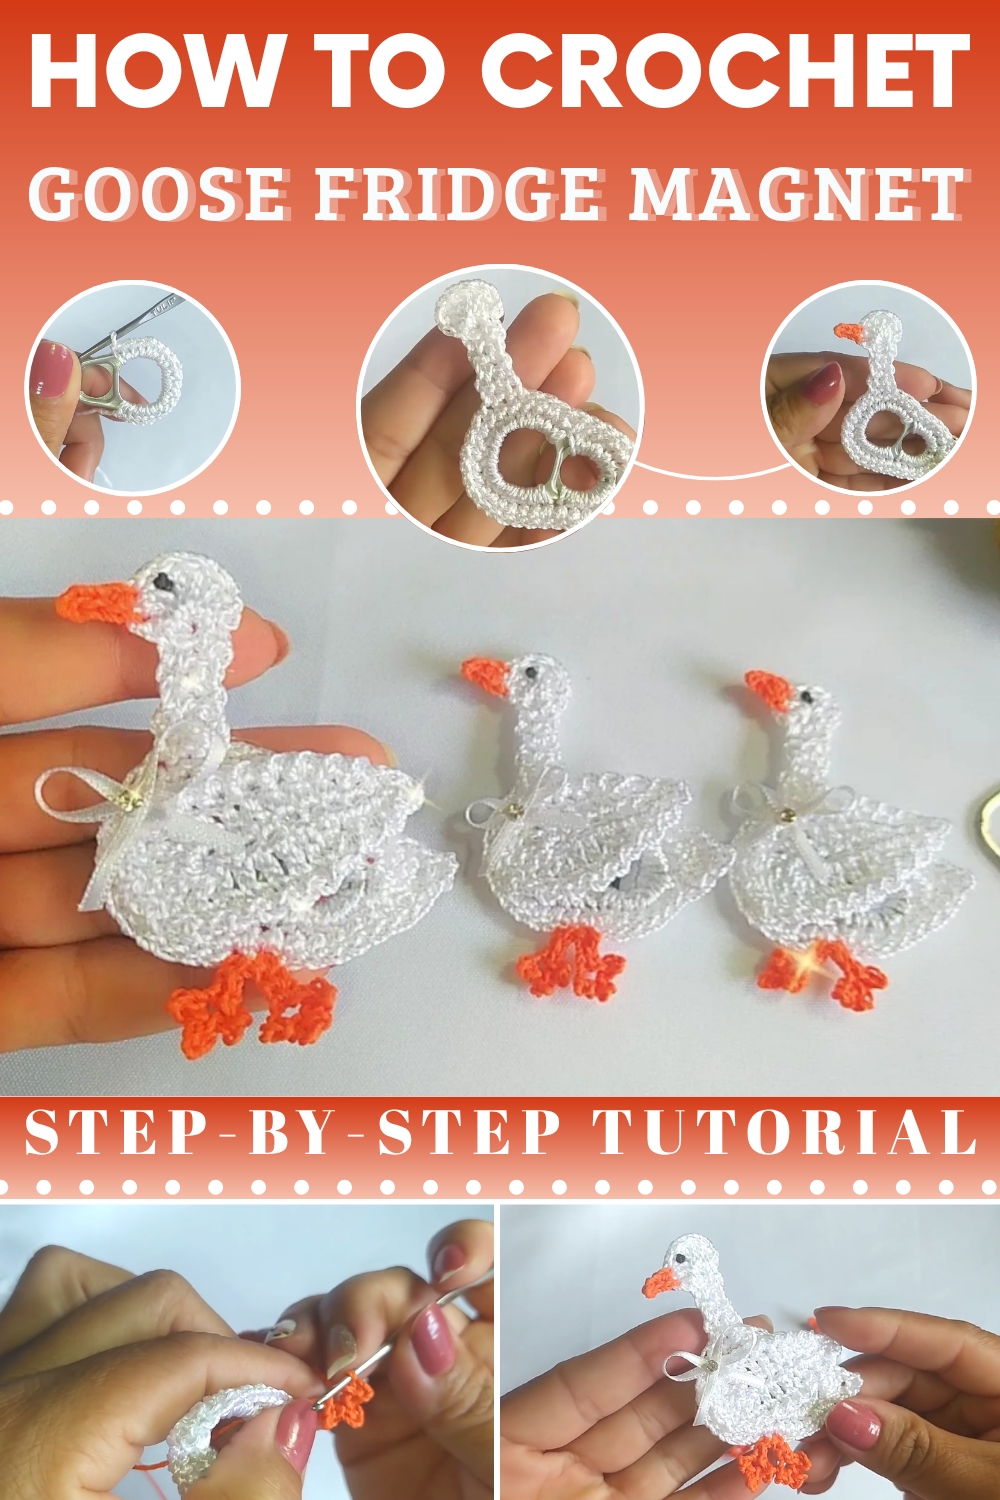
The compact size makes it ideal for small spaces, while its tactile appeal and textured crochet enhance visual interest. The project refines motor skills, reinforces stitch control, and offers a rewarding, quick win for both seasoned stitchers and curious beginners. As a thoughtful gift or personal delight, this goose magnet blends practicality with personality adding a flutter of handcrafted warmth to everyday surfaces.

Free Crochet Goose Fridge Magnet Pattern
Skill Level
Beginner to Intermediate – Basic crochet skills are required, including working with small details and assembly.
Finished Size
Approximately 5–6 inches (12–15 cm) depending on your yarn and tension.
Materials Needed
- Yarn:
- White yarn: Main color for the goose body (Tex 288 or similar).
- Pumpkin/Orange yarn: For beak and feet details.
- Black yarn: For the eye (optional; movable eyes can be used instead).
- Crochet Hook: 1.75 mm hook (or size appropriate for the yarn used).
- Magnet: Small flat magnet to attach to the back.
- Ribbon: 12 cm piece of decorative ribbon in a color of your choice (optional, for adding a bow).
- Glue: Hot glue gun (for attaching the magnet and optional details).
- Sewing tools:
- Tapestry needle for attaching pieces.
- Scissors to cut yarn/thread.
- Lighter to seal yarn and ribbon ends.
Key Abbreviations
- ch – Chain
- sc – Single Crochet
- dc – Double Crochet
- sl st – Slip Stitch
- st(s) – Stitch(es)
- BLO – Back Loop Only
- Floats: Use floating stitches for attaching details.
Special Techniques
- Magic Circle (MC): This technique creates a tight, closed center for circular crochet.
- Slip Stitch (sl st): Used to join rounds seamlessly or to create decorative edging.
- Shaping with Increases and Decreases: Necessary to form specific contours, like for the neck and feet.
Pattern Instructions
1. Creating the Goose Base
Yarn Color: White
- Begin by attaching yarn to the sardine seal's larger edge:
- Insert your hook and ch 1.
- Round 1: Crochet 20 sc evenly spaced across the larger edge. Then, move to the smaller side of the seal and crochet 12 sc around. Join with a sl st in the first sc. (32 sts total)
- Round 2:
- Ch 1, sc in each st around (32 sts total).
- Work around evenly until you reach the thinner part of the seal, where you will make 5 sc to shape the curve.
- Feather Detail Shape:
- In the next st, yarn over and make 1 dc, repeat in the same st to make 3 dc total.
- Ch 2 after the third dc, sl st into the top of the last dc to form a small "picot" point.
- Finish this decorative feather detail by adding 3 dc into the same st.
- Continue to the End of the Row:
- Return to single crochet in each st until you’ve completed the seal. Join with a sl st, cut the yarn, and weave ends in with a tapestry needle.

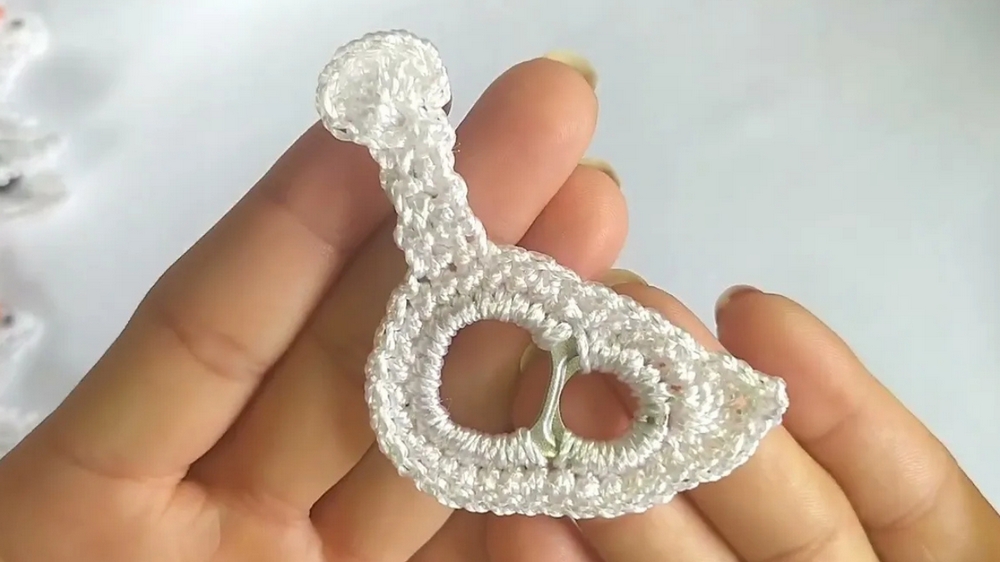
2. Forming the Neck Base and Head
- Attach White Yarn to Create the Neck:
- Locate the fifth sc from the larger part of the base. Start sc in this st to create the neck. Tip: Ensure that your stitching aligns with the center of the body for symmetry.
- Row 1: Crochet 3 sc evenly in a straight line.
- Rows 2–6: Repeat 3 sc back and forth to form the neck's height.
- Head:
- After completing the last neck row, ch 1, and turn your work.
- Work 6 dc into the center st of your last row to form the head. (This creates a semi-circle shape).
- Finish by joining with a sl st into the next st. Cut the yarn and weave in any excess yarn.
3. Goose Wings (Make 2)
Yarn Color: White
- Wing Base:
- Ch 8 and turn. Starting from the second ch from your hook:
- Work 2 sc into the first 2 ch.
- Work 2 half double crochet (hdc) into the next 2 ch.
- Work 3 dc into the last ch.
- Ch 8 and turn. Starting from the second ch from your hook:
- Shape Wing:
- Rotate your work to the opposite side of the starting chain, ensuring symmetry.
- Work 3 dc into the curve.
- Complete the other side by adding 1 hdc and 2 sc down the chain.
- Rotate your work to the opposite side of the starting chain, ensuring symmetry.
- Edging:
- Work a decorative edge all around the wing using picots:
- (sl st, ch 1) in each stitch.
- Secure your yarn and weave any ends.
- Work a decorative edge all around the wing using picots:
4. Beak and Feet
Yarn Color: Pumpkin/Orange
Beak:
- Position on the head, working into 2 central stitches.
- Ch 4. Sl st into first st to form a loop, then sc into the next 2 sts.

Feet:
- Locate two base stitches where you will attach the legs.
- For each foot, start by ch 5.
- Work sl st back across the five chains for the toes.

5. Adding Details
- Eye:
- Use black thread or movable eyes and attach near the head. If using yarn, embroider the eye with a tapestry needle.
- Bow (Optional):
- Use 12 cm of ribbon to form a bow, and glue or sew it below the neck.
- Magnet:
- Secure a flat magnet to the back of the sardine seal with hot glue.

Final Words
Congratulations! You’ve now completed your Goose Refrigerator Magnet. This unique and whimsical design is perfect for kitchen decor or as a thoughtful handmade gift.
Tips for the Pattern
- Use tight stitches to create a neat and sturdy structure.
- Sew all details securely for durability, especially if gifting or selling.
- Feel free to customize the colors or add embellishments like beads for extra charm!