
Free Crochet Our Lady Of Fatima Using Can Tab For Spiritual Charm
Experience faith with this Crochet OUR LADY OF FATIMA using soda can tabs, offering delicate texture and eco-friendly charm in every stitch.
Throughout human history, devotional art has transcended functionality to embody profound expressions of faith, reverence, and tradition. The "crochet Our Lady of Fatima Pattern"offers one such remarkable tribute. Rooted not just in aesthetics but symbolism, this delicate piece encapsulates the story and grace of Our Lady of Fatima, all while blending the warmth of handmade artistry with timeless spiritual beauty. Whether as a keepsake, a meaningful gift, or a spiritual accent for your home, this crochet creation carries deep cultural and personal value, making it both a testament to devotion and a unique personal project.
Thoughtful Crochet OUR LADY OF FATIMA with Soda Tabs to Your Space
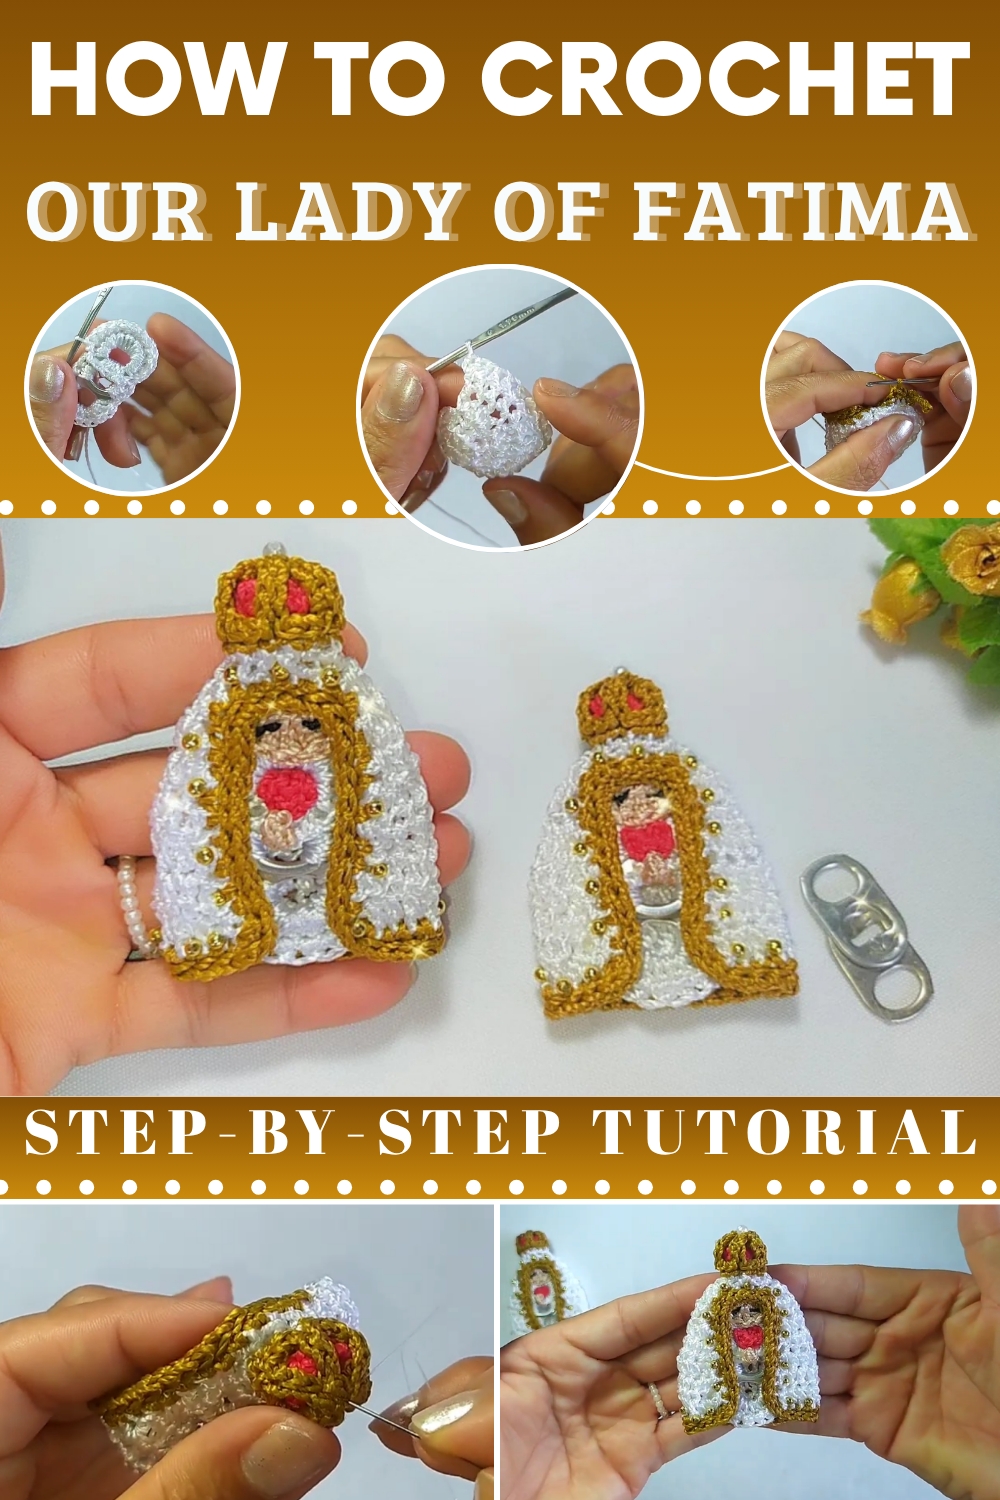
This versatile piece can be used as a fridge magnet, a keychain, or a decorative token of faith. The tutor recommends patience during assembly and crochet precision while handling the smaller threads and additions. Keeping the loops loose ensures smooth shaping and prevents excessive tension.
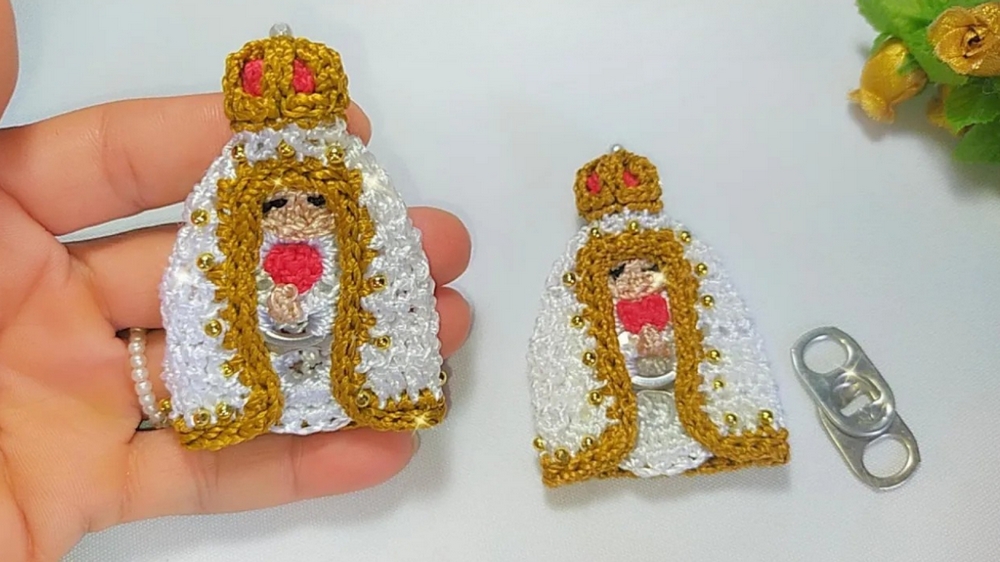
In blending creativity with devotion, this project doesn't merely offer a decorative item but a reflection of spiritual significance. As you pause to admire the finished Lady of Fatima, her serene visage in thread reminds us of art's profound connection to the heart.
Materials List
- Yarn:
- White thick silk thread (Tex 300)
- Beige thick silk thread (Tex 288)
- Red thick silk thread
- Gold thick silk thread (Tex 288 or similar)
- Hook: 1.75 mm crochet hook
- Upcycled items: 2 matching sardine can tabs
- Notions:
- Small gold pearls (very small, plus one #3 pearl for crown)
- Black sewing or embroidery thread (for eyes)
- Fine needle (for embroidery and embellishments)
- Nylon thread (for beading/sewing pieces)
- Craft (hot) glue (for assembly)
- Scissors
- Lighter (to seal yarn ends)
- Stitch marker (optional)
- Optional:
- Keychain ring
- Flat magnet
Key Abbreviations
| Abbreviation | Meaning |
|---|---|
| ch | chain |
| sl st | slip stitch |
| sc | single crochet |
| hdc | half double crochet |
| dc | double crochet |
| st(s) | stitch(es) |
| inc | increase (2 sts in same st) |
| dec | decrease (single crochet two stitches together) |
| MR | magic ring |
| rep | repeat |
Special Notes:
- Pattern uses US crochet terminology.
- Work tightly for a neat finish on metal tabs.
- Use a hot glue gun for permanent assembly, especially when using as a fridge magnet or keychain.
- Take care when handling and sealing thread ends.
Step-by-Step Pattern
1. Prepare the Can Tabs
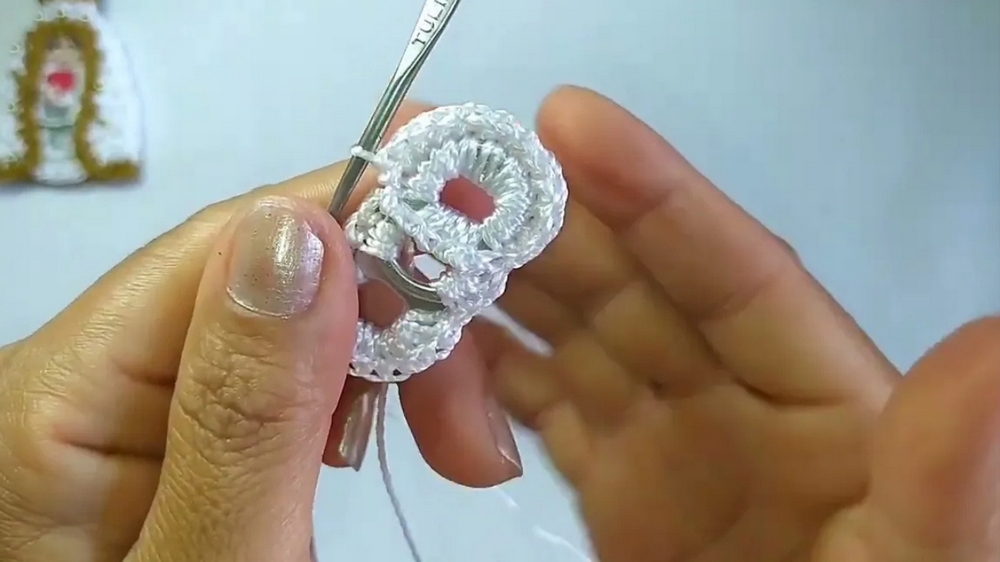
- Arrange two matching sardine can tabs so their holes align, one atop the other (right tab on top of left tab).
2. Crocheting the Base (Tunic/Body)
With white yarn
Attach yarn through the aligned center holes (between the two tabs):
- Ch 2.
- Work 3 hdc into the same space (center between tabs).
- Along the first curve (outer edge of one tab):
Work 12 hdc evenly spaced around the curve. - At the connecting section (between tabs):
Work 3 hdc through both tabs’ center holes. - Along the remaining curve:
Work 12 sc evenly spaced around. - Join with sl st to the first hdc.
Total round forms an oval with both tabs joined.
3. Create the Folded Hands
- After joining, chain 1.
- Insert hook into the center (tabs’ center hole), and work 4 sc (these form the hands).
- After every sc, sl st into the curve/border to create the appearance of clasped hands.
- Join to base with sl st.
4. Outline the Base
- For the curved edge: sc in each st around the curve.
- For the straight edge: hdc in each st.
- Join with sl st to base at start.
- Fasten off and seal ends with a lighter or weave in.
5. The Hands (Arm details)
With beige yarn
- Join with sc on a stitch above “clasped hands.”
- Ch 4, sl st in the same st.
- Fasten off.
- On the next adjacent stitch, ch 4, sl st to form the other hand/arm.
- Weave in/seal ends. Glue or sew hands together for a praying effect.
6. The Face (Head)
With beige yarn
- MR, ch 3 (counts as first dc), 11 dc into ring. (12 dc total)
- Pull MR tight. Join to first dc with sl st.
- Fasten off, seal ends.
Eyes:
- Use black thread and fine needle.
- Embroider two curved lines for closed sleepy eyes.
7. The Halo
With white yarn
- MR, ch 2 (counts as first hdc), 11 hdc into ring (12 hdc total).
- Pull MR tight. Join to first hdc with sl st.
- Ch 1, sc in each st around, working ONLY through the inner loop (for a ridged finish).
- Join with sl st. Fasten off and seal ends.
8. The Veil (Cloak)
With white yarn
- Attach yarn to cloak side.
- Row 1:
- Ch 2, hdc in same st, [inc] across next 8 sts (8 increases).
- Row 2–7:
- Ch 2, turn. Inc in first st (2 hdc in same st), hdc to last st, inc in last st.
- (There are increases only at each row’s start and end.)
- After 7 rows, fasten off and seal ends.
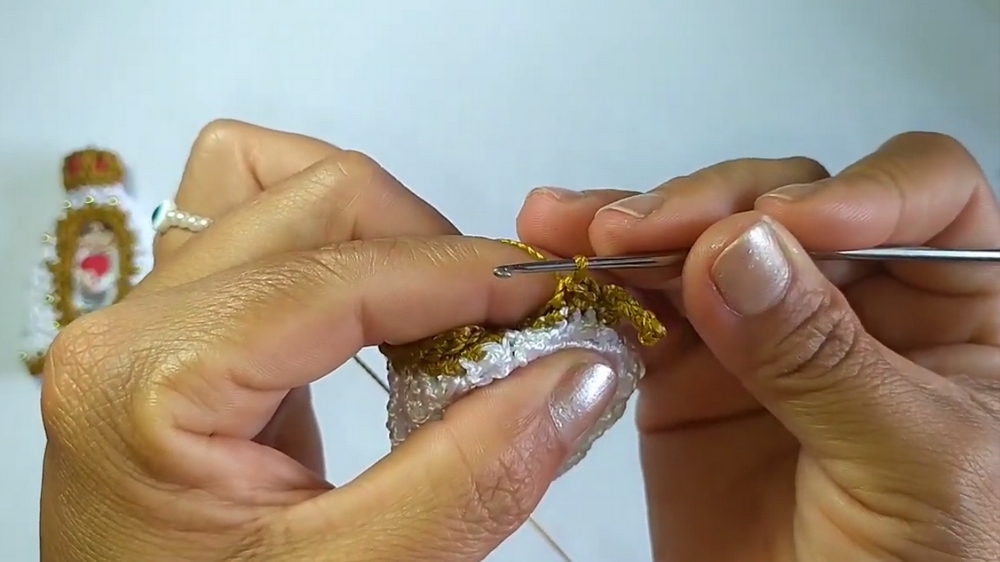
Edging (with gold yarn):
- Join gold yarn at corner. Sc in each st around the border of cloak.
- Join with sl st.
- Optional: Sl st all around edge with gold for extra finish.
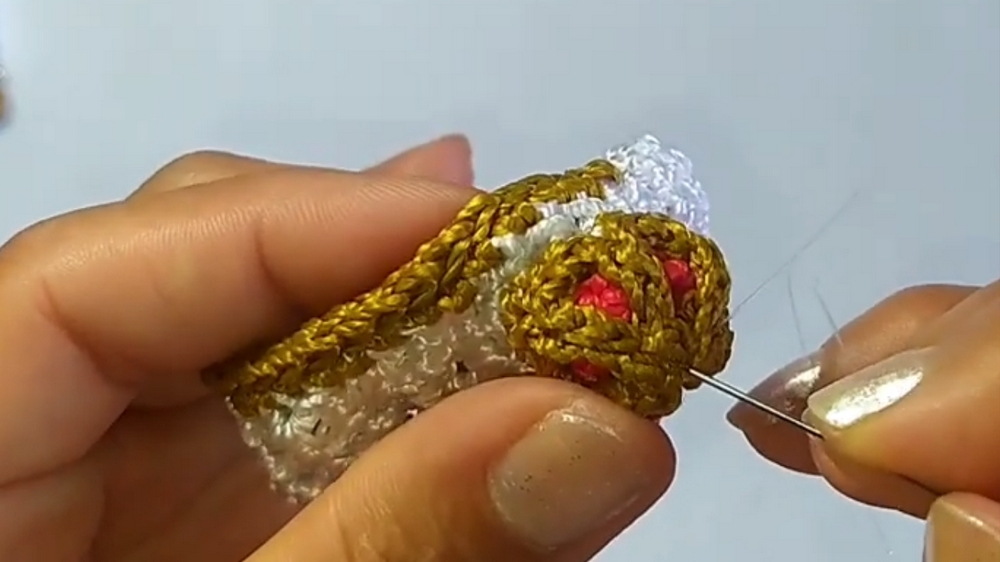
9. The Crown
- Identify 12 front loops at crown/top of halo.
- With gold, sc in each of the 12 loops.
- After last sc, ch 5, sl st in each ch back toward base, sl st in next st on crown (repeat 6 times around crown to create 6 points).
- Fasten off and seal ends.
- Sew or glue a small bead/pearl at the very top of the crown.
10. Decorative Red Heart and Crown Insert
Heart insert:
- With red yarn, MR, ch 1, 8 sc in MR. Close MR.
- Work 2 rounds: Each round, sc in each st around (8 sts per round).
- Fasten off, sew shut, weave in/seal end. Squeeze to shape into a heart.
- Glue inside crown/hands area.
11. Pearl Embellishment
- Sew small pearls (with nylon thread and fine needle) evenly around the border of the cloak and/or crown area.
12. Optional: Make Red Mini Heart
- With red: MR, ch 2, 3 sc, ch 1, sl st in same ring. Fasten off and shape into a heart.
13. Assembly
- Sew or glue head to body.
- Attach crown and halo.
- Sew or glue clasped hands, red heart, and pearl.
- Add magnet or keyring to the back if desired.
Conclusion
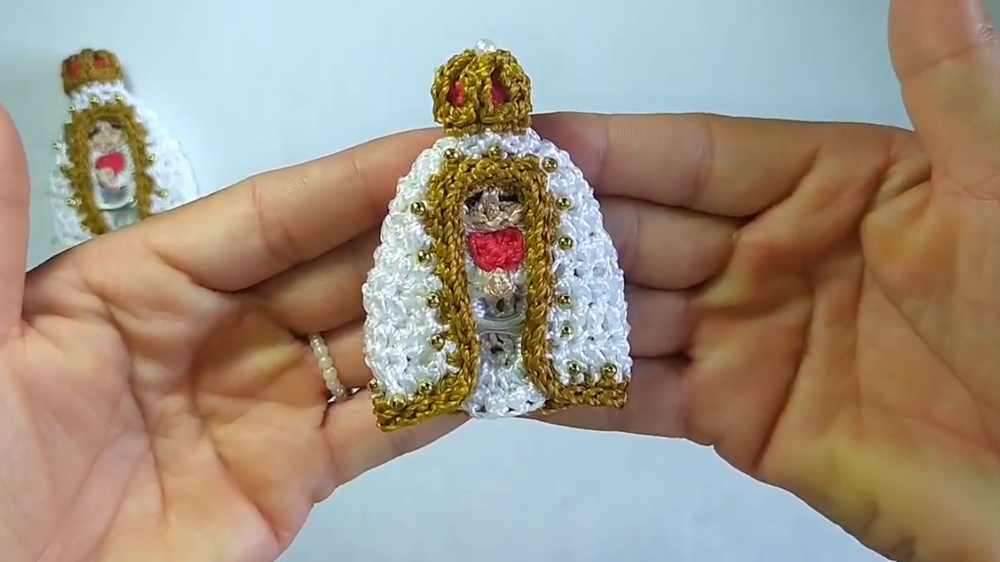
You've created a meaningful, upcycled Our Lady of Fatima ornament—ideal as a magnet, keychain, or present for someone special. Its neat edging, small pearls, and luminous crown add special charm.
Pattern Correction
- If in any round the stitches seem tight or loose, adjust your hook size to maintain neat, even stitches.
- For best results on the face and embroidery, use sharp, fine needles and practice on scrap yarn first.
Tips
- Always weave or seal all thread ends for a neat finish and to avoid unraveling.
- For safety and durability (especially for magnets/keychains), opt for glue + a few reinforced stitches.
- Customise with extra embroidery or colored beads.