
Cute Free Crochet Egg Bunny Shell Pattern – Easter Amigurumi
Make Easter fun with this Free Crochet Egg Bunny Shell Pattern to create a cute bunny design that doubles as a decorative egg holder.
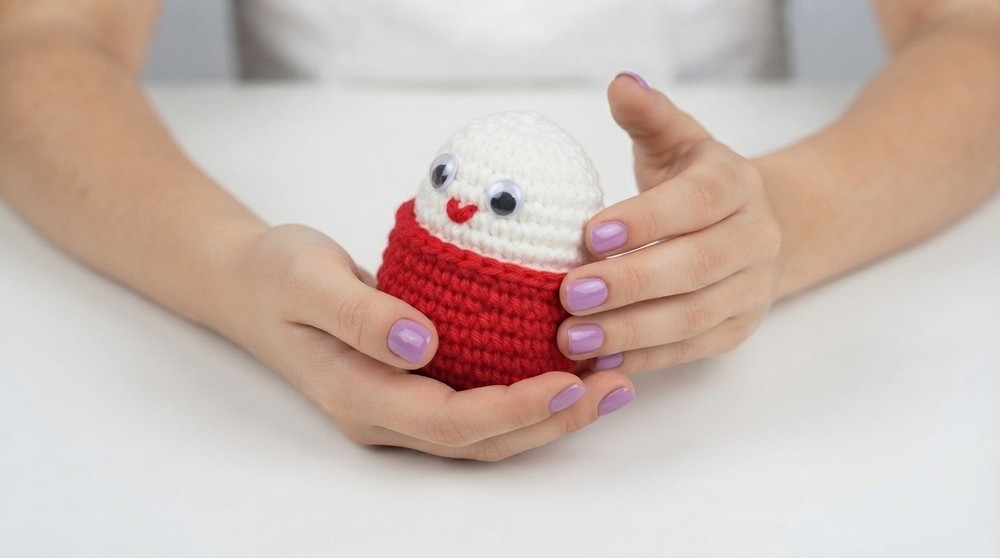
When springtime rolls around, nothing feels quite as festive as little handmade decorations that capture the season’s charm. One delightful example is the free crochet egg bunny shell pattern, a clever and whimsical project that combines the playful shape of an egg with the sweet features of a bunny. This design creates a cozy, textured shell that’s both cute and compact, perfect for seasonal décor or charming gifts.
Adorable Free Crochet Egg Bunny Shell Pattern for Spring

This pattern results in a small, rounded shell featuring soft curves and subtle detailing that evoke the gentle shape of an egg, with added bunny ears and facial accents giving it personality. The texture is pleasantly dense yet soft, thanks to careful stitching that offers just enough firmness to hold the shape while feeling gentle to the touch. It’s versatile in size ideal for creating tiny egg-shaped bunnies to nestle into Easter baskets, or larger versions that can sit as standalone ornaments. Plus, there’s room to customize with different colors and yarn types, allowing you to match your personal style or holiday scheme.

Putting this design together involves basic stitches with a bit of shaping through increases and decreases, making it approachable for all skill levels. One tip that helps is to maintain consistent stitch tension so the shell keeps its rounded form and the bunny details come through clearly. The inspiration behind this pattern brings a fresh twist to classic Easter motifs, merging the symbolism of eggs and bunnies in a playful way. Using yarn that’s soft but holds structure well complements the stitch texture, adding to the project’s charm and durability.
Whether you’re making gifts for friends, adding accents to your home, or simply enjoying a fun, creative activity, the free crochet egg bunny shell pattern offers a delightful way to celebrate springtime with handmade cheer. It’s a project that sparks imagination and invites you to add your personal touch in every stitch.

Crochet Egg Bunny Shell – Complete Pattern
Welcome back to the channel! In today’s tutorial, Celeste shows you how to make an adorable Egg Bunny Shell — a cute bunny-themed eggshell cover that fits over a crochet egg. The egg itself can be made using a separate tutorial (see channel), while today’s focus is on making the bunny shell, including the shell base, bunny head, ears, face, and assembly.
Quick Overview Of Pattern
- The bunny shell is worked separately from the egg.
- Main shell (bottom) is crocheted in the round, using simple increases.
- The bunny head is worked similarly, using single crochet increases and finished with facial features.
- Ears are shaped with increases, then decreases, and sewn on.
- Eyes are glued, and mouth is stitched with yarn.
Notes
- The shell and bunny head are worked in continuous rounds—use a stitch marker or the yarn tail to keep track of rounds.
- Gauge is not critical; the design fits standard medium-size crochet eggs.
- Use hot glue to attach wiggly eyes safely.
- An alternative color of yarn is used for the embroidered mouth.
- You need to make two ears for the bunny.
Skill Level
Confident Beginner
- You should know how to make: magic ring, single crochet, increases, decreases, slip stitch, basic sewing/embroidery, and assembly.
Materials
- Worsted/Medium (#4) weight acrylic yarn (main color for shell and bunny head)
- Contrasting yarn (for mouth)
- 5.00 mm (H-8) crochet hook
- Two wiggly eyes (for bunny head)
- Hot glue gun (for attaching eyes)
- Yarn needle
- Scissors
- Stitch marker (or use yarn tail)
- (Crochet egg made separately; tutorial link on channel)
Measurements / Sizing
- Fits standard medium-sized crochet egg (shell diameter approx. 5–6 cm).
- Ears approx. 3.5–4 cm long.
- Head fits proportionally to shell.
- Gauge is flexible since it slips over a pre-made egg.
Gauge
Not crucial for this pattern. Using recommended materials and hook, your shell base will be about 5–6 cm in diameter after 10 rounds.
Stitch Abbreviations
- mr – magic ring
- ch – chain
- sc – single crochet
- inc – increase (2 sc in same stitch)
- dec – decrease (sc2tog)
- sl st – slip stitch
- st(s) – stitch(es)
Special Stitches
- Magic Ring: Create a tight adjustable ring to start working in the round.
- Invisible Decrease: Insert hook into front loop of two stitches, yarn over, pull through, yarn over, pull through both loops.
The Crochet Pattern!
1. Bottom of Bunny Shell
- Make a magic ring and leave a long tail (for stitch marker).
- Ch 1, then work 6 sc into the ring. Pull tail to close [6].
- Use the tail as a stitch marker; DO NOT JOIN ROUNDS.
- 2 sc in each stitch around [12].
- Move marker. sc in each st around [12].
- Move marker. (1 sc in next st, 2 sc in next st) repeat around [18].
- Continue in this manner, alternating sc and inc around.
- Rows 5–10: sc in each stitch (no increases). Continue for a total of 6 rounds. Don’t forget to move your marker.
- On Row 11 (final): Sl st in each stitch around to finish the edge.
- Fasten off, secure the yarn tail inside, and cut excess.


You have now completed the shell base.
2. Bunny Head
- Make a magic ring and leave a tail for stitch marker.
- Ch 1, 6 sc into ring, pull tight [6].
- 2 sc in each stitch around [12].
- sc in each st around [12].
- (1 sc in next st, inc in next st) repeat around [18].
- sc in each st around [18].
- (1 sc, inc) repeat, then sc in each st around [24].
- sc in each st around [24].
- (1 sc, 2 sc in next st) repeat [36].
- sc in each st around [36].
- Sl st in each stitch around to finish.
- Fasten off and secure inside. This forms the bunny’s head.
3. Bunny Ears (Make 2)
- Magic ring, ch 1.
- 6 sc into ring, pull to close.
- Use tail as marker and work 2 sc in each st around [12].
- sc in each st around [12].
- Repeat previous round (sc in each st) for total of 3 rounds.
- (1 sc, dec) repeat around [8].
- Next round: (2 sc, dec) repeat [6].
- sc in each st around for next 2 rounds [6].
- Fasten off and leave a long tail for sewing.

Repeat for the second ear.
4. Assembly & Face
- Position bunny head on top of shell base (do not attach permanently yet).
- Sew ears to upper portion of bunny head, spacing evenly.
- Attach eyes: Place wiggly eyes in position (not too far apart). Use a glue gun to secure.
- Embroider mouth: Use contrast yarn and a yarn needle. Stitch a small “V” shape (or smile) below the eyes.
- If making a matching bunny egg, embroider mouth and glue eyes on the egg as well, following the head instructions.

Assembly & Finished Size
- Head: Sewn or glued atop shell base.
- Ears: Sewn at the top, angled outward.
- Eyes: Glued with hot glue.
- Mouth: Stitched in contrasting yarn.
- Fits a medium-size egg inside the shell.
- Finished bunny shell height (with ears): approx. 10–12 cm.
Conclusion and Ending Words
Your crochet Egg Bunny Shell is now complete! This cute project can be customized with different colors and facial features to match any Easter or springtime celebration. Remember, you can make the egg using Celeste’s separate pattern, then decorate them both for extra cuteness. Thank you for following along—don't forget to subscribe, comment, and share your finished creations! Happy crocheting, and see you in the next tutorial.