
Adorable Free Crochet Dog Amigurumi Pattern for Cozy Corners
Snuggle up with charm using this Free Crochet Dog Amigurumi Pattern, perfect for adorable handmade gifts and cozy decorative companions.
Crochet enthusiasts will love this Free Crochet Dog Amigurumi Pattern, perfect for adding a charming handmade touch to your home or gifting to someone special. This pattern provides a step-by-step approach to creating a soft, huggable dog amigurumi that delights both children and adults. Its visual appeal lies in its cute design and customizable features, allowing you to experiment with colors, expressions, and textures.
Easy-to-Follow Crochet Dog Amigurumi Pattern for Quick Fun

Practical and Stylish Uses
This crochet dog amigurumi isn't just decorative, it can function as a playful toy, a cozy companion, or even a whimsical home accent. The pattern encourages precision and patience, enhancing your crocheting skills while yielding a satisfying finished product. Adding other patterns like a Puppy or Bear can help build a charming collection of handmade companions.
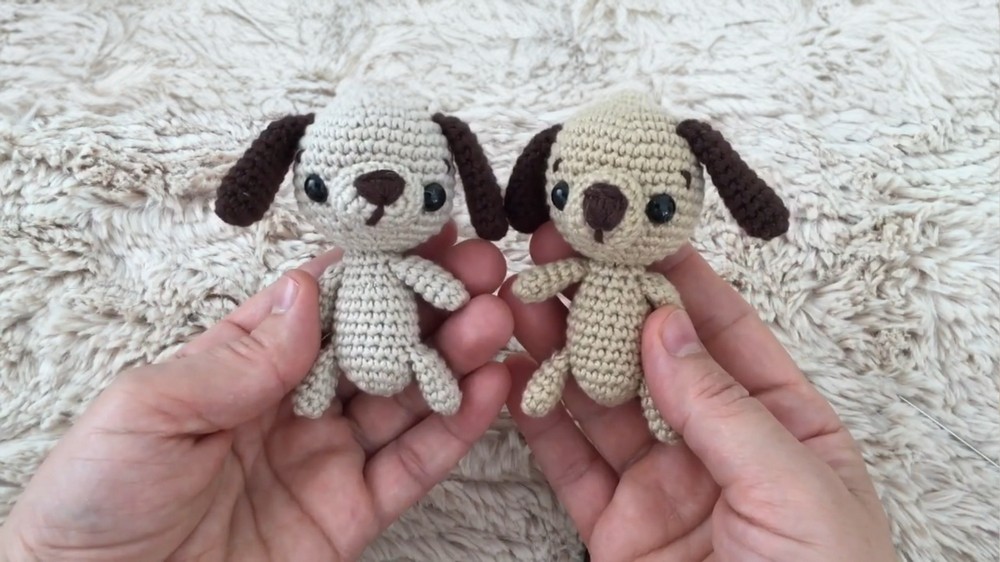
Crochet Amigurumi Dog Pattern
Finished Size
When made with the suggested materials and a 2.75 mm (C/2) crochet hook, the finished dog will measure approximately 10–12 cm (4–5 in) depending on your tension.
Materials Needed
- Yarn:
- Main body color.
- Contrast color for ears (optional).
- Black yarn for embroidering the nose.
- Yarn type: 100% cotton (Gazal Cotton or similar) for durability and a neat finish.
- Crochet Hook: 2.75 mm hook (adjust as per your tension).
- Safety Eyes: 8 mm plastic safety eyes (optional). You may also embroider eyes with black yarn.
- Stuffing: Polyester fiberfill.
- Stitch Marker: For marking rounds.
- Tapestry Needle: For sewing and weaving in ends.
- Scissors.
Special Techniques Used
- Magic Ring (MR): A sliding loop that serves as the starting point for seamless rounds.
- Single Crochet (sc): Insert hook in stitch, yarn over, pull up a loop, yarn over, and pull through both loops on the hook.
- Increase (inc): Make 2 sc in the same stitch.
- Decrease (dec): Insert hook through front loops of the next two stitches, yarn over, pull through, yarn over, pull through both loops on the hook.
- Slip Stitch (sl st): Insert hook into stitch, yarn over, pull through the stitch and the loop on the hook.
Pattern Instructions
Work each piece separately, and assemble the components at the end for the finished product.
Arms (Make 2)
- Create a Magic Ring (MR) and make 7 sc into the ring. Pull the ring tight (7 sts).
- Rows 2–6: 1 sc in each stitch around (7 sts).
- Slip stitch into the next stitch, fasten off, and leave a long tail for sewing.
Repeat for the second arm.
Legs (Make 2)
- Create a Magic Ring (MR) and make 6 sc into the ring (6 sts).
- Round 2: (1 sc, inc) repeat 2 times (8 sts).
- Rounds 3–6: 1 sc in each stitch around (8 sts).
- Slip stitch into the next stitch, fasten off, and leave a long tail for sewing.
Repeat for the second leg.
Ears (Make 2)
- Create a Magic Ring (MR) and make 6 sc into the ring (6 sts).
- Round 2: inc in each stitch around (12 sts).
- Rounds 3–10: 1 sc in each stitch around (12 sts).
- Round 11: (4 sc, dec) repeat 2 times (10 sts).
- Round 12: dec in every stitch (5 stitches). Slip stitch, fasten off, and leave a long tail.

Repeat for the second ear.
Nose
- Create a Magic Ring (MR) and make 6 sc into the ring (6 sts).
- Round 2: (1 sc, inc) repeat 3 times (9 sts).
- Round 3: (2 sc, inc) repeat 3 times (12 sts).
- Rounds 4–5: 1 sc in each stitch around (12 sts).
- Fasten off, leaving a long tail for sewing.

Tail
- Create a Magic Ring (MR) and make 6 sc into the ring (6 sts).
- Round 2: (1 sc, inc) repeat 2 times (8 sts).
- Rounds 3–13: 1 sc in each stitch around (8 sts).
- Fasten off, leaving a long tail for sewing.
Head
- Create a Magic Ring (MR) and make 6 sc into the ring (6 sts).
- Round 2: inc in each stitch around (12 sts).
- Round 3: (1 sc, inc) repeat 6 times (18 sts).
- Round 4: (2 sc, inc) repeat 6 times (24 sts).
- Round 5: (3 sc, inc) repeat 6 times (30 sts).
- Round 6: (4 sc, inc) repeat 6 times (36 sts).
- Rounds 7–13: 1 sc in each stitch around (36 sts).
- Round 14: (4 sc, dec) repeat 6 times (30 sts).
- Round 15: (3 sc, dec) repeat 6 times (24 sts).
- Round 16: (2 sc, dec) repeat 6 times (18 sts).
- Round 17: (1 sc, dec) repeat 6 times (12 sts).


Stuff the head with fiberfill as you go. Fasten off, leaving a long tail for sewing.
Body
- Create a Magic Ring (MR) and make 6 sc into the ring (6 sts).
- Round 2: inc in each stitch around (12 sts).
- Round 3: (1 sc, inc) repeat 6 times (18 sts).
- Rounds 4–10: 1 sc in each stitch around (18 sts).
- Round 11: Attach the legs at the appropriate positions as you crochet: crochet 2 sc, attach the first leg over 3 stitches, crochet 5 sc, attach the second leg the same way, and finish the round.
- Rounds 12–14: Work the arms similarly by attaching them over 2 stitches on each side. Fill the body with fiberfill as you go.
- Round 15: (1 sc, dec) repeat 6 times (12 sts).
- Fasten off, leaving a long tail for sewing.
Assembly and Finishing
- Head: Sew the head to the top of the body neatly. Align the front of the head with the body’s finishing point.
- Ears: Sew the ears symmetrically onto the sides of the head. Place the narrower end of each ear towards the bottom.
- Nose: Attach the nose onto the head, slightly below and between the eyes for a cute, dog-like expression.
- Tail: Sew the tail onto the back of the body.
- Eyes: Insert safety eyes between rounds 12–13 on the front of the head, spacing them 8 stitches apart. If embroidering, sew small black circles or ovals for eyes.
- Eyebrows and Details: Use black yarn to embroider small eyebrows or additional face details if desired.

Final Words and Tips
- Use a stitch marker to keep track of rounds, as this pattern works in continuous rounds.
- Stuff evenly but firmly to maintain the shape, especially in smaller pieces like the legs and arms.
- Pay attention to symmetry when attaching features. Lay out all parts first to ensure correct placement.
- For durability, embroider the eyes instead of using safety eyes if gifting the dog to small children.
Some Important Points
Uses
The finished amigurumi dog is versatile due to its small size.
- Primary Use: Small toy for children.
- Secondary Use: Bag charm or keychain.
Materials:
- Yarn: Two colors of Gazzal Baby Cotton or similar high-quality cotton yarn.
- Crochet Hook: A 1.75 mm hook is used, but the tutor notes the size should be adjusted based on your yarn thickness and personal tension.
- Safety Eyes: 8 mm safety eyes.
- Tutor's Suggestion: For small toys, eyes can be easily embroidered with black yarn instead of using plastic eyes.
- Stuffing: Synthetic fiberfill (Elyaf).
- Tools: Scissors, stitch marker, and tapestry needle.
Special Features
This pattern is designed to reduce the most tedious part of amigurumi: assembly.
- Seamless Limb Integration: The arms and legs are crocheted separately, but they are joined directly into the corresponding rounds of the body, eliminating the need to sew them on. This is a significant time-saver.
- Oval Snout: The snout is intentionally crocheted in an oval shape to give the dog a distinct, realistic profile.
- Minimal Sewing: Only the head, ears, snout, and tail need to be sewn onto the body, making the overall assembly process much faster compared to patterns where all limbs are sewn.
Level of Difficulty
The project is rated for an Intermediate Crocheter due to the number of separate pieces and the process of joining limbs mid-project.
- Required Skills: Magic Ring, chain, single crochet (SC), increases, and decreases.
- Intermediate Skills Used: Seamless integration (joining) of separate pieces (limbs) into the main body piece, and attaching numerous smaller components (ears, snout, tail, head) in a structured manner.
Tutor's Suggestions
- Yarn Quality: The tutor strongly emphasizes that the quality of the cotton yarn is more important than the brand, ensuring the toy is beautiful and durable.
- Eye Selection: 8 mm eyes are considered ideal for this size of dog, but smaller eyes (6 mm or 7 mm) can also be used.
- Stuffing Limbs: Do not stuff the arms and legs because they are very small. This allows them to stay flat and ensures a smoother join with the body. Only the body and head should be stuffed.
- Limb Joining Technique: When joining the arms and legs, use a specific technique (starting the next SC and using the limb's stitch as a partial decrease) to prevent gaps and ensure a smooth, gap-free join.
Tip
When joining the small arms and legs to the body, ensure you are using the specific technique of starting the SC in the limb and finishing it with the SC in the body. This creates a cleaner, sturdier, and less gapped connection than simply slip stitching or sewing, which is crucial for a small, heavily handled toy.
Conclusion
This Amigurumi Dog project offers an excellent lesson in seamless construction, significantly speeding up the final assembly. By pre-crocheting and integrating the limbs directly into the body, the resulting toy is structurally sound and requires less detailed finishing work.