
Unique Free Crochet Bunny Amigurumi Pattern for Playful Decor
Hop into creativity with the Free Crochet Bunny Amigurumi Pattern, perfect for cute gifts, cozy décor, or snuggly handmade friends.
Soft, cuddly, and irresistibly charming, this little bunny amigurumi makes a perfect addition to any home or nursery. The Free Crochet Bunny Amigurumi Pattern provides clear guidance to create a plush, huggable figure that can serve as décor, a gift, or even a small companion for children. Its versatility allows it to be displayed on shelves, attached to bags or keychains, or simply used as a comforting handmade item.
Stylish Crochet Bunny Amigurumi Pattern for Trendy Home Decor

The pattern’s appeal lies in its soft texture, charming proportions, and the ease of shaping small amigurumi elements. Benefits include its suitability for beginners and experienced crocheters alike, the short time required to complete a bunny, and the opportunity to practice essential amigurumi techniques such as shaping, attaching parts, and working small details. The finished piece is both visually appealing and functional, offering joy and warmth wherever it is placed.

Step-by-Step Crochet Pattern: Colorful Bunny Using Chenille Yarn
Finished Size
Approximately 30 cm tall based on the materials described. This size may vary slightly depending on yarn tension and gauge.
Materials Needed
Yarn:
- Leftover chenille yarn scraps in a variety of colors.
(Ensure all scraps are the same gauge to achieve uniformity in crocheting.)
Tools:
- Crochet Hook: 5 mm.
- Stuffing: Polyester fiberfill or material from old pillows for softness and fullness.
- Stitch marker (or use a contrasting scrap of yarn).
- Scissors for trimming yarn.
- Wool tapestry needle for sewing parts.
- Hot silicone/glue gun for attaching details.
Optional:
- Pearl cotton thread (Dark) for detailing the facial features (e.g., eyes, eyebrows, mouth).
- Blush or light makeup for cheeks.
Gauge
Gauge is not critical for this pattern but recommended to ensure consistent measurements:
- 10 sc x 10 rows = 4 inches (10 cm) square using chenille yarn and 5 mm hook.
Skill Level
Intermediate to Advanced: Familiarity with basic stitches, working in the round, increasing, decreasing, and sewing parts is essential.
Key Abbreviations
- MR: Magic Ring
- sc: Single Crochet
- inc: Increase (2 sc in the same stitch)
- dec: Decrease (crochet 2 stitches together using front loops only)
- ch: Chain
- sl st: Slip Stitch
Special Techniques
- Magic Ring: Ensures a tight and seamless beginning for round items like the head and limbs.
- Changing Colors: Pull through with a new yarn color at the final stitch of the last yarn color.
- Invisible Decreases: Decrease by crocheting together the front loops only of two stitches for smooth shaping.
- Joining Legs: Using chain stitches and loops to unify the bunny’s lower body.
Pattern Instructions
Head
- Round 1:
- Begin with a magic ring. Crochet 6 sc into the ring. Tighten and sl st into the first stitch to close. (6 stitches)
- Round 2:
- Inc in every stitch: Work 2 sc into each stitch around. (12 stitches)
- Round 3:
- Alternate sc, inc. Repeat this pattern around. (18 stitches)
- Round 4:
- Alternate 2 sc, inc. Repeat pattern around. (24 stitches)
- Round 5:
- Alternate 3 sc, inc. Repeat pattern around. (30 stitches)
- Round 6:
- Alternate 4 sc, inc. Repeat pattern around. (36 stitches)
- Rounds 7–12:
- Crochet 1 sc in each stitch (no increases) for 6 total rounds to create the shape.
Tip: If a yarn color runs out, seamlessly change colors.
- Round 13:
- Alternate 4 sc, dec. Repeat pattern around. (30 stitches)
- Round 14:
- Alternate 3 sc, dec. Repeat pattern around. (24 stitches)
- Round 15:
- Alternate 2 sc, dec. Repeat pattern around. (18 stitches)
- Round 16:
- Alternate 1 sc, dec. Repeat around. (12 stitches)
- Final Round:
- Work 6 decreases. (6 stitches)
- Cut yarn, leaving a long tail, and use a tapestry needle to weave it through the last 6 stitches. Tighten to close the head completely.
- Stuff: Fill the head firmly with fiberfill, shaping it evenly.

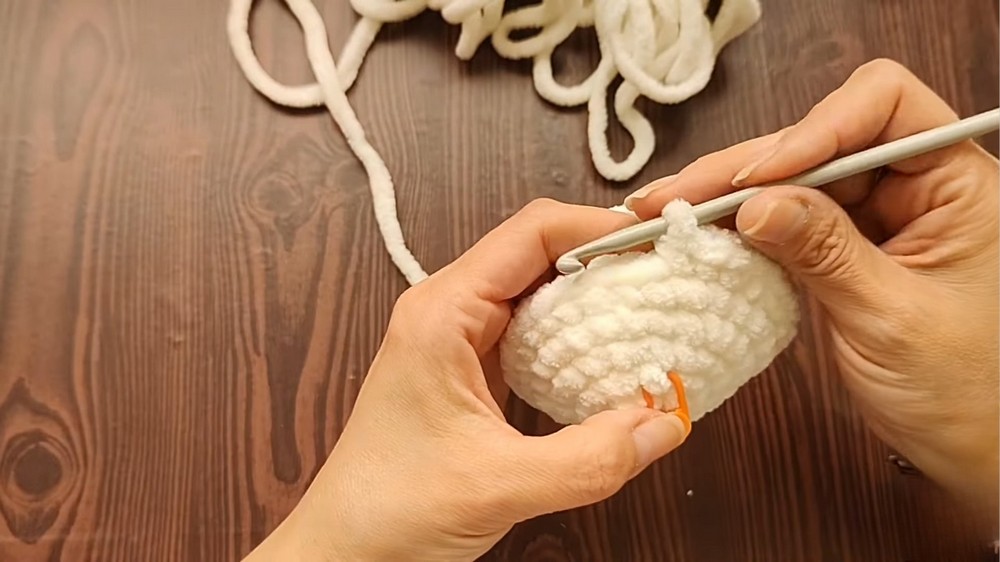

Body
- Legs: Make two legs, follow the steps below:
Round 1:- Work a magic ring and crochet 6 sc inside. (6 stitches)
Round 2:
- Inc in every stitch: 2 sc in each stitch. (12 stitches)
Rounds 3–8:
- Crochet 1 sc in each stitch for 6 total rounds to create the leg.
Tip: Cut yarn for the first leg; leave the yarn intact on the second leg for joining.
- Joining Legs:
Create 3 chains, attach the second leg to the first leg by crocheting its 12 stitches. Continue working around the chain stitches to unify the body:- Round 1: Work 12 sc around Leg 1, 3 sc in the chain stitches, 12 sc around Leg 2, and 3 sc in chains. (30 stitches)
- Rounds 2–3:
- Crochet 1 sc in each stitch. (30 stitches per round)
- Creating Curvature for Body:
Alternate rounds with decreases:- Round 4: 5 sc, dec around. (26 stitches)
- Round 5: 4 sc, dec around. (24 stitches)
- Continue decreasing as follows:
- 3 sc, dec. (18 stitches)
- 2 sc, dec. (12 stitches)
- sc, dec. (6 stitches)
- Stuff the body lightly and use the tapestry needle to close the final opening securely.

Ears and Hands
Ears: Make 2 pieces.
- Round 1:
- Start with magic ring. Work 6 sc inside.
- Round 2:
- Crochet 1 sc in each stitch. (6 stitches)
- Round 3:
- Crochet sc, inc. Repeat. (12 stitches)
- Rounds 4–7:
- Crochet 1 sc in each stitch. (12 stitches per round)
- Round 8:
- Crochet 2 sc, dec. Repeat. (9 stitches)
- Cut yarn, leaving a long tail for sewing.
Hands: Make 2 pieces.
- Round 1:
- Start with magic ring. Work 6 sc inside.
- Rounds 2–4:
- Crochet 1 sc in each stitch. (6 stitches per round)
- Final Round:
- Crochet dec around. (4 stitches)
- Cut yarn, leaving long tail for sewing.
Bow (Optional)
- Chain 11, then crochet 10 sc across.
- Work 4 total rows of 10 sc.
- Fold the piece and tie the center with a strong yarn to form a bow.
Assembly
- Attach Head to Body: Use the tail of the body to sew the head securely.
- Position Features: Sew ears on top and attach arms to the body’s sides.
- Decorate with Bow: Fix the bow near the ear or chest using hot glue or stitches.
- Embroider Face Details: Use pearl cotton yarn to embroider eyes, eyebrows, and mouth.
Conclusion
Congratulations! Your Colorful Bunny is complete! This vibrant piece repurposes leftover yarn, creating a unique and cheerful amigurumi suitable for decoration or gifting.
Tips
- Customization: Add a small tail, embellishments like a scarf, or create variations in size by adjusting the yarn thickness and hook.
- Blending Colors: Experiment with color placement for artistic patterns or stripes.