
Iconic Free Crochet Mulan Amigurumi with Artistic Flair
Honor timeless beauty with this Crochet Mulan Amigurumi Pattern, showcasing graceful details, cultural charm, and a delightful handmade touch.
Long before becoming an animated icon, Mulan’s story of courage, resilience, and grace inspired countless generations. Translating these qualities into the art of crochet offers a charming way to honor this beloved character. A Mulan amigurumi not only captures quiet strength and beauty in miniature form, but also represents a treasured keepsake filled with symbolism and personality. This project is a thoughtful gift for Disney enthusiasts, a lovely decorative piece for collectors of handmade art, or an empowering toy that brings joy while highlighting bravery and determination.
Free Crochet Mulan Amigurumi for Collectible Charm

The tutor provides step-by-step instructions, making this accessible for beginners and versatile enough for experienced crocheters to add customized flourishes. The pattern balances simplicity and complexity, ensuring satisfaction at every skill level.

A Mulan crochet amigurumi stands as more than just handmade artistry it is a symbol of courage, humility, and perseverance, reflected in each stitch. Perfect for display as a source of inspiration or given as a heartfelt gift, the completed design serves as a reminder of strength and beauty in every form. A final flourish, such as adjusting uniform stitches or refining color choices, can add an individual touch—resulting in a piece that is truly timeless and deeply personal.
Crochet Princess Mulan Amigurumi Pattern Step-by-Step
Materials List
- Yarn: 2mm thickness, blend of 50% acrylic and cotton, in the following colors:
- Blue (dress and collar)
- Black (hair)
- Red (belt/accent)
- Pink (sleeves)
- Skin tone (head, hands, body)
- White (optional detail)
- Crochet Hook: 3 mm
- Stuffing: Polyfill or preferred stuffing
- Safety Eyes: 2 pieces, 10 mm
- Embroidery Thread: Black (for facial features)
- Semigold Pearl: For decorative accent
- Scissors
- Tapestry Needle
- Stitch Marker
- Wooden Stick: 3 mm (for neck support)
- Wire: Thin craft wire (for posing arms)
- Hot Glue/Silicone
- Candy: (for internal arm filling, optional)
- Blush or Makeup: (optional, for cheeks)
Key Abbreviations
| Abbreviation | Meaning |
|---|---|
| MR | Magic Ring / Magic Circle |
| ch | Chain |
| sc | Single Crochet |
| inc | Increase (2 sc in same stitch) |
| dec | Decrease (sc2tog) |
| sl st | Slip Stitch |
| BLO | Back Loop Only |
| FLO | Front Loop Only |
| st(s) | Stitch(es) |
| dc | Double Crochet |
| hdc | Half Double Crochet |
Special Notes
- Pattern is written in US crochet terminology.
- Amigurumi is worked in continuous rounds unless directed otherwise. Use a stitch marker to keep track.
- Stuff pieces firmly but do not overstuff, especially the head/neck area.
- Dress, hair, and accessories are crocheted separately and sewn or glued onto the body.
Pattern Instructions
1. Hands (Make 2)
With skin tone yarn:
- Round 1: MR, ch 1, 6 sc (6)
- Rounds 2-4: Sc in each st around (6) — 3 rounds
- Sl st, ch 1, fasten off.
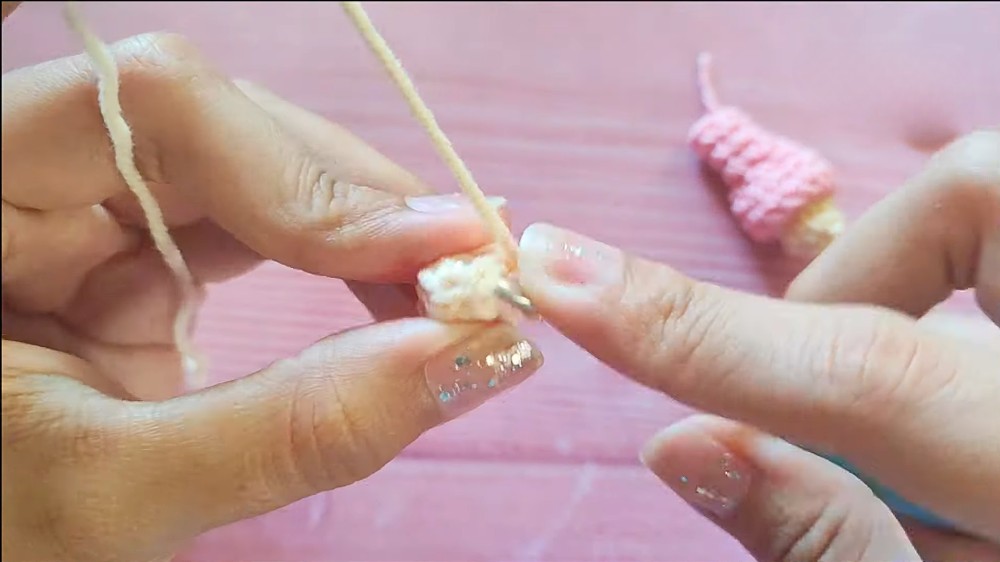
Sleeve (Pink):
- Ch 12, join to first ch with sl st to form a ring.
- Round 1: Ch 1, 12 sc around. Join with sl st.
- Round 2: Ch 1. (2 sc, dec), repeat around ([2 sc, dec] x3 total = 9 sts).
- Sl st, ch 1, fasten off.
Assembly:
- Insert hand into sleeve.
- Join with skin tone yarn: Hold sleeve and hand together, and work 9 sc around, alternating through both pieces.
- Do not sl st at the end. Continue working in a spiral for arm shaping:
- (sc, dec) repeat around (6).
- Work 2 more rounds of 6 sc each.
- Sl st, ch 1, fasten off.
- Make the second arm in the same way.
2. Legs (Make 2)
With pink (or skin color) yarn:
- Round 1: MR, ch 1, 6 sc (6)
- Round 2: Inc in each st (12)
- Round 3: BLO, sc in next 3, inc in next 3, sc in next 3, inc in next 3 (total 12)
- Change to pink: Work 9 sc in BLO (keeping only the back loops), continue 4 more rounds of 9 sc each.
- Sl st, ch 1, fasten off.
- Make the second leg the same way.

3. Join Legs & Form Body
- Attach pink yarn at the side join (where you finished off).
- Ch 3 (creates space between legs).
- Take second leg, join yarn in 2nd st past join; sc around leg, continued across chain (3 sc), and across next leg, then return across chain (3 sc) – for a complete round of 24 sc (9 per leg + 3 each side).
- Rounds 2-3: Sc in each st around (24).
- BLO: Next round, sc in 6, dec repeat (21).
- Next round: sc in 5, dec repeat (18).
- Add/Join Arms:
- Work 3 sc, join one arm over 3 sts, 6 sc (across chest), join next arm over next 3 sts (see video for exact placement), finish 3 sc (back).
- Next round: sc in each st around (handle available arm stitches).
- Decrease round: (sc, dec) repeat (12).
- Add stuffing.
- Final body round: dec around (6 sc).
- Insert wire or candy into arms for poseability before closing.
4. Neck and Head
Neck base in skin-tone:
- Pick up 6 sc at neck hole (from front loops if possible).
- Continue 2 more rounds, 6 sc each. Add stuffing if desired. Insert bamboo stick/wooden dowel for stability.
Head:
- Round 1: FLO of neck, 6 inc (12)
- Round 2: (sc, inc) around (18)
- Round 3: (2 sc, inc) around (24)
- Round 4: (3 sc, inc) around (30)
- Round 5: (5 sc, inc) around (36)
- Round 6: (6 sc, inc) around (42)
- Rounds 7-8: Sc in each st around (42)—2 rounds
- Next round: 9 sc, 3 dec, 15 sc, 3 dec, 6 sc (36)
- Rounds 10-13: Sc in each st around (36)—4 rounds.
- Begin decreasing:
- (4 sc, dec) around (30)
- (3 sc, dec) around (24)
- (2 sc, dec) around (18)
- (sc, dec) around (12)
- Add safety eyes between rounds 8 and 9, spaced 8 stitch apart after decreasing, or as preferred.
- Stuff head firmly.
- 6 dec (6)
- Sl st, ch 1, fasten off. Weave in end.

5. Dress (Skirt)
With blue yarn:
- Pick up from reserved front loops at bottom of waist.
- Ch 2, dc in same st, (2 dc in next, 1 dc in next) repeat around (32 dc).
- Sl st to join. Ch 2, dc in each dc around—repeat for 3 rounds total (32 dc per round).
- Sl st, ch 1, fasten off.
6. Waistband/Belt
With blue yarn:
- Ch 27, join with sl st to form a ring.
- Ch 1, sc in each chain around (27). Sl st.
- Change to red. Ch 1, sc in each sc around (27). Sl st.
- Repeat another round in blue.
- Sl st, ch 1, fasten off.
Optional: On the last blue round, pick up loops at the back for an additional red accent frill: (2 sc, inc) repeat.
7. Collar/Neck Accessory
With light blue yarn:
- Ch 16
- Starting from 2nd ch from hook: sc in each ch (15).
- Sl st, ch 1, fasten off.
8. Ears (Make 2)
With skin-tone yarn:
- MR, 6 sc
- Sl st, fasten off, leave a long tail for sewing.
9. Hair Base and Fringes
With black yarn:
- MR, 6 sc
- Round 2: 6 inc (12)
- Round 3: (sc, inc) around (18)
- Round 4: (2 sc, inc) around (24)
- Round 5: (3 sc, inc) around (30)
Fringe/Locks:
- Sl st, ch 32
Work back along the chain with hdc—repeat for 30 sts for 30 hdc per fringe. - Skip 1 base st and sl st to next st, repeat for 10 long fringes.
- For side fringes: ch 15, work 13 hdc back, sl st—repeat for two more.
- Finish with two more long fringes (ch 32, 30 hdc) for the back.

Assembly:
- Position 5 front, 10 back, and 3 on each side over head as shown in the video. Glue or sew in place.

10. Accessories
Daisy Flower
With white yarn:
- MR, ch 2 (counts as first dc)
- (dc, ch 1, sl st into ring) x 5—5 petals
- Fasten off, weave in and sew onto hair.
Semigold pearl
- Attach as decorative hair jewel with glue.
11. Embroidery
- Face: Use black embroidery thread to stitch nose, mouth, eyebrows, and eyelashes as seen in video.
- Blush: Apply with cotton swab below eyes and above nose.
12. Final Assembly
- Sew or glue collar/neck accessory in place.
- Attach ears on either side, two rounds above eyes.
- Arrange and glue or sew hair in place (refer to step-by-step above).
- Secure dress, waistband, sleeves, and additional details as desired.
- Secure all ends, tidy up, and adjust face/hair as needed.
Conclusion
Your Princess Mulan amigurumi is finished—an approximately 13 cm tall, detailed, poseable crocheted doll featuring removable accessories and detailed hair! This project combines multiple small pieces and careful finishing for a stunning result, suitable for display or imaginative play.
Pattern Correction & Tips
- Joining Pieces: Always ensure arms, legs, and head are stuffed and attached securely. If doll wobbles, use extra support (as with stick and wire).
- Hair: Arrange and glue in layers for a natural look.
- Color Changes: Carry yarn neatly and weave in all ends for a polished finish.
- Finishing Touches: Take time with embroidery and accessories for the best facial expression and decorative effect.
Special Features
This project likely includes some standout elements that set it apart. These may include:
- The use of intricate stitches to add texture and visual interest.
- Customizable options, such as selecting colors or adding embellishments.
- A unique design element (e.g., unusual shaping, glitter accents, etc.) that makes the project particularly distinctive.
Level of Difficulty
Based on crochet pattern, this project would typically fall under beginner to intermediate depending on the complexity of the stitches and overall design. The tutor may take extra time to explain methods step by step, ensuring accessibility for those new to crochet.
Tutor’s Suggestions
Crochet tutors often emphasize the importance of maintaining consistent tension throughout the project, as it ensures even stitching and better results. Additionally, keeping track of stitch counts with markers can prevent errors during complex sections.
Uses of the Completed Project
Depending on the project (e.g., bag charm, toy, decor), the end result could serve as a functional item or a decorative piece. Handmade creations like these are thoughtful gifts and versatile accessories.
Tip for Success
Take your time with each step, especially if you’re new to the craft. It’s better to go slow and ensure accuracy than to rush through and have to undo mistakes. If possible, keep your workspace well-lit and organized to avoid missing key details.
Introduction
Handmade something unique is often a rewarding experience, and crochet tutorials like this one make it possible to transform simple materials into something truly special. The video offers step-by-step instructions to guide viewers through a project that combines practicality with beauty. Whether you are an experienced crocheter seeking inspiration or a novice ready to try your hand at a new project, it speaks to a wide array of interests.
Conclusion
pattern like this showcase not only technical expertise but also the joy inherent in creating something from scratch. With a balance of clear instructions, user-friendly techniques, and creative freedom, this crochet project is a mindful and productive activity. Whether kept for personal use or given as a heartfelt gift, the finished piece will undoubtedly showcase the time, effort, and love poured into its creation.