
Free Crochet Angel Amigurumi Pattern to Brighten Any Space
Bring a touch of charm and serenity with the Free Crochet Angel Amigurumi Pattern, perfect for ornaments, gifts, or cozy decorations.
Brimming with charm and delicate detail, this angel amigurumi brings a touch of serenity and joy wherever it is displayed. The Free Crochet Angel Amigurumi Pattern allows you to create a beautifully handcrafted figure that can be used as a Christmas tree ornament, a thoughtful gift, or a decorative piece for any cozy corner. Its versatility makes it ideal for both festive and everyday displays.
Sweet Crochet Angel Amigurumi Pattern for Home Decor
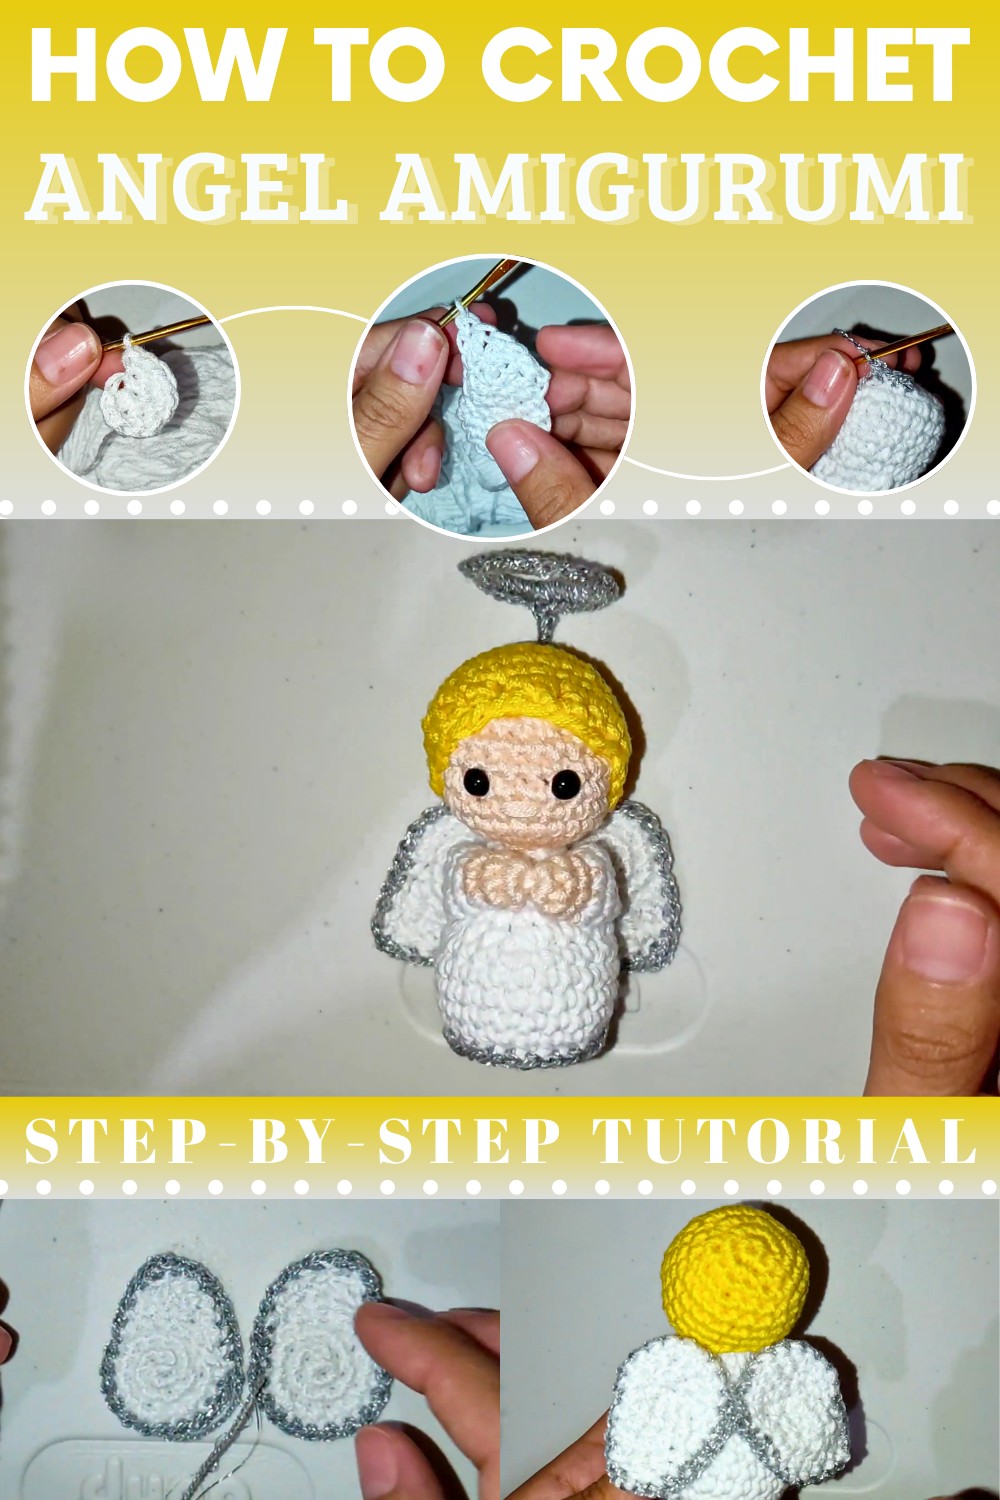
This design is not only visually appealing, with its soft textures and serene expression, but also practical and enjoyable to make. It is suitable for beginners looking to practice basic amigurumi techniques as well as more advanced makers who want to experiment with small decorative details. Completing this project typically takes just a few hours, making it a quick yet rewarding addition to your handmade collection.

The skirt or lower body is shaped in wider rounds for balance, and a small halo is added at the top. Eyes and facial details are embroidered or attached to bring the angel’s gentle expression to life. The final steps include weaving in all yarn ends and adding a hanging loop or ribbon if desired.
Crochet Angel Pattern
Materials List
- Yarn:
- White (sport or DK weight recommended, for wings)
- Gray, silver, gold, or metallic yarn (optional, for accent/edge)
- Crochet Hook: 2.25 mm (B) to 2.5 mm (C) or size appropriate for yarn
- Wire: Thin craft wire (for halo)
- Stitch marker (optional, to mark rounds)
- Yarn needle: For sewing and weaving ends
- Embroidery scissors
- Pins (for positioning wings before sewing)
- Small pre-made ring (optional, for halo base)
- Tweezers or pliers (optional, for shaping the halo)
Key Abbreviations
| Abbreviation | Meaning |
|---|---|
| st(s) | stitch(es) |
| ch | chain |
| sc | single crochet |
| hdc | half double crochet |
| dc | double crochet |
| inc | increase (make 2 sc in one stitch) |
| sl st | slip stitch |
| MR | magic ring |
| BLO | back loop only |
| FLO | front loop only |
Special Notes
- Work rounds in continuous spirals unless instructed otherwise.
- Use a stitch marker to mark the first stitch of each round.
- Adjust wire length and thickness for halo as desired.
- You may edge wings and halo in any accent color (gray, silver, gold).
Pattern: Angel Wings
Make 2 wings.
Wing (White Yarn)
- Round 1 (Base):
- Begin with a magic ring (MR).
- Work 6 sc into the ring.
- Pull tight to close the ring. (6 sc)
- Round 2:
- Inc in each st around. (12 sc)
- Round 3:
- (1 sc, inc) repeat around. (18 sc)
- Shaping the Wing:
- Sl st into next st to finish the round.
- Ch 3 (counts as first dc), dc in each of the next 2 sts. (3 total, each in its own stitch)
- Next, work 2 hdc (half double crochet) in next 2 sts.
- Sl st in the next st.*
- Ch 1, turn, then work:
- 2 hdc in next 2 sts
- Then 3 dc, each in next st
- Finish by working a sl st.
- Fasten off white, leaving a tail to sew.


Edging/Accent (Gray, Gold, or Silver, Optional):
- Join accent yarn at the base of the wing (start or finish end).
- Sc evenly around the edge, putting 2 sc in very pointed or curved tips for smoothness.
- Sl st to join and fasten off, weaving in ends.

Tip:
For mirrored wings, start shaping from the opposite side on the second wing (i.e., if you began the accent rows from the right for the first, begin from the left for the second).
Pattern: Halo
- Cut a piece of thin wire, enough to create a small circle, about 1–1.5 inches diameter.
- Shape wire into a ring, twisting or overlapping ends to secure. Use pliers for safety if needed.
- If you have a pre-made small ring, you may use that instead.
- With accent yarn (silver, gold, or preferred):
- Attach yarn to the ring with a knot.
- Sc around the entire ring, covering wire completely.
- Sl st to first sc at the end, fasten off, and weave in end.
Assembly & Finishing
- Body Band (if desired for extra “shine” or stability):
- With accent yarn, attach at the back and sc around the entire “band” or back loop area left after assembling the body.
- Sl st, fasten off, and weave in ends.
- Wings Placement:
- Pin each wing in place at the back of the angel, with pointed ends downward and close together.
- Sew securely, taking care to catch several stitches for strength.
- Place both wings so that they are symmetrical and even.
- Attach Halo:
- Insert ends of the halo into the top/back of the head.
- Secure by stitching or twisting wire inside the head or through the crocheted strands with your needle or hook.
- Fasten so that halo stands upright just above the head.


Conclusion
Your angel is now beautifully finished, featuring delicate, shaped wings and a radiant halo. These details add charm and character, making your creation perfect for ornaments, gifts, or keepsakes.
Pattern Correction
- For mirrored wings: Remember to reverse the direction of the decorative row for the second wing so they are not identical on both sides.
- Wings: Always check your stitch count to ensure symmetrical shaping.
Tips
- Use metallic yarn for extra sparkle, especially on edges and halo.
- Stiffen wings with light spray starch if desired for a firmer effect.
- Adjust the size of the wings or halo by adding more increases or rounds, or changing your hook size.