
Enchanting Free Crochet Bellflower Girl with Handmade Charm
Bring playful charm to life with Crochet Bellflower Girl Pattern, featuring delicate details, whimsical style, and a delightful handmade touch.
The delicate art of crochet has evolved from a simple pastime to a means of capturing cherished moments and bringing them to life. One such charming creation is the Bellflower Girl, a lovely crochet doll that combines innocence and a touch of whimsy. Inspired by the natural grace of flowers and the wonder of childhood, this petite masterpiece transforms into an adorable piece of decor or a cherished keepsake. The doll's most distinctive feature is its removable hat, which doubles as a flower bloom, adding a delightful layer of narrative and visual charm.
Magical Free Crochet Bellflower Girl in Whimsical Corners

Whether gifted as a token of affection or displayed proudly as a unique handmade treasure, the Bellflower Girl reminds us of the simple joys found in the tiniest details. More than just a handmade, the Bellflower Girl offers a creative way to express affection, decorate your home, or share unique handmade gifts.
With its irresistible charm and colorful appeal, this crochet piece becomes more than an object; it’s a treasure, a bond between the artist and the admirer. Simple yet enchanting, this beautiful doll is a testament to the joy of sharing handmade art.
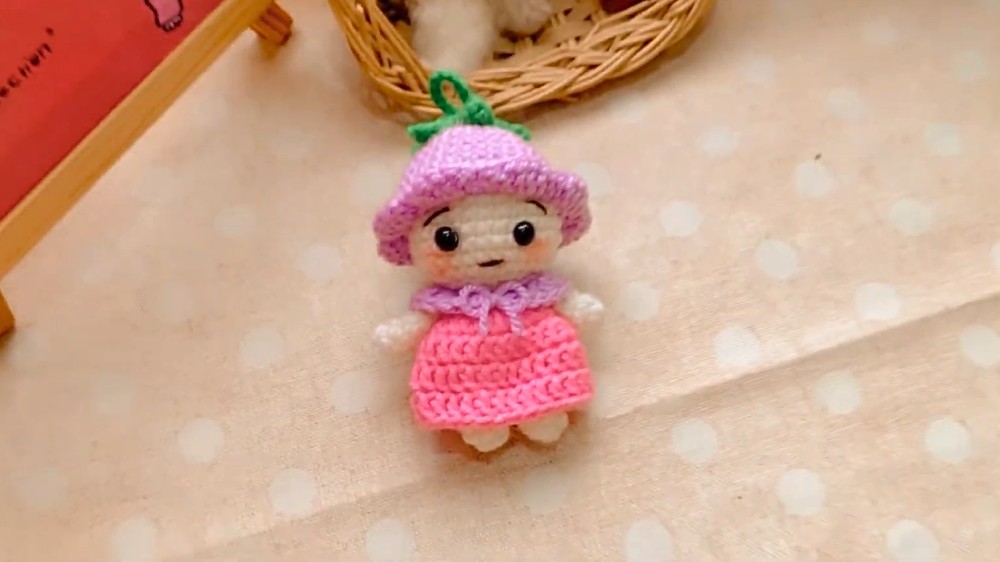
Crochet Bell Flower Girl Pattern Step-by-Step
Materials List
- Yarn: DK/Light worsted weight yarn in these colors:
- Skin color (or off-white)
- Pink (dress)
- Green (flower stem)
- Purple (flower and collar)
- Stuffing: Polyester fiberfill
- Crochet Hook: 2.5 mm
- Safety Eyes: 2 small (or black embroidery thread)
- Embroidery Thread: (for mouth, eyebrows, etc.)
- Blush or Makeup: (optional, for cheeks)
- Scissors
- Yarn Needle
- Stitch Marker
- Glue: For attaching safety eyes (optional)
Key Abbreviations
| Abbreviation | Meaning |
|---|---|
| MR | Magic Ring |
| ch | Chain |
| sc | Single Crochet |
| hdc | Half Double Crochet |
| dc | Double Crochet |
| inc | Increase (2 sc in 1 st) |
| dec | Decrease (sc2tog, invisible) |
| sl st | Slip Stitch |
| st(s) | Stitch(es) |
| FLO | Front Loop Only |
| BLO | Back Loop Only |
Special Notes
- Pattern written using US crochet terminology.
- Work in continuous rounds unless specified; use a stitch marker to keep track.
- Adjust hook size according to your tension and desired doll size.
Pattern Instructions
1. Head
With skin color yarn:
- Round 1: In MR, ch 1, work 6 sc (6)
- Round 2: Inc in each st around (2 sc in each) (12)
- Round 3: (sc in next st, inc), repeat around (18)
- Round 4: (sc in next 2 sts, inc), repeat around (24)
- Round 5: (sc in next 3 sts, inc), repeat around (30)
- Rounds 6-11: Sc in each st around (30)—6 rounds
- Round 12: (sc in next 3 sts, dec), repeat around (24)
- Round 13: (sc in next 2 sts, dec), repeat around (18)
- Round 14: (sc in next st, dec), repeat around (12)
- Insert safety eyes between Rounds 9 and 10, with about 6 sts between eyes.
- Stuff the head firmly.
- Fasten off, leaving a long tail if sewing closed later. Embroider facial features.

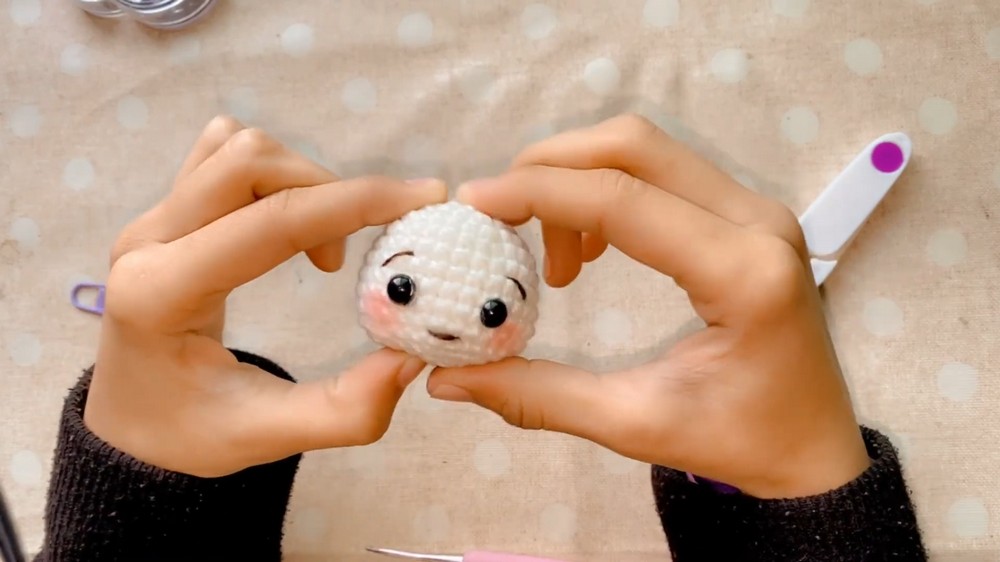
2. Legs & Body
Legs (Make 2, do not cut 2nd):
With skin color yarn:
- Round 1: In MR, ch 1, 9 sc (9)
- Rounds 2-6: Sc in each st around (9)—5 rounds
- Fasten off first leg. After finishing the second leg, do not cut yarn.
- Join two legs to begin body:
- Next, 15:04: Place legs side by side and continue as one piece, the total number of sts is now 18 (9 per leg).

Body:
- Rounds 7-10: Sc in each st around (18)
- Round 11 (BLO): (sc in next st, dec), repeat around (12)
- Proceed to stuffing. Do not cut off the yarn.
3. Dress (Skirt Frill)
Attach pink yarn to the FLO left by Round 11 (previously reserved front loops):
- Ch 2, dc in same st as join (do not count ch-2 as a st).
- (Dc in next st, 2 dc in next st) Repeat around. (Alternating one dc in a st, 2 dc in next st)
- [Makes 27 dc around at the end of Round 1]
- Join with sl st, ch 2.
- Rounds 2-4: Dc in each st around (27)
- (No increases, just regular dc stitches)
- Join each round with a sl st, ch 2 at start
- Fasten off, weave in ends.
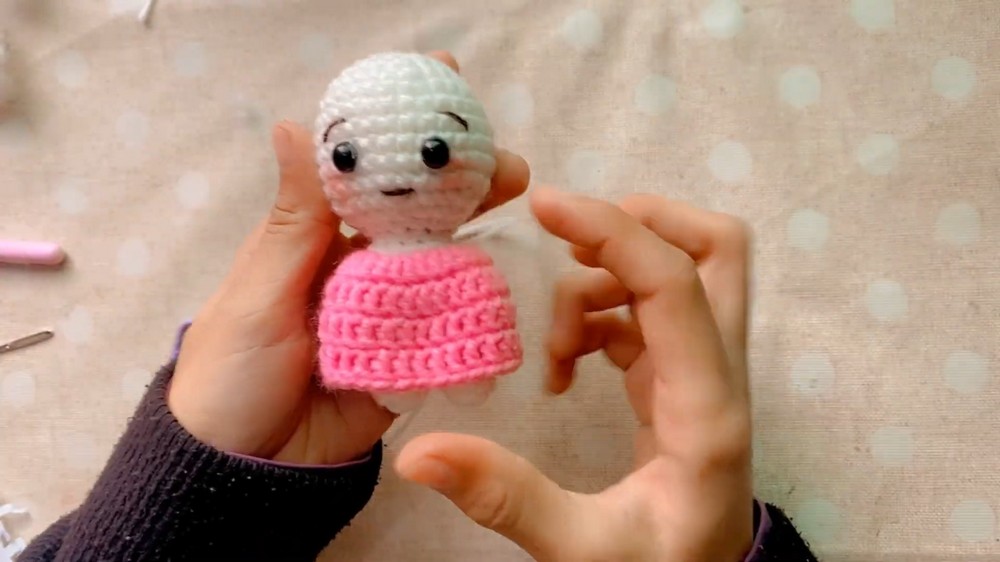
4. Arms (Make 2)
With skin color yarn:
- Round 1: MR, 6 sc (6)
- Rounds 2-6: Sc in each st around (6)
- Fasten off, leaving long tail for sewing.
- Do not stuff.
- Sew or attach to the sides of the body just below the dress.
5. Face Details
- Blush: Apply using actual blush/makeup or pink pastels (optional).
- Mouth & Eyebrows: Embroider with black or brown thread.
- Hide all thread ends neatly inside the head.
6. Neck Collar
With purple yarn:
- Ch 21
- Row 1: Starting in 2nd ch from hook, (sc, dc in next 2, 2 dc in same st), repeat pattern across.
- Sequence: sc, dc, dc, (2dc in same st), dc, dc, (2dc in same st), etc.
- Repeat for length of chain (adjust as needed for fit).
- Fasten off, leave long tails to tie or sew as a small bow under doll's neck.
7. Bell Flower Hat
With purple yarn:
- Round 1: MR, 8 sc (8)
- Round 2: Inc in each st around (16)
- Round 3: (sc in next st, inc) around (24)
- Round 4: (sc in next 2 sts, inc) around (32)
- Rounds 5-10: Sc in each st around (32)—6 rounds
- Round 11 (FLO): Start hat petals—each petal:
- (Hdc in next st, [dc, dc] in next st, [dc, dc] in next st, sc in next st) repeat for a total of 8 petals.
- [Hdc, dc, dc, dc, dc, sc] per petal.
- Join with sl st, fasten off, weave in ends.
8. Hat Flower Base & Strap
With green yarn:
Flower Base ("mommet"):
- Round 1: MR, 5 sc (5)
- Round 2: Inc in each st (10)
- For small leaves (repeat 5 times):
- Ch 4, skip 1st ch, sc in next ch, hdc in next ch, dc in next ch, skip next st on main ring, sl st in next st to anchor.
- Repeat until 5 points/leaves formed.
- Fasten off, and weave in ends.
Strap:
- Ch 10 (or more for longer strap), fasten off.
- Attach through the green "mommet" at center; knot or glue to secure.
9. Final Assembly
- Sew head to body securely, centered.
- Sew or tie on the collar/bow.
- Attach arms to sides of body, just under the dress frill.
- Fit and position hat/flower on the head.
- Place green flower base (mommet) on top of hat; secure.
- Add green strap (optional, as flower stem or as a loop for hanging).
- Tidy up all stray yarns, ensure all pieces are securely attached.
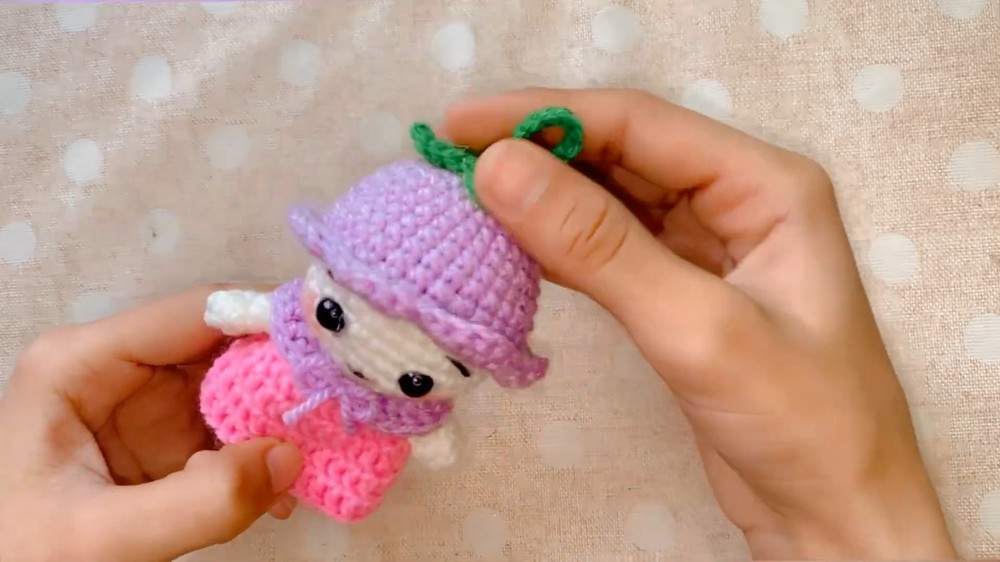
Conclusion
Your Bell Flower Girl is complete—a sweet decorative doll or gift perfect for spring! The detachable flower hat adds playful charm. You may adjust color, size, or details to personalize. Assembly is simple, but follow the tips on securing round joins and stuffing for a polished, sturdy result.
Pattern Correction & Tips
- Stitch count: Always use a stitch marker and count stitches each round for accuracy.
- Safety eyes: Attach before closing the head, but always supervise for children’s toys.
- Dress and collar: Adjust length or rounds to customize doll size or add embellishments (such as mini flowers on the collar).
- Assembly: Sew with care to ensure pieces are aligned and secure.
- For a more secure hat: You may sew or use a small piece of Velcro if desired.
Special Features
The doll has a cute design with a flower that can be removed and placed on her head like a hat. The tutorial also includes details for adding a collar, facial features, and blush to give the doll a more lively and "cute" look.
Level of Difficulty
The tutorial seems to be intended for those with some experience in crocheting, as it moves through the steps at a steady pace. The stitches and techniques described are relatively simple but require focus and precision, especially for the smaller parts. The tutor mentions that it's a very simple project, but also highlights that it requires attention to detail to ensure the head is attached correctly and the shaping is precise.
Uses
This project is for creating a cute, decorative crocheted doll. It can be a lovely handmade gift or a decorative item.
Tutor's Suggestions
- Use a stitch marker to keep track of your starting point in each round.
- Leave a long tail of yarn after finishing the head and body to make it easier to sew them together.
- The tutor mentions that the video moves quickly, but the viewer can slow it down for better understanding.
- The tutor suggests using a different color yarn if a skin tone is not available, as she did.
Step by Step Guide
The video provides a detailed tutorial on crocheting a cute bellflower girl or doll. The finished doll features a removable flower hat, making it a "bellflower girl". The video walks you through each step, from gathering materials to assembling the final product.
Conclusion
This comprehensive tutorial provides a creative way to use crochet to make a cute bellflower girl doll. The final product is a beautiful, detailed, and fun toy that showcases a variety of crocheting techniques.
Tip: When attaching the head to the body, be careful to keep it centered so it doesn't lean to one side.