
How to crochet amigurumi No Sew Bee With This Cute Pattern
Buzz into creativity with this free crochet no-sew bee pattern, offering simple steps to make a cute, fuss-free, and lovable handmade bee in no time.
If you enjoy quick and fun crochet projects, you’ll love making tiny things that brighten everyday items. One of my favorite easy projects is a cute little bee that you don’t even have to sew together. The free crochet no sew bee pattern is perfect for creating a small, cheerful bee decoration that you can use right away. With just a few changes, like switching colors or tweaking the shape, you can also turn it into other insects or small critters, making this pattern very flexible for your creativity.
Quick Crochet No Sew Bee Pattern Anyone Can Try

This no sew bee is full of charm with its round, plump body and bright stripes. The texture is soft but has enough structure to hold its shape nicely without any sewing involved. Its wings and antennae are part of the same piece, giving it a smooth and polished look. The style is playful and simple, making it easy to attach to bags, hats, or keychains. Its standout feature is definitely the clever design that keeps all parts connected, so there’s no need for extra finishing steps.
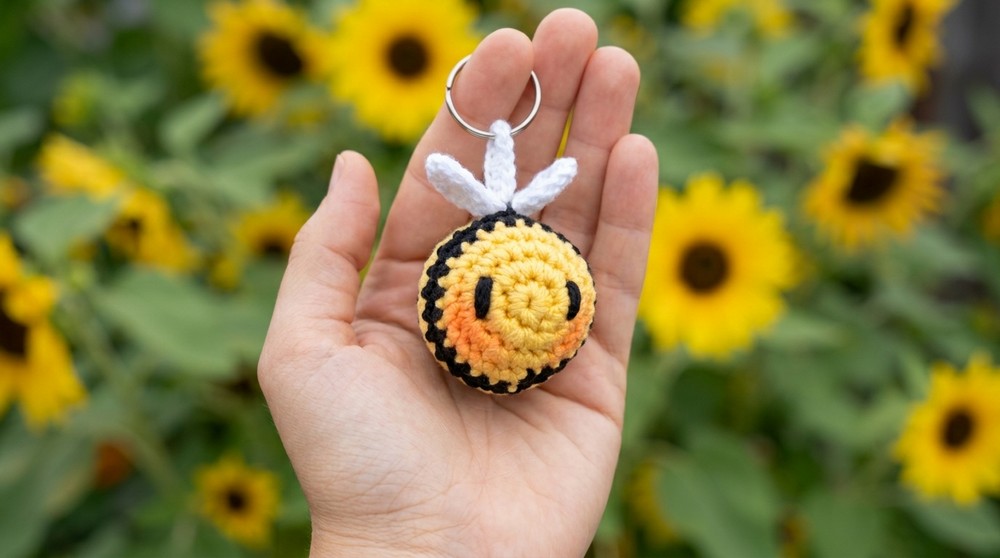
You don’t need to be an expert to make this project. It mostly uses the single crochet stitch, worked carefully to shape each part of the bee as you go. This makes it ideal for beginners or anyone wanting a quick project that looks great. The pattern guides you through every step, so it’s easy to follow and finish in no time.
When finished, this free crochet no sew bee pattern makes a wonderful gift or a sweet decoration for yourself. You can wear it, gift it, or collect it as part of a cheerful crochet insect set. If you love simple, satisfying projects that bring a smile, this bee is a perfect fit to add some buzz to your crochet collection.
Expert No-Sew Crochet Bee Pattern
This expert-level crochet bee pattern enables you to create an adorable, seamless amigurumi bee with almost no sewing at all. The bee is formed using clever joining techniques and minimal color changes. All elements – including the wings – are crocheted directly, making this a fast and clean finish project. If you love a polished, streamlined amigurumi with few loose ends, this pattern is for you!
Pattern Notes
- This pattern is intended for experienced/amigurumi-expert crocheters: it assumes comfort with magic rings, changing colors, working in the round, invisible joins, front and back loop stitches, wing shaping, and embroidery/basic amigurumi finishing.
- Minimal sewing is required: wings are attached as-you-go, and only tail closing, wing securing, and facial embroidery are handled separately.
- Be attentive to transitions between rounds, especially when color changes occur or when wings are joined, for an invisible, pro-quality finish.
- Use a stitch marker to keep track of rounds as you work continuously (do not join with slip stitch unless noted), and stuff the bee lightly as you close.
Skill Level
Expert / Advanced Amigurumi
Materials
- Sport or light DK weight cotton yarn:
- Yellow (body)
- Black (stripes and face)
- White (wings)
- 2 mm crochet hook (or size for tight fabric)
- Yarn needle
- Scissors
- Polyester stuffing
- Optional: powder blush for cheeks
Measurements / Sizing
- Finished bee measures approximately 6–7 cm long (2.4–2.75 inches), wingspan about 3.5–4 cm depending on tension.
- Designed for a small palm-sized plush.
Gauge
- Not crucial; denser, tight stitches are preferred for amigurumi.
- Example: 6 sc x 7 rows = 2.5 cm (1”) square.
- Adjust hook/yarn to avoid stuffing showing between stitches.
Stitch Abbreviations
| Abbreviation | Meaning |
|---|---|
| MR | Magic ring (or magic circle) |
| ch | Chain |
| st(s) | Stitch(es) |
| sc | Single Crochet |
| tc/tr | Treble (Triple) Crochet |
| sl st | Slip Stitch |
| inc | Increase (2 sc in same st) |
| dec | Decrease (sc 2 tog) |
| FLO/BL | Front/Back Loop Only |
Special Stitches
- Treble (Triple) Crochet (tr): Yarn over hook twice, insert in stitch, yarn over and pull up a loop (4 loops on hook), yarn over and pull through 2 loops, repeat twice more until only one loop remains.
- No-Sew Joining: Wings are crocheted directly into/through the body stitches at specific rounds rather than sewn on afterward.
The Crochet Pattern
Certainly! Here’s your detailed, complete step-by-step pattern, written for an expert audience and including EVERY step from the transcription. All joining, color changing, wing making, and finishing details are included, with nothing skipped.
[Expert No-Sew Amigurumi Bee Pattern]
Pattern Notes
- The bee is worked almost seamlessly with expert no-sew methods for attaching the wings as you crochet.
- This pattern uses continuous rounds (do not join unless otherwise instructed), tight amigurumi stitches, and layered embroidery for the face detail.
- Use a stitch marker and keep all color changes and wing joins exact for the best results.
- Written in US crochet terms.
Skill Level
Expert: You should be very comfortable with amigurumi, colorwork, wing joining, magic ring starts, and working in the round with invisible decreasing.
Materials
- Sport weight cotton yarn in white (wings), yellow (body), and black (stripes & face)
- 2mm crochet hook or size needed to keep stitches tight
- Yarn needle
- Scissors
- Small amount of stuffing
- Optional: pink blush for cheeks
Measurements / Sizing
- Finished bee is approx. 6–7cm (2.5") long and 3cm (1.2") tall.
Gauge
- Not critical; work tightly so stuffing doesn’t show. (About 6 sc x 7 rows = 2.5 cm / 1")
Stitch Abbreviations
| Abbreviation | Meaning |
|---|---|
| MR | Magic ring |
| ch | Chain |
| sc | Single Crochet |
| tr/trc | Treble Crochet |
| sl st | Slip Stitch |
| inc | Increase (2 sc in same st) |
| dec | Decrease (sc2tog) |
| st(s) | Stitch(es) |
Special Stitches
- Treble Crochet (tr): Yarn over twice, insert in indicated place, yo, pull up loop (4 loops on hook), [yo, pull through 2 loops] 3 times.
- Invisible Decrease: Insert hook into front loop only of the next 2 sts, YO, pull through both, YO, pull through 2 remaining loops.
The Crochet Pattern!
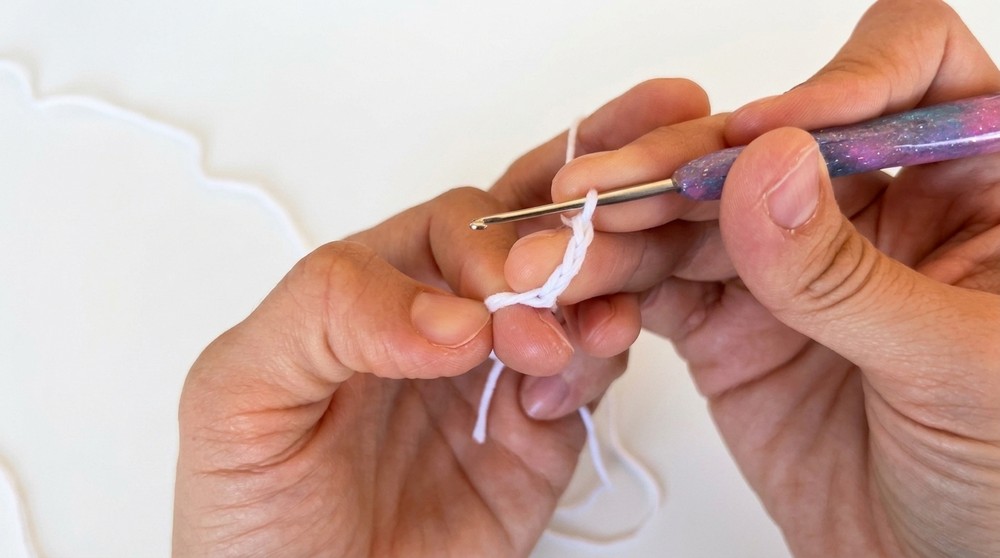
WINGS (Make 2, worked in one piece) — White
- Make a magic ring.
- First Wing:
- Ch 3.
- Make 4 tr in the ring.
- Ch 3, sl st into ring.
- Second Wing (worked into SAME magic ring):
- Ch 3.
- 4 tr in ring.
- Ch 3, sl st into ring.
- Ch 1, FO and cut yarn, leaving long tails.
- Pull starting tail to make magic ring center small but do not close fully (will use to attach wings later).

BODY
With Yellow:
- Round 1: MR, 8 sc in ring. (8)
- Round 2: 2 sc in each st around (inc in every st) – (16)
- Round 3: [sc in first st, inc in next st] 8x. (24)
- Round 4: Sc in each st around (24)

STRIPE & COLOR CHANGES
- Round 5: Sc in each st (24), but at final st: Insert hook, pull up yellow, switch to black, YO and pull through to finish st. You are now working with black.
- Round 6 (Black): Sc in each st around (24).
JOIN & SECURE WINGS
NOTE: You will join the wings at two opposite sides (for balance) and anchor the ends inside with knots—no sewing later!
- Round 7 (Black):
- Sc into next 12 sts.
- Hold the wings with the “front” side (the treble bumps) facing you, aligning them above the bee.
- Going through the next st on the bee’s body, also insert hook into the edge of the wing’s magic ring and complete a single crochet, joining the wing. Do this for two consecutive sc (on the ring), joining wing firmly to bee. (Cross over/anchor tail ends inside.)
- Finish remaining 10 sts of the round.

—You’ve joined the first side of the wings on the top of the bee.
COLOR CHANGE & JOIN OTHER END OF WINGS
- Round 8: Switch to yellow at last black st (as before).
- Sc in next 12 sts.
- On st 13 and 14, join the OPPOSITE side of the wing’s magic ring to the bee’s body in the same manner (insert through body st and wing ring, sc together for both).
- Finish last 10 sc.
- Ensure the wing’s tails are inside; knot these ends together on the inside to secure wing if desired.

BODY, STRIPES, AND DECREASES
- Round 9–10 (Black): Change to black at final st of round 8. Work 24 sc per round.
- Round 11 (Yellow, Begin Decreases):
- [dec (sc2tog), sc in next 2 sts] x6 (18)
- Round 12 (Yellow):
- [dec, sc] x6 (12)
- Stuff the bee with fiberfill.
- Round 13: (Black) 6 decreases (6 sts).
- Finish end:
- Fasten off, thread yarn needle and weave through front loops of last 6 sts. Pull to tightly close, creating a pointed tail. Leave the end. No need to hide point—this is the bee’s “stinger.”

FACE
- With a length of black, embroider eyes on round 2 at the front:
- Bring yarn out where you want one eye, skip 2 sts vertically, insert needle, repeat once to make bold.
- Repeat for other eye, symmetrical to first.
- (Optional) Blush: Dab a little pink powder/blush on either side of the face for cheeks.
Assembly & Finished Size
(Bulleted for clarity):
- Secure wing tails INSIDE with a strong knot.
- Close tail end firmly to make a tidy point.
- Shape you bee with your hands, pinching the wings upright and refining the face if needed.
- Finished bee = about 6–7 cm (2.5") long, 3 cm tall.
- No other sewing needed—truly no-sew except for finishing off yarn ends and embroidering the face.
You Are Done!
You’ve followed every step:
- Made two beautiful wings with trebles in a magic ring (in one piece).
- Crocheted the bee body seamlessly.
- Changed colors without visible joins.
- Joined wings as-you-go in two rounds.
- Boldly embroidered the face and shaped the bee with pro finishing.
Customize with more stripes or colors as you wish. Enjoy your expert, no-sew amigurumi bee!
Congratulations! You now have a seamless, no-sew expert bee, perfectly neat from every angle. With wings joined as-you-go, strong finishing, and bold facial embroidery, it’s a delightful project for skilled crocheters seeking a polished mini plush. Make more in various colors or add a hanging loop for keychains or decorations.