
Sweet Crochet Mini Tulip Pot Free Pattern To Add Floral Charm
Add a cheerful floral touch to your space with this Crochet Mini Tulip Pot Pattern and place a sweet tulip on your table for a cozy look
Adding a bit of color and cheer to your home feels great, especially when you make it yourself. I recently found a fun and simple project—a small crochet tulip in a tiny pot—that looks lovely anywhere. The Crochet Mini Tulip Pot Free Pattern is an easy way to create this cute flower decoration that can brighten up your desk, shelf, or gift to someone special.
Quick Crochet Mini Tulip Pot Free Pattern As Handmade Gift
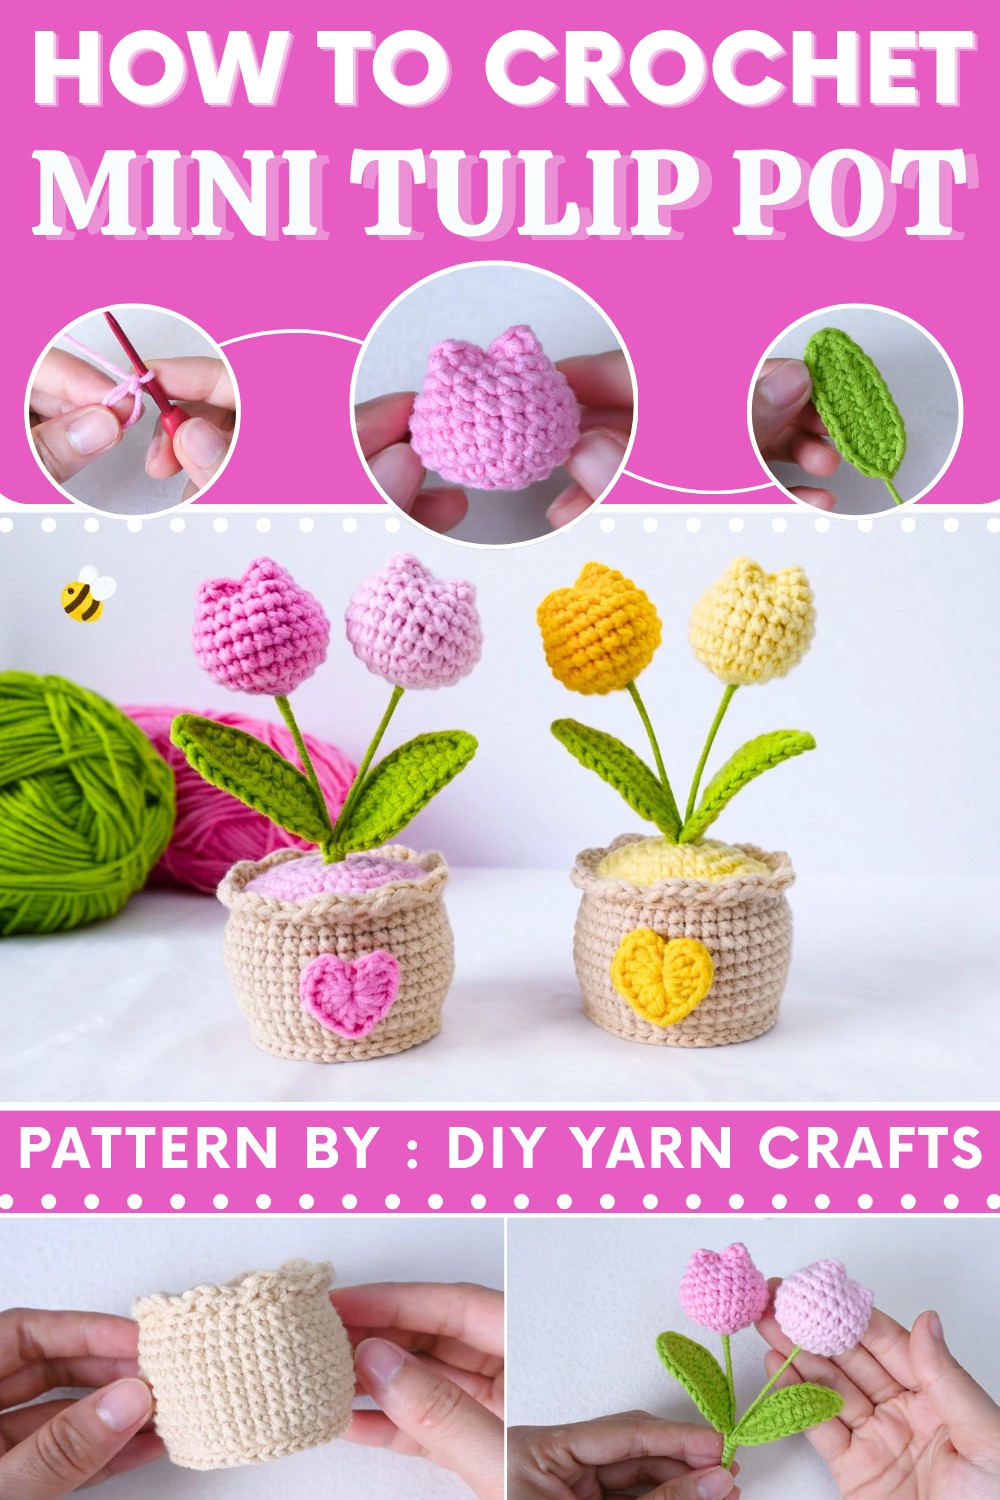
This pattern comes from the helpful channel DIY Yarn Crafts. It shows you how to make a small tulip flower with soft yarn and a small pot to hold it. You will use simple crochet stitches like single crochet and half double crochet, which are easy to learn. The tulip looks soft and pretty, with a green stem wrapped around a wire to keep it standing tall. The tiny leaves add a nice touch, and the pot has a neat ribbed texture that makes it look handmade and special.

The finished tulip pot is small and cute—perfect for decorating your home in any room or for giving as a thoughtful, handmade gift. It’s a nice way to add some flower beauty without needing real plants, and it also lasts a long time. You can use it to decorate a study desk, kitchen window, or even your bedroom.
If you want a fun and simple project that looks great and is useful, the Crochet Mini Tulip Pot Free Pattern is a wonderful choice. It’s a great way to enjoy making something pretty and using your hands to create joy.
Crochet Mini Tulip Pot Pattern
This helpful guide will show you, step by step, how to crochet a lovely tulip pot. Each instruction is clear and simple, so even beginners can follow along. You will start with the tulip buds, sew soft and pretty leaves, and work your way to making the sturdy pot. All materials needed are listed, and each stitch and tool is explained. Working through each part slowly, you will see your tulip pot come together. These instructions use basic crochet terms and give small tips to help make the process easier. The finished tulip pot will brighten any table or shelf.
Quick Overview
- Tulip Buds: Spiral rounds, filled, shaped to form 4 petals.
- Leaves: Crocheted over 0.5 mm wire for structure, shaped in one round.
- Pot: Flat, joined rounds for the base; sides in back loops; scalloped rim in front loops.
- Bottom Pot Rim: Added with slip stitches into unworked loops.
- Soil Cover: Flat circle with a center hole for stems.
- Stem & Assembly: Wire stems wrapped with yarn and glued; leaves attached; all secured into the pot.
Materials
- Yarn: 5-ply (Susan’s Family or similar: pink, green, brown/beige)
- Hook: 2.5 mm
- Wire: 0.5 mm (16 cm per leaf), 1.0 mm (10 cm per stem)
- Stuffing: Fiberfill cotton
- Tools: Stitch marker, darning needle, scissors, hot glue gun, glue sticks, (optional: small gravel for weight)
Measurements & Gauge
- Finished Height: 12–14 cm (incl. pot, stem, tulip)
- Pot Width: 5.5–6 cm at top
- Gauge: 22 sc × 24 rnds = 10×10 cm (tight tension suggested)
Stitch Abbreviations
| Abbreviation | Meaning |
|---|---|
| MR | Magic Ring |
| st(s) | Stitch(es) |
| ch | Chain |
| sl st | Slip Stitch |
| sc | Single Crochet |
| hdc | Half Double Crochet |
| inc | Increase (=2 sc in same st) |
| BLO | Back Loop Only |
| FLO | Front Loop Only |
Special Stitches:
- sc inc: Work 2 sc in the same stitch
- Crocheting over wire: Hold wire along edge, insert hook under both yarn and wire
The Pattern Steps
Tulip Bud (Make 2)
Worked in spiral (do not join each round)
- Round 1:
🔹 MR, 7 sc in ring. Pull tail tight. Place marker. (7 sts)

- Round 2:
🔹 Inc in each st (=2 sc in each, all around).
(14 sts) - Round 3:
🔹 Repeat (1 sc, inc) 7x around.
(21 sts) - Round 4:
🔹 1 sc in each st around. (21 sts) - Rounds 5–9:
🔹 1 sc in each st around for 5 more rounds. (21 sts each) - Finishing:
🔹 Sl st in next st to finish. Cut yarn, leaving long tail.
🔹 Stuff firmly with fiberfill.
🔹 Pinch top to cross-shape. Sew across the top with yarn to make 4 defined petals.

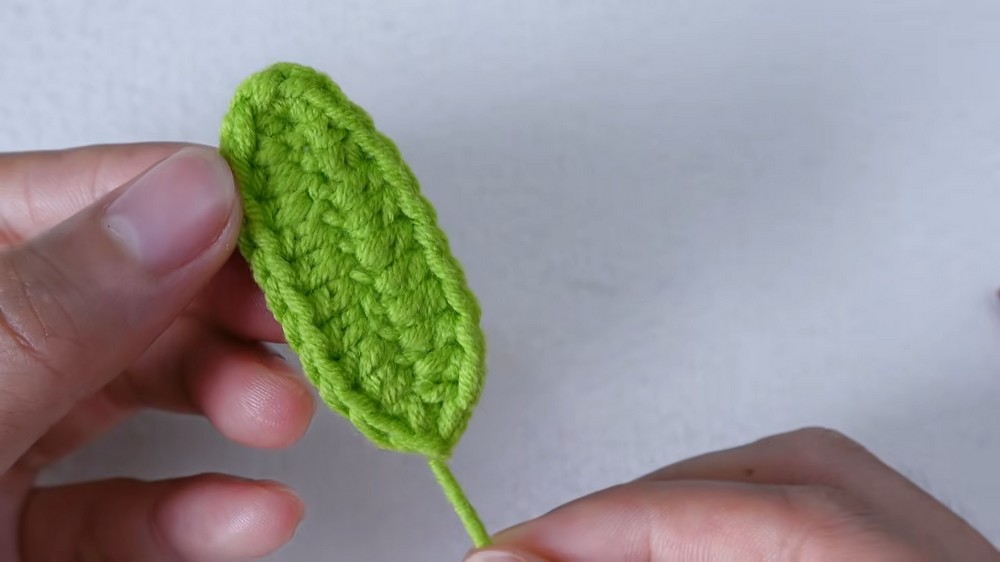
Tulip Leaves (Make 2)
Crocheted in one round, over wire
- Preparation:
🔹 Ch 12.
🔹 Fold 16 cm of 0.5 mm wire slightly in half. - Leaf (worked over wire):
- Skip first ch from hook, insert in 2nd ch.
- 1 sc (over wire) in this ch.
- 1 hdc (over wire) in each of the next 8 ch.
- 1 sc in next ch.
- Tip: In last ch, 3 sc (all in same ch).
- Turn: Down the other side of chain.
- Skip first space; insert hook into next st (over wire & starting tail)
- 1 sc
- 1 hdc in each of 8
- 1 sc in end
- Sl st to first sc.
- Ch 1, cut yarn.
- Finishing:
🔹 Wrap yarn tail around base wires, knot on the back, and trim.
Flower Pot
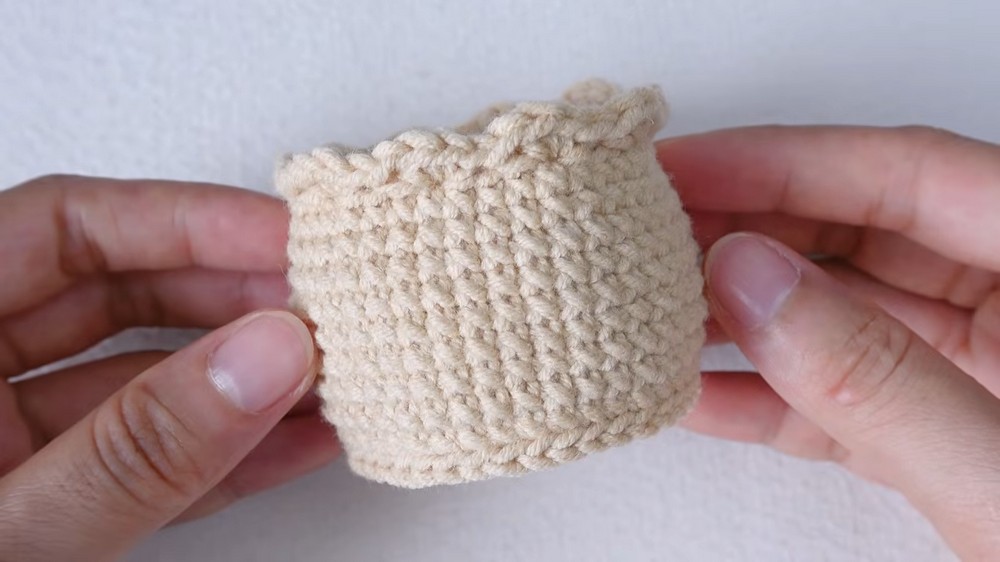
Worked in joined rounds; each round: ch 1, end with sl st to first st.
- Round 1:
🔹 MR, 8 sc in ring. Sl st join. (8 sts) - Round 2:
🔹 Ch 1. Inc in each st (2 sc per st). Sl st join. (16 sts) - Round 3:
🔹 Ch 1. (1 sc, inc), repeat around. Sl st join. (24 sts) - Round 4:
🔹 Ch 1. (2 sc, inc), repeat around. Sl st join. (32 sts) - Round 5:
🔹 Ch 1. (3 sc, inc), repeat around. Sl st join. (40 sts) - Round 6 (BLO):
🔹 Ch 1. 1 sc in BLO of each st. Sl st join. (40 sts) - Round 7:
🔹 Ch 1. 1 sc in each st (both loops). Sl st join. (40 sts) - Rounds 8–14:
🔹 Ch 1. 1 sc in each st (both loops). Sl st join. (40 sts each) - Round 15 (FLO, Rim):
🔹 Ch 1. Work 4 sc in FLO of first st, skip next 3 sts,
🔹 4 sc in FLO of the next st, skip 3, repeat all around.
🔹 After final group, join with sl st to first of the 4 sc.
🔹 Cut yarn, weave in end.
Bottom Rim (Detail)
- Attach yarn to a front loop leftover from Round 6 at bottom.
- Ch 1, sl st in same loop and all leftover loops around.
- Sl st join, cut yarn, pull ends inside pot & tie to secure.
Soil Cover
- Round 1:
🔹 MR, 8 sc. Pull tight, but leave tiny center hole. Sl st join. (8 sts) - Rounds 2–5:
🔹 Repeat the increases as in Pot Rounds 2–5. - Finish:
🔹 Sl st join; cut yarn leaving 40 cm tail for sewing on the pot.
Assembly
- Stuff Pot: Fill firmly with fiberfill; add gravel stones to bottom for stability if desired.
- Attach Soil: Use long tail & darning needle to sew soil cover to inside rim of the pot.
- Make Stems:
- Hot glue top of 10 cm, 1.0 mm wire.
- Insert deeply into tulip base.
- Add more glue down wire; tight-wrap green yarn 4–5 cm.
- Repeat for both buds.
- Join Stems & Leaves:
- Twist two stems together.
- Place two leaves alongside stems, glue them.
- Continue wrapping green yarn tightly to end of stems.
- Cut & glue tail to secure.

- Insert Flowers: Push stems into the center hole of the soil cover.
Optional Accent
- Glue a crochet heart on the pot’s wall.
Conclusion
Now your tulip pot is finished, showing your time, skill, and care. It will look beautiful anywhere you put it, and can make a wonderful gift for a friend or loved one. The tulip and leaves add color, while the pot stands firm and neat. Each small step along the way has helped the project to turn out neat and sweet. Remember, little details like wrapping the wire and sewing the top can make a big difference. Your finished tulip pot will be noticed and enjoyed at home or at work, bringing smiles to everyone who sees it.
