
Free Crochet Reindeer Sphere Pattern with Easy Instructions
Brighten your holidays with a unique Crochet Reindeer Sphere that adds cozy charm and festive joy to any space with its delightful handmade design.
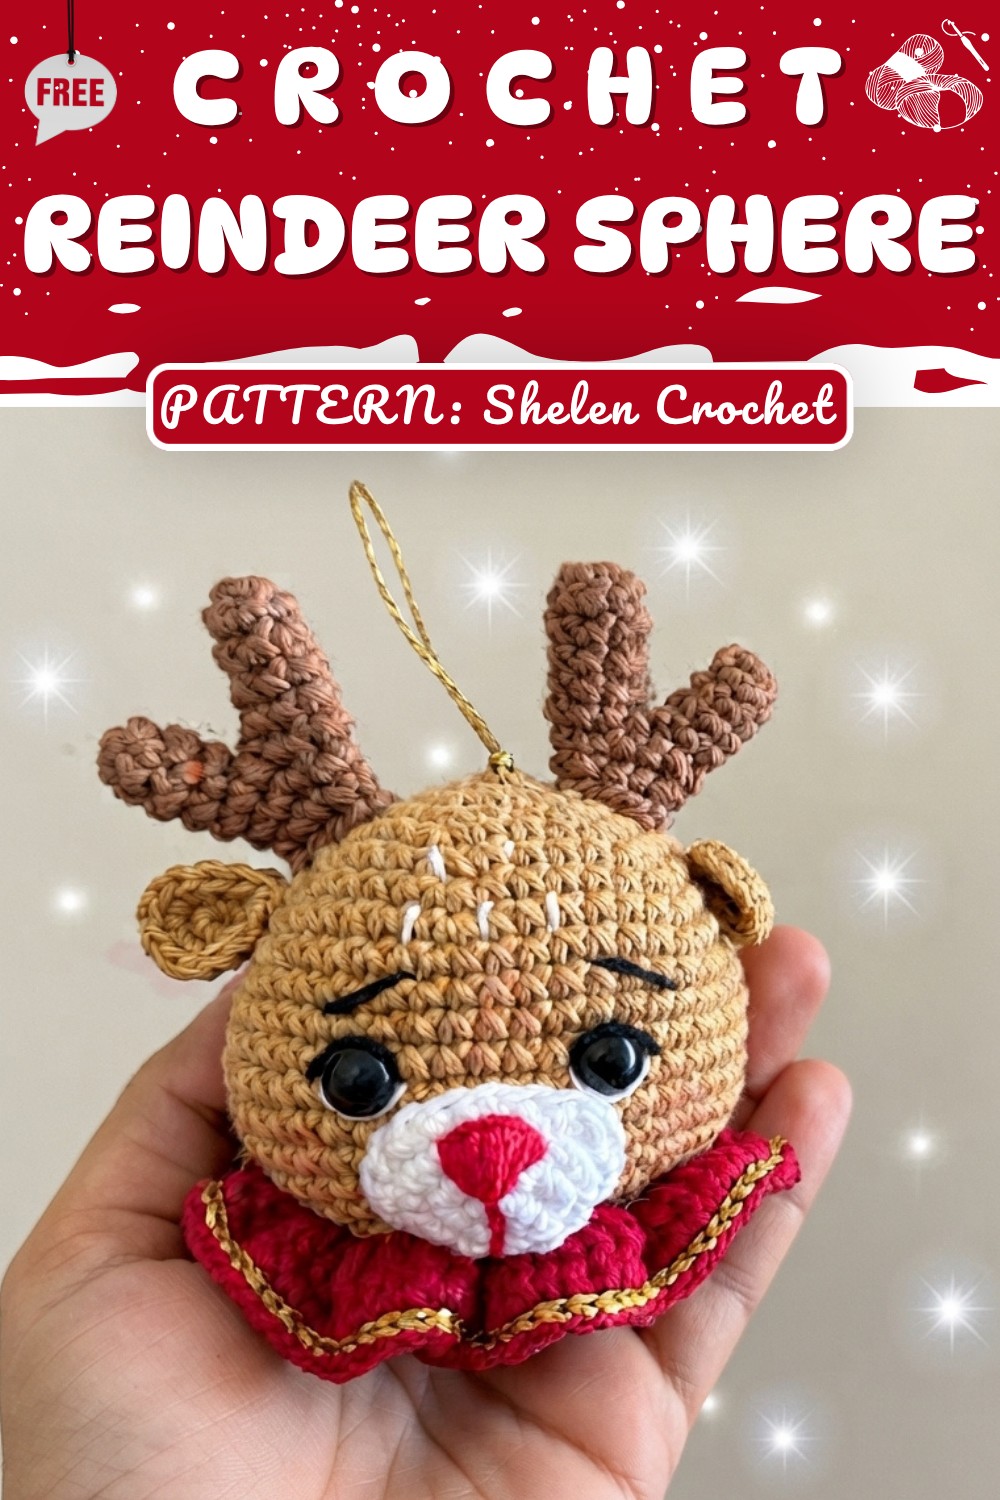
This charming ornament features a cute reindeer face with antlers, a bright red nose, and friendly eyes, spreading holiday cheer in a simple yet delightful way. The Crochet Reindeer Sphere is a festive decoration suitable for hanging on your Christmas tree, attaching as a gift tag, or using as a keychain or bag charm.
Cute Crochet Reindeer Sphere Free Pattern to Decorate Your Christmas Tree
Made from soft yarn in traditional holiday colors like brown, red, and white, it adds a warm, cozy touch to any setting.
All credit goes to [Shelen Crochet], whose original YouTube tutorial inspired this design—her clear instructions and creative approach provide excellent guidance for anyone interested. Thanks to her skillful presentation, even beginners can approach this project with confidence.
The finished ornament is small enough to hold comfortably in your hand or to hang gracefully with other decorations.
The Crochet Reindeer Sphere offers a charming addition to holiday décor and thoughtful handmade gifts. For detailed guidance and more imaginative ideas, visiting Shelen Crochet’s channel is highly recommended.
This cozy, festive piece brings a genuine seasonal spirit to life through simple, accessible techniques.
Chelen en Crochet – Amigurumi Reindeer Sphere Pattern
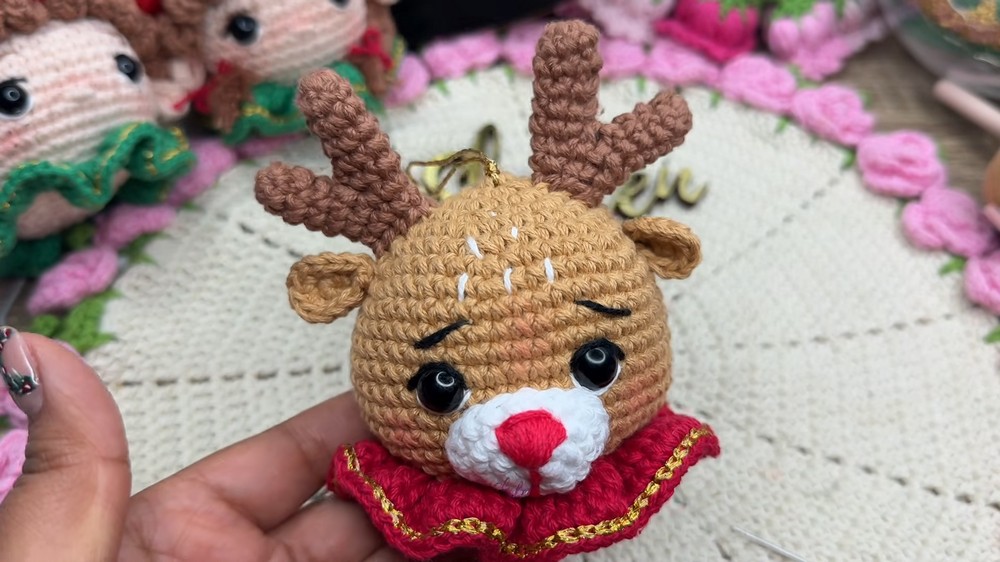
Today, we will create a charming and festive Reindeer Sphere, ideal for holiday decoration or as a cute gift. This delightful round reindeer features expressive eyes, sculpted muzzle, adorable ears, and detailed antlers. Let’s make this step by step, closely following each part of the video for the most authentic results.
Pattern Highlights
Spherical Reindeer Construction
- Constructed in the round with classic amigurumi increases and decreases.
- The “false X” single crochet offers extra dense and gorgeous stitch definition.
Expressive Face and Embellishments
- Safety eyes for a friendly expression, embroidered details for a lively face.
- Optional “freckles” on the forehead for added character.
Iconic Reindeer Features
- Sculpted muzzle and sewn-on, contrasting red nose.
- Ears and intricate antlers are separately crocheted and attached for a realistic finish.
Neat Assembly and Polished Finish
- All components are joined with clean sewing or glue options.
- Gold thread hanger makes this reindeer perfect for ornaments or gifts.
Notes
- Every round begins with a chain for height; this chain is not counted as a stitch.
- The "false X" sc stitch is used for a denser, tidier fabric; regular sc can be used.
- Safety eyes are firmly attached and secured for safety.
- Antlers are constructed in two segments and then joined.
- Use cold silicone or quality craft glue when sewing is not preferred for assembly.
Skill Level
Confident Beginner to Intermediate
Previous experience with amigurumi (increases/decreases, working in rounds), simple embroidery, and sewing small parts is recommended.
Materials
- Yarn: Cotton #6 in bean brown (or tobacco/café shades for the main), red, carmine, black, white, gold
- Hook: 2.20 mm crochet hook
- Safety Eyes: Size 9 mm
- Stuffing: Pillow or polyester fiberfill
- Embroidery Needle
- Blush (powder or cream) and application brush
- Cold silicone or craft glue
- Scissors
- Gold thread for hanging loop
Measurements / Sizing
- Finished sphere (without horns/ears): ~8-9 cm in diameter
- Approximate total height (horns included): ~11-12 cm
Gauge
- Not critical for amigurumi; work with a tight tension to minimize gaps.
- Typical: After round 4, your circle should measure approximately 2.5–3 cm in diameter.
Stitch Abbreviations
| Abbreviation | Meaning |
|---|---|
| ch | chain |
| sc | single crochet |
| inc | increase (2 sc in 1 st) |
| dec | decrease (sc 2 together) |
| sl st | slip stitch |
| MR | magic ring |
| blo | back loop only |
Special Stitches
- False X Stitch: Insert hook under both loops (front-to-back), yarn over, draw through, yarn over, pull through both loops for a neat “X” look.
- Invisible Decrease: Insert hook in front loop only of next 2 sts, yarn over, draw through both, yarn over, pull through both loops.
The Crochet Pattern
Sphere (Head/Body — Brown Yarn)
- Rnd 1: MR, ch 1, 6 sc (false X method). Sl st to join. (6)
- Rnd 2: ch 1, 6 inc (12). Sl st.
- Rnd 3: ch 1, (sc, inc) around (18). Sl st.
- Rnd 4: ch 1, (2 sc, inc) around (24). Sl st.
- Rnd 5: ch 1, (3 sc, inc) around (30). Sl st.
- Rnd 6: ch 1, (4 sc, inc) around (36). Sl st.
- Rnd 7: ch 1, (5 sc, inc) around (42). Sl st.
- Rnd 8: ch 1, (6 sc, inc) around (48). Sl st.
- Rnd 9–16: ch 1, sc in each st around (48 st per rnd). Sl st.
- Rnd 17: ch 1, (6 sc, dec) around (42). Sl st.
- Rnd 18: ch 1, (5 sc, dec) around (36). Sl st.
- Rnd 19: ch 1, (4 sc, dec) around (30). Work in blo for this round. Sl st.
- Rnd 20: ch 1, (3 sc, dec) around (24). Sl st.


Add safety eyes between Rounds 12 and 13, 6 st apart. Secure with washers and carefully melt back with lighter. Embroider details (see below).

- Rnd 21: ch 1, (2 sc, dec) around (18). Sl st.
- Rnd 22: ch 1, (sc, dec) around (12). Sl st.
- Stuff firmly.
- Rnd 23: ch 1, 6 dec (6). Sl st, fasten off, close with yarn needle through front loops, and weave in end.
Collar (Red/Carmine)
- Attach red to unused loops from Rnd 19.
- ch 3 (counts as first dc), 2 dc into same st, (3 dc into next st) around. Join with sl st.
- ch 1, sc in each dc around. Join, fasten off.
- Attach gold yarn, sl st through each st around for decorative edge. Fasten off, weave in ends.
Muzzle
- Rnd 1: MR, ch 1, 6 sc. Sl st.
- Rnd 2: ch 1, (3 sc in 1 st), sc in next 2, repeat once (10). Sl st.
- Rnd 3: ch 1, sc, 2 inc, 3 sc, 2 inc, 2 sc (14). Sl st.
- Rnd 4: ch 1, 3 sc, inc, 6 sc, inc, 3 sc (16). Sl st, fasten off.
Add embroidery for the nose: Center a red-carmin stitched triangle at the top of muzzle, then embroider a vertical line and a few horizontal bars for detailing. Glue or sew muzzle to lower front of head, centered between the eyes.

Ears (Make 2, Brown)
- Rnd 1: MR, ch 1, 6 sc. Sl st.
- Rnd 2: ch 1, 6 inc (12). Sl st, leaving a long tail to sew. Make 2.
Antlers (Each Consists of Two Parts, Brown)
First Part (Short prong)
- Rnd 1: MR, ch 1, 6 sc. Sl st.
- Rnd 2–4: ch 1, 6 sc around. Sl st. (4 rounds total) Fasten off.
Second Part (Main prong)
- Rnd 1: MR, ch 1, 7 sc. Sl st.
- Rnd 2–5: ch 1, 7 sc each round. Sl st.
- Join: Without fastening off, sl st to base of first part and cont. working:
- 6 sc around first prong and then 7 sc around main prong. (13 sc)
- Dec Round: ch 1, (sc, dec) around (9). Sl st.
- Last Round: ch 1, 9 sc in each st around. Sl st, leave long tail. FO.
Face Embroidery (Between Rnd 12–13, Centered)
- Eye highlight: White yarn (2 strands). Make small dash at inside or outside eye angle.
- Lashes & Brows: Black yarn (2 strands) for lashes and 3-stitch brows, positioned above eyes.
- Freckles: (Optional) White yarn, one or two small dots on forehead.
- Blush: Apply gentle circles of blush on cheeks with brush for cuteness.
Assembly & Finished Size
- Antlers: Sew one prong downwards and one prong upwards, atop head, symmetrically.
- Ears: Sew each ear to the side of the head, lined up with antlers.
- Muzzle: Attach muzzle to lower front, centered between eyes. Secure well.
- Face: Embroider all features as described before closing up.
- Neck/Collar: Attach completed collar around blo line.
- Gold thread hanger: Thread ~20 cm gold yarn through top of head, knot, and hide ends in sphere.
- Finish: Hide any exposed ends, give a final fluff, and tidy the blush for a polished appearance.

FINISHED SIZE:

Approx. 8–9 cm sphere, 11–12 cm tall including antlers.
Conclusion
Congratulations! Your adorable reindeer sphere is complete—a delightful, festive addition to your seasonal décor or a thoughtful hand-crafted gift. Every detail, from its sweet blush to its neatly formed antlers and personalized embroidery, brings joyful character to your creation. Thank you for choosing to crochet along with Chelen en Crochet. Wishing you happy crafting and a magical season; see you in the next festive tutorial. Don’t forget to subscribe for more amigurumi adventures!