
Free Crochet Christmas Tree Pattern with Easy Instructions
Adorn festive corners with Free Crochet Christmas Tree Pattern featuring cute holiday charm perfect for cozy shelves tables and rooms season.
Brighten up your holiday space with a charming crochet creation from DIY Yarn Crafts. The Free crochet Christmas Tree Pattern brings to life a delightful little tree, made with soft yarn that feels cozy and looks festive. This small tree is designed to catch the eye with its full, green branches and simple, sweet shape. Perfect for putting on your desk, mantel, or even giving as a handmade gift, it adds a special touch to holiday decorating.
Beginner Friendly Christmas Tree Free Crochet Pattern

The finished crochet Christmas tree stands out with its soft texture and neat form, making your space feel warm and cheerful. Its compact size means you can use it almost anywhere, whether beside wrapped presents or nestled on a bookshelf. This handmade decoration offers more than just looks—it brings a warm, personal feeling that store-bought items can’t match.

DIY Yarn Crafts made sure the pattern is simple enough for beginners to try, while still interesting for those who crochet regularly. The clear instructions make it easy to create your very own holiday tree in just a few steps, turning crocheting time into a fun and rewarding experience.

This crochet tree can become a yearly decoration that grows more meaningful with time. You can add your own flair by sewing on tiny beads or using different shades of green to make it unique.
Crochet Christmas Tree Pattern
Create a festive crochet Christmas tree using yarn and basic crochet stitches complemented by a sturdy cone base and topped with a charming star. This pattern guides you through making the structural components, decorative leaf rings, the tree top, and the star topper, combining crafting techniques for a neat, textured holiday decoration.
Quick Overview Of Pattern
- Structure: Build a cone base from cardstock and a yarn-wrapped trunk.
- Leaf Rings: Crochet textured rings representing tree foliage featuring individual leaf motifs.
- Tree Top: Smaller ring with leaf-like stitches crowning the tree.
- Star: A fun crocheted star topper with pointed tips.
- Assembly: Glue the components to form a standing Christmas tree.
Notes
- The cone and trunk are prepared with non-crochet techniques using cardstock and wrapping yarn.
- Work in joined rounds with slip stitch joins.
- The leaf pattern uses chains, slip stitches, single crochet (sc), and half double crochet (hdc).
- Maintain tension that allows rings to sit flat yet slightly flexible to hug the cone.
- Attach pieces securely with hot glue for durability.
- Yarn type and hook size influence finished size; adjust accordingly.
Skill Level
Beginner to Intermediate
Basic stitches and simple shaping suffice. Some crafting skills (cardstock shaping, gluing, yarn wrapping) complement crochet work.
Materials
- Yarn (green for tree, yellow or gold for star, brown for trunk)
- Crochet hook sized 3.5 to 4 mm (appropriate to chosen yarn)
- Cardstock or sturdy paper for cone
- Hot glue gun and glue sticks
- Toilet paper tube (for trunk)
- Scissors
- Stitch marker (optional)
Measurements / Sizing
- Finished tree approximately 20–25 cm tall.
- Base cone sized to approx. 10 cm diameter at bottom.
- Leaf rings sized to fit cone circumference.
- Star approx. 5 cm diameter.
Adjust sizes by increasing or decreasing chains and stitches to your preference.
Gauge and Stitch Pattern
- Gauge is flexible but aim for balanced tension to maintain the shape of rings and leaves.
- Leaf stitches consist of mini motifs made with chain, slip stitch, sc, and hdc.
- Tree formed by layering concentric leaf rings.
Stitch Abbreviations
- ch = chain
- sc = single crochet
- hdc = half double crochet
- sl st = slip stitch
- mr = magic ring
Special Stitches
- Magic Ring (mr): Adjustable ring to start rounds tightly closed.
- Leaf motif: Combination of chains, slip stitches, single crochet, and half double crochet forming delicate leaf shapes on rings.
The Pattern — Step by Step
1. Creating the Tree Structure
Cone:
- Cut a piece of cardstock into a cone shape sized to your desired tree height and base diameter.
- Roll the cardstock into a cone, overlapping edges.
- Secure edges using hot glue to maintain shape.
Trunk:
- Take a toilet paper tube as the base for the trunk.
- Wrap brown yarn tightly and evenly around the tube using hot glue intermittently to fix yarn in place.
- Continue wrapping until the tube is fully covered.
Assembly:
- Attach the cardstock cone securely to the top of the wrapped trunk using hot glue.
2. Crocheting the Leaf Rings
Base Ring:
- Make a slip knot.
- Chain enough stitches to fit the circumference of your cone's widest section approximately. Join into a ring with a slip stitch (sl st).
Foundation Row:
- Chain 1.
- Work 1 single crochet (sc) into each chain around the ring.
- Join with a slip stitch to the first sc.

Leaf Pattern (repeat around):
- Chain 5.
- Slip stitch into the 2nd chain from the hook.
- Work 1 sc in the next chain.
- Work 1 half double crochet (hdc) in each of the last two chains.
- Skip 1 stitch on the base ring.
- Slip stitch into the next stitch on the base ring.
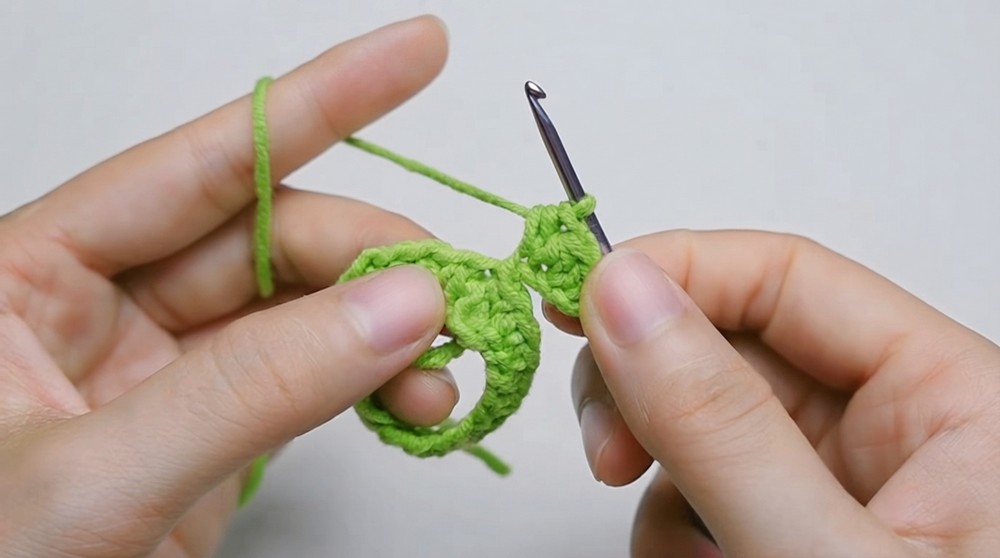
Repeat this leaf pattern sequence around the ring entirely.
Finishing:
- After the last leaf motif, join with a slip stitch to the base ring's last stitch.
- Chain 1, then cut the yarn and fasten off.

3. Crocheting the Tree Top
Magic Ring:
- Create a magic ring.
Round 1:
- Chain 1.
- Work 5 half double crochets (hdc) into the ring.
- Join with a slip stitch into the first hdc.
Round 2 (Leaf Pattern):
- Chain 4.
- Slip stitch into the 2nd chain from the hook.
- Work 1 sc in each of the last two chains.
- Slip stitch into the next stitch of the hdc round.
Repeat this sequence around.
Finishing:
- Chain 1.
- Fasten off and cut yarn.
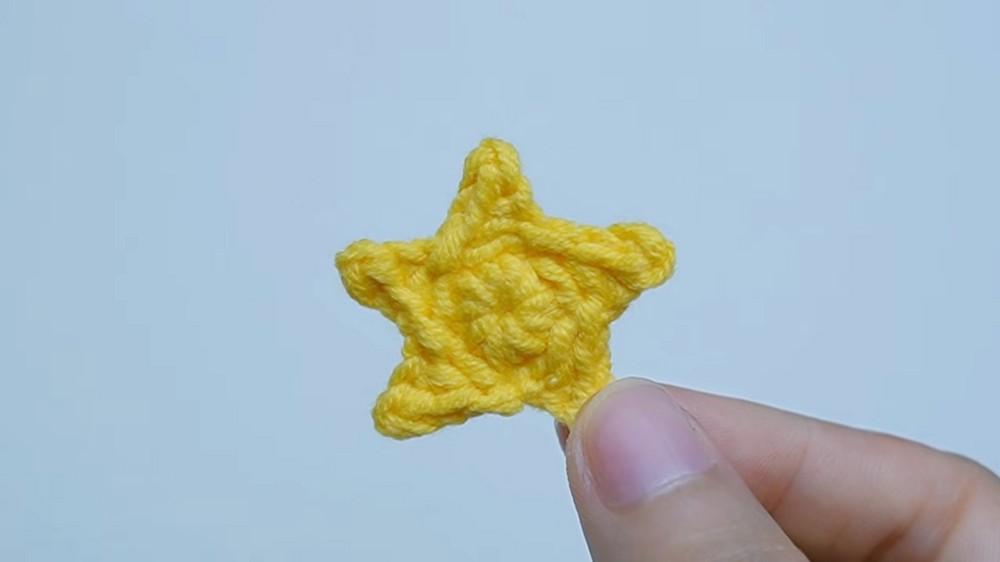
4. Making the Star
Magic Ring:
- Form a magic ring.
Round 1:
- Make 10 single crochets (sc) in the ring.
- Join with slip stitch in the first sc.
Round 2 (Points):
- Chain 3.
- Slip stitch into the 2nd chain from the hook.
- Work 1 sc in the last chain.
- Skip 1 stitch on the round.
- Slip stitch into the next stitch.
Repeat this pattern around to form 5 points.
Finishing:
- Chain 1.
- Fasten off and cut yarn.
Final Step: Assembly
- Using hot glue, attach each of the crocheted leaf rings onto the cardstock cone structure, starting from the bottom largest ring to the smaller rings above.
- Glue the crocheted star securely to the top of the cone.
- Make sure all components are well affixed and allow glue to dry fully before handling.

Assembly & Finished Size
Your finished Christmas tree stands neat and textured, approximately 20–25 cm tall with a sturdy base. The layered leaf rings provide a dimensional, lush effect around the cone. The folded cone and wrapped toilet paper tube ensure structural integrity, while the crocheted star crowns this delightful holiday craft.
Conclusion
This detailed crochet Christmas tree project perfectly blends simple crochet techniques with easy crafting. The cardstock cone and yarn-wrapped trunk establish a solid skeleton, ideal for securely mounting the delicate crocheted leaf rings that add lively texture and dimension. The crochet star topper brings traditional charm, completing your seasonal décor.
Suitable for beginners familiar with basic stitches, this pattern encourages the use of mixed media and layering skills. By adjusting the number of chains or size of leaf rings, you can customize the tree’s height and fullness.
This project offers a rewarding crafting experience where crochet merges with DIY, resulting in a festive accent perfect for mantelpieces, tabletops, or gifting. We hope this pattern inspires your holiday creativity and adds warmth to your handmade decorations.