
FREE Crochet Christmas Tree Pop Tutorial – Perfect for Beginners
Sprinkle holiday charm with our Crochet Christmas Tree Pop Pattern; an adorable DIY project to craft festive tree pops full of joy and creativity!
During the holiday season, decorations often carry sentiment and personality that make celebrations feel extra special. The Crochet Christmas Tree Pop Pattern combines style and purpose, offering a unique way to enhance holiday décor or prepare thoughtful handmade gifts. These whimsical tree pops are both charming and functional, working beautifully as ornaments, table centerpieces, or even playful stocking fillers for friends and family.
FREE Crochet Pattern for Charming Christmas Tree Pops – Try It Now!

One of its standout features is its versatility—you can customize the colors, sizes, and designs to match different themes or preferences, making it ideal for a wide range of festive uses. Not only does it allow you to personalize your space, but it also serves as a relaxing activity to balance the hustle and bustle of the season. The pattern is clear and beginner-friendly, inviting anyone interested to try their hand at crochet without feeling overwhelmed.
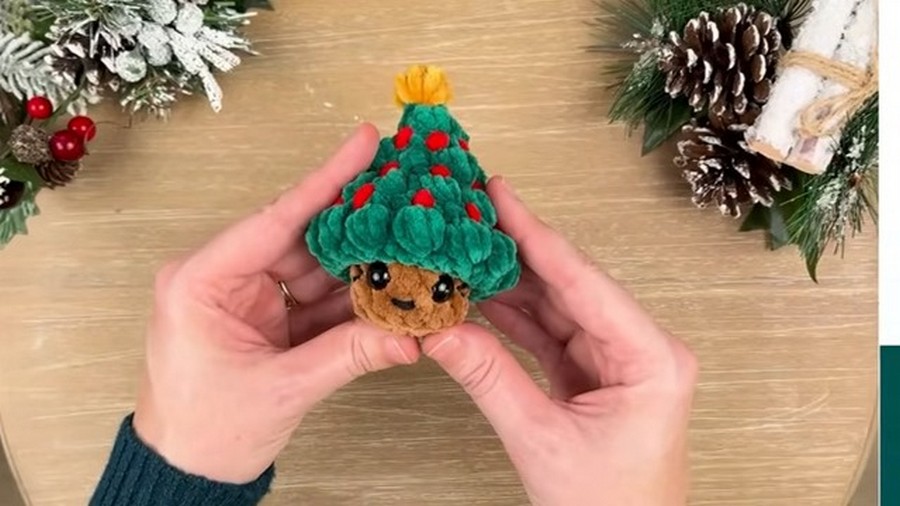
Beyond their decorative appeal, the tree pops make perfect keepsakes; they hold a handmade touch that conveys warmth and thoughtfulness. Since the pattern is free, it’s an accessible way to bring creativity into your festive traditions without stretching your holiday budget. These stylish, functional designs are sure to spark joy and add a special handmade charm wherever they're used.
Christmas Tree Pop Amigurumi Pattern
Materials
- Yarn:
- Chunky plush yarn in the following colors:
- Green (tree) – e.g., Premier Parfait Chunky, Hobbii Honey Bunny, Baby Snuggle, Himalaya Dolphin Baby
- Brown (trunk), Red (ornament), Yellow (star/topper), Black (embroidery for face)
- Chunky plush yarn in the following colors:
- Hook: H/5.0 mm crochet hook
- Darning/yarn needle
- 10 mm safety eyes (or embroider if preferred)
- Stitch marker
- Scissors
- Handfuls of stuffing
Key Abbreviations (US Terms)
- MR: Magic ring
- ch: chain
- sc: single crochet
- inc: increase (2 sc in next st)
- dec: decrease (sc2tog or invisible decrease)
- sl st: slip stitch
- st(s): stitch(es)
- BLO: back loop only
- flo: front loop only
- bobble: special bobble stitch (explained below)
Special Notes
- Work rounds in continuous spiral; use a stitch marker for the start of each round.
- For the bobble stitch:
- (Yarn over, insert hook, yarn under, pull up loop; yarn over, pull through two loops) three times in the same st (you’ll have 4 loops on hook), yarn over, pull through all loops.
- Use invisible decreases unless otherwise stated.
- Use safety eyes or embroider if the toy is for children under 3.
- Push bobbles out as you work to make texture pop.
Pattern
TREE BODY (Green Yarn, work from top down)
Rnd 1:
MR, 6 sc in ring (6)
Rnd 2:
(sc in next st, bobble in next st), repeat around (6 sts: 3 sc, 3 bobbles)
Rnd 3:
Inc in each st around (12)
Rnd 4:
(sc in next st, bobble in next st) repeat around (12 sts: 6 sc, 6 bobbles)
Rnd 5:
(sc in next st, inc in next st) repeat around (18)
Rnd 6:
(sc in next st, bobble in next st) repeat around (18 sts: 9 sc, 9 bobbles)

Rnd 7:
(sc in next 2 sts, inc in next st) repeat around (24)
Rnd 8:
(sc in next st, bobble in next st) repeat around (24 sts: 12 sc, 12 bobbles)
Rnd 9:
Sc in each st around (24)

Pause and embroider or surface sew ornaments:
- With red (or color of choice) and yarn needle, stitch small circles (wraps) between bobbles and sc rows as desired for ornaments. Tie ends together inside and weave in.
Rnd 10 (BLO):
(sc in next 2 sts, invisible dec) repeat around (18)
Rnd 11:
Sc in each st around (18)

Rnd 12:
(sc in next st, inv dec) repeat around (12)
Rnd 13:
Sc in each st around (12)
Rnd 14:
Dec around (6), on final dec, change to brown for trunk—do not fasten off. (Cut green, tie off, start using brown on last pull through.)
TREE TRUNK (Brown Yarn)
Rnd 15 (FLO):
Inc in each st around (12)
Rnd 16:
(sc in next 3 sts, inc in next st) repeat around (15)
Rnd 17–19:
Sc in each st around (15 for 3 rounds)
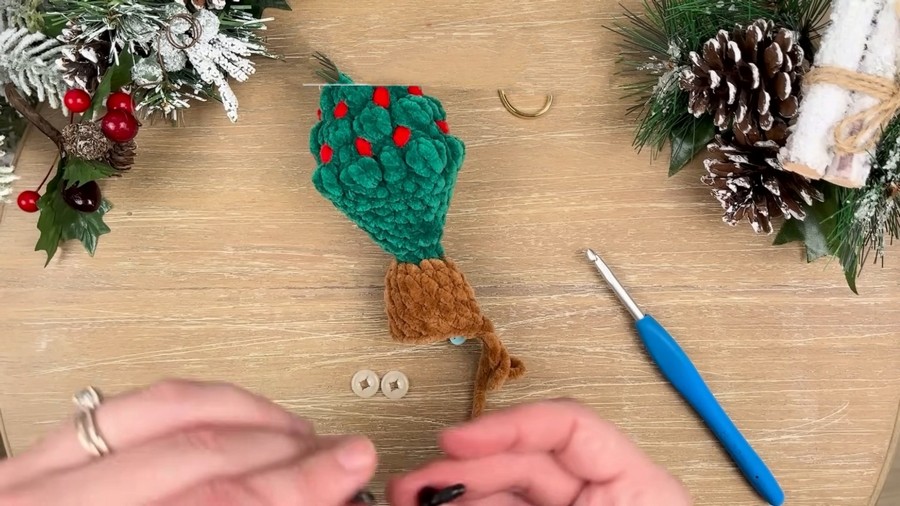
- Insert safety eyes between rounds 17 and 18, 2–3 sts/gaps apart.
- Stuff the head portion firmly.
BASE & CLOSING
Rnd 20 (BLO):
Dec 7 times, 1 sc in last st (8)
- Stuff trunk firmly.
- Fasten off, leaving a long tail.
- Using yarn needle, weave tail through final 8 sts (front loops). Pull tight to close hole, weave in end.

STAR/TREE TOPPER (Yellow Yarn, Surface Crochet)
- Make a slip knot.
- Insert hook between rounds 1 and 2 of tree top, exiting through the magic ring hole.
- Yarn over, pull through and sl st to attach topper.
- Ch 3, then in 3rd ch from hook, work a bobble stitch (as described above).
- Sl st into the same st as before to anchor. Fasten off, leave tail to weave in securely.
FACE (Black Yarn Embroidery)
- Mouth: Centered between eyes, between Rounds 18 & 19. Make a small “U” or “V” shape, wrapping the yarn around 2 stitches.
- Eyelashes: Extend 1–2 short “V”-shaped lines at outer edges above each eye.
- Tie all ends together inside, weave in.
Assembly & Finishing
- Push out any indented bobbles gently.
- Attach safety eyes, stuff body and trunk if not done earlier.
- Weave in all loose ends.
- Add a hanging loop for ornaments if desired.
- (Optional) Surface embroider more details or ornaments as you like!
Conclusion
You now have a festive Christmas Tree Pop—a plush, textured character perfect for gifting, decorating, or hanging as an ornament! The pattern alternates rounds of bobble and single crochet to create its whimsical look.
Pattern Correction & Tips
- Correction: In bobble rounds, ensure you alternate properly and always end with a bobble so stitch count remains correct.
- Tip: Push bobbles out as you go!
- Tip: If using thinner yarn, adjust hook size and expect a smaller amigurumi.
- Tip: If trunk opening feels large, loosely sew across before final stuffing.