
Free Crochet Bird With Easy & Simple Pattern Used As a Keychain
Enjoy every stitch with this Easy Crochet Bird Free Amigurumi Pattern to make an adorable little bird that everyone will love to display.
Step into the world of amigurumi with an open heart. I still recall the afternoon I first sat down to loop a little bird into existence. Watching those simple strands change from a flat ring into a plump, cheerful figure felt like capturing a tiny piece of joy. You are going to fall in love with how friendly and approachable this project is.
Easy Crochet Bird Free Amigurumi Pattern That Brings Smiles
This bird possesses a truly lovable character. It rests snugly in your palm, and those wide, bright eyes seem to look up with such curious wonder. Placing it on your windowsill or your desk brings an instant, cozy charm to your space. Furthermore, the playful tuft of yarn hair on top provides just the right amount of personality to make you grin every time you see it.

One of the most rewarding aspects of this project is its versatility. Choosing a smooth cotton yarn helps your stitches look crisp, clean, and professional. Conversely, opting for a soft acrylic yarn transforms the bird, making it feel much larger and incredibly huggable.
It is a fantastic, budget-friendly endeavor because it requires only a small amount of yarn. It serves as an excellent way to give purpose to those colorful, leftover scraps that otherwise might sit forgotten in your collection.

Beyond the final result, the journey itself is incredibly grounding. There is a peaceful, rhythmic quality to each stitch that helps wash away the day's stress. Additionally, it is a fast project, meaning you can celebrate a finished companion in just a few hours.
In the end, this little bird is more than just a figure; it is a gentle reminder of what you can accomplish with your own two hands. I hope you feel the same sense of accomplishment I did when you tuck that final tail in. Come join me and let's get those hooks moving today.
Crochet Bird Pattern
In today’s pattern, we will be making an adorable amigurumi bird. This step-by-step pattern will guide you through the process of crocheting a cute bird with wings, a beak, and charming eyes. Whether you are a beginner or intermediate crocheter, you will enjoy crafting this fun and colorful project.
Let’s get started and happy hooking!
Notes
- Use a stitch marker to keep track of the beginning of each round, as rounds are worked continuously without slip stitches unless specified.
- Invisible decrease technique is used for neat shaping during decreasing rounds.
- Stuff firmly but without overfilling to maintain proper shape.
- Yarn tails should be woven in securely for a clean finish.
- Hot glue is used to attach the eyes, but sewing is an alternative.
Skill Level
This project suits beginner to intermediate crocheters familiar with:
- Magic ring/start
- Single crochet (sc)
- Increase (inc) and decrease (dec), including invisible decrease
- Sewing amigurumi parts
Materials
- Black yarn (from 1 Euro Shop)
- Yellow yarn (from Denmark)
- 2.5 mm crochet hook
- Needle for sewing yarn tails and assembly
- Safety pin (used as a stitch marker)
- Sisal (for stuffing) or toy stuffing fiberfill
- Doll eyes (size unspecified)
- Scissors
- Hot glue gun (optional for eyes)
Measurements / Sizing
- Bird height: approximately 10 cm (depending on yarn and tension)
- Wingspan: approximately 5-6 cm
- Beak size: small, about 2 cm diameter
Gauge and Stitch Pattern
- Gauge is not strict; maintain consistent tension.
- Stitch used throughout: single crochet (sc) in continuous rounds, worked in spiral fashion.
Stitch Abbreviations
- ch = chain
- sc = single crochet
- st(s) = stitch(es)
- inc = increase (2 sc in one stitch)
- dec = invisible decrease (crochet two stitches together invisibly)
- MR = magic ring (also called magic circle)
- sl st = slip stitch
Special Stitches
- Magic Ring (MR): Start the piece with a tight adjustable loop to work stitches into, avoiding holes.
- Invisible Decrease: A neat method to decrease stitches invisibly for shaping. Insert the hook through the front loops of two stitches, yarn over and pull through both loops.
The Crochet Pattern
Body
Round 1:
- Using Yellow yarn, create a magic ring.
- ch 1 (does not count as a stitch).
- Work 6 sc into the ring.
- Pull the tail to close the ring tightly.
- Place stitch marker in the last stitch made to mark the start of rounds.
Round 2:
- Inc in every stitch around (2 sc in each stitch).
- Total 12 sc.
Round 3:
- 1 sc, inc repeat around.
- Total 18 sc.
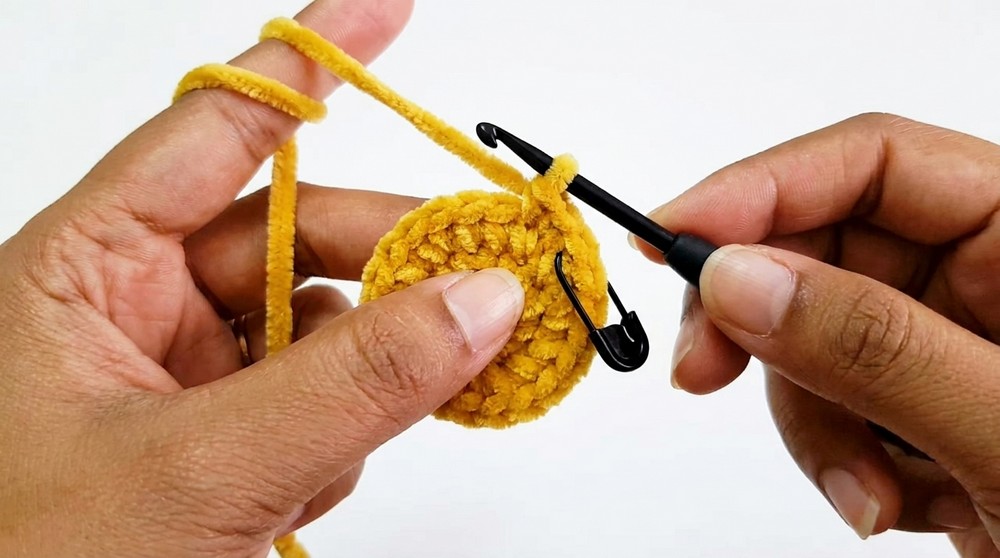
Round 4:
- 2 sc, inc repeat around.
- Total 24 sc.
Round 5:
- 3 sc, inc repeat around.
- Total 30 sc.
Rounds 6-10:
- Work 1 sc in each stitch around.
- Maintain 30 sc.

Round 11:
- 3 sc, dec repeat around (use invisible decrease).
- Total 24 sc.

Round 12:
- 1 sc in each stitch around.
- Total 24 sc.
Round 13:
- 2 sc, dec repeat around.
- Total 18 sc.
- Add toy stuffing firmly at the end of this round.
Round 14:
- 1 sc in each stitch around.
- Total 18 sc.
Round 15:
- 1 sc, dec repeat around.
- Total 12 sc.
Round 16:
- 1 sc in each stitch around.
- Total 12 sc.
- Add additional stuffing.
Round 17: (Last round)
- Dec 6 times evenly across the round (decrease 4 times each as described).
- Close the hole.

Finishing body:
- Slip stitch, ch 1, fasten off.
- Weave in yarn tails with a needle.
Tassel Hair Decoration:
- Cut yellow yarn pieces approximately 3-4 cm long.
- Make a small tassel and attach at the top center of the bird’s head.
- Trim excess yarn evenly.
Wings (Make 2)
Round 1:
- Make a magic ring with yellow yarn.
- ch 1 (does not count).
- Work 6 sc into the ring.
Round 2:
- Inc in every stitch (2 sc per stitch).
- Total 12 sc.
Rounds 3-6:
- 1 sc in each stitch around.
- Total 12 sc per round.
Finishing wings:
- Fasten off leaving a long tail for sewing.
- Make two wings.
Beak
Round 1:
- Using black yarn, make a magic ring.
- ch 1 (does not count).
- Make 6 sc in the ring.
- Pull the tail tight to close the ring.
Round 2:
- 1 sc in each stitch around.
- Total 6 sc.
Round 3:
- Inc in every stitch by working 2 sc in each.
- Total 12 sc.
Round 4:
- 1 sc in each stitch around.
- Total 12 sc.
Finishing beak:
- sl st in next stitch, ch 1, fasten off leaving a tail for sewing.
Assembly
- Position the wings on each side of the body, approximately aligned with the 4th round of the bird's body. Just below eye.
- Sew the wings securely to the body using the long tail and a tapestry needle.
- Position the beak on the front center below where the eyes will be placed. Sew in place carefully.
- Mark the placement for the doll eyes approximately two stitches apart above the beak.
- Attach the doll eyes either by sewing or hot glue.
- Tidy any loose ends by weaving them inside the body.


Finished Size
- The bird stands approximately 10 cm tall.
- Wingspan is about 5–6 cm wide.
- Beak diameter roughly 2 cm.
Conclusion and Ending Words
Congratulations on completing your amigurumi bird! Using simple stitches and careful shaping, you created a delightful soft toy that can be used as a keychain, decoration, or gift. Feel free to experiment with yarn colors and eye styles to personalize your bird.
Quick Overview Of Pattern
- Start with red yarn to crochet the bird’s body using a magic ring and single crochet rounds.
- Gradually increase stitches to shape the round body.
- Continue working even rounds to lengthen the body, followed by decreases to close it.
- Create small tassel-like hair on the top of the head.
- Crochet wings separately with a magic ring and single crochet rounds.
- Make the beak using orange yarn with mini rounds and increases.
- Sew all parts together and attach doll eyes.
- Use toy stuffing to fill the bird for a plush finish.
