
Free Crochet Amigurumi Bird Pattern for Nature Lovers
Cheer up your décor with this Free Crochet Amigurumi Bird Pattern featuring adorable birds full of color, charm, and perfect for gifting joy.
This charming little creation brings a joyful and colorful touch to your handmade collection, with its rounded body, tiny wings, and sweet face that look delightful on a shelf, desk, or as a keychain. The Crochet Amigurumi Bird pattern works wonderfully as a heartfelt gift, a playful decoration in a nursery, or a friendly companion that brightens your day with its cheerful look.
Free Crochet Amigurumi Bird Pattern for Nursery Décor

This Crochet Amigurumi Bird pattern is great for both beginners and more experienced makers, as the repetitive stitches make it easy to follow while still learning something new. When finished, these little birds don’t just look adorable, they also make meaningful handmade gifts or cute décor that shows your creativity and care.

Little Bird Amigurumi Crochet Pattern
Materials
- Yarn: Worsted weight yarn (acrylic or cotton recommended)
- Main color for the body
- Contrasting color for the beak
- Black for the eyes
- Hook: 2.5–3.5 mm (US C–E), adjust for your yarn/tension
- Stuffing: Polyester fiberfill
- Yarn Needle: For sewing and finishing
- Stitch Marker (optional): To mark rounds
- Safety Eyes (optional): Instead of embroidered eyes
- Scissors
Key Abbreviations (US Terminology)
- ch: chain
- sl st: slip stitch
- sc: single crochet
- inc: increase (2 sc in one st)
- dec: decrease (sc 2 sts together)
- st(s): stitch(es)
- rep: repeat
- rnd: round
Special Notes
- Pattern is worked in continuous rounds unless otherwise specified.
- Use a stitch marker to mark the start of each round.
- Stuff body and wings firmly but avoid overstuffing.
- Adjust hook size as needed for tight stitches.
Pattern
Body
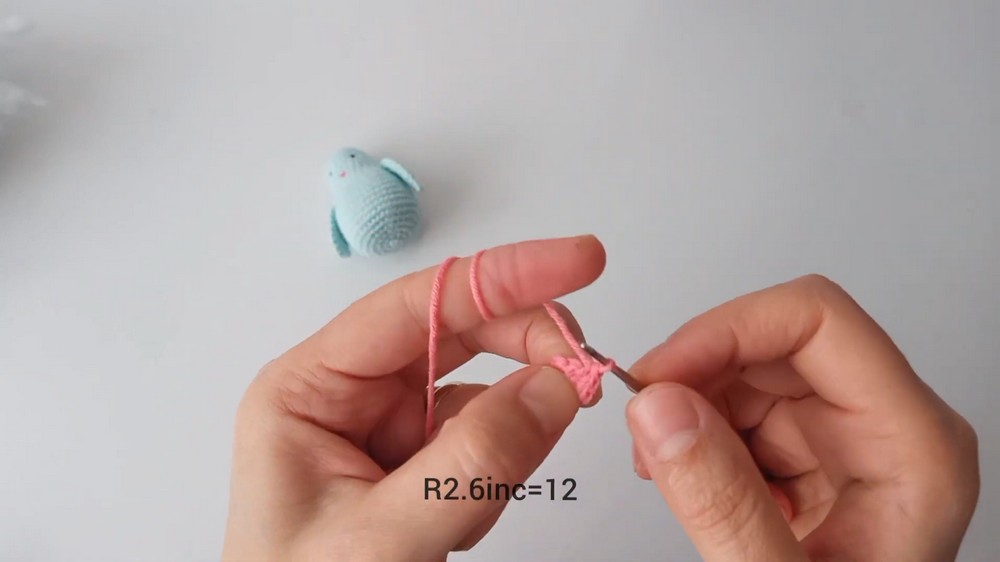
- Rnd 1: Start with a magic ring, work 6 sc into ring. (6)
- Rnd 2: Inc in each st around (2 sc in each st). (12)
- Rnd 3: (1 sc, inc) repeat around. (18)
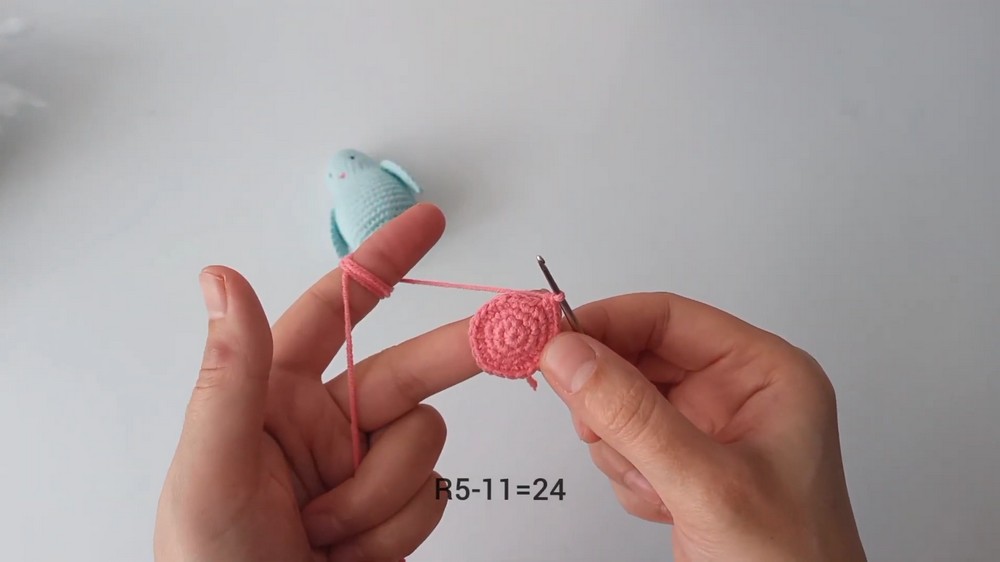
- Rnd 4: (2 sc, inc) repeat around. (24)
- Rnd 5–11: Sc in each st around for 7 rounds (24)
- Rnd 12: (3 sc, inc) repeat around. (30)
- Rnd 13: (4 sc, inc) repeat around. (36)
- Rnd 14: (5 sc, inc) repeat around. (42)
- Rnd 15–21: Sc in each st around for 7 rounds (42)

Body Decreases
- Rnd 22: (5 sc, dec) repeat around. (36)
- Rnd 23: (4 sc, dec) repeat around. (30)
- Rnd 24: (3 sc, dec) repeat around. (24)
- Rnd 25: (2 sc, dec) repeat around. (18)
- Stuff body firmly at this stage.
- Rnd 26: (1 sc, dec) repeat around. (12)
- Add more stuffing as needed.
- Rnd 27: Dec in each st around. (6)
- Finish off, leave a long tail for closing.
- Thread needle through remaining stitches and pull to close. Secure.

Wings (Make 2)
- Rnd 1: Start with a magic ring, work 6 sc into ring. (6)
- Rnd 2: Inc in each st around. (12)
- Rnd 3: (1 sc, inc) repeat around. (18)
- Rnd 4: (2 sc, inc) repeat around. (24)
- Rnd 5: (3 sc, inc) repeat around. (30)
- Assembly:
- Fold the circle in half.
- Sc 14 across the flat edge to join both sides, forming a semi-circle.
- Fasten off, leaving a long tail for sewing.
- Repeat for the second wing.
Assembly
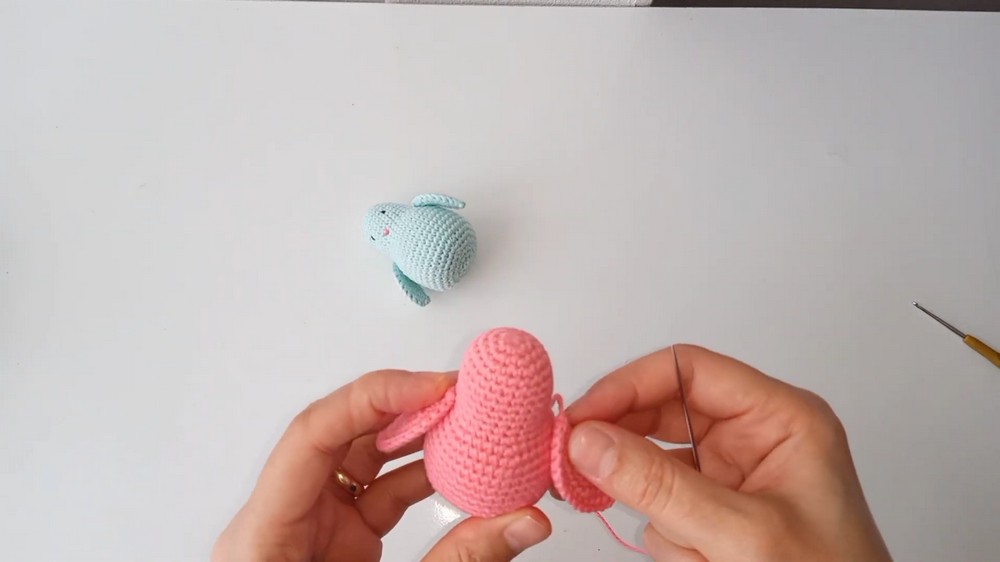
- Wings: Sew the wings to the body where increases were made, or as desired. Center and secure well.
- Eyes:
- Option 1: Sew on black yarn (French knot or stitch) for eyes.
- Option 2: Attach safety eyes.
- Beak: Using contrasting yarn, embroider a small triangle/oval between and below the eyes.
Conclusion
You have now completed your practical, detailed little bird amigurumi! This pattern covers fundamental amigurumi skills, making it ideal for beginners or a quick gift.
Pattern Corrections & Tips
- Check stitch counts after each round, especially during increases/decreases.
- Use a stitch marker to help keep your place.
- Stuff firmly but avoid stretching stitches.
- Adjust yarn/hook for size or style preferences.
- Customize the bird by using different colors or adding accessories.