
Free Crochet Amigurumi Doll Pattern Featuring Unique Hair and Santa Hat
Design a charming holiday doll with this Free Crochet Amigurumi Doll Pattern, featuring detailed hair, a festive face, and a cute Christmas hat to brighten decor.
Crocheting a charming amigurumi doll can be a delightful and creative experience, especially when focusing on details like the hair, face, and a festive Christmas hat. The Free crochet AMIGURUMI DOLL pattern is a wonderful project that lets you bring a personalized doll to life with simple yarn and stitches. The doll’s hair is usually made by attaching strands or using crochet loops, which adds texture and style, making the doll feel more lifelike and unique.
Free Crochet Amigurumi Doll Pattern with Adorable Face and Hat Details
Embroidering the face with thoughtful stitches for eyes, nose, and mouth gives the doll expression and character, turning it into a friendly little companion. Adding a Christmas hat with bright yarns and playful trims rounds out the design, giving it a cozy holiday charm that’s perfect for seasonal decorating or gifting.

This amigurumi doll pattern typically uses beginner-friendly techniques, mainly working in single crochet rounds. The clear instructions help crafters learn how to assemble the doll and add features like hair and hat with ease, making it accessible even if you’re fairly new to crocheting. Small details such as the embroidered face and playful Christmas hat make this free pattern stand out and add personality to the final piece.

Such a doll proves ideal not only as a cute holiday decoration but also as a heartfelt handmade gift or collectible. Its soft texture and charming style can brighten any room during the holidays, while the custom details like hair and hat make it a memorable keepsake. If you’re interested in a cozy project that combines creativity with simple stitches, this Free crochet AMIGURUMI DOLL pattern is definitely worth exploring.
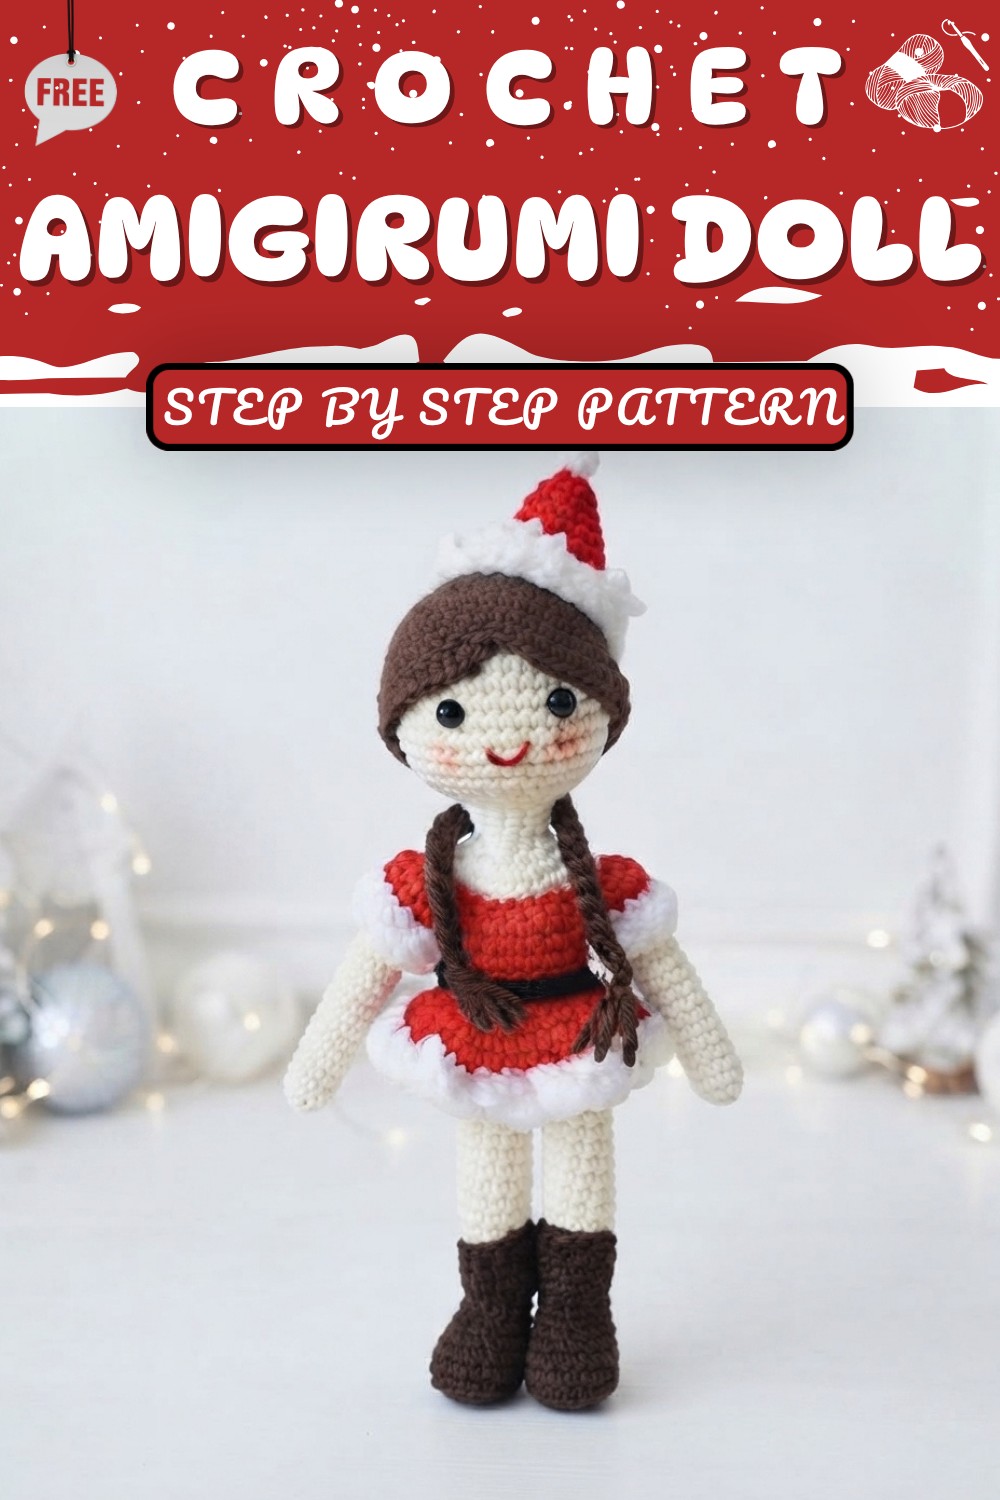
Christmas Amigurumi Doll Finishing Pattern
Today we are going to make the hair, the face, and the Christmas hat to finish our Christmas doll. If you want to know how I did this, please keep on watching.
Quick Overview of Pattern
- Crochet and sew a cap-style hairpiece and add side braids.
- Embroider the face: sew bead eyes, add lips, and (optional) blush.
- Crochet a classic Christmas hat, complete with brim.
- Attach hair, face, and hat to your amigurumi doll for the final holiday touch.
Notes
- All parts (hair, face, hat) are created separately, then sewn or glued to the doll’s head.
- You can adjust hair length and braid thickness for a custom look.
- Use any shade of yarn for hair and hat that suits your doll.
- Try the hair cap and hat on your doll’s head frequently for the best fit before sewing on.
- Blush and beads add personality; both are optional.
Skill Level
Advanced Beginner – Intermediate
Familiarity with basic amigurumi, working in the round, increasing, decreasing, color changes, and simple embroidery or sewing is helpful.
Materials
- Finished amigurumi doll needing hair, face, and hat
- Brown yarn (hair)
- Red acrylic yarn (hat)
- White yarn (hat brim)
- 2 small beads (eyes)
- Red yarn (for lips/embroidery)
- Scissors
- Needle (for sewing and embroidery)
- 3 mm crochet hook
- Small amount of blush (optional, for cheeks)
- Toothpicks (optional, to help stand your doll while working)
Measurements / Sizing
- Hair cap diameter: fits doll’s head snugly (about 3–4 cm across once completed).
- Hat circumference: slightly larger than hair cap to fit over it.
- Braids: length and thickness to your taste (usually 15–18 chains long).
- Face details: positioned neatly and symmetrically.
Gauge
Gauge is not crucial for this project; amigurumi is more about stitch tightness and proportions.
After increases, your hair cap or hat circle should fit snugly over your doll’s head.
Stitch Abbreviations
| Abbreviation | Meaning |
|---|---|
| ch | chain |
| sc | single crochet |
| inc | increase (2 sc in st) |
| sl st | slip stitch |
| dc | double crochet |
| hdc | half double crochet |
| st(s) | stitch(es) |
Special Stitches
- Magic Ring: Make a loop, insert hook, pull yarn, and work stitches in the ring.
- Increase (inc): Two single crochets in one stitch.
- Slip Stitch (sl st): Insert, yarn over, pull through all loops.
The Crochet Pattern
1. Hair Cap & Braids (with Brown Yarn)
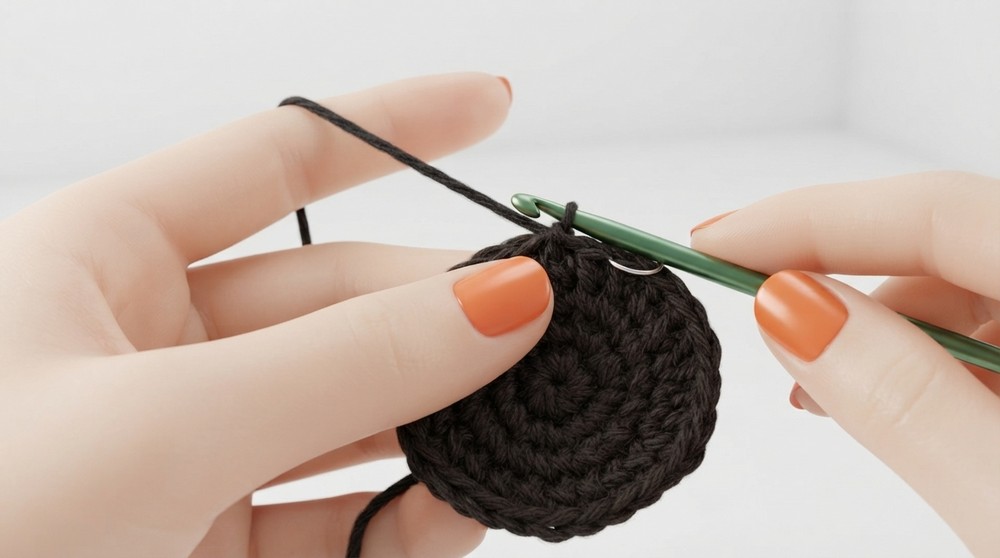
Hair Cap
- Make a magic ring.
- Ch 1 (not counted), work 6 sc in the ring. (6)
- Pull the tail to close the ring snugly.
- Round 2: Work 2 sc in each st around (inc in every stitch). (12)
- Round 3: [1 sc, inc] around. (18)
- Round 4: [2 sc, inc] around. (24)
- Round 5: [3 sc, inc] around. (30)
- Round 6: [4 sc, inc] around. (36)
- Round 7: [5 sc, inc] around. (42)
- Rounds 8–13 (or as needed): sc in every stitch around. Repeat for as many rounds as needed for cap to fit the head (The sample used 6 rounds).
- Try the cap on your doll several times. When satisfied with depth, slip stitch in first stitch of last round.
- Fasten off, leaving a long tail for sewing to the head.

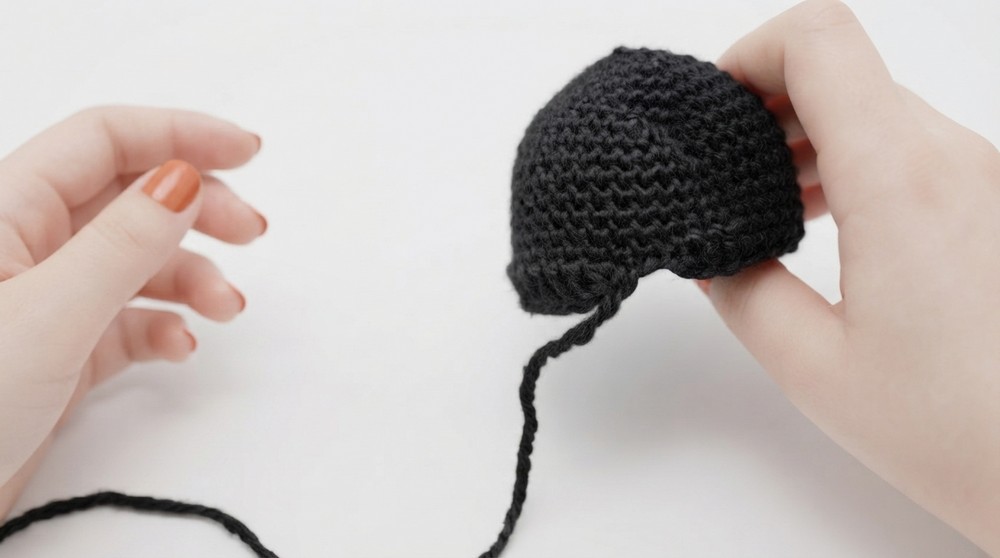
Attaching Hair Cap
- Sew the hair cap to the head with the yarn tail, stitching neatly around the cap’s edge.
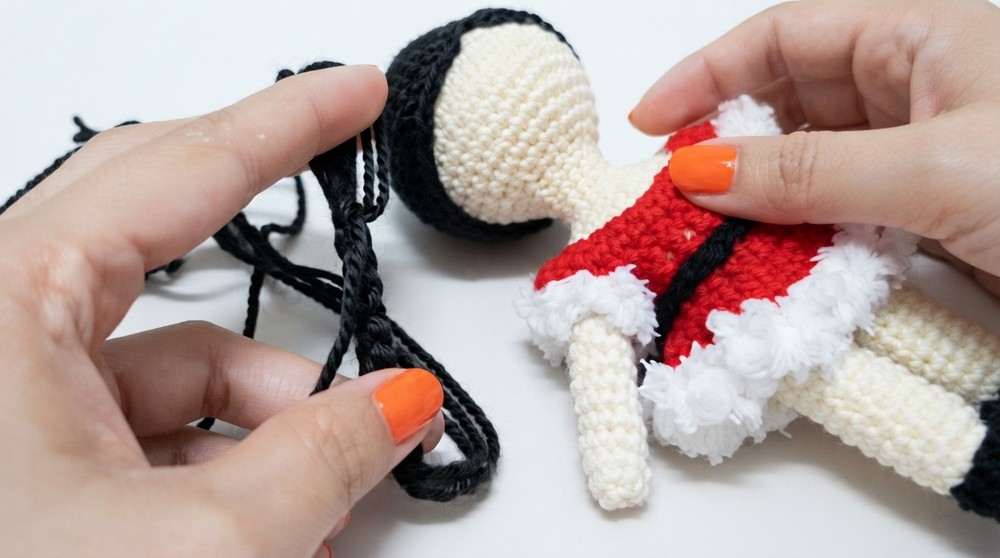
Braids
- Cut three long strands of brown yarn for each braid.
- Group and knot them at the end, then braid to the desired length (around 15–18 chains for medium length).
- Use the leftover yarn tails to sew each braid to the base side of the hair cap, one on each side.
- Secure braids well; trim to even length.
2. Face
Eyes (with Beads)
- Position safety pins or markers where you want the eyes (try 3–4 stitches apart).
- Thread a needle with strong thread or fine yarn, insert it from the rear of the head to one eye mark, thread on the bead, then pull through to the second mark, adding the bead for the other eye.
- Pass the needle back and forth to secure both beads.
- Secure ends and hide them inside the head.

Lips (with Red Yarn)
- With a needle and red yarn, embroider the lips between and just under the eyes.
- Start by bringing the needle up at the corner of the mouth, stitch across 3–4 stitches, and back down into the head to form a smile.
- Make a second pass if you want a thicker look.
- Hide yarn tail inside the head.
(Optional) Blush
- Dab a small amount of blush onto the cheeks using your finger, a cotton swab, or soft brush.
3. Christmas Hat
Hat Body (Red Yarn)
- Make a magic ring, ch 1. Work 6 sc into the ring. (6)
- Pull tight to close ring.
- Round 2: Work 2 sc in each st around. (12)
- Rounds 3 & 4: sc in each st around. (12) – two rounds
- Round 5: [1 sc, inc] around. (18)
- Rounds 6 & 7: sc in each st around. (18) – two rounds
- Round 8: [2 sc, inc] around. (24)
- Rounds 9 & 10: sc in each st around. (24) – two rounds
- Fasten off red yarn.
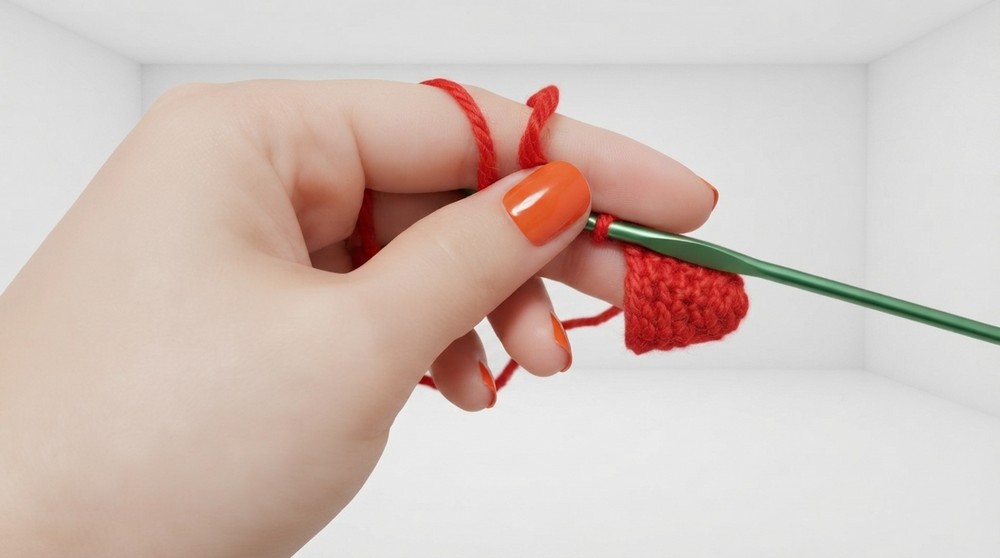
Hat Brim (White Yarn)
- Join white yarn to the last round.
- Ch 2, then hdc in each st around.
- Join with sl st at end.
- Fasten off, leaving a tail for sewing or weaving in.
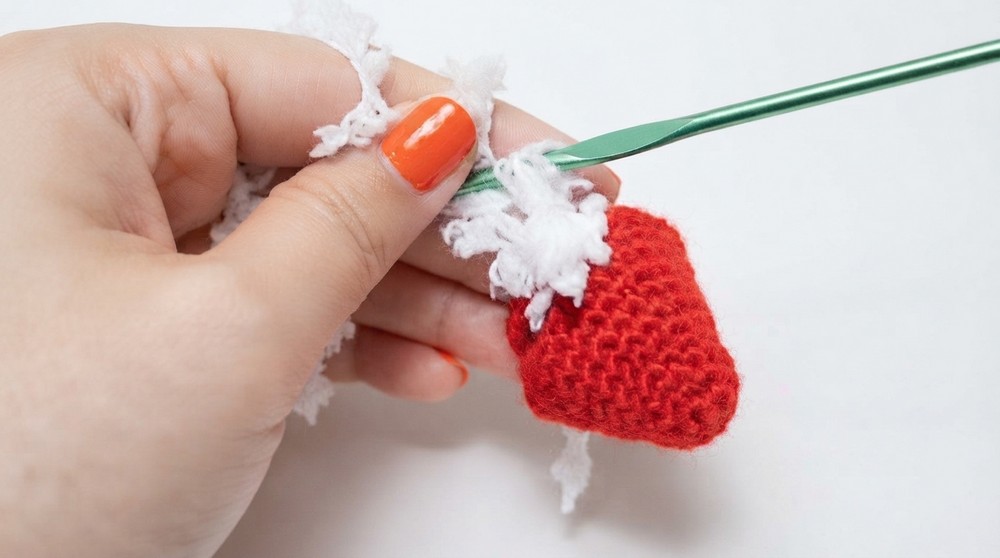
Assembly & Finished Size
- Attach Hair Cap: Place on head, sew securely.
- Add Braids: Use leftover yarn to stitch the braids to the sides.
- Sew Face: Attach eyes and lips. Add blush and other facial details as desired.
- Place Hat: Pull the Christmas hat over the hair cap, angle as you like, and use a few stitches or glue to secure in place.
- Final Height: Doll height remains the same; hat adds ~1–1.5 cm height; final features create an adorable finished look.
Conclusion and Ending Words
Now we are done with our amigurumi doll for Christmas. The hair, face, and Christmas hat give it that finished festive look! If you found this tutorial helpful, please give it a thumbs up and don’t forget to like and subscribe to my channel for more videos. Click the bell button to be notified.