
Beginner-Friendly Crochet Amigurumi Reindeer Free Pattern
Hang a little holiday cheer with the Crochet Amigurumi Reindeer Free Pattern, featuring tiny antlers and a friendly face for Christmas shelves.
Looking for a fun and cute project? The Crochet Amigurumi Reindeer is a wonderful choice for anyone who enjoys making soft toys. This small stuffed animal usually stands around 6 to 8 inches tall, making it just the right size to hold or display on a shelf. Its shape is charming, with a rounded body, short legs, and a friendly face featuring little eyes and a nose that gives it a warm, human-like expression.
Little Crochet Amigurumi Reindeer Free Pattern That Kids Will Adore
The design includes details like tiny antlers and ears that add character to the reindeer, making it look approachable and sweet. This makes it perfect for festive decorations or a handmade gift during the holiday season. Plus, it can bring a cozy, cheerful touch to any room.

All in all, this friendly crochet reindeer is easy to follow and great for anyone wanting to practice amigurumi. Give it a try and enjoy making this lovable little creature!
Crochet Reindeer Pattern
About the Pattern
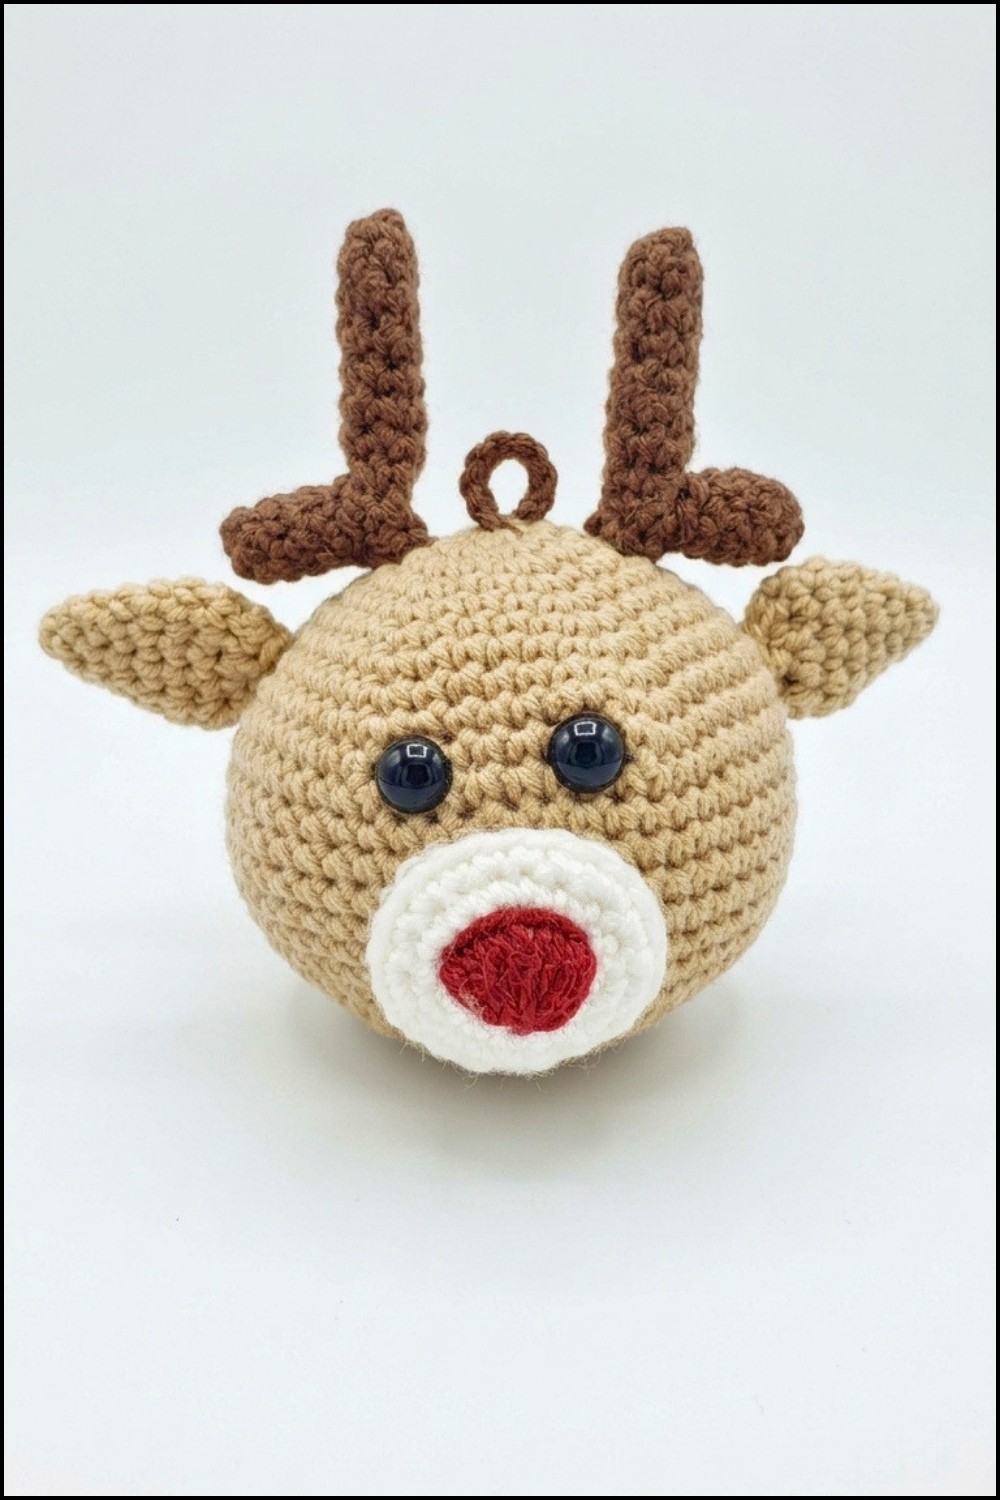
This crochet reindeer features classic amigurumi construction and detailed assembly. Created in separate parts using rounds and invisible decreases, the reindeer showcases a soft body, sculpted muzzle, expressive ears, and signature horns. The iconic red nose, added by embroidery, transforms the reindeer into a character fit for holiday displays or gifting.

Pattern at a Glance
- Construction: Work in the round using single crochet, increasing and decreasing as indicated.
- Head & Body: Constructed in a continuous piece for seamless shaping.
- Facial Features & Details: Muzzle, horns, ears, and nose are made separately and securely attached.
- Finishing Touch: Embroidered red nose brings character and festive charm.
Important Notes
- Crochet each part in continuous rounds; use a stitch marker to indicate round beginnings.
- Use invisible decreases for smooth shaping.
- Stuff parts lightly but firmly for best structure.
- Assemble features by sewing with matching yarn for clean seams.
- Embroider the red nose at the designated position using the center point for accuracy.
Difficulty Level
This project is suitable for advanced beginners to intermediate crocheters. Familiarity with amigurumi techniques, invisible decreases, and embroidered finishing details is assumed.
Supplies Needed
- Worsted weight yarn: brown (body/head), beige or lighter brown (muzzle/inner ear), dark brown (horns), red (nose embroidery)
- Crochet hook: 2.5–3 mm (as needed for a firm gauge)
- Polyester fiberfill stuffing
- Tapestry needle
- Stitch marker
- Small sharp scissors
Size & Measurements
- Finished reindeer: approximately 15–18 cm tall, depending on yarn, hook size, and stuffing.
- Horn span: 4–6 cm wide
Gauge & Stitch Details
- Gauge is not crucial provided that stitches are tight enough to prevent stuffing from showing.
- Pattern uses primarily single crochet (sc) in the round.
- Increases: work 2 sc in 1 stitch.
- Invisible decrease: as described below.
Crochet Abbreviations
- mc – magic circle
- sc – single crochet
- inc – increase (2 sc in same st)
- dec – decrease (invisible, unless otherwise noted)
- ch – chain
- st/sts – stitch/stitches
Special Stitch Guide
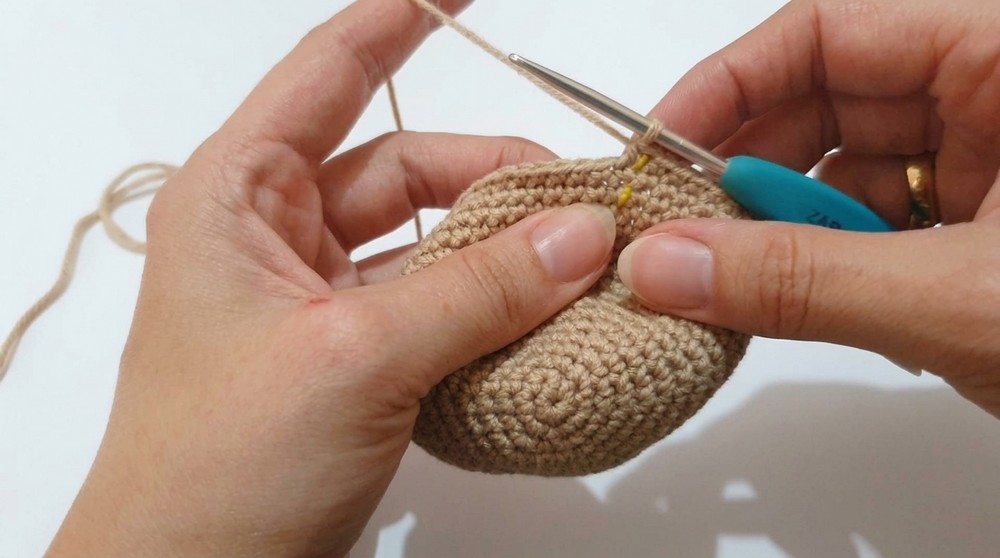
- Invisible Decrease (dec): Insert hook into the front loops only of the next two stitches, yarn over, pull through both front loops, yarn over again, pull through both loops on hook.
Complete Crochet Pattern
Head & Body Construction
- Round 1:
- Start with 6 sc in a magic circle (mc). (6)
- Round 2:
- inc in each stitch around (12)
- Round 3:
- [sc 1, inc], repeat around (18)
- Round 4:
- [sc 2, inc], repeat around (24)
- Round 5:
- [sc 3, inc], repeat around (30)
- Round 6:
- [sc 4, inc], repeat around (36)
- Round 7:
- [sc 5, inc], repeat around (42)
- Round 8:
- [sc 6, inc], repeat around (48)
- Round 9:
- [sc 7, inc], repeat around (54)
- Rounds 10–17:
- sc in each stitch around (54 per round) (8 rounds even)
- Round 18:
- [sc 7, dec], repeat around (48)
- Round 19:
- [sc 6, dec], repeat around (42)
- Round 20:
- [sc 5, dec], repeat around (36)
- Round 21:
- [sc 4, dec], repeat around (30)
- Round 22:
- [sc 3, dec], repeat around (24)
- Round 23:
- [sc 2, dec], repeat around (18)
- Round 24:
- [sc 1, dec], repeat around (12)
- Round 25:
- 6 dec (6)
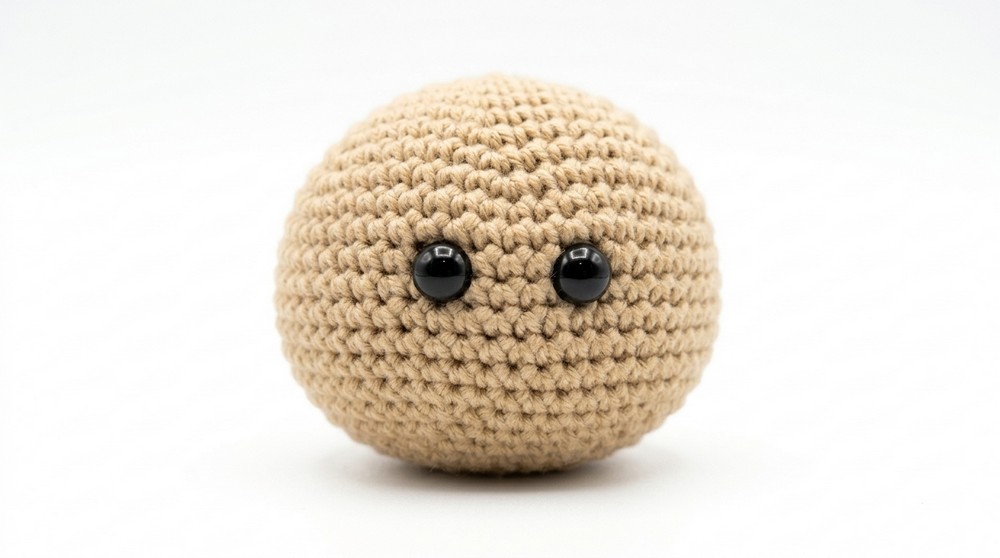
- Fasten off, sew up the hole, and weave in the end.

Muzzle
- Round 1:
- 6 sc in mc (6)
- Round 2:
- inc in each stitch around (12)
- Round 3:
- [sc 1, inc], repeat around (18)
- Round 4:
- [sc 2, inc], repeat around (24)
- Round 5:
- [sc 2, dec], repeat around (back to 12 stitches for shaping)
- Assembly:
- Stuff lightly before closing.
- Leave a long tail for sewing.
- Attach to the head one stitch below the eyes, shaping the muzzle neatly.
Horns (Each Reindeer Makes Two Horns)
- Main Piece:
- Rounds 1–11:
- 6 sc in mc, and work 1 sc in each st for 11 rounds (6 sts per round).
- Rounds 1–11:
- Secondary Piece:
- Rounds 1–4:
- 6 sc in mc, and work 1 sc in each st for 4 rounds.
- Rounds 1–4:
- Assembly:
- Sew each secondary piece to the side or top of the main horn where branch effect is desired.
- Securely attach the finished horn on the reindeer's head, placing the bases between rounds 3 and 4 from the start of the head.
Nose & Ears
- Nose (Red):
- Using red yarn and the center-point embroidery technique, embroider a round or small oval nose centered vertically on the muzzle.
- Ears (Make 2):
- Round 1:
- 4 sc in mc (4)
- Round 2:
- inc in each (8)
- Round 3:
- [sc 1, inc], repeat around (12)
- Round 4:
- [sc 2, inc], repeat around (16)
- Round 5:
- [sc 3, inc], repeat around (20)
- Round 6:
- [sc 2, dec], repeat around (15)
- Round 7:
- [sc 3, dec], repeat around (12)
- Fasten off, fold the bottom, and sew closed.
- Sew ears in place, attaching 3–4 rounds below the horns on each side of the head.
- Round 1:
Assembly & Finished Size
- After completing all crochet pieces, stuff the body and head, ensuring the shape remains round and firm.
- Attach the muzzle below the eyes and stuff lightly before fully closing. Place the horns above and between the ears, securing the secondary branches for realism.
- Embroider the red nose neatly on the center of the muzzle. Sew the ears 3–4 rounds beneath the horns.
- Check all limbs and features are evenly aligned and securely fastened.
- The finished reindeer measures between 15 and 18 cm, depending on yarn and tension, creating a charming holiday keepsake.

Conclusion and Ending Words
The crochet reindeer pattern showcases essential amigurumi skills, from shaping with precise increases and decreases, to assembling dimensional features. Thoughtful placement of embroidered and sewn details ensures the project is both expressive and durable. This reindeer is crafted as a versatile and festive piece, suitable for personal display or as a heartfelt handmade gift.