
Whimsical Free Crochet Gnome Amigurumi Pattern for Any Space
Bring cozy charm with the Free Crochet Gnome Amigurumi Pattern, a soft, adorable plush perfect for gifts, décor, and playful handmade fun.
Crochet amigurumi gnomes are charming additions to any home décor, adding a touch of whimsy and handcrafted warmth. The Free Crochet Gnome Amigurumi Pattern guides you in creating a soft, squishy gnome complete with a tall, pointy hat, rounded body, and a bushy beard.
Free Crochet Gnome Amigurumi Pattern That Brings Smiles

Customization is simple: choose traditional red and gray, earthy tones, or bold, bright colors to suit your style. When complete, this gnome radiates warmth, charm, and personality. Its handcrafted nature makes it a unique, lasting piece that adds playful elegance and cozy cheer wherever it is placed.
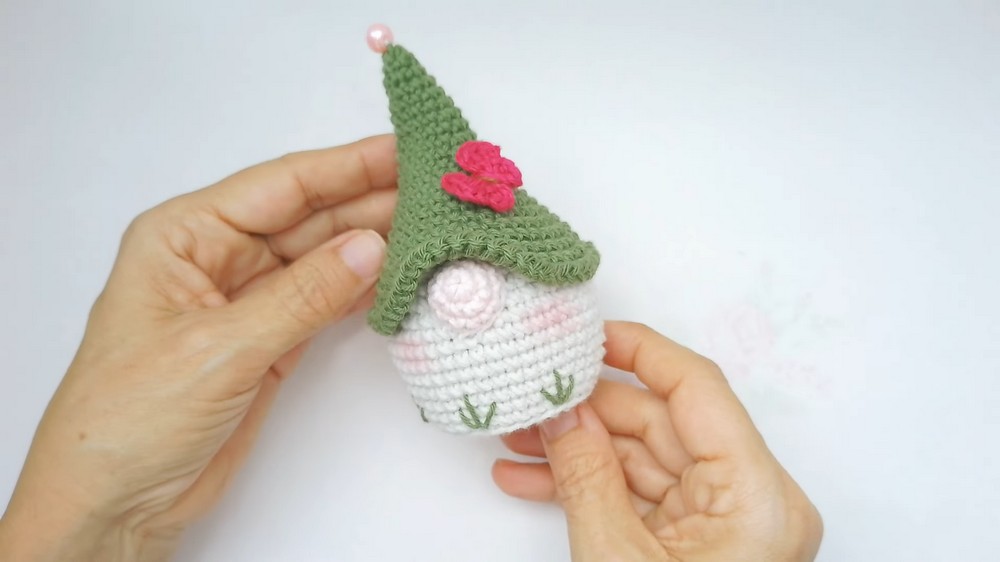
Its smooth stitches and rounded curves give the finished piece a polished, visually appealing look, making it a delightful accent for shelves, desks, or cozy corners. This gnome is versatile and practical. It can be a charming gift, a playful addition to a toy collection, or a decorative accent that brightens any room.
Amigurumi Gnome Crochet Pattern
Materials List
- Yarn:
- Body, Hat, and Branches: Acrylic or cotton DK/worsted-weight yarn in your preferred colors (e.g. greens, cream, pastel pink, dark pink, brown)
- Small amounts in other colors for details (e.g. butterfly, nose)
- Crochet Hook: 3 mm (or size suitable for your yarn)
- Padding: Polyester stuffing (fiberfill or synthetic cotton)
- Optional:
- Small piece of cardboard/plastic for flat base stability
- 1 small pearl or bead for decoration
- Sewing needle and regular thread for attaching decorations
- Stitch markers
- Blush or eyeshadow for cheeks
- Glue (for securing butterfly or knot ends)
Abbreviations (US Terms)
- MR = Magic ring
- ch = Chain
- sc = Single crochet
- inc = Increase (2 sc in the same stitch)
- dec = Invisible decrease (single crochet two together)
- sl st = Slip stitch
- dc = Double crochet
- hdc = Half double crochet
- st/sts = Stitch/Stitches
- Rnd(s) = Round(s)
Special Notes
- The gnome is worked in continuous rounds, unless otherwise noted.
- Mark the first stitch of each round for accuracy.
- Slight variation in row counts or rounds will not significantly impact the charm of your piece.
The Gnome - Step by Step
Body
With body color (e.g. cream or green):
- Rnd 1: MR, 6 sc into ring. (6)
- Rnd 2: 6 inc. (2 sc in each st around) (12)
- Rnd 3: (sc 1, inc) x 6. (18)
- Rnd 4: (sc 2, inc) x 6. (24)
- Rnd 5: (sc 3, inc) x 6. (30)
- Rnd 6: (sc 4, inc) x 6. (36)
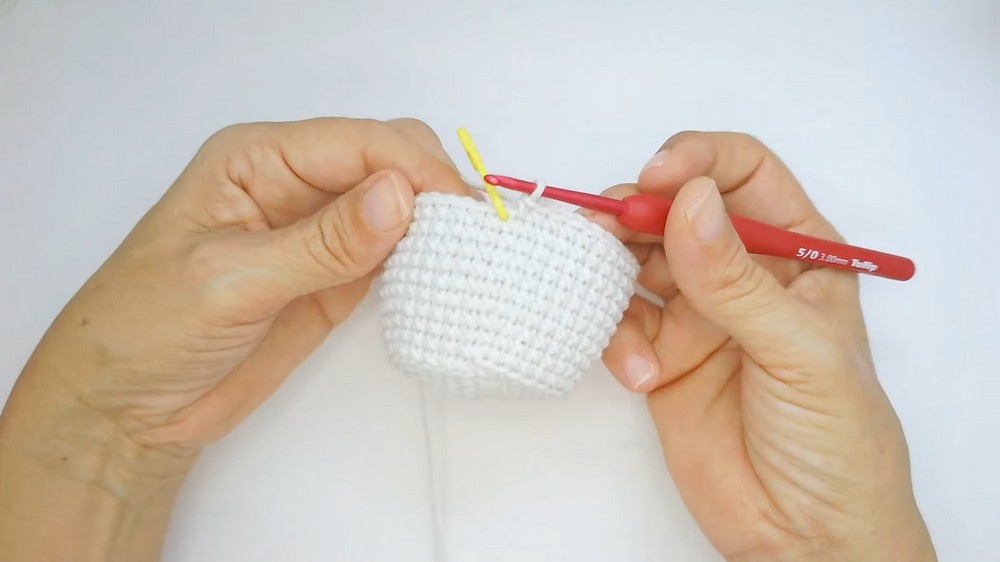
- Rnd 7: Working in back loops only, sc in each st around. (36)
- This creates a flat base edge for the body.
- Rnd 8: Sc in each st around (through both loops). (36)
- Rnd 9: (sc 5, inc) x 6. (42)
- Rnds 10–16: Sc in each st around. (42) — 7 rounds
- You can use the optional cardboard base at this stage before stuffing.
- Rnd 17: (sc 4, dec) x 7. (35)
- (Optional: Place and trim cardboard/plastic circle for flat base now if using. Insert it into the base of the body.)
- Rnd 18: Sc in each st around. (35)
- Rnd 19: (sc 3, dec) x 7. (28)
- Rnd 20: Sc in each st around. (28)
- Stuff body firmly, adjusting your cardboard base if used.
- Rnd 21: (sc 2, dec) x 7. (21)
- Rnd 22: Sc in each st around. (21)
- Rnd 23: (sc 1, dec) x 7. (14)
- Rnd 24: Sc in each st around. (14)
- Rnd 25: 7 dec. (7)
- Finish stuffing. Fasten off leaving a tail. With a yarn needle, thread through remaining stitches and pull tight to close. Weave in end neatly.


Gnome Hat
With hat color (e.g. dark green):
- Rnd 1: MR, 6 sc. (6)
- Rnd 2: Sc in each st around. (6)
- Rnd 3: (sc 1, inc) x 3. (9)
- Rnd 4: Sc in each st around. (9)
- Rnd 5: (sc 2, inc) x 3. (12)
- Rnd 6: Sc in each st around. (12)
- Rnd 7: (sc 3, inc) x 3. (15)
- Rnd 8: Sc in each st around. (15)
- Rnd 9: (sc 4, inc) x 3. (18)
- Rnd 10: Sc in each st around. (18)
- Rnd 11: (sc 5, inc) x 3. (21)
- Rnd 12: (sc 6, inc) x 3. (24)
- Rnd 13: (sc 7, inc) x 3. (27)
- Rnd 14: (sc 8, inc) x 3. (30)
- Rnd 15: (sc 9, inc) x 3. (33)
- Rnd 16: (sc 10, inc) x 3. (36)
- Rnd 17: (sc 5, inc) x 6. (42)
- Rnd 18: (sc 6, inc) x 6. (48)
- Rnd 19: Sc in each st around. (48)
- Rnd 20: Sc 12, [(sc 2, inc) x 8], sc 12. (56)
- First, sc 12, then alternate 2 sc and inc for 24 stitches, then sc 12.
- Rnd 21 (Decorative Border): [ch 1, sl st in next st] repeat around.
- Creates a zigzag edge. Fasten off, leaving a long tail for sewing.

Nose
With pastel pink or color of choice:
- Rnd 1: MR, 6 sc. (6)
- Rnd 2: 6 inc. (12)
- Rnd 3: Sc in each st around. (12)
- Fasten off, leaving long tail to sew to body.
Embroidered Branches
- With green yarn and a yarn needle, embroider six groups of three short stitches (branches) evenly spaced around the "face" (front upper area of body, around rnd 8).
- Each group:
- First stitch to the right side, short.
- Second stitch to the center, a bit longer (upwards).
- Third stitch to the left side, short.
- Make all groups starting and ending each thread at the same point for neatness. Tie off and hide the ends inside the body.
Butterfly
With thin, contrasting yarn:
- MR, ch 3.
- Work in ring: 2 dc, ch 2, sl st into ring, ch 1, 2 hdc, ch 1, sl st into ring, ch 1, 2 hdc, ch 1, sl st into ring, ch 2, 2 dc, ch 3, sl st into ring.
- Fasten off. Pull MR tight to form butterfly, tie yarn ends to pinch center.
- Optional: Wind a strand of brown yarn around center for body; sew or glue into place on hat.
Assembly
- Sew the nose in the center under the hat brim, lightly stuffing as you sew.
- Sew the hat to the body. Adjust for position; pin if helpful for alignment.
- Add butterfly: Sew or glue onto hat as desired; decor can be placed elsewhere.
- Add pearl or bead at tip of hat, if you like, for a whimsical finish.
- Blush For a blushing effect, gently dab pink eyeshadow/blush onto cheeks with your fingertip.

Pattern Correction & Tips
- If the gnome’s body seems too narrow, add a round or two (maintaining the stitch count) before starting your decreases.
- If your hat appears too small, repeat the final increase rounds to desired circumference.
- Don’t stress over tiny inconsistencies—your gnome will be uniquely yours!
- Use stitch markers between increases/decreases for improved accuracy.
Conclusion
You have crafted a lovely, whimsical amigurumi gnome suitable for gifting, decorating, or delighting friends and family with a handmade woodland charm! Make as many as you like, switching up colors, details, and accessories for variety.