
Whimsical Crochet CHRISTMAS TREE in Festive Corners
Celebrate festive cheer with Crochet CHRISTMAS TREE Pattern, featuring joyful details, cozy charm, and whimsical holiday appeal.
Twinkling lights, festive ornaments, and the scent of pine have long signaled the joy and warmth of the holiday season. A handcrafted Christmas tree captures that spirit in miniature form, offering a charming accent that brings cheer to homes, mantels, or tabletops. Beyond decoration, it can serve as a thoughtful gift, a centerpiece for holiday displays, or a playful addition to seasonal décor, carrying both aesthetic appeal and the warmth of handmade charm.
Festive Crochet CHRISTMAS TREE for Holiday Joy

The process begins with forming the tree’s base, gradually building upward with layered sections that mimic the natural shape of a fir tree. Midway, subtle increases and textured stitches create fullness and dimension, giving the tree a lifelike silhouette while maintaining a compact, manageable size. Branches and optional embellishments, such as tiny stars, baubles, or contrasting trims, can be added to enhance visual interest and reflect personal style. Each layer is shaped carefully to maintain balance and symmetry, resulting in a polished and appealing piece.
Lightweight, versatile, and endlessly festive, this crochet Christmas tree can be tailored in traditional greens, sparkling whites, or vibrant hues, suiting any holiday aesthetic. Functional, decorative, and full of character, it captures the magic of the season while adding handcrafted elegance to any space.
Materials Required
- Yarn:
- Green yarn for the tree (Cascade Ultra Pima DK weight yarn in “Spring Green”)
- Brown yarn for the trunk (same yarn brand in “Cocoa”)
- Black yarn for the face (Payton's Grace mercerized cotton)
- Crochet Hook: 3.75 mm
- Additional Tools:
- Tapestry needle for weaving in ends and embroidery
- Scissors
- Safety eyes (optional, or use black yarn for eyes)
- Stuffing (polyfill) for shaping the tree
- Optional: Yarn for embellishments, like colored "Christmas lights" or decorations

Special Features
- Seamless Design: The tree is crocheted as a single piece, eliminating the need to sew separate sections together.
- Customizable Embellishments: You can add safety eyes for a playful face, embroidered facial features, or Christmas decorations like light bulbs for extra charm.
- Versatility: The amigurumi can be used as a pin cushion, holiday table decor, or even a gift for festive occasions.
- Optional Star Topper: The video includes instructions for the tree itself, but the star topper tutorial is available separately on the creator's channel.
- Compact Size: The final product is portable and perfectly sized for small displays or as a thoughtful gift.
Step-by-Step Instructions
1. Base of the Tree: Rounds 1–15
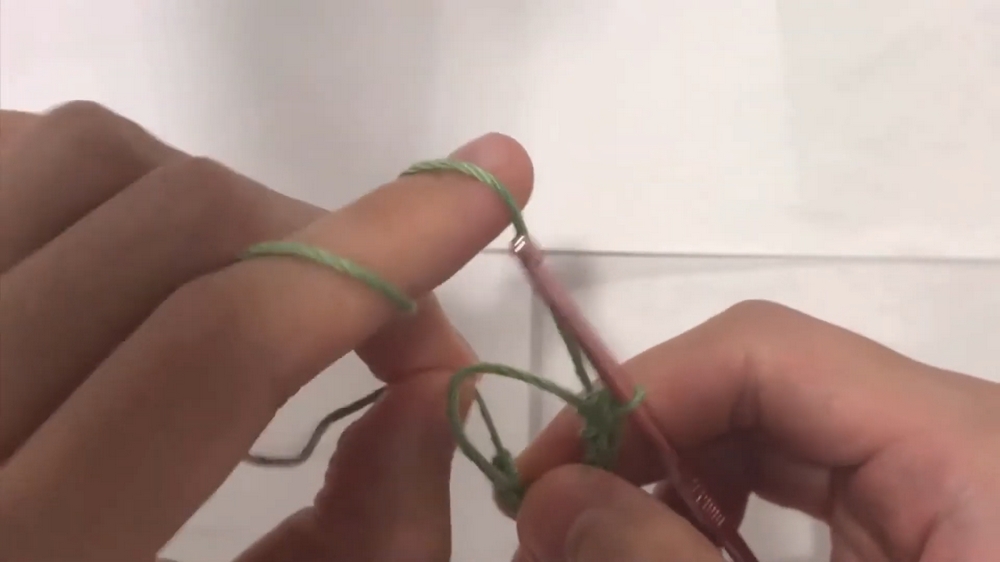
- Create a Magic Ring:
Wrap the yarn around your fingers twice, pull one strand through, and lock the loop in place. This technique forms the center of the tree. - Round 1: Crochet 6 single crochets into the magic ring. Pull the tail to close.
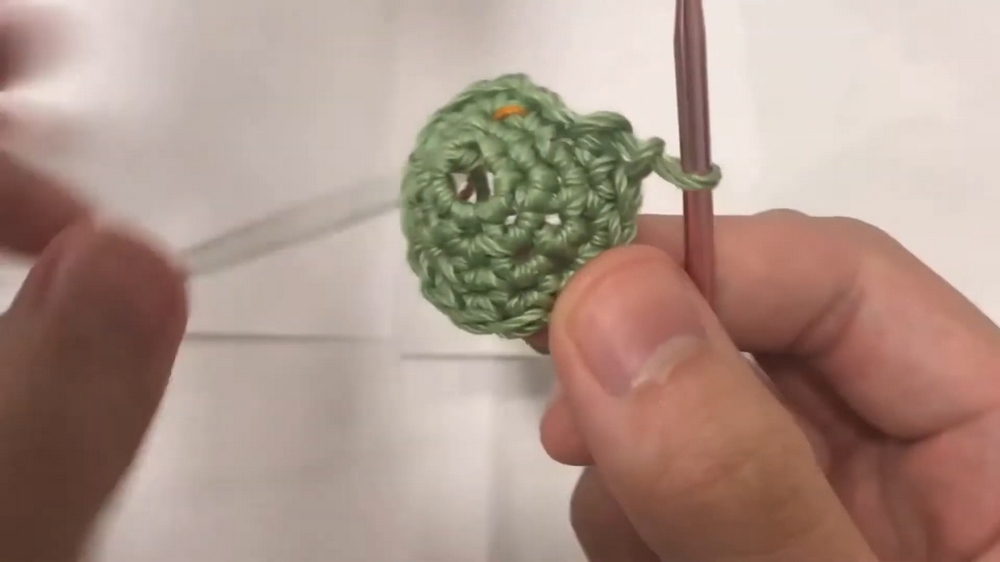
- Round 2: Increase by crocheting 2 single crochets into each stitch (12 stitches).
- Rounds 3–15: Use a systematic pattern of increasing the stitch count by alternating increases and adding more single crochets between increases.
- Example Pattern:
- Round 3: 1 increase, 1 single crochet (18 stitches)
- Round 4: 1 increase, 2 single crochets (24 stitches)
- Round 5: 1 increase, 3 single crochets (30 stitches)
- Continue increasing similarly until Round 15 (ending with 12 single crochets between increases, 42 stitches total).
- Example Pattern:
2. Creating Tree Layers: Rounds 16–23
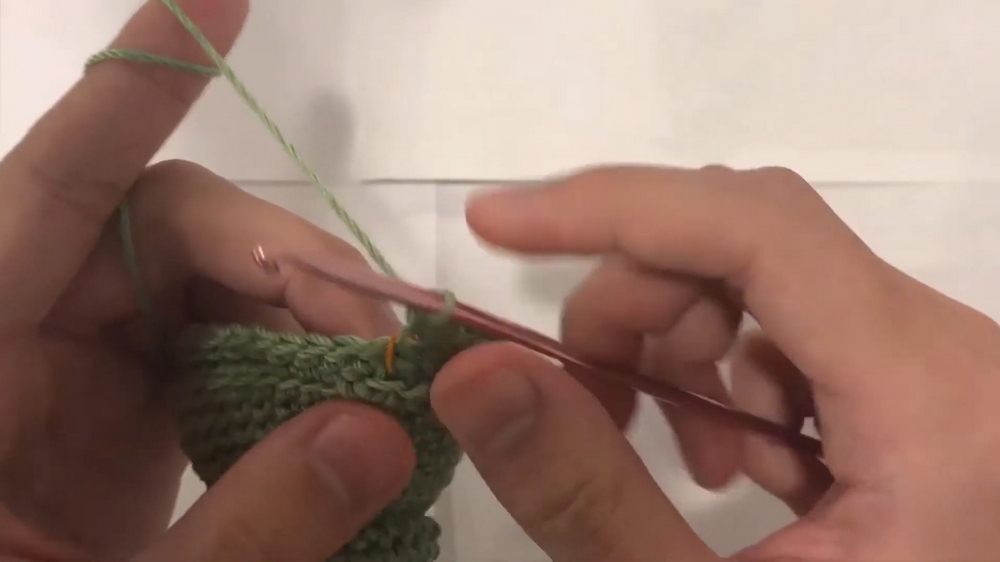
- Work in Back Loops Only (Round 16): Transition to creating tree layers by crocheting into the back loops, alternating 12 single crochets and a decrease to shape the conical structure (39 stitches).
- Round 17: Work in front loops only, alternating 12 single crochets followed by an increase (42 stitches).
- Continue: Follow similar rounds to build layers, increasing slightly with each round. For example:
- Round 19: 14 single crochets, 1 increase.
- Round 20: 15 single crochets, 1 increase.
- Stop expanding after Round 23.
3. Trunk Transition: Rounds 24–31
- Round 24: Cut the green yarn, attach brown yarn for the trunk, and crochet into the front loops only (single crochet in each stitch).
- Rounds 25–31: Work evenly with brown yarn to define the tree's trunk. At Round 31, pull tight to taper the trunk's shape slightly.

4. Shaping and Details
- Stuff the Tree: Add polyfill stuffing (not too much) to maintain the tree shape as you start closing it off. Finish stuffing near the end.
- Create Face Features:
- Add safety eyes or embroider using black yarn. Use a tapestry needle to stitch the mouth after placing the eyes symmetrically.
5. Closure and Final Touches: Rounds 32–35
- Round 32: Work 3 single crochets, then decrease to start tapering the tree's top.
- Round 33: Alternate 2 single crochets with a decrease (tighten stuffing as needed).
- Round 34: Work single crochet followed by a decrease.
- Round 35: Crochet decreases in every stitch to close the top of the tree securely.
- Secure the End: Use the tapestry needle to weave the end of the yarn through the stitches and tie it off neatly.

Tutor's Suggestions
- Stuffing: Avoid overstuffing the tree to prevent distortion. Finish stuffing just before the top is closed.
- Safety Eyes Placement: If using safety eyes, add them before stuffing, near the halfway mark of the tree's height.
- Markers for Counting: Use a piece of string or stitch markers to track rounds accurately while working in spirals.
- Working with Back/Front Loops: Switching between back and front loops creates layered textures, crucial for shaping the tree.
- Tree Decorations: For added charm, attach colored yarn "Christmas lights" or small beads after finishing the tree.
Difficulty Level
This project is beginner-friendly, but slightly more advanced techniques such as magic ring creation, working in back/front loops, and consistent stitch counting may challenge complete beginners. However, with patience and closely following the tutorial, anyone can complete this festive piece.
Uses
- Holiday Decor: Perfect for tabletop displays, mantels, or holiday setups.
- Pin Cushion: Use as a functional and cheerful pin cushion for sewing projects.
- Personalized Gifts: Add special touches like decorations or initials to make unique holiday presents.
- DIY Craft Projects: Incorporate the tree into larger holiday amigurumi scenes or wreaths.
Tip for Beginners
When working in back and front loops, take your time identifying which loop to insert your hook into. Plush or DK yarn may obscure the loops — run your finger along the stitches to feel for the correct loop before inserting the hook.
Conclusion
The Crochet Christmas Tree Amigurumi is a fun, festive project that showcases simplicity while creating a charming decor item. With a seamless design and customizable elements, it's perfect for the holiday season and a wonderful gift idea. The step-by-step pattern ensures a smooth process, making it accessible to crocheters of all experience levels. Whether you're crafting as stress relief or for seasonal cheer, this project is bound to leave you with a sense of accomplishment and a beautiful handmade creation.