
Try This Crochet Amigurumi Bunny Free Pattern For Kids
Enjoy making a sweet little rabbit with this Crochet Amigurumi Bunny Free Pattern, perfect for Easter baskets, cute gifts, and spring decorations.
Looking for a fun and cute project to try? The Crochet Amigurumi Bunny is a wonderful choice for anyone who loves soft toys. This little bunny has a friendly face and a sweet, round shape that makes it easy to hold and cuddle.
Pretty Crochet Amigurumi Bunny Free Pattern For Spring
The bunny is usually made in a small size, perfect for a child’s hand or as a decoration on a shelf. Its shape includes long floppy ears, a round body, and tiny arms and legs, all sewn together to look like a real little bunny. The simple design brings a gentle and lovable character to life.
Moreover, making this bunny is a great way to practice basic crochet skills. It is best suited for beginners to intermediate crocheters. If you know how to do the chain stitch and single crochet stitch, you’re already halfway there. Learning to stuff and shape the bunny also helps improve your hand control and attention to detail.
In addition, you can customize the bunny’s look by choosing different yarn colors or adding little details like a bow or a tiny nose. This personal touch makes each bunny unique and special.
Finally, this project is not only fun but also relaxing, giving you a lovely toy at the end. Whether it’s your first amigurumi or your tenth, the Crochet Amigurumi Bunny is friendly to make and sure to bring a smile. Give it a try and enjoy every stitch!
About the Pattern
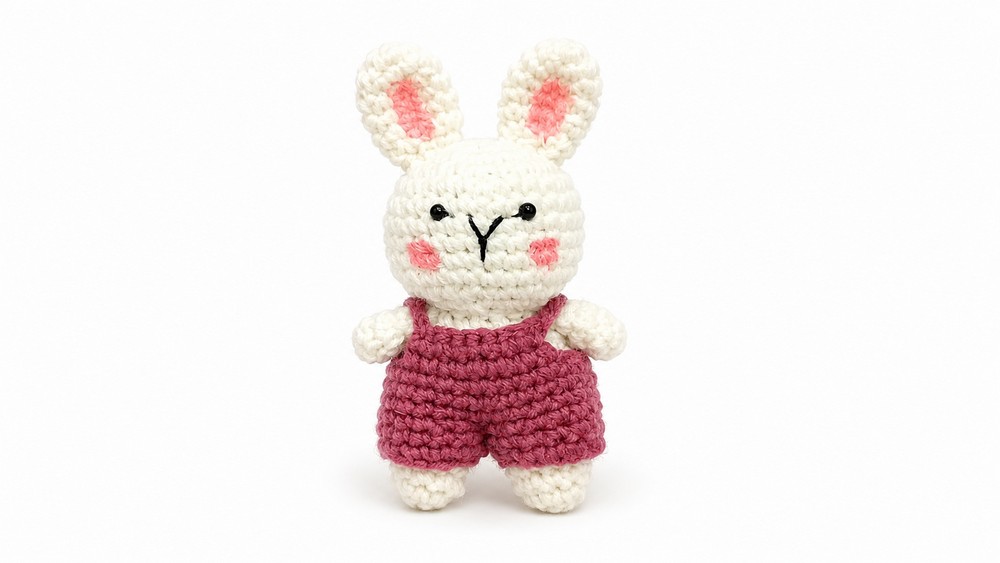
This crochet bunny pattern is constructed from individually crocheted body parts that are carefully joined together, producing an adorable, plush toy with simple shaping and charming details. Starting from a basic magic ring, each piece uses foundational crochet techniques such as single crochet, increasing, and decreasing, which makes the pattern accessible but engaging. The addition of accessories like a dress brings personality and a finished look to the bunny, perfect for gifting or display.
Key Pattern Details
- Structure: All parts—head, hands, legs, body, ears, and dress—are crocheted separately then assembled.
- Shaping: Magic ring beginnings, strategic increases and decreases define the form.
- Assembly: Step-by-step instructions guide you through joining limbs, attaching features, and adding clothing detail.
- Finishing Touches: Eyes are placed precisely for character; ears and dress complete the design.
Important Notes
- Ensure you maintain a consistent tension throughout the project for symmetry.
- Stuff each part firmly, especially the head and body, before fully closing rounds.
- Leave long yarn tails at joins for easier sewing.
- Use stitch markers if needed for counting rounds and matching placement of limbs and features.
Difficulty Level
This pattern is designed for advanced beginners or intermediate crocheters. A familiarization with the magic ring technique, basic increases and decreases, and amigurumi assembly will allow for a successful project.
Supplies Needed
- Worsted or DK weight yarn in at least three colors (main bunny color, accent for dress, optional contrast for accessories)
- Crochet hook sized appropriately for chosen yarn (often 2.5mm–3.5mm)
- Toy stuffing/polyfill
- Safety eyes or black embroidery floss for eyes
- Yarn needle for sewing parts together and finishing
- Scissors
- Stitch markers (recommended)
Size & Measurements
When crocheted with standard worsted-weight yarn and a 3.0mm hook, the finished bunny typically measures approximately 7–9 inches tall (from feet to tip of ears). Size may vary slightly based on yarn and hook selection as well as individual tension.
Gauge & Stitch Details
- Gauge is not strictly essential for amigurumi, but ensure your stitches are tight enough to prevent stuffing from showing.
- The pattern uses single crochet (sc) throughout, worked in spiral rounds.
- Increase (inc): Work two single crochets in one stitch.
- Decrease (dec): Combine two stitches into one using single crochet decrease.
Crochet Abbreviations
- MR: Magic Ring
- sc: single crochet
- inc: increase (2 sc in same stitch)
- dec: decrease (sc 2 together)
- ch: chain
- st(s): stitch(es)
- FO: fasten off
Special Stitch Guide
- Magic Ring (MR): Begin by looping yarn to create a ring, then work the required number of stitches into the loop, pulling the yarn tail to close.
- Single Crochet Decrease (dec): Insert hook into next stitch, yarn over and pull up a loop, insert hook into next stitch, yarn over and pull up a loop (three loops on hook), yarn over and pull through all loops.
Complete Crochet Pattern
Head
- Round 1: Start with a magic ring, work 6 sc into the ring.
- Round 2: 2 sc in each stitch around (12 sc).
- Round 3: (1 sc, inc) repeat around (18 sc).
- Round 4: (2 sc, inc) repeat around (24 sc).
- Round 5: (4 sc, inc) repeat around (30 sc).
- Rounds 6–8: Work 30 sc per round, even.
- Round 9: (7 sc, inc) repeat around (34 sc).
- Round 10: Work 34 sc evenly.
- Round 11: (2 sc, dec) repeat around (24 sc).
- Round 12: (2 sc, dec) repeat around (18 sc). Stuff the head firmly before fully closing.
- FO, leave a long tail for sewing to body.


Hands (Make 2)
- Round 1: Magic ring, 6 sc.
- Round 2: (2 sc in one stitch, 1 sc in next two) repeat around to end with 8 sc.
- Round 3: Work 8 sc (even).
- Round 4: (sc, dec) repeat to end with 6 sc.
- FO, leave tail for sewing.
Legs (Make 2)
- Round 1: Magic ring, 5 sc.
- Round 2: 2 sc in each stitch (10 sc).
- Rounds 3–6: Work 10 sc evenly, 1 round each.
- FO first leg. Do not FO second leg; instead, proceed to join for the body.
Body & Assembly
- Round 7: From last round of second leg, ch 2 and join to first leg with sc; continue single crocheting around both legs and across chain for a total of 24 sc.
- Rounds 8–10: Work 24 sc evenly for each round.
- Round 11: (2 sc, dec) repeat around (18 sc).
- Round 12: Attach hands as you work this round by aligning them and crocheting through both the body and the top of each hand as you go, maintaining 18 sc. Stuff the body as you go.
- FO leaving a long yarn tail to attach the head.
Ears (Make 2)
- Round 1: Magic ring, 5 sc.
- Round 2: 2 sc in each stitch (10 sc).
- Rounds 3–5: Work 10 sc evenly for three rounds.
- Round 6: (sc, dec) repeat around (7 sc).
- FO, leaving a long tail for attaching. Sew each ear to the head, positioning at rows 2–3.
Eyes
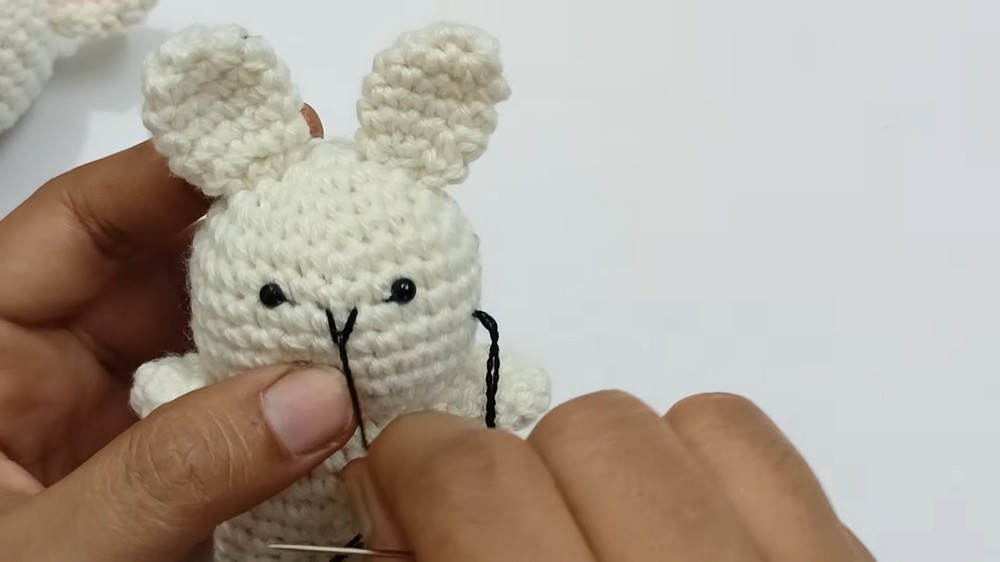
- Attach safety eyes or embroider eyes between rounds 5 and 6 of the head, spacing them symmetrically.
Dress
- Leg Tubes: Make two tubes, each with 14 stitches for the legs.
- Round 1 & 2 for Each Leg: Work 14 sc each round.
- Join the two leg tubes together to have 28 stitches in the next round.
- Rounds 3–5: Work 28 sc in each round.
- Round 6: (12 sc, dec) repeat around for 26 sc.
- Bib Front: At the center front, work 8 sc flat for several rows to form a bib.
- Straps: Chain the required length and attach to bib for small shoulder straps.

Joining & Final Size
Sew the head securely onto the body. Attach the ears to the head at the specified rounds, shaping them as you go. Position and sew the arms and legs firmly into the body structure. Dress the bunny in its custom crocheted dress, ensuring the bib and straps are sitting well. Attach or embroider the eyes neatly for final character expression.
The complete bunny will stand approximately 7–9 inches tall when made with suggested materials, with harmonious proportions between its head, limbs, and clothing.

Final Words
This crochet bunny pattern provides crocheters with detailed segments, focusing on well-defined rounds for each body part and accessory. The project not only produces a delightful handmade toy, but also builds skills in shaping, assembling, and finishing amigurumi. With its classic approach and sweet outcome, the bunny becomes a rewarding centerpiece for gifting, decor, or imaginative play.