
Easy Crochet Amigurumi Bunny Free Pattern To Make A Sweet Friend
Choose Crochet Amigurumi Bunny Free Pattern for soft rabbit details and sweet spring charm that fits nursery decor or thoughtful birthday keepsakes.
Try this cute little friend to brighten your day. This Crochet Amigurumi Bunny is a lovely choice! This small toy usually stands about 4 to 6 inches tall, making it easy to hold or display anywhere. It has a soft, round body with long ears that give it a gentle, human-like appearance. The big eyes and small nose add to its sweet, friendly face.
Mini Crochet Amigurumi Bunny Free Pattern For Spring Decorations
In addition, the shape of the bunny is simple and smooth. Its arms and legs are short and slightly rounded, which makes it look cuddly and approachable. Also, small details like a fluffy tail or a tiny bow can be added to personalize the bunny even more, enhancing its charm.
Moreover, this project suits beginners and those with some experience. The stitches used are basic, mostly single crochet, along with increases and decreases to give it the right shape. This means most people can try making it without feeling overwhelmed.
Besides, the size is perfect for gifts or decorations. It can sit on a shelf or be a soft toy for children. Plus, choosing different colors can make each bunny unique and special.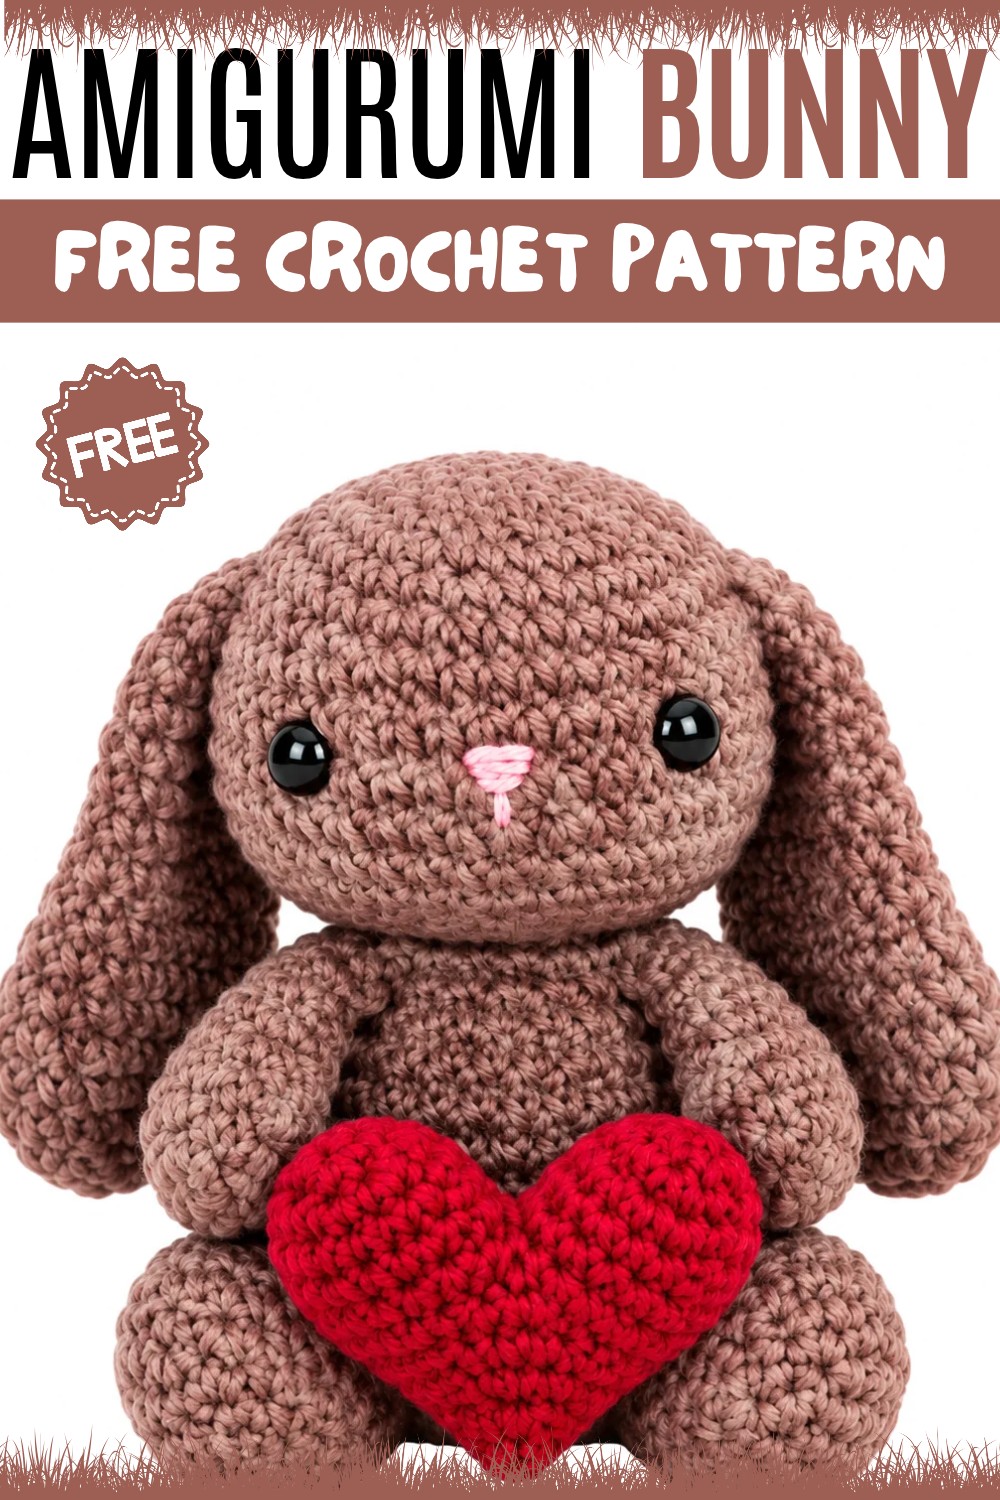
Overall, Crochet Amigurumi Bunny is a simple and fun project. It features a friendly look and easy steps, making it an enjoyable project for many. Whether for yourself or as a gift, this little bunny is sure to bring smiles all around.
Created By :
Crochet Bunny Pattern
This crochet bunny is designed in modular sections and features classic amigurumi techniques to create a soft, huggable toy. Each part is constructed separately—ears, head, arms, feet, and body—then sewn together to form a sweet animal with a round head, elongated ears, sturdy body, and proportionately sized limbs. Made with 3-ply acrylic yarn and a 4mm hook, the project is accessible to anyone wanting to practice their skills in shaping, joining, and simple assembly.

Pattern Basic Points
- Individual pieces for precise shaping: ears, head, arms, legs, and main body.
- Ears taper towards the tip and are attached as you go for secure placement.
- Head has classic amigurumi increasing and decreasing, with safety eyes and embroidered or sewn nose.
- Arms and legs are straightforward tubes, providing stability and cuddle-appeal.
- Body is formed by joining the legs and working upward in a single piece.
- Assembly uses long yarn tails and involves neat, seamless joining for durability.
Special Notes
- Work each piece in continuous rounds (spiral), do not join unless specified.
- Stuff parts gradually as you work to maintain a smooth shape and avoid lumps.
- Attach features such as eyes and ears as directed in the instructions for optimal symmetry and character.
- Use markers to easily identify the start of each round, especially on small circumference pieces.
Skill Level
This bunny pattern is rated Beginner. Crocheters should know the magic ring technique, single crochet, increases (two single crochets in one stitch), decreases (single crochet two together), and basic hand sewing for the final assembly.
Materials
- Yarn: 3-ply acrylic yarn in a main color of choice (for bunny) and a small amount of contrast for facial details if desired.
- Crochet Hook: 4mm
- Fiberfill/Polyester Stuffing: For all pieces.
- Safety Eyes or beads: Size appropriate for bunny’s head (optional, or use embroidery).
- Yarn Needle: For assembly and sewing on details.
- Stitch marker: For keeping track of rounds.
- Scissors.
Measurements and Gauge
- Finished bunny measures approximately 16–20 cm (6.5–8 inches) tall, depending on stuffing and stitch tension.
- Gauge: Not crucial for soft toys, but stitches should be tight enough that stuffing does not show.
- Recommended test: 8–9 SC and 8 rows = 2 cm (measured unstuffed).
Stitch Abbreviations
- MR: Magic Ring
- SC: Single Crochet
- INC: Increase (2 SC in same stitch)
- DEC: Decrease (SC 2 stitches together)
- CH: Chain
- St(s): Stitch(es)
Special Stitches Used
- Magic Ring (MR): Wrap yarn into a ring, work the stated number of SC into the ring, pull gently to tighten.
- Single Crochet Decrease (DEC): Insert hook into next stitch, yarn over and pull up loop, insert into following stitch, yarn over and pull up loop, yarn over and pull through all three loops.
Detailed Bunny Crochet Pattern
1. Ears (Make 2) (0:40–7:50)
- R1: MR, 8 SC.
- R2: INC in each stitch (16).
- R3–R6: 1 SC in each stitch (16).
- R7: (2 SC, DEC) around (12).
- R8–R10: 1 SC in each stitch (12).
- R11: (4 SC, DEC) repeat twice (10).
- R12: 1 SC in each stitch (10).
- R13: (3 SC, DEC) repeat twice (8).
- R14: 1 SC in each stitch (8).
- Fasten off, leaving a long tail for sewing.


2. Head (8:00–30:16)
- R1: MR, 6 SC.
- R2: INC in each stitch (12).
- R3: (1 SC, INC) around (18).
- R4: (2 SC, INC) around (24).
- R5: (3 SC, INC) around (30).
- R6: (4 SC, INC) around (36).
- R7: (5 SC, INC) around (42). Attach ears in this round for even placement.
- R8–R11: 1 SC in each stitch (42).
- R12: (5 SC, DEC) around (36).
- R13: (4 SC, DEC) around (30).
- R14: (3 SC, DEC) around (24).
- R15: (2 SC, DEC) around (18). Insert safety eyes and nose or embroider as preferred at this point.
- R16: (1 SC, DEC) around (12).
- Fasten off, leaving a long tail for sewing. Stuff the head firmly but not overstuffed to retain shape.
3. Arms (Make 2) (30:18–36:43)
- R1: MR, 6 SC.
- R2: (1 SC, INC) around (9).
- R3: (2 SC, INC) around (12).
- R4: 1 SC in each stitch (12).
- R5: (2 SC, DEC) around (9).
- R6: 1 SC in each stitch (9).
- R7: (1 SC, DEC) around (6).
- R8: 1 SC in each stitch (6).
- Fasten off, leave tail for sewing, and stuff arms lightly.
4. Feet and Body (36:45–53:58)
Feet/Legs (Make 2)
- R1: MR, 6 SC.
- R2: INC in each stitch (9).
- R3–R4: 1 SC in each stitch (9).
- Do not fasten off second leg.
Body
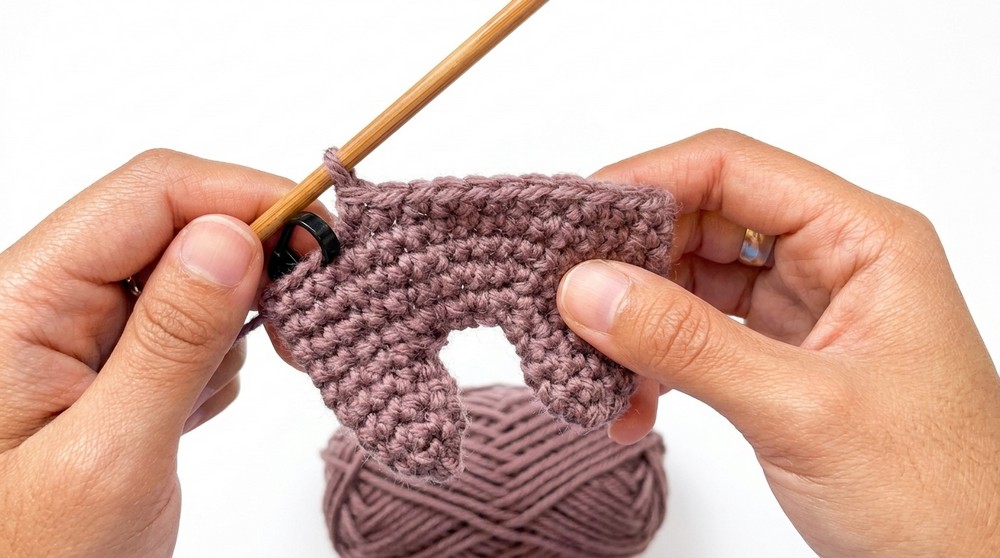
- After finishing the second leg, CH 3 (39:19).
- R1: Crochet around first leg (9), 3 SC across chain, crochet around second leg (9), 3 SC along the other side of the chain (total: 24 SC).
- R2: Increase evenly to 30 stitches (work 3 SC, INC around).
- R3: Increase evenly to 36 stitches (work 5 SC, INC around).
- R4–R5: 1 SC in each stitch (36).
- R6: (7 SC, DEC) repeat around (32).
- R7: 1 SC in each stitch (32).
- R8: (2 SC, DEC) repeat around (24).
- R9: 1 SC in each stitch (24).
- R10: (2 SC, DEC) repeat around (18).
- R11: 1 SC in each stitch; attach arms here (18).
- R12: 1 SC in each stitch (18).
- Fasten off, leaving a long tail for closing and attaching to head. Stuff the body and legs as you go for even filling.
Assembly & Finished Size
- Firmly stuff all pieces, especially the head and body, to help bunny stand or sit properly.
- Sew the head securely to the body using the long tail from the head and the yarn needle. Take care to join evenly for stability and a neat appearance.
- Position and sew arms slightly to the front and top sides of the body for a natural pose.
- Hide and weave in all ends for a clean finish.

When finished, your crochet bunny will measure approximately 16–20 cm tall, with a balanced body and expressive face. The stuffed ears are floppy yet hold shape, and the arms and legs sit or stand naturally. Gentle shaping and assembly ensure both durability and comfort for gripping as a toy or decorative piece.

Conclusion
This beginner-friendly crochet bunny pattern emphasizes the fundamentals of amigurumi toy-making while offering a rewarding and structured crafting experience. The step-by-step fabrication—starting from compact tubular limbs to a rounded, sculpted head and floppy ears—provides building blocks applicable to numerous soft-toy projects. The result is a sweet, customizable bunny, ideal for gifts, children’s toys, or as an introduction to assembling plush animals. Attention to the sequential joining and careful stuffing will produce a huggable and lasting crochet companion.