
Tiny Crochet Amigurumi Snowman Free Pattern For Winter Decor
Find a charming Crochet Snowman Amigurumi with this free pattern that is easy to follow and perfect for adding a cozy handmade touch to your decor.
A cute and friendly little toy made with yarn, the Crochet Snowman Amigurumi looks just like a happy snowman you see during winter, complete with a round body, a smiling face, and sometimes a tiny hat or scarf. This handmade snowman brings a warm and cheerful feeling to any room, making it a wonderful decoration for cold days or holiday time.
Festive Crochet Snowman Amigurumi Free Pattern For Holiday Decor
One of the best things about making a crochet snowman is how simple and fun it can be. You can choose different colors for the yarn, such as white for the body, bright orange for the nose, and red or green for the scarf. Some people like to make their snowman big enough to use as a soft pillow, while others prefer a small size to keep on their desk or bookshelf. This size choice is easy to do by just changing the yarn thickness or the size of the crochet hook you use.
To make this snowman, you will mostly use the single crochet stitch, which is one of the easiest types to learn but works perfectly to create a tight, smooth surface. Other important stitches are increases and decreases, which help shape the round body and the head.
Besides being a lovely decoration, the crochet snowman can also be a soft toy for children or a special gift for family and friends. It adds a friendly, handmade touch that shows your care and creativity.
This small project invites everyone to enjoy crafting, from kids trying it for the first time to adults who love making cozy ornaments. The beauty of the Crochet Snowman Amigurumi lies in its simple design, customizable colors, and the joy it brings when displayed or gifted.
Created By :
Little Snowman Amigurumi Pattern
This little snowman amigurumi combines classic seasonal charm with fun, accessible construction. Key shaping techniques ensure the body retains a rounded, smooth silhouette while added accessories such as a colorful hat, scarf, carrot nose, and branch-like hands evoke a whimsical winter spirit. The project is divided into main body, hat, scarf, nose, and "branch" hands for focused, manageable crafting.

Pattern Basic Points
- The snowman’s body is worked in one continuous piece, beginning at the base.
- Accessories (hat, scarf, nose) are crocheted separately and sewn in place for secure, neat assembly.
- Branch hands are twisted from floral/iron wire for realism and clarity.
- Increases and decreases are used for smooth shaping of the body and head.
- Surface features (nose, eyes) are securely attached or embroidered for a safe, lasting result.
Special Notes
- Use four-strand milk cotton for a soft, consistent finish and plump look.
- Maintain even tension to avoid gaps showing stuffing, especially on decreases.
- Utilize a smaller hook (1.25 mm) for features like the nose for precise, tight fabric.
- Embroider eyes and mouth for expressive features; safety eyes can be used as a substitute with secure placement.
- The number of chains in the scarf can be adjusted for a longer or shorter look.
Skill Level
Beginner to Intermediate:
Best suited to makers with confidence in basic amigurumi techniques (working in the round, increases, decreases, joining parts), color changes, and simple wire wrapping/attachment for the branch hands.
Materials
- Yarn: Four-strand milk cotton (white for body, coloring for hat, scarf, and nose)
- Hooks: 2.0 mm for body/accessories, 1.25 mm for nose
- Polyester fiberfill or similar stuffing
- Florist/iron wire: 5 cm lengths for arms, 1.5 cm for fingers
- Embroidery thread or small amount black yarn: For the snowman’s eyes/mouth
- Scissors, sewing needle
- Glue (optional, for fixing hat pom and wire arms in place)
- Carding brush or comb: If making a fluffy pompom
Measurements
- Height: ~8–10 cm (3.1–3.9 in), includes hat
- Width: ~5 cm (2 in) at broadest point
- Scarf length: ~14–15 cm (5.5–5.9 in)
Gauge
- Not critical. Tight amigurumi gauge: stitches should be dense enough to prevent stuffing from showing.
Stitch Abbreviations
- MR = magic ring
- ch = chain
- sc = single crochet
- hdc = half double crochet
- dc = double crochet
- inc = increase (2 sc in one stitch)
- dec = decrease (sc 2 together)
- sl st = slip stitch
- st/sts = stitch/stitches
Special Stitches
- Invisible Decrease: Insert hook in front loops of two stitches, yarn over, pull through two loops, yarn over, pull through both loops remaining.
- Standing stitch: Ch 1 used at round start to bring height up to work; not counted as a stitch.
- Color Change: On last yarn-over of stitch before change, switch to new color and pull through to complete stitch.
Main Body
Using 2.0 mm hook and white yarn:
- Round 1: MR, 6 sc. [6]
- Round 2: 2 sc in each st around (inc x6). [12]
- Round 3: (1 sc, 1 inc) x6. [18]
- Round 4: (2 sc, 1 inc) x6. [24]
- Rounds 5–7: Sc in each st around. [24, for 3 rounds]
- Round 8: (2 sc, 1 dec) x6. [18]
- Round 9: (1 sc, 1 dec) x6. [12]
- Stuff the lower body well.
- Round 10: (1 sc, 1 dec) x4. [8]
- Round 11: (inc in each st) x8. [16]
- Round 12: (1 sc, 1 inc) x8. [24]
- Round 13: (3 sc, 1 inc) x6. [30]
- Rounds 14–18: Sc in each st around. [30, for 5 rounds]
- Round 19: (3 sc, 1 dec) x6. [24]
- Round 20: (2 sc, 1 dec) x6. [18]
- Round 21: (1 sc, 1 dec) x6. [12]
- Stuff head and upper body firmly.
- Close opening, fasten off, and weave in end.
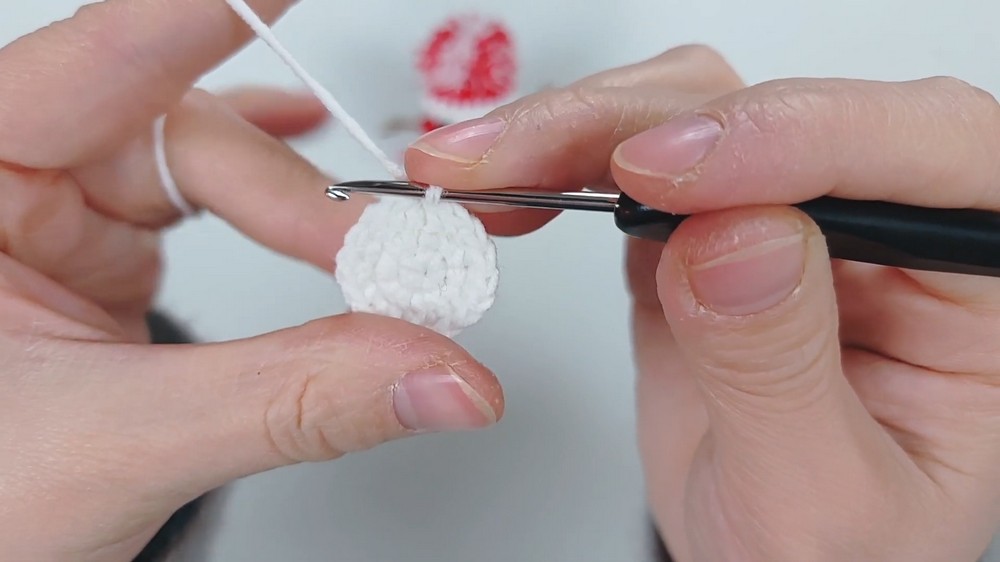

Hat
Using any color, 2.0 mm hook:
- Round 1: MR, 6 sc. [6]
- Round 2: Ch 2 (not a st), 3 dc in each st around (inc in dc x6). [18]
- Round 3: Ch 2, (1 dc, 2 dc in next st) around. [24]
- If changing color, make incomplete last dc and finish stitch in new color.
- Round 4: Ch 2, 1 dc in each st around. [24]
- Fasten off and weave in ends.
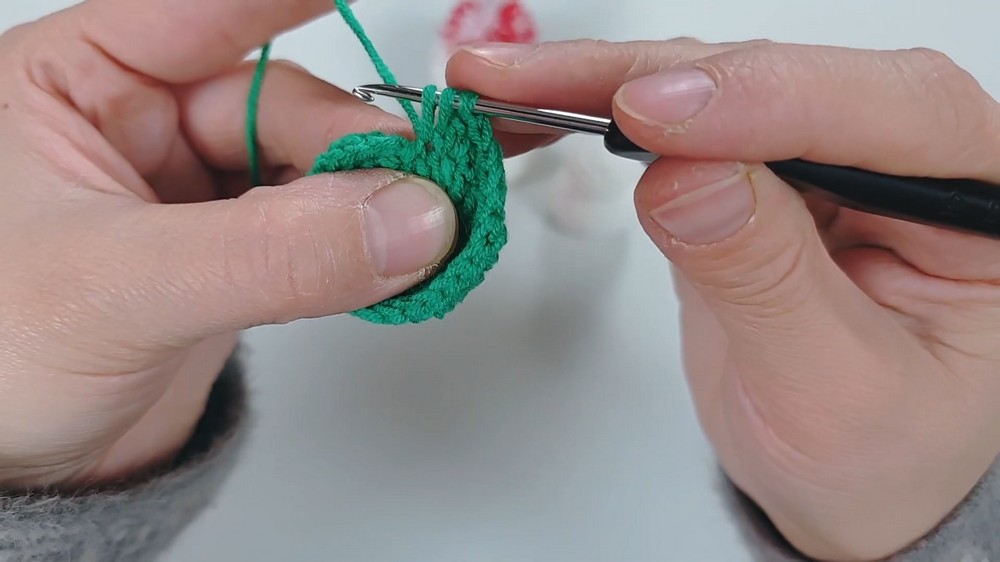
Hat Pom-Pom:
- Take white and green thread, wind approx. 15–20 times around fingers.
- Slide off, tie center tightly. Use a brush or comb to fluff, trim to desired size.
- Stitch or glue securely to hat top.
Scarf
With desired color:
- Make a slipknot, ch 55.
- Turn, from second chain from hook, sc in each chain (for 54 sc).
- Fasten off.
- For optional tassels: Cut several 8 cm strands, loop through ends and trim for uniform fringes.

Nose
With 1.25 mm hook, orange/yellow yarn:
- Round 1: MR, 3 sc. [3]
- Round 2: (1 inc in each st) x3. [6]
- Round 3: Sc in each st. [6]
- Fasten off with long tail for sewing.
Branch Hands
- Cut two pieces of “branch” colored iron wire, about 5 cm each.
- Cut smaller pieces (1.5 cm each) for "fingers” (2–3 per hand).
- Twist small wires around end of main branch as fingers, wrap 1–2 times for stability. Repeat for both arms.
- Apply a drop of glue to secure, if desired.
Assembly
- Stuff and close snowman body fully.
- Position and sew hat to the head; attach pom-pom.
- Wrap and knot scarf at neck, secure with a few stitches if needed.
- Attach nose at center of face, a few rounds down from top.
- Embroider or stitch on eyes with black yarn/thread to desired distance apart; add mouth if desired.
- Insert finished branch arms at sides, use glue or stitch into place.
- Tuck in any loose threads, and trim accessories as needed for balance and finish.
Finished Size
- Approximately 8–10 cm tall.
- Compact enough for desk, ornament, or pocket display.

Conclusion
This snowman amigurumi unites simple techniques with classic winter styling for a delightful, giftable project. Select vibrant or pastel hues for accessories to match your seasonal mood, and adjust the scarf and hat for individualized charm. The pattern is a playful study in shaping and finishing, yielding a whimsical friend ready for gifting, ornamenting, or brightening any cold day. Carefully made branch hands and facial accents ensure each snowman exudes personality, warmth, and joy.