
Sweet Free Crochet Heart Keychain Pattern for Your Bag or Keys
Embellish your keys with charm using this Crochet Heart Keychain Pattern, perfect to stitch, personalize, and brighten daily accessories.
This sweet accessory brings cheerful color and personality to your everyday items, turning ordinary keys or bag zippers into a lovely reminder of love and joy. Making a Crochet Heart Keychain pattern lets you create a soft, padded heart that’s perfect as a small gift, a thoughtful token on special occasions, or a personal keepsake you can carry everywhere.
Free Crochet Heart Keychain Pattern for Beginners & Pros

This Crochet Heart Keychain pattern is beginner‑friendly and quick to make, using minimal materials like yarn, a suitable hook, a bit of stuffing, and a metal keyring. Because it’s compact and portable, you can create many in different colors and styles, a quick, joyful project that brightens your day and makes heartfelt gifts for loved ones. Working on such projects can be calming and satisfying, helping you relax while improving focus, patience, and hand‑eye coordination, and you end up with something both beautiful and useful.

Practical Heart Keychain Crochet Pattern
Materials
- Yarn: Worsted weight yarn (acrylic or cotton recommended), color of your choice
- Crochet Hook: 2.5–3.5 mm (US C–E)
- Stuffing: Polyester fiberfill
- Yarn Needle: For sewing and finishing
- Stitch Marker: Optional, helpful for marking the beginning of rounds
- Keychain Ring: Optional, if making a keychain
- Scissors
Key Abbreviations (US Terminology)
- ch: chain
- sl st: slip stitch
- sc: single crochet
- inc: increase (2 sc in the same stitch)
- dec: decrease (sc two stitches together)
- st(s): stitch(es)
- rep: repeat
- rnd: round
Special Notes
- This pattern is worked in joined rounds (with slip stitches) for a more symmetrical heart shape.
- Always begin each round with a chain and finish with a slip stitch.
- Stuff the heart as you go before the opening becomes too small.
- Tension should be tight to prevent stuffing from showing through.
Step-by-Step Pattern
First Heart Lobe
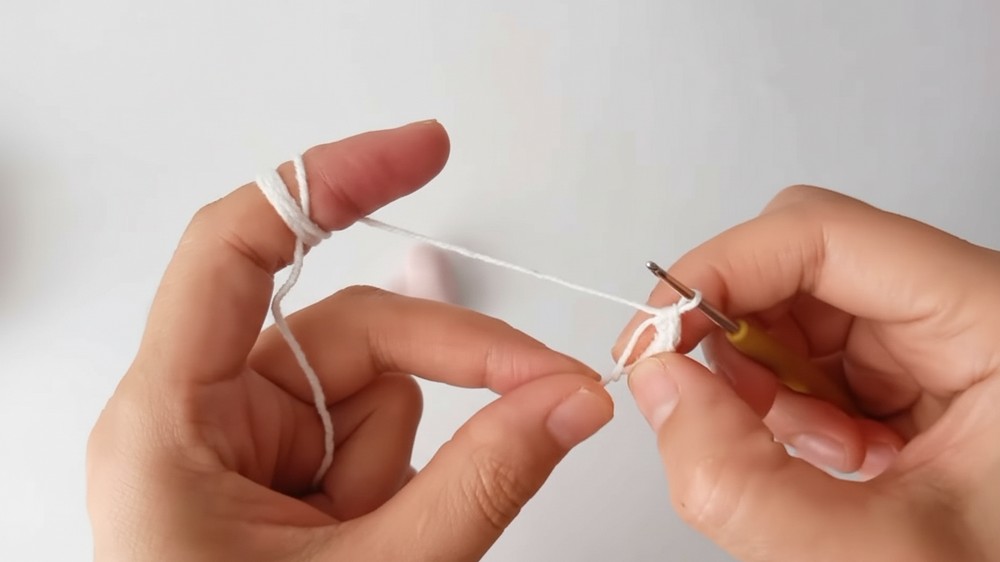
- Magic Ring: Make a magic ring.
- Rnd 1: Work 6 sc into magic ring. (6 sts)
- Close Magic Ring: Pull tail to close.
Sl st to the first sc to join round. - Rnd 2: Ch 1 (does not count as a stitch), work 2 sc into each stitch around (inc in each st). (12 sts)
Sl st to first sc to join round. - Rnd 3: Ch 1, (1 sc, inc) repeat around. (18 sts)
Sl st to first sc to join round. - Rnd 4–6: Ch 1, sc in each st around for 3 rounds. (18 sts each)
Join each round with a sl st to the first sc.
Do not fasten off.

Second Heart Lobe
- Without breaking yarn, ch 10.
- Magic Ring: The chain forms the base for the second lobe.
Work 6 sc along the chain (can either go into the chain or make a magic ring at the end). - Close Magic Ring: Sl st to the top of the first sc you made on the first lobe to join.
- Rnd 2: Ch 1, inc in each st around. (12 sts)
Sl st to first sc to join round. - Rnd 3: Ch 1, (1 sc, inc) repeat around. (18 sts)
Sl st to first sc to join round. - Rnd 4–6: Ch 1, sc in each st around for 3 rounds. (18 sts each)
Sl st to first sc to join each round.

Heart Body
- Joining:
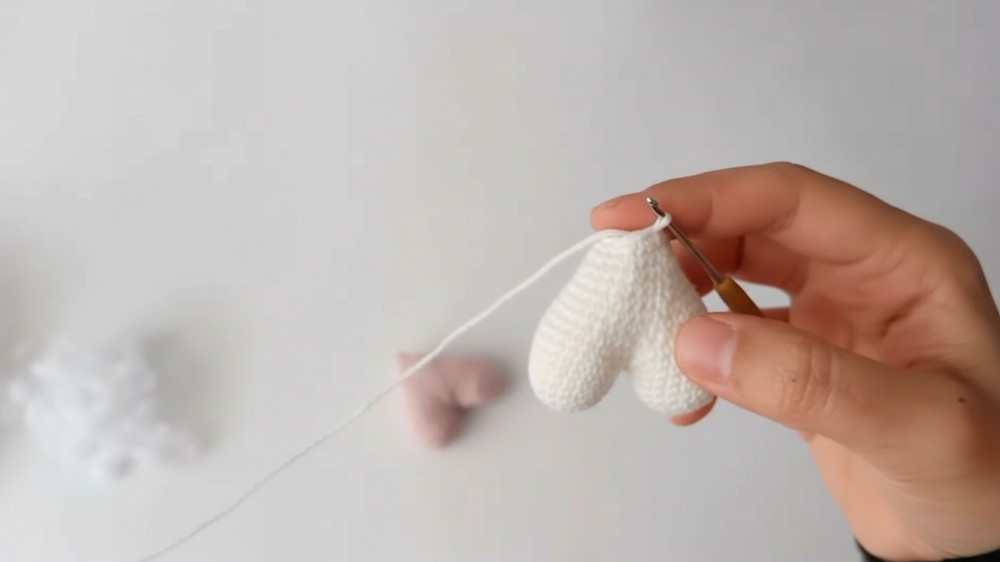
After completing both lobes, join with sc around both lobes (along the outside edge), working 36 sc total.- When you reach the bases of the lobes, continue sc around the whole shape to join fully.
- Sl st to the first sc to join.
- Rnd 2–3: Ch 1, sc in each st around (36 sts), join each round with a sl st.
(No increases or decreases)
Shaping and Decreasing
- Rnd 4:
(4 sc, dec) repeat around. (30 sts)
Join with sl st. - Rnd 5–6:
Ch 1, sc in each st around (30 sts), join with sl st. - Rnd 7:
(3 sc, dec) repeat around. (24 sts)
Join with sl st. - Rnd 8–9:
Ch 1, sc in each st around (24 sts), join each round with sl st. - Stuff your heart firmly.
- Rnd 10:
(2 sc, dec) repeat around. (18 sts)
Join with sl st. - Rnd 11:
Ch 1, sc in each st around (18 sts), join with sl st. - Rnd 12:
(1 sc, dec) repeat around. (12 sts)
Join with sl st. - Rnd 13:
Dec in each st around. (6 sts)
Join with sl st. - Fasten off leaving a long tail. Using yarn needle, thread through remaining stitches and pull tightly to close.
Finishing
- Attach Keychain Ring: If desired, use remaining tail to sew a ring at the top of the heart.
- Weave in ends.
- Shape your heart as needed; add more stuffing if required before full closure.

Conclusion
You have now completed a quick and practical heart keychain. This motif is versatile and easy to make, ideal for gifts or beginners practicing amigurumi.
Pattern Corrections & Tips
- Make sure to join rounds with slip stitches for a neat shape.
- Count stitches carefully after each round to ensure symmetry.
- Stuff before the heart opening gets too small to avoid difficulty.
- Customize your heart by using different yarn colors or embellishments.