
Easy Free Crochet Cat Pattern to Spark Cozy Vibes
Charm your projects with this Crochet Cat Pattern, featuring playful details, cozy textures, and whimsical appeal for every creation.
Graceful, curious, and full of personality, cats have captivated humans for centuries with their playful antics and gentle companionship. Translating this charm into crochet form creates a figure that is both decorative and endearing, offering a miniature companion that can brighten shelves, desks, or cozy corners. Perfect as a keepsake, a gift for cat lovers, or a whimsical accent for home décor, it combines artistry with warmth, capturing the essence of these beloved animals.
Fun Free Crochet Cat Pattern for Magical Collections
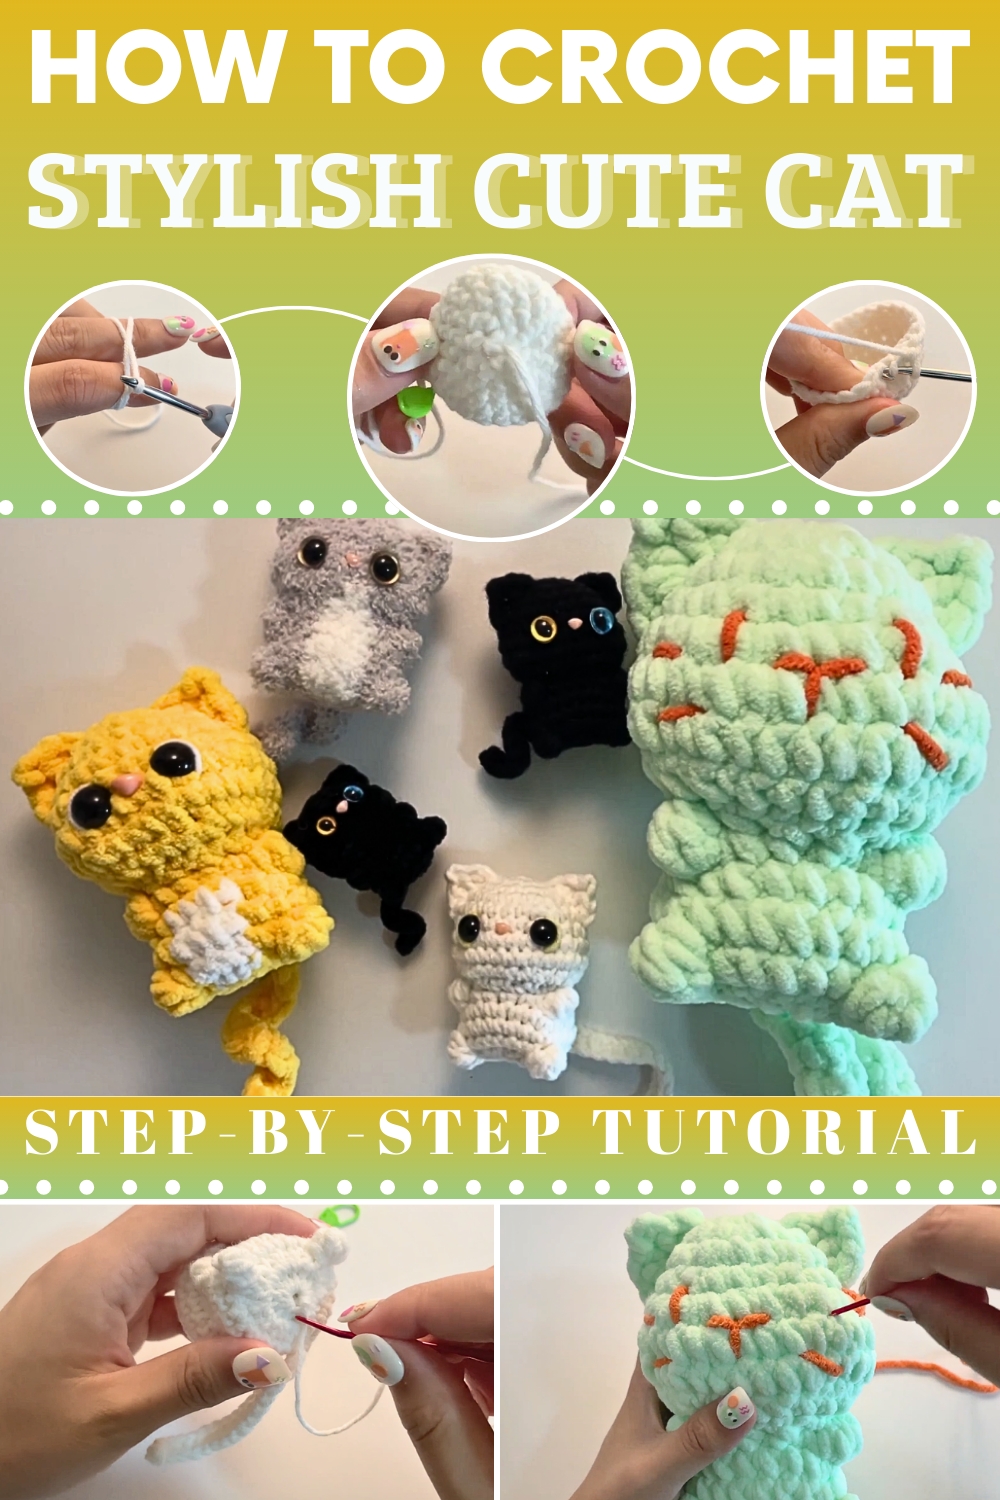
The process begins with forming a softly rounded body, carefully shaped to balance plumpness with proportion. Midway, the head is attached, allowing space for expressive facial features—eyes, nose, and mouth—that convey character and charm. Small, pointed ears and delicately shaped paws enhance the silhouette, while subtle details such as tail positioning or slight variations in posture give the figure life-like appeal. Each stitch contributes to a cohesive, polished look that reflects both cuteness and sophistication.
Lightweight, versatile, and full of character, this crochet cat can be adapted in a variety of colors, sizes, and poses to suit personal taste or décor style. Beyond its visual charm, it serves as a comforting keepsake or thoughtful gift, radiating warmth, playfulness, and handmade elegance in every stitch.
Materials Needed
To get started, gather the following materials:
- Yarn: A ball of yarn fitting the size of your crochet hook.
- Crochet Hook: Choose a hook that matches the yarn weight (e.g., 3.0–4.0mm).
- Polyfill Stuffing: To give the kitten shape and plushness.
- Darning Needle: For weaving in ends and adding embroidery details.
- Stitch Marker: To track the start of rounds.
- Scissors: For trimming loose ends.
- Optional Plastic Safety Eyes and Nose: For a polished look, or use yarn to embroider the features.
- Glue: To secure safety pieces.

Sleek Crochet Cat Pattern
Finished Size
The finished size will vary depending on your yarn and hook, but the kitten should measure about 10-12 cm tall.
Materials Needed
- Yarn:
- Suggested: Acrylic or cotton yarn in gray, pink, or black for the body and ears.
- If adding details like a nose or whiskers using yarn, keep a contrasting color (black or pink) handy.
- Crochet Hook:
- Use a size appropriate for your yarn. Example: 2.5mm-3.5mm for DK/sport weight yarn.
- Stuffing:
- Polyfill fiber stuffing for filling the body and shaping the kitten.
- Safety Eyes and Nose or Embroidery Supplies:
- Small round safety eyes or black thread to embroider the eyes.
- Stitch Markers:
- Useful for tracking rounds, especially in the body shaping.
- Scissors.
- Tapestry/Yarn Needle:
- For sewing details and weaving in ends.
Gauge
Gauge is not critical for this pattern, but ensure your stitches are tight to avoid gaps through which stuffing could emerge.
Abbreviations Used
- MR: Magic Ring.
- SC: Single Crochet.
- HDC: Half Double Crochet.
- DC: Double Crochet.
- TR: Treble Crochet.
- Inc: Increase (2 SC in one stitch).
- Dec: Decrease (combine two stitches into one).
- Sl St: Slip Stitch.
- Ch: Chain.
- St: Stitch(es).
- (...): Total stitch count per round.
Special Techniques
- Magic Ring (MR):
Begin with a loop of yarn around your fingers and work into the loop to create a tight and adjustable start. - Invisible Decrease (Dec):
Work through the front loops only of two stitches to create a subtle and professional decrease. - Bobble Stitch:
- Work 5 incomplete double crochets into the same stitch. Then yarn over and pull through all the loops on the hook.
Pattern Instructions
1. Body/Head
Round 1:
- Start with a magic ring (MR), crochet 6 SC into the ring. (6)

Round 2:
- Inc in every stitch. (12)
Round 3:
- (1 SC, Inc) 6 times. (18)
Round 4:
- (2 SC, Inc) 6 times. (24)
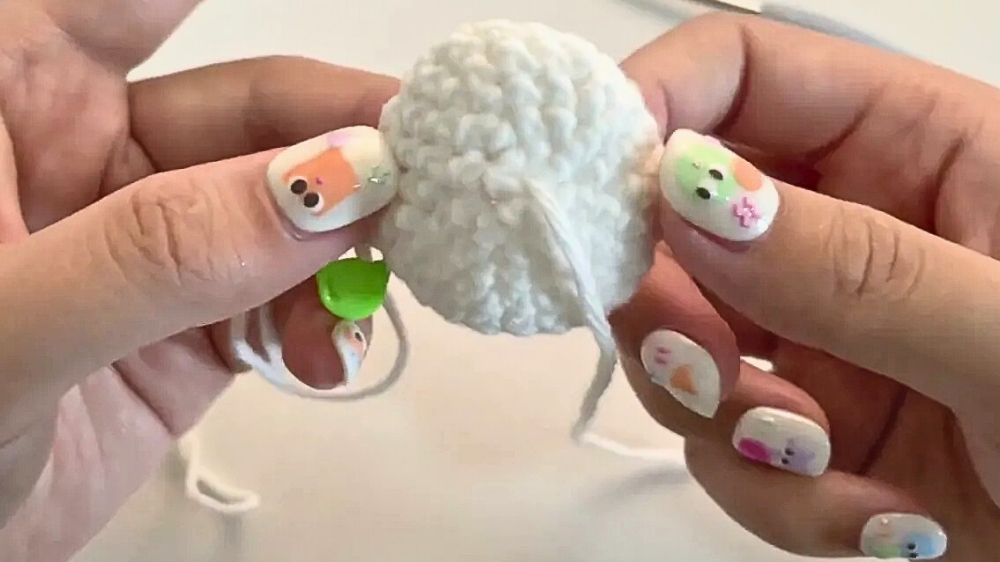
Rounds 5–6:
- SC around (24).
Round 7:
- (3 SC, Inc) 6 times. (30)
Round 8:
- SC around (30).
Round 9:
- (3 SC, Dec) 6 times. (24)

Round 10:
- (2 SC, Dec) 6 times. (18)
Round 11:
- (1 SC, Dec) 6 times. (12)
- Pause here to stuff the body firmly but evenly with polyfill.
Round 12:
- Work 6 Dec to close the top. (6)
- Fasten off and weave the tail through the remaining stitches. Pull tight to secure and close the hole.
2. Tail
- Ch 17. Begin crocheting into the second chain from the hook.
- Work 1 SC in each chain across. (16 SC)
- Fasten off and leave a tail for attaching to the body.
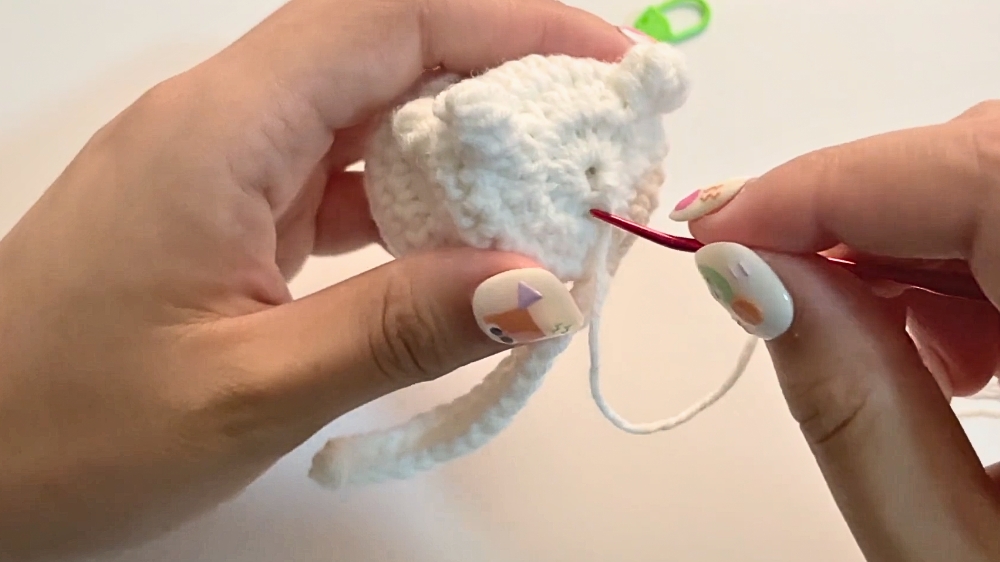
3. Ears
(Make 2)
- Insert your hook between rounds 2 and 3 for the left ear.
- Slip stitch and Ch 1 to secure the yarn.
Left Ear:
Step 1: Row 1: In the next gap, work 2 HDC, Ch 2, and Sl St into the second back loop of the chain.
Step 2: Row 2: Move to the stitch between rounds 3 and 4, work 2 HDC into the gap.
Right Ear:
Begin on the opposite side between rounds 5 and 6. Repeat the left ear instructions symmetrically.
4. Arms (Optional Bobble Detail)
(Make 2 directly onto the body at Round 11)
- Work 5 incomplete DCs into one stitch to form a bobble.
- Pop the bobble outward by pressing gently before proceeding.
- SC 6 in the round.
5. Feet
(Make 2 bobbles directly onto the base of Round 14.)
- Between the lower stitches on the body, work bobble stitches to form feet.
6. Face and Details
- Attach safety eyes or embroider eyes with black thread. Place between rounds 6 and 7, leaving a stitch or two between them.
- Embroider a simple straight stitch for the nose using pink thread just below the eyes.
- Add whiskers with fine black embroidery thread.

Finishing Touches
- Stuff Firmly: Ensure all body parts are stuffed evenly but not overfilled to maintain a smooth shape.
- Attach Tail: Use a needle to sew the end of the tail to the lower back of the body.
- Weave in Ends: Secure all loose yarn ends by weaving them into the body to hide and secure them.
Tips for Success
- Use Stitch Markers: To easily track the start and end of each round.
- Even Stuffing: Distribute filling evenly to avoid lumps or uneven shaping.
- Customizing Colors: Try different yarn colors for a personalized kitten. Gray, black, white, or even tabby multicolored looks great!
Conclusion
Your adorable crocheted kitten is now complete! With its rounded body, perky ears, and fluffy tail, this little cat is perfect for gifting or decorating any room. The mix of simple stitches and cute details makes this a fun project for beginners and advanced crocheters alike.
Final Words
Thank you for crafting along! If you enjoyed this project or have any questions, feel free to share your feedback or ask for guidance. Be creative and experiment with colors and details to make your kitten truly unique. Looking forward to crocheting with you again.