
Free Crochet Dog Max Grinch Pattern for Festive Decor
Bring festive smiles with this Crochet Dog Max Grinch Pattern capturing holiday spirit and playful character for cheerful seasonal displays.

Holiday-Ready Crochet Dog Max Grinch Pattern That Brings Smiles
A fun and festive plush figure inspired by a beloved holiday story can bring charm and personality to your décor or gifts. The Crochet Dog Max Grinch pattern lets you make a cute version of Max, the loyal dog companion from the Grinch tale, adding seasonal magic to your amigurumi collection or holiday display.
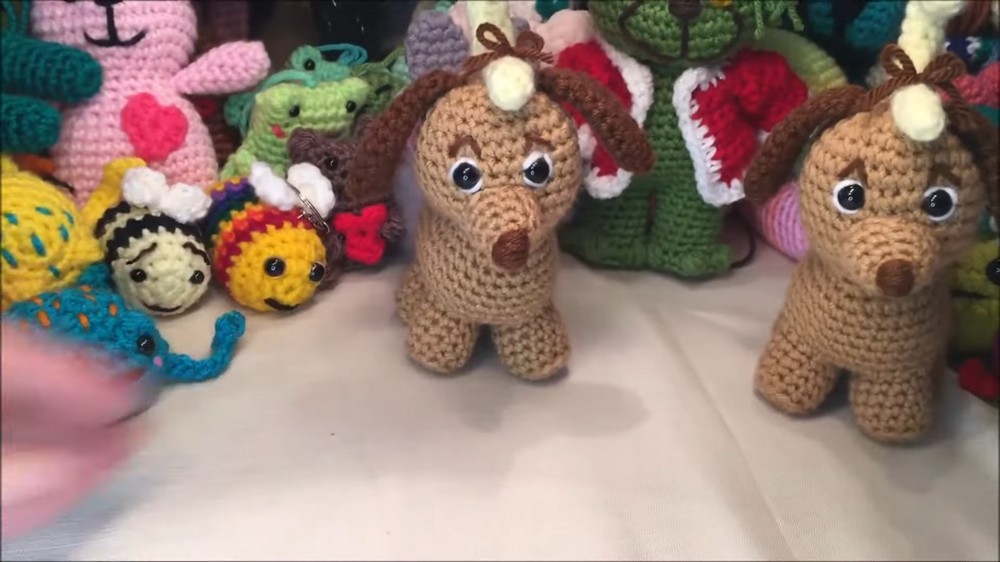
The finished dog often has an expressive face, floppy ears, and cute proportions that appeal to all ages, making it great as a handmade gift, ornament, keychain, or shelf companion. Because this design mixes simple shaping with recognizable character details, it draws smiles and keeps spaces feeling cozy and cheerful during special times of the year.
Seasonal Crochet Dog Max Grinch Pattern
Skill Level
- Intermediate to Advanced: Requires experience with crocheting in the round, color changes, increases, decreases, and assembling sewn parts.
Finished Size
- Approximately 6 to 8 inches tall (with a 4 mm hook and medium-weight yarn).
Materials
- Yarn:
- Main Color: Medium-weight yarn (#4) in the desired body color (e.g., light brown).
- Accent Colors: Medium-weight yarn for feet, muzzle, tail, ears (e.g., beige or darker brown).
- Horn Color: Yellow or gold yarn for the unicorn horn.
- Embroidery Yarn: Small amounts of black and white for eye highlights and nose details.
- Hook: 4 mm crochet hook (or as required for yarn type).
- Safety Eyes: 10 mm size (or adjust based on preference).
- Stuffing: Polyester fiberfill for stuffing the body, head, and smaller parts.
- Wire (optional for horn): Rubber-coated garden wire for shaping the horn.
- Scissors: For cutting yarn and embroidery thread.
- Darning Needle: For attaching parts and embroidery.
- Stitch Markers: Optional, but helpful for tracking rounds.
- Pins: For securing parts during assembly.
Key Abbreviations
- ch: chain
- sc: single crochet
- sl st: slip stitch
- inc: increase (2 sc in the same stitch)
- dec: decrease (single crochet 2 stitches together)
- st(s): stitch(es)
Special Notes
- Construction: The head, body, and legs are created as a mostly seamless unit. Additional features like the ears, muzzle, horn, eye embroidery, and tail will be sewn or added separately.
- Gauge: Not crucial but aim for tight stitches to prevent stuffing from showing.
- Customization: Adjust yarn colors for a playful or whimsical design.
- Keep Track of Rounds: Use a stitch marker or the provided row-by-row guide to ensure accuracy.
Step-By-Step Pattern
Step 1: Legs (Make 4)
- Round 1: Form a magic ring (MR). Work 6 sc into the ring. [6 sts]
- Round 2: (Inc in each st) repeat around. [12 sts]
- Round 3: Stitch into the back loops only, sc around. [12 sts]
- This creates a flat base for the leg.
- Rounds 4–6: Sc evenly around. [12 sts per round]
- This is 3 rounds of 12 sc.
- Count 36 sc if working consecutively.
- Finishing: Sl st into the next st and fasten off. Leave a short tail for securing inside the body later.
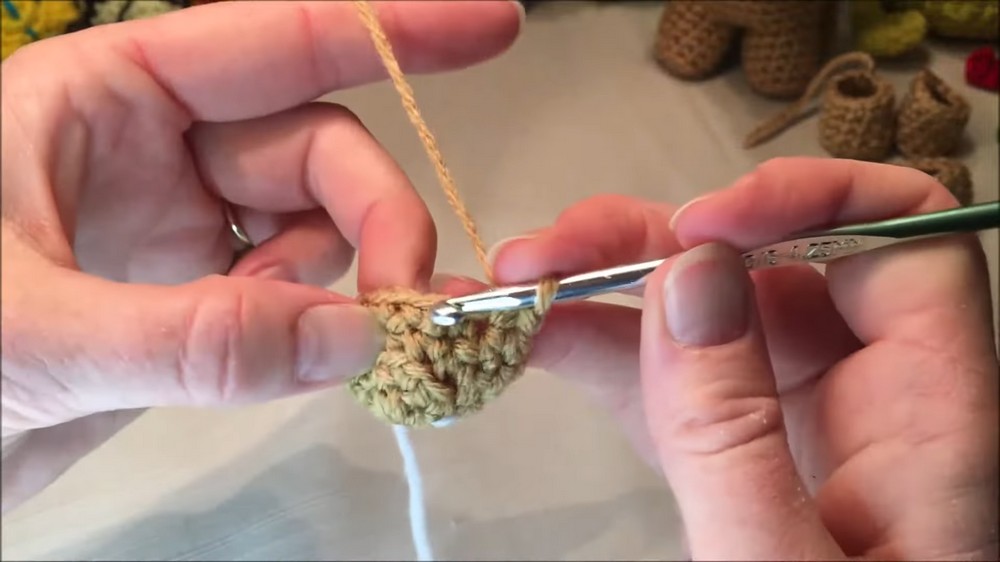
Repeat this process THREE more times to create 4 identical legs.
Step 2: Head & Body
Head
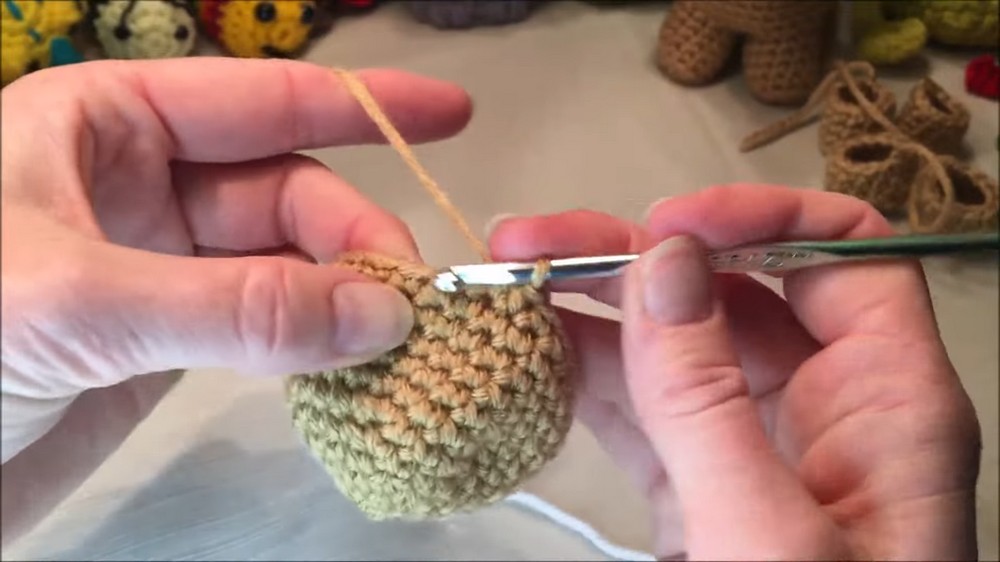
- Round 1: Begin with an MR. Work 6 sc into the ring. [6 sts]
- Round 2: (Inc in each st) repeat around. [12 sts]
- Round 3: (1 sc, inc) repeat around. [18 sts]
- Round 4: (2 sc, inc) repeat around. [24 sts]
- Round 5: (3 sc, inc) repeat around. [30 sts]
- Rounds 6–10: Sc evenly around. [30 sts per round]
Body
- Round 11: (3 sc, dec) repeat around. [24 sts]
- Round 12: (2 sc, dec) repeat around. [18 sts]
- Round 13: (1 sc, dec) repeat around. [12 sts]
At this point, you’ll chain 7 to begin transitioning toward the body.
- Chain Attachment for Body (Round 14):
- Chain 7. Work 6 sc along the chain, 12 sc around the head, and up the opposite side of the chain with 6 sc. [24 sts]
- Round 15: (3 sc, inc) repeat around. Adjust stitch count as needed for accuracy. End with 30 sts.
- Round 16: (4 sc, inc) repeat around. [36 sts]
- Rounds 17–21: Sc evenly around. [36 sts per round]

Add Eyes:
- Insert 10 mm safety eyes between rounds 7 and 8, spaced evenly 5 sts apart.
- Round 22 (Adding Legs):
- Attach the legs as directed: (2 sc, 6 sc through the leg and the body, 3 sc, 6 sc through other leg and body) repeat for all 4 legs.
- Rounds 23–24: Decrease evenly around. Fasten off, leaving a long tail for sewing and final adjustments.
Step 3: Additional Pieces
Muzzle
- Round 1: MR, work 6 sc into the ring. [6 sts]
- Round 2: (1 sc, inc) repeat around. [8 sts]
- Round 3: (2 sc, inc) repeat around. [10 sts]
- Round 4: (3 sc, inc) repeat around. [12 sts]
- Round 5: Sc evenly around. [12 sts]
Stuff lightly, sl st to close, and leave a long tail for sewing.
Tail
- Round 1: MR, work 4 sc. [4 sts]
- Rounds 2–5: Sc evenly around. [4 sts per round]
Sl st to close and leave a long tail for sewing.
Ears (Make 2)
- Round 1: MR, work 6 sc. [6 sts]
- Round 2: (1 sc, inc) repeat around. [8 sts]
- Round 3: Sc evenly around. [8 sts]
- Round 4: (3 sc, inc) repeat around. [10 sts]
- Round 5: Sc evenly around. [10 sts]
- Round 6: (1 sc, dec) repeat around. [6 sts]
- Rounds 7–9: Sc evenly around for 3 rows. [6 sts per round]

Fasten off and fold ear flat. Work 2 sc to close across the top and leave a long tail for sewing.
Horn
Large Horn:
- Round 1: MR, work 5 sc. [5 sts]
- Rounds 2–25: Sc evenly around. [5 sts per round]
- This is 24 rounds (120 sc total). Stuff lightly as you crochet. Add wire if desired for shape.

Small Horn:
- Rounds 1–5: Same as the large horn. Work 25 total sc.
Assembly Instructions
- Muzzle: Place 1 row below eyes and sew securely with a darning needle.
- Ears: Position on either side of the head, about 3 rows above the eyes. Flatten and sew securely.
- Horn: Insert the large horn between rows 3 and 4 on top of the head. If using the small horn, attach this piece to the top of the large horn.
- Tail: Attach the tail to the body, centered on the back.
- Eye Embellishments (Optional): Use white embroidery thread to create a bold eye outline, and use black or brown to add eyebrows.
- Nose Details: Use black embroidery thread to create a puffed oval or small nostrils.
- Bow (Optional): Tie a bow around the base of the horn using yarn for decoration.
Conclusion
Congratulations on completing Max the Unicorn! With its no-sew body design and whimsical features, this project combines functionality and creativity. Enjoy creating this fun and imaginative piece, and customize it with your favorite colors for a personal touch.
Tips
- Stuffing: Avoid overstuffing to maintain shape, but pack tightly enough for support.
- Securing Parts: Use pins to position appendages and ensure symmetrical placement before sewing.
- Customize Your Design: Experiment with color combinations and additional features like flowers, blush details, or a flowing mane.
Pattern Corrections
If the stitch count is slightly off in certain rounds (due to human oversight or tension differences), make minor adjustments by adding or omitting single sc stitches, ensuring the overall structure remains intact.