
Crochet Dog Amigurumi Free Pattern That Feels Special
Lovely joy begins with this Crochet Dog Amigurumi Pattern, guiding a cuddly puppy shape ideal for heartfelt gifts and charming decor homes.

Handmade Crochet Dog Amigurumi Pattern With Loving Touch
A cute dog figure with soft curves and gentle features brings warmth and joy wherever it is placed. This amigurumi dog has a friendly appearance that appeals to all ages, making it a lovely choice for home décor, gifts, or personal collections. Its compact size allows it to sit neatly on shelves or desks, while the smooth stitching gives it a tidy and polished look. The finished piece feels comforting to hold and visually pleasing, which makes it especially popular as a keepsake or a playful toy.
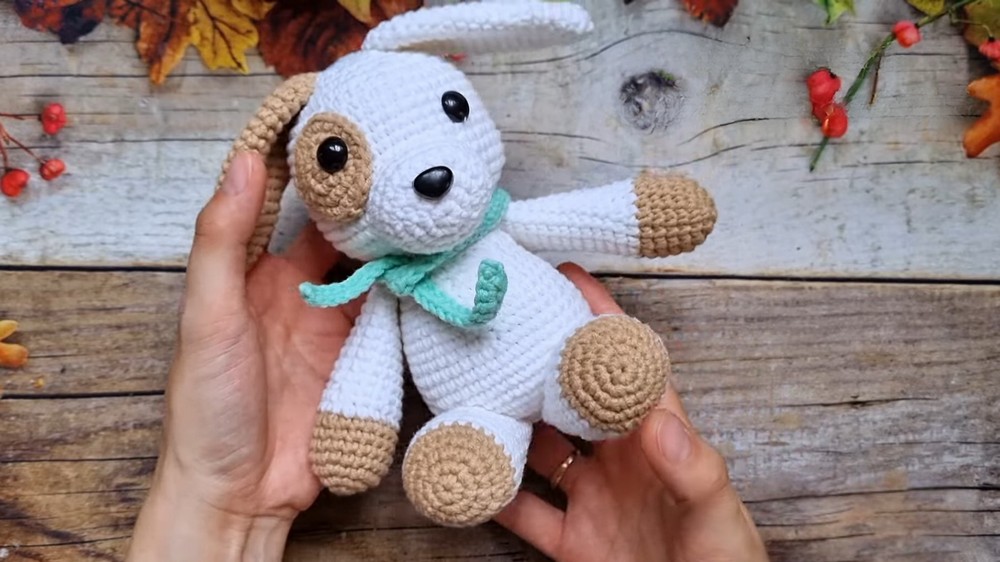
Crochet Pattern for a Cute Stuffed Dog
Skill Level
Intermediate – Requires knowledge of basic crochet stitches, increasing, decreasing, and assembly techniques.
Materials
- Yarn:
- 125 g of yarn in the following colors:
- Main Color for the body (e.g., brown or beige).
- Accent Color for details (e.g., white, black, or contrasting colors).
- Scraps of black yarn (for facial embroidery).
- 125 g of yarn in the following colors:
- Crochet Hook: 2.5 mm.
- Stuffing: Polyester fiberfill or cotton.
- Tapestry Needle: For sewing and securing parts.
- Scissors.
- Hot Glue (optional): For attaching eyes if you prefer not to sew.
- Stitch Marker: To mark rounds.
Special Techniques
- Magic Circle: A loop that allows you to tightly close the starting round.
- Single Crochet (Sc): Insert hook, yarn over (YO), pull up a loop, YO again, pull through two loops.
- Increase (Inc): Work two single crochet stitches in the same stitch.
- Single Crochet Decrease (Sc2tog): Insert hook, YO, pull up a loop. Insert hook into next stitch, YO and pull up another loop (3 loops on hook). YO and pull through all three loops.
- Reversing Formula: On even-numbered rounds, alternate where you increase to stagger increases and create a circular shape. Instructions on how to reverse are provided in the rounds below.
Pattern Instructions
Head
- Round 1:
- Start with a magic circle.
- Ch 1, work 6 Sc into the circle. Pull the yarn tail tightly to close the circle.
- Sl St into the first Sc to join.
- Round 2:
- Inc in each stitch around (2 Sc in each stitch).
- Total stitches: 12.
- Round 3:
- Work (Sc, Inc) around.
- Total stitches: 18.
- Round 4 (Reversing Formula):
- Alternate the increases: Work Sc, Inc, Sc (this creates a staggered alignment).
- Total stitches: 24.
- Round 5 (Normal Sequence):
- Work (Sc, Sc, Inc) around.
- Total stitches: 30.
- Repeat Rounds:
- Continue increasing by one Sc per round until you reach 48 stitches in Round 8. For example:
- Round 6: (Sc, Sc, Sc, Inc) – Total: 36.
- Round 7: (Sc, Sc, Sc, Sc, Inc) – Total: 42.
- Round 8: (Sc, Sc, Sc, Sc, Sc, Inc) – Total: 48.
- Continue increasing by one Sc per round until you reach 48 stitches in Round 8. For example:
- Rounds 9–18:
- Sc evenly in each stitch (48 stitches total per round).


Shape the Head:
8. Round 19:
- Begin decreasing using the reverse formula. Change from increases to decreases by replacing the Inc with Dec. For Round 19:
- Sc in next 3 stitches, Sc2tog (decrease).
- Total: 42 stitches.
- Round 20:
- Sc in next 4 stitches, Sc2tog.
- Total: 36 stitches.
- Continue Decreasing:
- Reduce by one less Sc between decreases in every subsequent row until only 12 stitches remain. For example:
- Row 21: Sc in 3, Sc2tog – Total: 30.
- Row 22: Sc in 2, Sc2tog – Total: 24.
- Row 23: Sc in 1, Sc2tog – Total: 18.
- Row 24: Sc2tog in all stitches – Total: 12.
- Reduce by one less Sc between decreases in every subsequent row until only 12 stitches remain. For example:
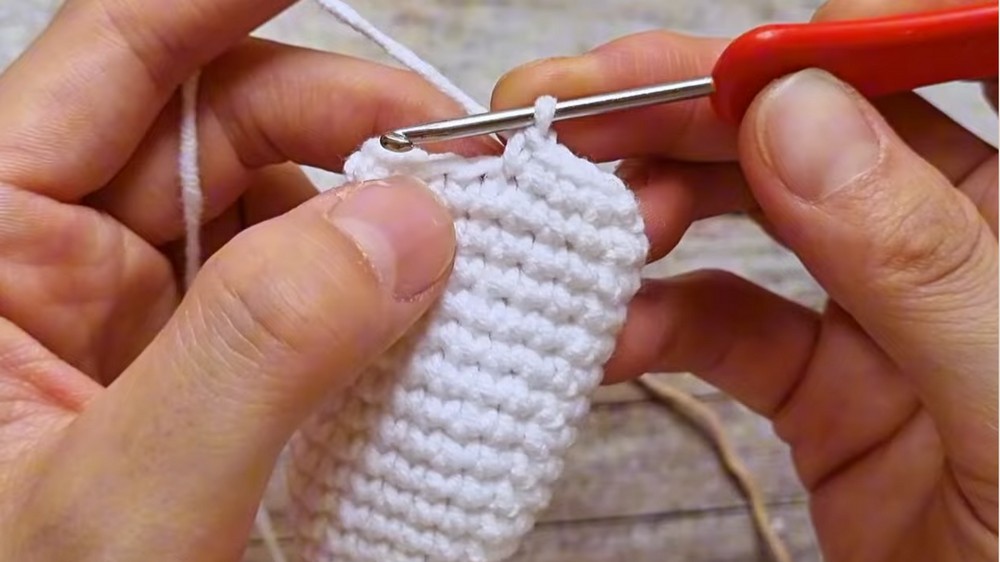
Stuff the Head Firmly and close the top using a tapestry needle. Pull tightly to create a rounded head.
Body
- Rounds 1–8:
- Follow the same instructions for shaping the head (stopping at 48 stitches).
- Rounds 9–18:
- Sc evenly, maintaining 48 stitches per round.
- Rounds 19–23 (Shaping):
- Follow the same decrease technique used for the head until the body gradually narrows. Reduce until you reach 15 stitches by Round 23.
- Optionally, alternate a full (non-decreasing) Sc row between decrease rows for a gradual taper.
- Stuff Firmly but not overfilled to maintain the soft structure.
Arms and Legs
Arms (Make 2)
- Round 1:
- Create a magic circle, Ch 1, and work 6 Sc into the circle.
- Round 2:
- Work (Sc, Inc) around.
- Total: 9 stitches.
- Rounds 3–7:
- Sc evenly in each stitch.
- Round 8-9 (Optional Color Change):
- Add an accent color and Sc evenly.
- Final Rounds (Taper):
- Sc in 2 stitches, Sc2tog around. Repeat this decrease to narrow the arm.
- Stuff the Arms lightly and sew to the body at an angle of approximately 45° to give a realistic arm positioning.

Legs (Make Two)
- Follow the same process as the arms, but extend the length to 10 rounds before tapering.
- Stuff with fiberfill.
- Flatten the opening and Sc across to close.
- Sew both legs to the bottom of the body, ensuring symmetry.
Tail
- Round 1: Start with a magic circle and Ch 1. Work 6 Sc into the circle.
- Round 2: Inc in each stitch (12 Sc).
- Round 3: (Sc, Inc) around (18 Sc).
- Rounds 4–6: Work Sc evenly in each stitch.
Stuff firmly, and sew to the back of the body. Adjust the position so the tail balances the dog to stay upright when placed on a flat surface.
Face
- Eyes:
- Create a small circle using the head instructions up to Round 3 for each eye.
- Use black yarn for embroidery or hot glue premade black safety eyes to the head. Position evenly above the nose.
- Nose:
- Follow the same process as the eyes, then add 2–3 extra rows without increasing to give depth.
- Attach the nose to the lower part of the face, slightly above where the mouth will be. Stuff lightly before sewing.
- Mouth:
- Use black yarn to embroider a small inverted "Y" shape below the nose.
Scarf
- With an accent yarn color, Ch 50–60, enough to loop around the neck.
- Work back across the chain with 1 Sc in each stitch for a simple look, or use Hdc (Half Double Crochet) for a thicker appearance.
- Attach securely around the dog’s neck, and use a small button or tie a knot for a cute finishing touch.
Finishing the Dog
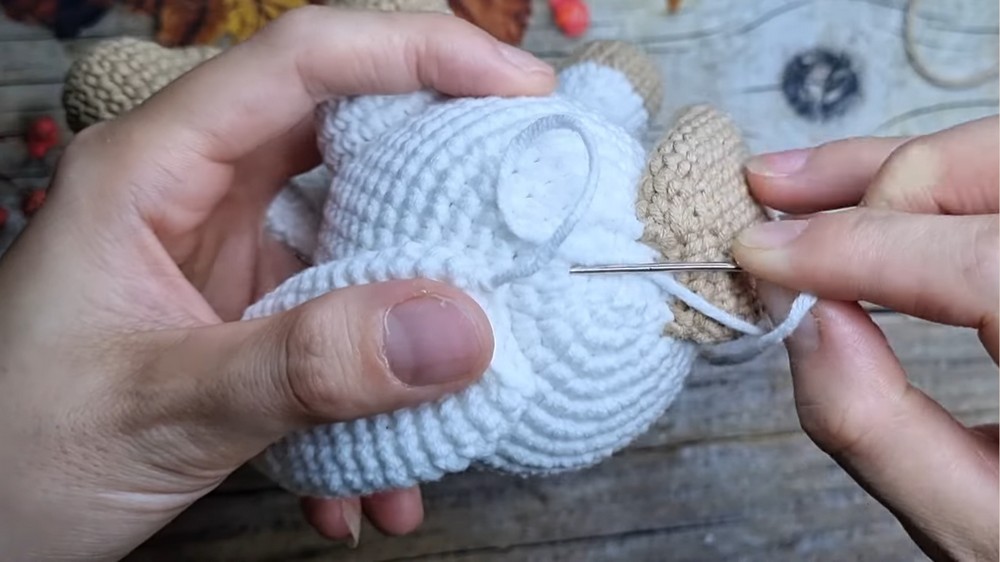
- Attach the head to the body by sewing the neck area securely. Tighten the thread between the rows for strength and hide loose ends.
- Sew the arms and legs at the correct angles to ensure balance.
- Install the eyes, nose, and mouth on the head.
- Check all parts for symmetry and security.
- I was complet the ears already. so , here i can attached ears to head.
Tips to Maintain the Pattern
- Avoid overstuffing: Overstuffing the body or limbs can distort the shape, making it look uneven.
- Use fabric glue for safety: Avoid small detachments of decorations when gifting this to children.
- Wash Gently: Spot-clean the finished dog as needed.
Final Words
You have successfully created a cute 15 cm crochet dog. This handmade item is perfect for gifting, decorating, or using as a keychain. Feel free to customize the colors of the body, add accessories, or embroider small extras to make it unique. Have fun crocheting and share your work with loved ones!