
Pretty Crochet Kitty In Tulip Free Pattern With A Playful Touch
Bring a sweet touch to your decor with this Crochet Kitty in Tulip Pattern that add a cute flower scene to shelves desks or cozy corners.
One day, I found a really cute little project that made me smile—a tiny kitty hiding inside a crochet tulip flower. This is called the Crochet Kitty In Tulip Free Pattern. It is a soft, small, and fun item that can be used as a gift or decoration. The flower petals open gently, and inside is a sweet kitty’s face, making it extra special. This project is great for anyone who likes simple and pretty crochets that bring a happy feeling to a room or to someone’s heart.
Fun Crochet Kitty In Tulip Free Pattern For Cat Lovers

The video by Shelen Crochet shows clear and simple steps to make this item. The tulip petals feel soft but hold their shape well because of a little wire inside. They curve nicely like real flower petals. The tiny kitty inside is made with smooth crochet stitches and has little eyes and a nose sewn on, giving it a very cute look. The colors are bright but gentle, making the flower nice to look at. The whole style is fun and friendly, perfect to show off on a shelf or table.
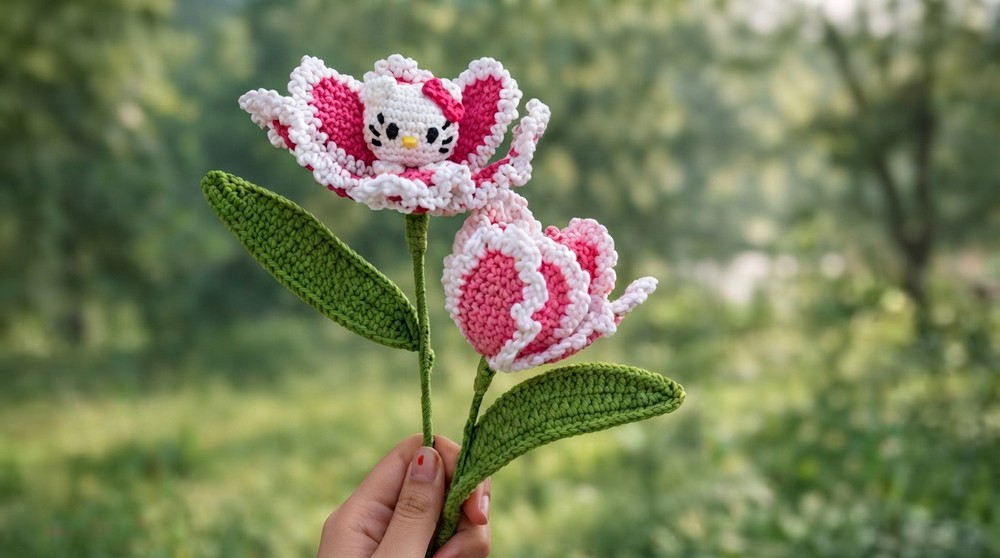
This crochet tulip with the kitty can be used in many ways. It makes a lovely decoration for your desk, shelf, or windowsill, adding a touch of cheer to any space. It is also a sweet gift for friends, family, or children, showing thought and care. You can use it as a keychain charm or a cute bag accessory because it is light and easy to carry around. Its soft texture makes it a comforting little item to hold or share. The Crochet Kitty In Tulip Free Pattern is a charming and useful handmade piece that brings smiles wherever it goes.
Crochet Tulip Kitty Pattern
This crochet project features a tulip that gently opens, showing a Hello Kitty figure hidden within its petals. Each part of the process focuses on simple shapes and clear steps, using familiar materials and easy-to-read stitches. Special touches like shaping wires and embroidery add extra detail, making each flower soft, sturdy, and full of character. With basic amigurumi skills, some colorful yarn, and a bit of patience, even those with moderate experience will complete every section with success. The result is a cheerful tulip that holds a sweet surprise, ready to brighten any desk, shelf, or heartfelt gift.
Before You Begin
- Base Stem: 30 cm wire or skewer wrapped in green yarn.
- Hello Kitty Inside: Made with amigurumi (magic ring, false X single crochet), facial embroidery, ears, hands, and bow.
- Tulip Petals: 3 small and 3 large petals, all with wire for shaping, and picot edging for decoration.
- Leaf: One big leaf, also formed around wire.
- Assembly: Stack all petals upside down over Hello Kitty, tie them to the stem.
Important Notes
- Work the Hello Kitty core in false X single crochet for tight, neat stitches.
- Wrap and glue all wire ends to stop them poking out.
- Watch the referenced tutorial video if you get lost.

Materials Needed
- Yarn: Cotton, size 6 – Colors: White, Fuchsia, Green, Black, Yellow
- Crochet Hook: 2.5 mm
- Wire/Stem Supports:
- 30 cm plastic-coated wire or wooden skewer (stem)
- Thin shaping wire (petals/leaf)
- Stuffing: Fiberfill (for Hello Kitty)
- Tools: Tapestry/embroidery needle, scissors, hot glue gun
Sizing
- Tulip Height: 25–30 cm (depends on wire)
- Hello Kitty Size: About 5 cm tall
Gauge
Not important, but make sure your stitches are tight so stuffing doesn’t show through.
Stitch Abbreviations
| Term | Meaning |
|---|---|
| ch | chain |
| sl st | slip stitch |
| sc | single crochet |
| hdc | half double crochet |
| dc | double crochet |
| inc | increase (2 sc in one stitch) |
| dec | decrease (sc 2 together) |
| mr | magic ring |
| FLO | front loops only |
Special Techniques
- False X Single Crochet: Insert hook, yarn over, pull up loop, YARN UNDER, pull through both loops.
- Picot Edging: short ch loops + sc combos to make a bumpy flower edge.
Let's Start Crocheting
Part 1: Hello Kitty Head & Body Core
Use White Yarn and 2.5 mm hook.
- Round 1:
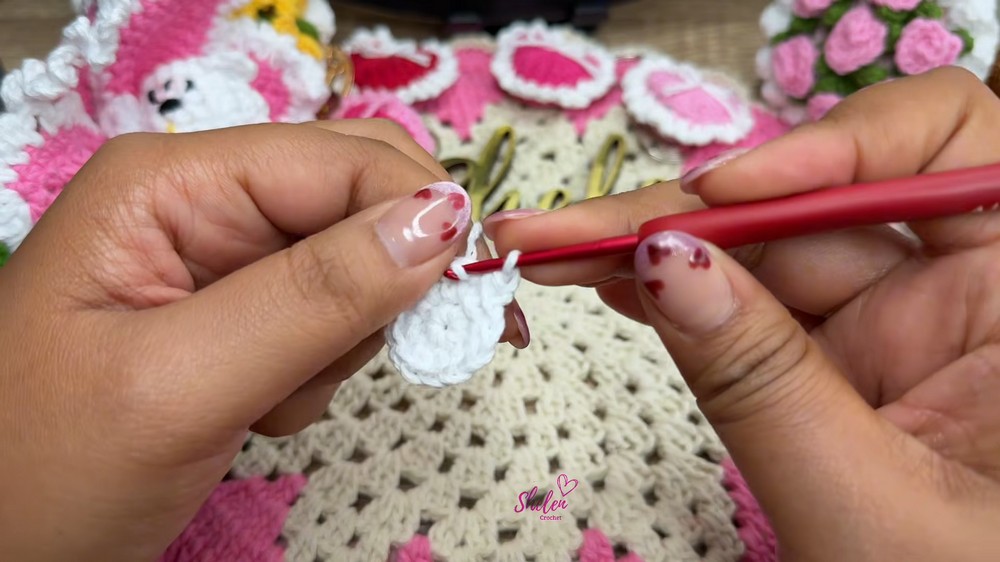
- mr, ch 1, 6 sc with false X stitch into ring. Pull ring tight, sl st to first st. (6 sts)
- Round 2:
- ch 1, 6 inc (2 sc in each st around). sl st to join. (12 sts)
- Round 3:
- ch 1, (1 sc, 1 inc)—repeat 6 times. sl st to join. (18 sts)
- Rounds 4–7:
- ch 1, 1 sc in each st all the way around, sl st to end. (18 sts, 4 rounds total)
Stop & Embroider Face
- Eyes & Eyelashes:
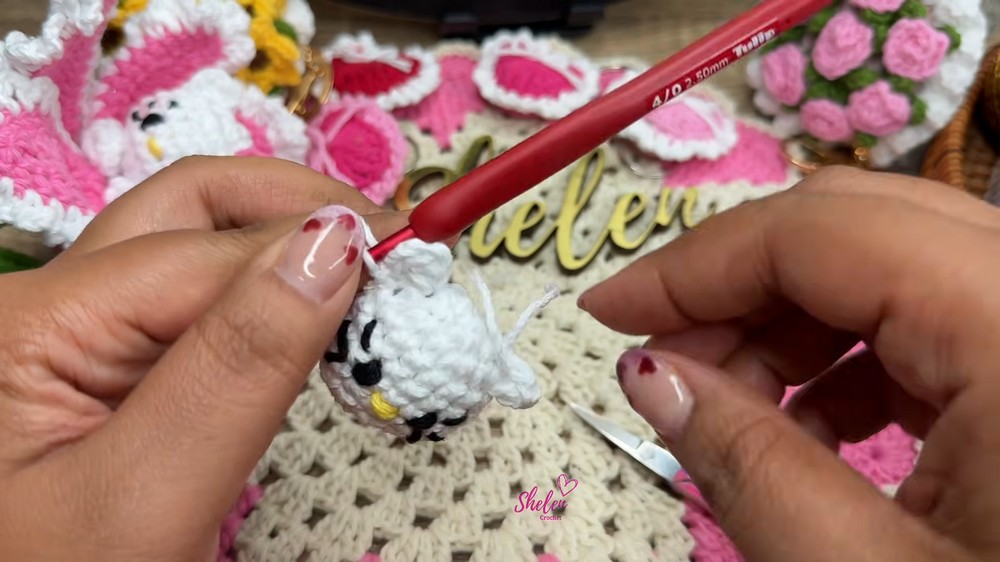
- Use black yarn; on Round 6, front, make eyes by wrapping thread 3x over a stitch; add 3 tiny eyelash lines each. Leave 3 stitches between eyes.
- Nose:
- Use yellow yarn; horizontal nose right between eyes (wrap 3x).
- Round 8:
-
- ch 1, (1 sc, 1 dec FLO)—repeat 6 times. sl st to join. (12 sts)
- Stuff Head Now
- Fill with fiberfill until round and firm.
- Round 9:
- ch 1, 6 dec (sc2tog) all the way around. sl st, ch 1, cut yarn leaving a tail. (6 sts left)
- Close Head:
- Use needle to pull tail through the front loops only of last 6 sts, pull tight, weave in and cut.
Part 2: Hello Kitty Details (Ears, Bow, Hands)
Ears (Make 2)
- Where to attach: Start at Round 3 of head, about one stitch out from the outer lash.
- Ear:
- ch 2 with both yarn ends (drop one tail), 1 dc in same base st, ch 2, sl st to top of Round 3.
-
- Fasten off, weave in tails.
Bow (Make 1, Fuchsia)
- How to work bow:
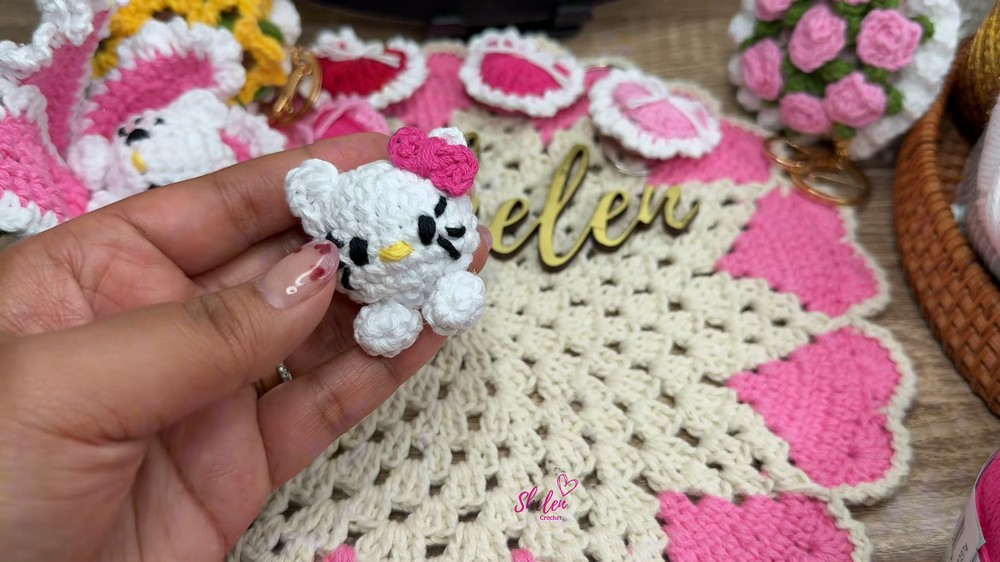
- Into mr, ch 2, 1 hdc, ch 2, sl st into ring, ch 2, 1 hdc, ch 2, sl st into ring.
- ch 1, leave long tail, tighten mr.
- Wrap tail around bow center 3x, tie at back, trim.
- Glue to base of one ear using hot glue.
Hands (Make 2, White)
- Round 1: mr, ch 1, 6 sc in ring. Join with sl st. (6 sts)
- Round 2: ch 1, 1 sc in each st around. sl st, ch 1, cut thread. (6 sts total)
- Assembly: Hide threads inside hands, glue two hands side by side and attach right below Kitty’s chin for a peeking look.
Part 3: Small Petals (Make 3, Fuchsia)
- Round 1: ch 12 (first knot doesn’t count).
- Start in 2nd ch from hook:
1 sc, 1 hdc, 6 dc, 1 hdc, 1 sc, 3 sc in last ch. - Down the other side:
1 sc, 1 hdc, 6 dc, 1 hdc, 1 sc. - sl st to first ch.
- Start in 2nd ch from hook:
- Round 2 (with Wire):
- Lay thin wire around petal edge.
- ch 1, sc over wire in each st up the petal.
- In middle top: 3 sc in one st (turn).
- Down the other side: sc over wire in each st.

-
- sl st, ch 1, cut yarn, leave 2 cm wire tails, twist them together.
- Round 3 (White Border):
- Join White Yarn at the base.
- 5 sc up one side.
- Ch 1, sc; ch 2, sc; ch 3, sc (repeat ch 3, sc sequence 5x).
- At top: ch 3, sc in same st (3x).
- Down: ch 3, sc (repeat 5x), ch 2, sc; ch 1, sc then 7 sc to finish.
- sl st, ch 1, cut yarn, glue/tuck tail.
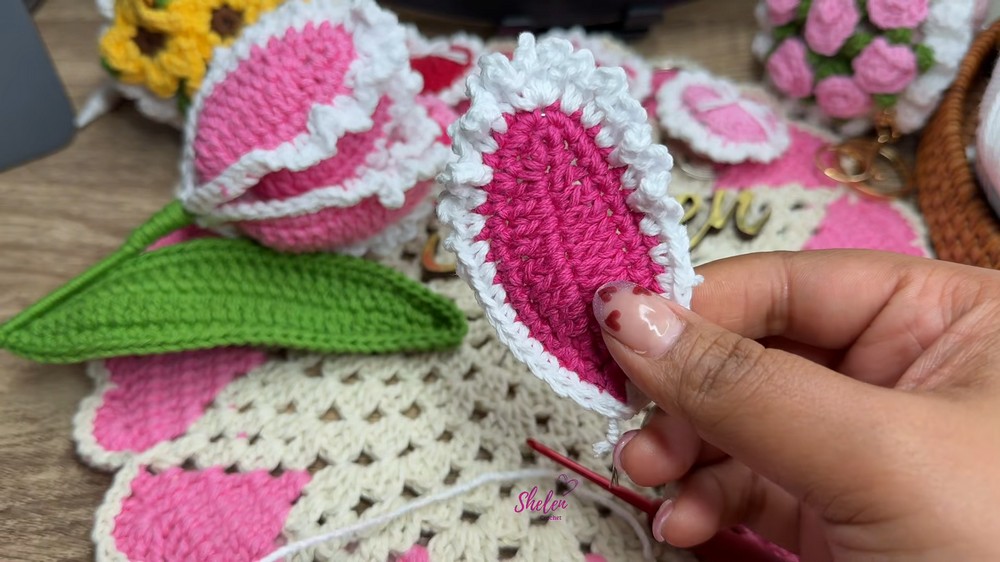
Part 4: Large Petals (Make 3, Fuchsia)
- Round 1: ch 14.
- 2nd ch from hook: 1 sc, 1 hdc, 8 dc, 1 hdc, 1 sc, 3 sc in last ch.
- Other side: 1 sc, 1 hdc, 8 dc, 1 hdc, 1 sc.
- sl st.
- Round 2 (add wire):
- Lay thin wire.
- ch 1, 14 sc over wire, 3 sc at peak, 14 sc down.
- sl st, ch 1, cut, twist wire ends.
- Round 3 (White Border):
- Join White at base.
- 6 sc up.
- Ch 1, sc; ch 2, sc; ch 3, sc.
- Ch 4, sc repeat 5x up.
- At top: ch 4, sc (3x in same st).
- Down: ch 4, sc (5x), ch 3, sc; ch 2, sc; ch 1, sc, then 8 sc to base.
- sl st, ch 1, cut, glue/tuck thread.

Part 5: Leaf (Make 1, Green)
- Round 1: ch 30.
- In 2nd ch: 1 sc, 1 hdc, 9 dc, 3 hdc, 2 sc, 3 hdc, 21 dc, 3 hdc, 2 sc, 3 sc in last ch.
- Up other side: 2 sc, 3 hdc, 21 dc, 1 hdc, 1 sc.
- sl st.
- Round 2 (add wire):
- Lay wire all around the edge.
- ch 1, sc in each stitch over wire to top, 3 sc in tip, continue sc around.
- sl st, ch 1, cut, wrap wire base with yarn end, curl leaf for shape.

Assembly & Finishing Up
- Stem: Dab silicone glue on wire/skewer end. Insert into the bottom of Hello Kitty’s head and glue firmly in.
- Small Petals: Place the 3 small petals upside down (wrong side in) around Hello Kitty.
- Use hot glue at base, wrap Green Yarn tightly around wires at base.
- Large Petals: Place the 3 large petals evenly spaced (wrong side in) on the outside. Continue wrapping green yarn (secure layers) down stem.
- Leaf: Insert leaf about halfway down stem. Wrap green yarn tightly at leaf base, keep wrapping to the end.
- Finish Stem: Add glue at wire tip, neatly cover end with yarn, trim any extra.
Finished Size
- Open flower is about 10 cm wide and 25–30 cm tall.
Conclusion & Ending Words
After all the work and attention to detail, your tulip stands tall with bright petals that can open and close around Hello Kitty. Every part, from the green stem to the flower’s edges, shows care and creativity. This project adds a touch of fun and color wherever it goes. Friends, family, or anyone who sees it will notice the thought behind each stitch and the soft surprise hidden inside. Try different color combinations in the future or display your tulip somewhere special. For even more ideas and step-by-step help, subscribe to the Chelen Crochet channel on YouTube.
