
Easy Crochet Snoopy Tulip Free Pattern + Tutorial
Bring charm and color to your home with the easy Crochet Snoopy Tulip pattern that you can use for gifts, decorations, or to brighten up any room.
Shelen Crochet shares a detailed crochet pattern through a YouTube tutorial, giving full credit to the original creator of this charming design. Watching her video is a great way to follow the instructions clearly and support her channel.
Unique Crochet Snoopy Tulip Free Pattern for Collectors
The Crochet Snoopy Tulip is a small and fun project that combines the famous Snoopy character with a bright tulip flower. Its size makes it easy to display on shelves, desks, or windowsills. In addition to being a cute decoration, it can be used as a unique gift topper or a keychain by adding a ring. Some people also use it as a brooch or a bag charm to add a playful touch to their outfits.
To make this project, you need simple materials such as colored yarn, a crochet hook, and stuffing to shape the flower and character. The pattern uses basic stitches, making it accessible for beginners as well as those with some crochet experience. The small size and straightforward technique mean it can be completed fairly quickly.

Because of its versatility, the Crochet Snoopy Tulip works well in different settings. It brightens up children’s rooms, can be part of seasonal decor, or adds a cheerful element to workspaces. It’s also a thoughtful handmade gift for friends, family, or Snoopy fans.
In summary, the Crochet Snoopy Tulip is an easy and enjoyable project that results in a charming piece useful for decoration, gifts, and personal accessories.
Snoopy Tulip Amigurumi Pattern
How to create a beautiful Snoopy-inspired tulip, perfect as a fun gift, whimsical decoration, or as part of your amigurumi flower garden. This detailed pattern walks you through every step: crocheting the flower, creating the leaf, making and attaching Snoopy’s little ears and face, wrapping the stem, and assembling everything into a delightful finished tulip.
Quick Overview Of Pattern
- Crochet the tulip flower in the round.
- Embroider facial features and attach safety eye and nose.
- Create and attach two three-dimensional Snoopy ears.
- Make a wired leaf with green yarn for realism and stability.
- Wrap and insert a sturdy, wrapped wire stem.
- Finish by assembling parts, adding blush, and styling.
Notes
- Use tight, even stitches to prevent the stuffing from showing.
- The “false X” single crochet is a variation creating the X-shaped look, but you may substitute regular single crochet.
- Safety eyes are optional; you may embroider the eyes instead if preferred.
- To avoid wire ends poking through, ensure they’re well-blunted and wrapped, or use the skewer stick alternative.
- The pattern uses continuous spirals with slip stitches to close rounds—do not count the beginning chain as a stitch unless indicated.
- Gauge is not critical, but your flower will look best with a firm, dense fabric.
Skill Level
Advanced Beginner to Intermediate
You should know how to:
- Make a magic ring
- Single crochet (sc)
- Increase, decrease
- Slip stitch (sl st)
- Work in the round
- Embroider basic features
- Basic amigurumi assembly
Materials
- Cotton yarn size 6: White, Black, Grass Green
- Crochet hook: 2.5 mm
- Safety eye (nose): 12 mm (oval black) or small black button/bead
- Embroidery needle
- Tweezers (for wire shaping)
- Scissors
- Blush (optional, for cheeks)
- Pillow stuffing/fiberfill
- 30 cm strong wire or skewer stick (for main stem)
- Thin wire (for leaf core)
- Lighter (to melt the safety eye base for security, optional)
- Silicone glue (for stem and assembly)
Measurements / Sizing
- Tulip height: Approx. 15–18 cm with stem
- Width at flower: Approx. 4–5 cm
- Leaf: 9–10 cm long, 2–3 cm wide
Gauge
Gauge is not crucial. Your stitches should be tight enough that stuffing does not show between them.
Stitch Abbreviations
| Abbreviation | Stitch |
|---|---|
| ch | chain |
| sl st | slip stitch |
| sc | single crochet |
| inc | increase (2 sc in next st) |
| dec | decrease (sc 2 together) |
| st(s) | stitch(es) |
| rnd(s) | round(s) |
Special Stitches
- False X Single Crochet: Insert hook in front loop and corresponding bar behind work, yarn over, pull up loop, yarn over, pull through two loops. Substitute with regular sc if preferred.
- Invisible Decrease (dec): Insert hook into front loops only of next two stitches, yarn over, pull through both front loops, yarn over, pull through both loops.
- Magic Ring: Adjustable center ring for working in the round.
Crochet Guide
Tulip Flower (Head/Face, White)
Rnd 1:
With white yarn and 2.5 mm hook, make a magic ring.
Ch 1 (does not count as st), 6 sc in ring.
Join with sl st to first sc. (6 sts)
Rnd 2:
Ch 1. Inc in each st around. (12 sc)

Sl st to join.
Rnd 3:
Ch 1. (Sc, inc) around. (18 sc)
Sl st to join.
Rnd 4:
Ch 1. (Sc, inc, sc) around, repeat 6 times. (24 sc)
Sl st to join.
Rnd 5:
Ch 1. (3 sc, inc) around, repeat 6 times. (30 sc)
Sl st to join.
Rnd 6:
Ch 1. (2 sc, inc, 2 sc) around, repeat 6 times. (36 sc)
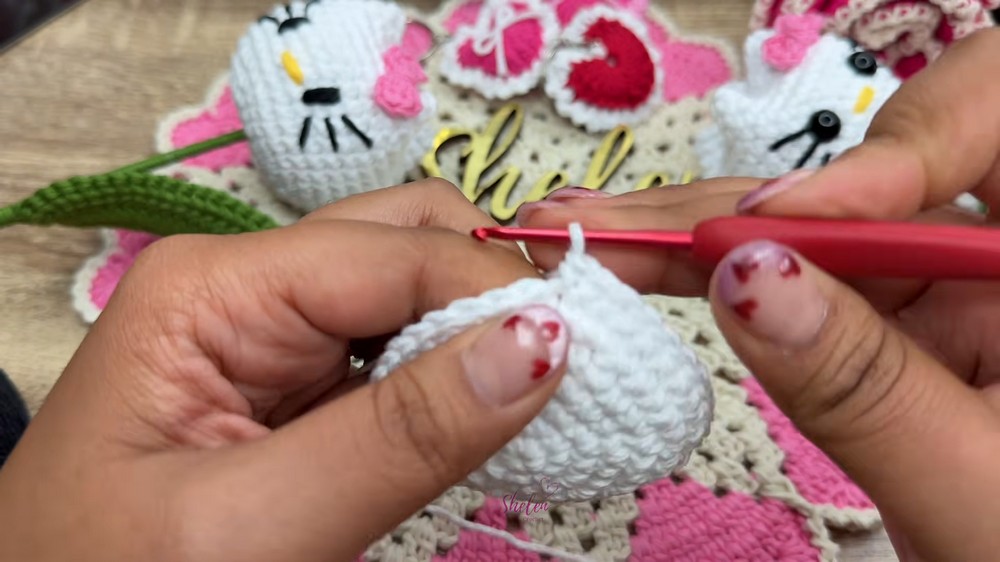
Sl st to join.
Rnd 7:
Ch 1. Sc in each st around. (36 sc)
Sl st to join.
Rnd 8–16:
Repeat Rnd 7 for each subsequent round—sc in every st, sl st to join (36 sc per round).

Fasten off, leaving a long tail to close the tulip after stuffing.
Leaf (Grass Green, wired)
Foundation:
Ch 1 (does not count as st).
Ch 25.
Insert wire:
Lay thin wire along chain, gently holding close as you work along.
First side:
Starting in 2nd ch from hook:
1 sc, 1 hdc,
17 dc (one in each ch),
2 hdc,
3 sc.
Corner:
Bend wire at the tip, in same place: 2 more sc.
Return side:
Continue down opposite side of chain:
2 sc, 2 hdc,
17 dc,
1 hdc, 1 sc.
Cut wire to match length. Fasten off.
Edge round:
Attach green yarn, ch 1. Sc in each st to tip. At tip: (sc, ch 2, sc) in same st. Continue sc around remaining edge.
Sl st, ch 1, fasten off.
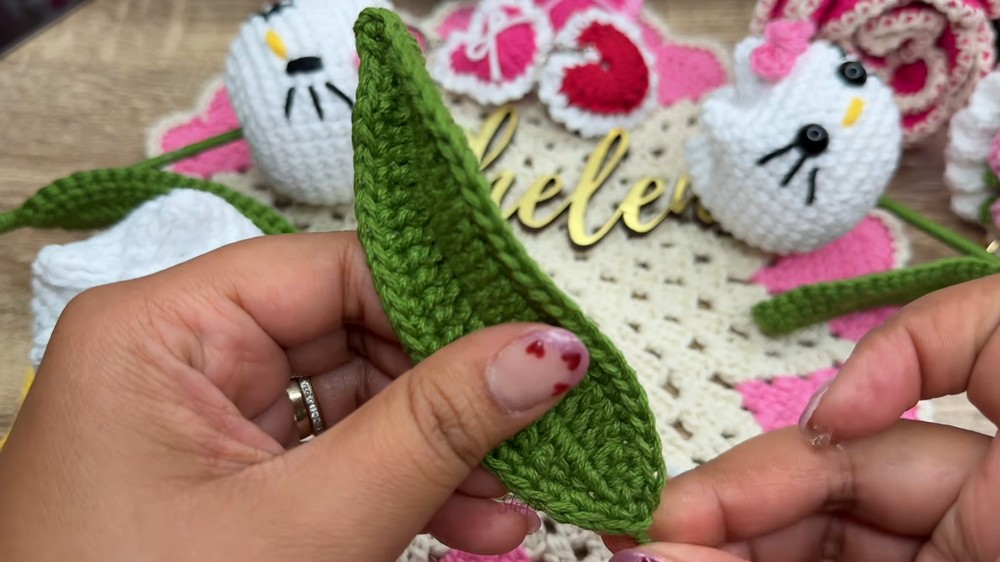
Use tweezers to shape and secure ends of wire so it’s not sharp.
Snoopy Ears (Make 2, Black)
Rnd 1:
With black yarn, make a magic ring, ch 1. 6 sc in ring. Sl st to first sc. (6 sts)
Rnd 2:
Ch 1. Inc in each st around. (12 sc)
Sl st to join.
Rnd 3–6:
Ch 1. Sc in each st around. (12 sc)
Sl st to join at end of each round.
Rnd 7:
Ch 1. (Sc, dec) around. (8 sts)
Sl st to join.
Rnd 8–10:
Ch 1. Sc in each st around (8 sc per round).
Sl st to join.
Fasten off, leaving a long tail for sewing.
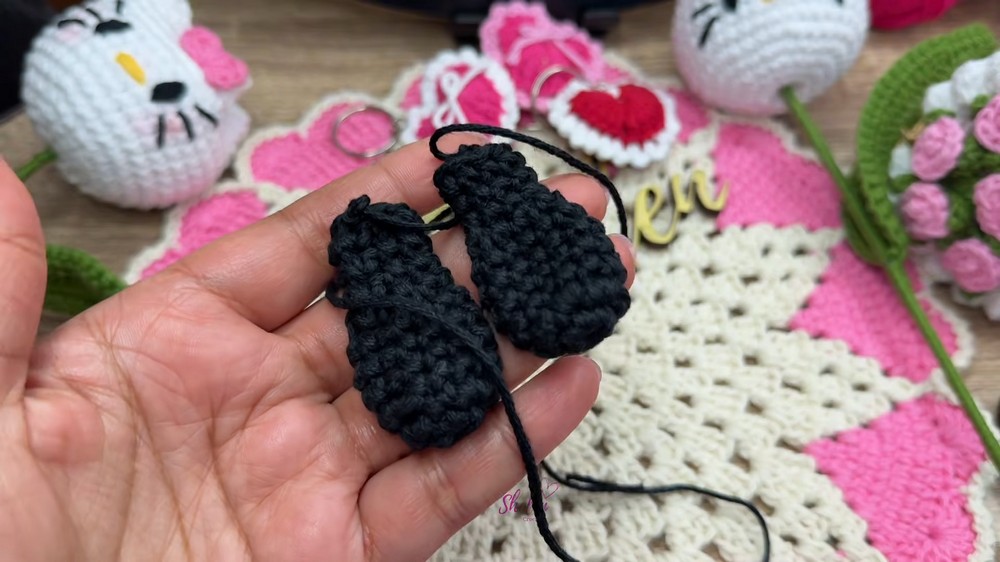
Repeat for second ear.
Assembly & Face Embroidery
Stuff and Close Tulip
- Insert a good amount of fiberfill into tulip, shaping as you go so the form is smooth and rounded.
- Use the long yarn tail with needle to weave and cinch closed the opening, going side to side, then making a few passes to close gaps. Hide tail inside tulip.
Attaching Nose and Eyes
- Position safety eye (as nose) between rounds 7 and 8 at the front center.
- Use lighter (with care!) to gently melt the inside end of the safety eye to prevent the nose from pulling out.
- For eyes, with black yarn and needle, embroider over rounds 12 and 13, spacing them about 3 stitches apart horizontally and 1 round down vertically from the nose. Secure neatly at the back.
Attaching Ears
- Using the yarn tails, sew each ear on a line two stitches up from the eyes, one on the right, one on the left. Place symmetrically to ensure Snoopy’s face is balanced.
- Attach securely, weaving in all ends.

Blush (Optional)
- Add a bit of powder blush, rubbing gently onto each cheek for extra cuteness.
Stem and Final Assembly
- Wrap Main Stem: Leave about 3 cm at one end of the 30 cm wire (or skewer). Using green yarn, apply silicone glue sparingly at the start and as you go, wrapping the yarn tightly to cover the wire, especially where the leaf attaches.
- Attach Leaf: Decide on position and overlap, trimming the wire if needed. Wrap yarn tightly over the leaf stem to secure. Continue wrapping to the bottom end, glue in place and cut yarn.
- Attach Tulip to Stem: Add a little glue to the open hole at the base of the tulip. Insert the covered wire stem firmly inside, hold until set.
- Final Touches: Tidy up the position of the ears and eyes, adjust the leaf, and fluff the tulip if necessary.


Finished Size
- Snoopy Tulip: About 15–18 cm (6–7 in) tall with stem, flower approx. 4–5 cm (1.5–2 in) wide.
Conclusion and Ending Words
This project blends amigurumi with fun hand embroidery and practical assembly techniques, making a unique decorative flower. Feel free to play with colors or make a whole garden of tulips with different facial expressions.