
Modern Free Crochet Juan Carlos Bodoque Pattern for Amigurumi Fans
Find joy in stitching with this Crochet Juan Carlos Bodoque Pattern that's offering a unique design that adds personality to your projects.
Bringing charm and personality to life, the crochet Juan Carlos Bodoque pattern turns a beloved character into a delightful handmade plush. Perfect for gifting, decorating shelves, desks, or children’s rooms, it stands out with vibrant colors and playful details. Its expressive features and carefully shaped limbs make it visually appealing while maintaining a soft, cuddly feel.
Free Crochet Juan Carlos Bodoque Pattern for Display
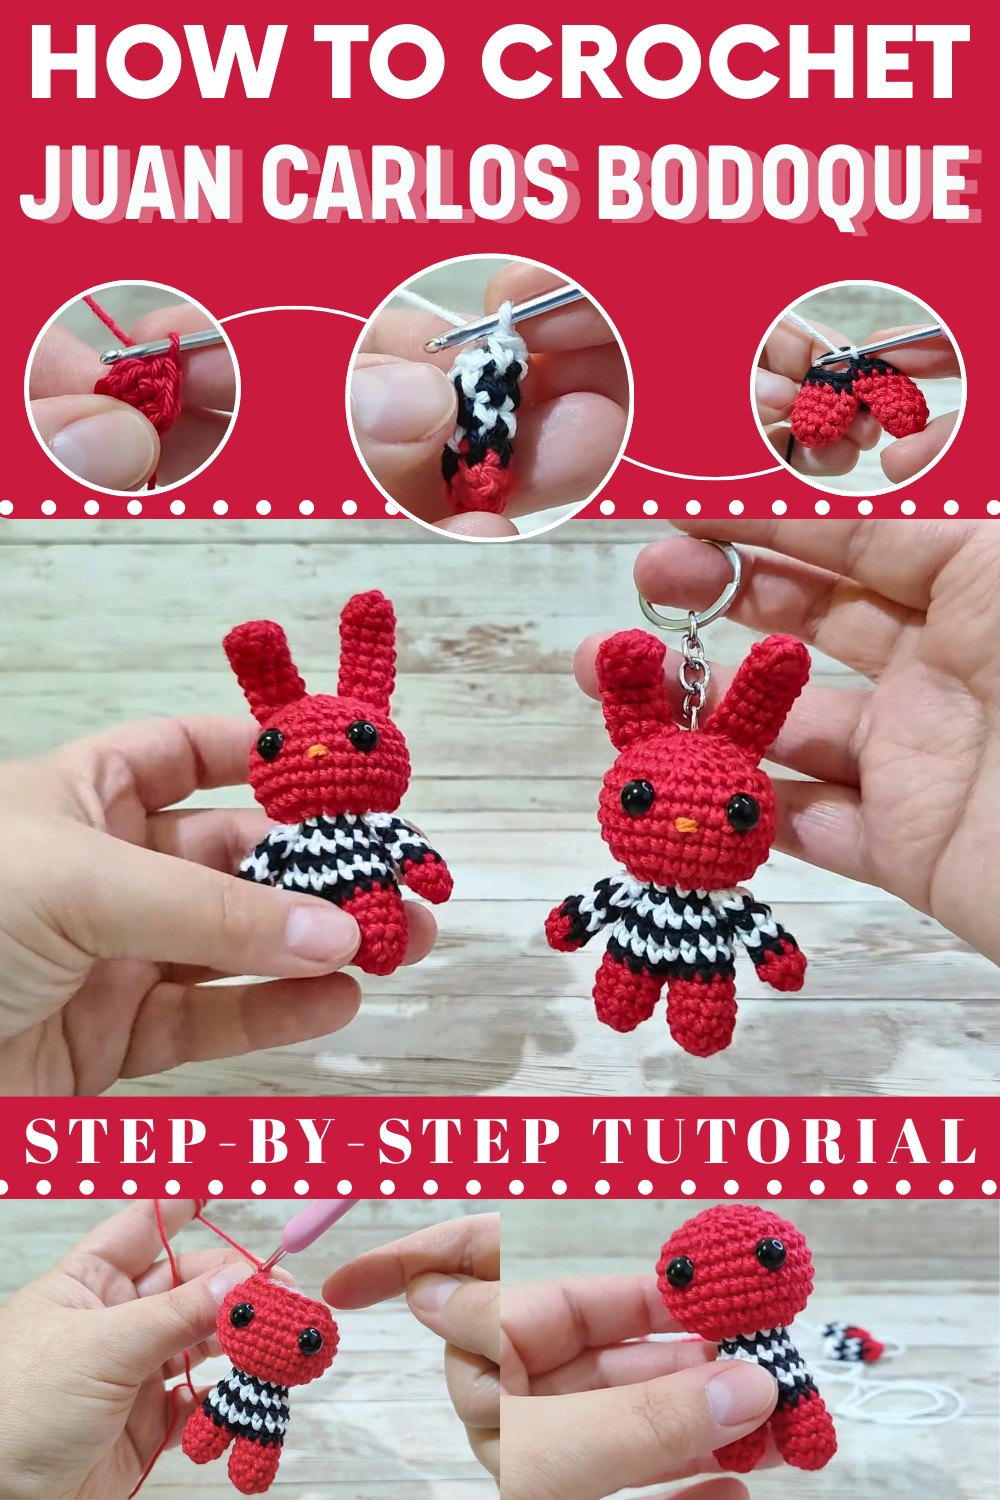
Suitable for intermediate makers and ambitious beginners, it’s an engaging way to learn while producing a charming piece. Whether displayed, gifted, or added to a collection, the Juan Carlos Bodoque amigurumi brings joy and creativity to any space, making it a truly rewarding crochet project. The pattern uses a variety of techniques, including single crochet, increases, decreases, and magic rings.

These stitches create a balanced, three-dimensional structure that’s both satisfying and educational. Attention to shaping and precise stitching results in a neat, professional-looking finish, while proper stuffing gives the plush its soft yet defined form. Beyond the finished product, this project helps improve crochet skills, offering opportunities to practice seamless joins, creative color changes, and size customization.
Juan Carlos Bodoque Mini Amigurumi Keychain Pattern
Materials
- Yarn: Sport/Light worsted weight in the following colors:
- Main color (body/arms/legs/ears): Pink or red, as per character
- White (shirt/leg/arm accents)
- Black (pants/arm accents)
- Red (shirt/body base)
- Orange (for nose embroidery)
- Hook: 2.0 mm-2.25 mm crochet hook
- Stuffing: Polyester fiberfill stuffing
- Notions:
- Yarn needle for sewing & embroidery
- Scissors
- Stitch marker (optional)
- Keychain hardware/ring
Abbreviations (US Terms)
| Abbreviation | Meaning |
|---|---|
| MR | Magic Ring |
| ch | Chain |
| sc | Single Crochet |
| inc | Increase (2 sc in same st) |
| dec | Decrease (sc2tog) |
| sl st | Slip Stitch |
| st(s) | Stitch(es) |
| FO | Fasten Off |
Special Notes
- The pattern is worked in continuous rounds unless otherwise specified.
- Stuff as you go.
- For neater color changes, always finish the last yarn over of the stitch before the change with the new color.
- The arms and legs feature color striping; carry the unused color inside stitches or leave yarn on the inside and pick up as needed.
Pattern
Ears (Make 2)
- With main color: 7 sc in MR (7)
- Rounds 2–7: sc in each st around (7)
- Flatten and close: Align the edges, sc through front and back together across opening (3 sc to close).
- Finish: Ch 1, FO, leaving a long tail for sewing.

Arms (Make 2)
- With main color: 6 sc in MR (6)
- Round 2: sc in each st around (6)
- Change to black: sc in each st around (6)
- Change to white: sc in each st around (6)
- Repeat rows of black and white as follows:
- Round 5: black (6)
- Round 6: white (6)
- FO, leave a long yarn tail for sewing.

Legs (Make 2)
- With main color: 6 sc in MR (6)
- Round 2: (sc, inc) x3 (9)
- Rounds 3–4: sc in each st around (9)
- End first leg: FO, leave tail.
- Do not FO second leg! Proceed to join legs for body.
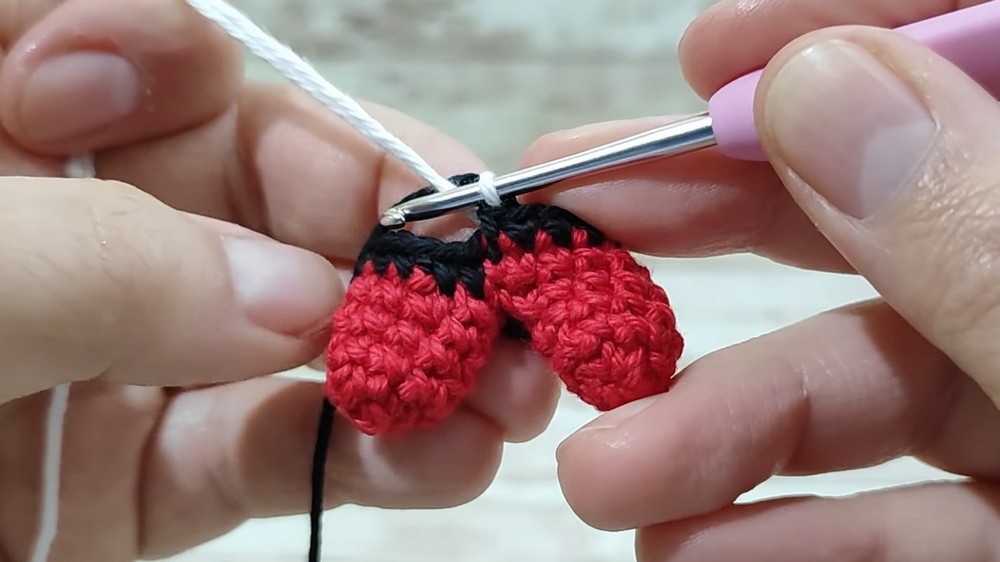
Body (Worked from legs up)
- With second leg, ch 1.
- Join both legs: sc all the way around first leg (9), sc in ch (joining chain), sc all the way around second leg (9), sc in ch (joining chain on opposite side), total 20 sc per round.
- Round 6: Change to black. sc in each st around (20)
- Round 7: Change to white. (8 sc, dec) x2 (18)
- Round 8: Change to black. sc in each st around (18)
- Round 9: Change to white. (4 sc, dec) x3 (15)
- Round 10: Change to black. (3 sc, dec) x3 (12)
- Round 11: Change to white. sc in each st around (12)
- Round 12: Change to red. inc in each st around (24)
- Round 13: (3 sc, inc) x6 (30)
- Rounds 14–17: sc in each st around (30)
- Round 18: (3 sc, dec) x6 (24)
- Mark eye placement between rounds 16 and 17, about 6 sts apart.
- Round 19: (2 sc, dec) x6 (18)
- Stuff head and continue stuffing as you close.
- Round 20: (sc, dec) x6 (12)
- Round 21: dec x6 (6)
- FO, close remaining hole with a needle.


Assembly
- Arms: Flatten and pinch each arm, then sew to the upper sides of body, aligned below the head.
- Ears: Sew ears to the top of the head, symmetrically spaced and slightly forward-facing.
- Embroider nose: Using orange yarn or embroidery thread, make a few horizontal stitches below eyes, between rounds 15–16.
- Attach keychain ring: Sew or hook through center top of head.
- Shape as desired: Slightly bend ears for expression.
Pattern Correction
- Leg and body join: After making both legs, do not FO the second; chain 1 to join into a single piece before continuing as body.
- Maintain color changes as established for arms, legs, and body—carry yarn for clean edges.
- Adjust numbers proportionally if you want a larger figure (increase all stitch/round counts).
Tips
- Always keep color changes on the same "back" side for a clean look.
- To keep your mini amigurumi firm, add a bit more stuffing than you think you need, using a small tool like a chopstick or tweezers for precision.
- Refer to photo/video for expression and ear placement if in doubt.
Conclusion
This tiny Juan Carlos Bodoque is the perfect palm-sized mascot or keychain! Simple colorwork and quick shaping make it an ideal beginner project or last-minute gift. Have fun experimenting with colors and expressions for other mini characters.