
Free Crochet Amigurumi Vampire Pattern Perfect for Spooky Fun
Sink into spooky fun with the Free Crochet Amigurumi Vampire Pattern, a cute handmade plushie perfect for Halloween décor, gifts, or playful charm.
A playful little evening companion that mixes spooky charm with handmade appeal, this Free Crochet Amigurumi Vampire Pattern offers a delightful way to add personality to shelves, desks, or gift shelves. The piece shines with personality, the little fangs peeking out beneath a mischievous grin, the velvet‑like cloak hinting at twilight adventures, and the balanced proportions offering aesthetic delight.
Sweet Free Crochet Amigurumi Vampire Pattern That Sparks Smiles
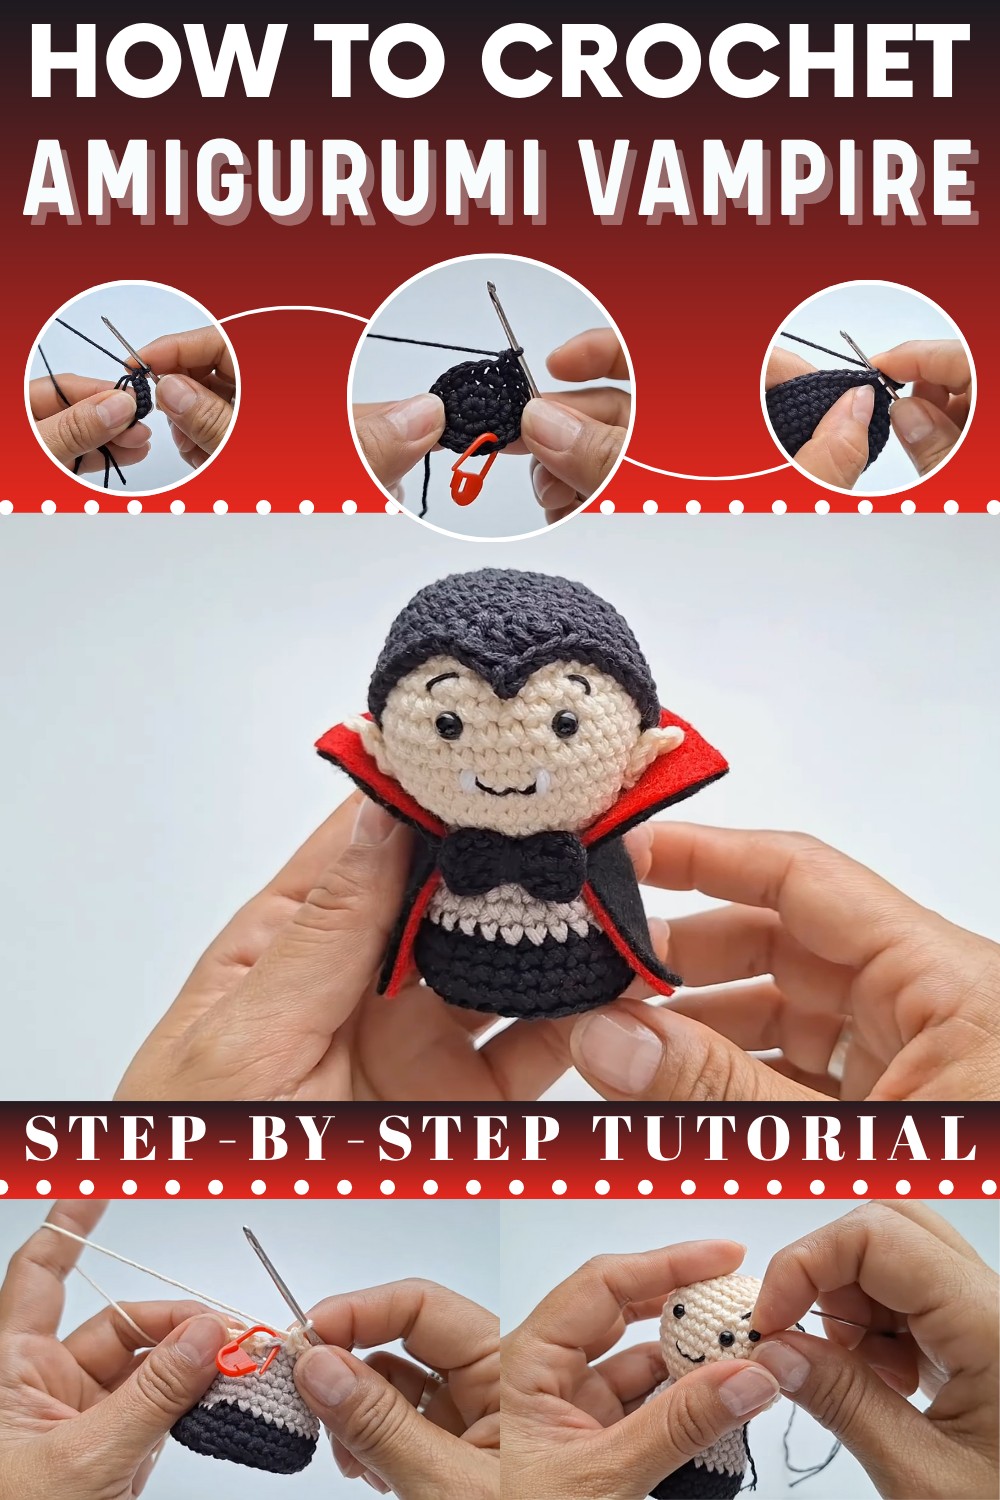
It’s not only about completing something fun, it’s about owning a handcrafted accent that bridges playful design and tactile comfort. The Free Crochet Amigurumi Vampire Pattern invites you to take pleasure in a small project that makes a big impression.

This project has real perks: you’ll sharpen your amigurumi skills with tight stitches, color changes, and small‑piece assembly; you’ll use leftover yarns and finish a compact, adorable figure quickly; and you’ll end up with a charming decoration or unique gift that sparks smiles and conversation.
Crochet Vampire Amigurumi Pattern Step-by-Step
Materials List
- Yarn: 100% cotton, 2 mm thickness (or sport/fingering weight), in:
- Black (hair, base of body)
- Sand (skin tone for face, ears)
- Light grey (shirt)
- White (fangs/mouth details)
- Hook: 2.0 mm crochet hook (or size for amigurumi tightness)
- Stuffing: Polyester fiberfill/synthetic stuffing
- Safety Eyes: 5 mm, pair (plus washers)
- Felt: Rectangles, Black and Red, each approx. 11 cm × 6 cm (for cape)
- Tapestry Needle: For sewing and embroidery
- Scissors
- Stitch Marker: For beginning of rounds
- Pins & Tweezers: For assembly and hiding ends
- Cardboard/Plastic Lid: For flat base
- Lighter: Optional, to secure safety eye backs
- Glue: Cold or hot glue (for cape/final assembly)
Key Abbreviations (US Terms)
- mr – magic ring
- sc – single crochet
- inc – increase (2 sc in one st)
- dec – decrease (invisible decrease preferred)
- sl st – slip stitch
- st(s) – stitch(es)
- ch – chain
- dc – double crochet
- BLO – back loop only
Special Notes
- All rounds are worked in a spiral (do not join unless stated).
- When changing color: Finish the last yarn over of the stitch before the change with the new color.
- Stuff as you go for best shape, especially before complete closure.
- Modify hook/yarn for a larger or smaller vampire if desired.
Pattern
Base/Body
With Black:
- Round 1: mr, 6 sc (6)
- Round 2: inc in each st around (6 inc) (12)
- Round 3: (sc, inc) × 6 (18)
- Round 4: (2 sc, inc) × 6 (24)
- Round 5: (3 sc, inc) × 6 (30)


At this point, cut a circle of cardboard or plastic to fit as a firm base (approx diameter of your work). Set aside for now.
- Round 6: BLO sc in each st around (30)
- Rounds 7–8: sc in each st around (30 per round)
Change to Light Grey (shirt):
- Rounds 9–10: sc in each st around (30)
- Make color change in last pull through of previous st to start grey.
Insert base disk and glue in place if desired. Continue stuffing as you finish.

Neck Decreases
- Round 11: (3 sc, dec) × 6 (24)
- Round 12: sc in each st around (24)
- Round 13: (2 sc, dec) × 6 (18)
- Round 14: sc in each st around (18)
Change to Sand (skin):
- Round 15: inc in each st around (36)
- You now have the head/face color. Tie off the yarn ends inside.
- Rounds 16–22: sc in each st around (36)
(That’s 7 rounds—head height)
Add safety eyes between rounds 20 and 21, spacing them with 3 sts between. (Use markers to center and align.) Secure with washers (use lighter tip and press back for extra safety, if desired).
Head Decreases & Shaping
- Round 23: (4 sc, dec) × 6 (30)
- Round 24: (3 sc, dec) × 6 (24)
- Round 25: (2 sc, dec) × 6 (18)
- Round 26: (sc, dec) × 6 (12)
- Stuff head/neck section firmly.
- Round 27: dec × 6 (6)
- Cut thread long, sl st to close.
Close: Weave through outer loops of each st, pull tight, knit ends in.
Hair Cap (Black)
- Round 1: mr, 6 sc (6)
- Round 2: inc in all sts (12)
- Round 3: (sc, inc) × 6 (18)
- Round 4: (2 sc, inc) × 6 (24)
- Round 5: (3 sc, inc) × 6 (30)
- Round 6: (4 sc, inc) × 6 (36)
- Rounds 7–10: sc in each st around (36 per round)
- Row 11: sc 17, (dc, dc, ch 1, sl st into same st), (dc, dc, ch 1, sl st)* in next st, sc 17 (for widow’s peak).
- Fasten off, leaving a long tail for sewing.

Ears (Make 2, Sand)
- Ch 4, turn.
- In 2nd ch from hook: sc, sc in next ch, sl st in last ch.
- Fasten off (leave long tail), sew in place after assembly.
Bow Tie (Black)
- mr, ch 3, dc in ring, ch 3, sl st into ring.
- Repeat (ch 3, dc, ch 3, sl st) to make other side of bow.
- Pull magic ring closed, tie ends around center, wrap a couple of times, secure. Sew to color-change area at neck.
Cape
- Cut two felt rectangles, one in black, one in red, 11 × 6 cm.
- Glue together, black on top. Allow to dry.
- Drape over shoulders; gather at neck and secure center front with a stitch (or glue).
- Optional: Taper (trim) corners for V-shaped drape per sample, if desired.
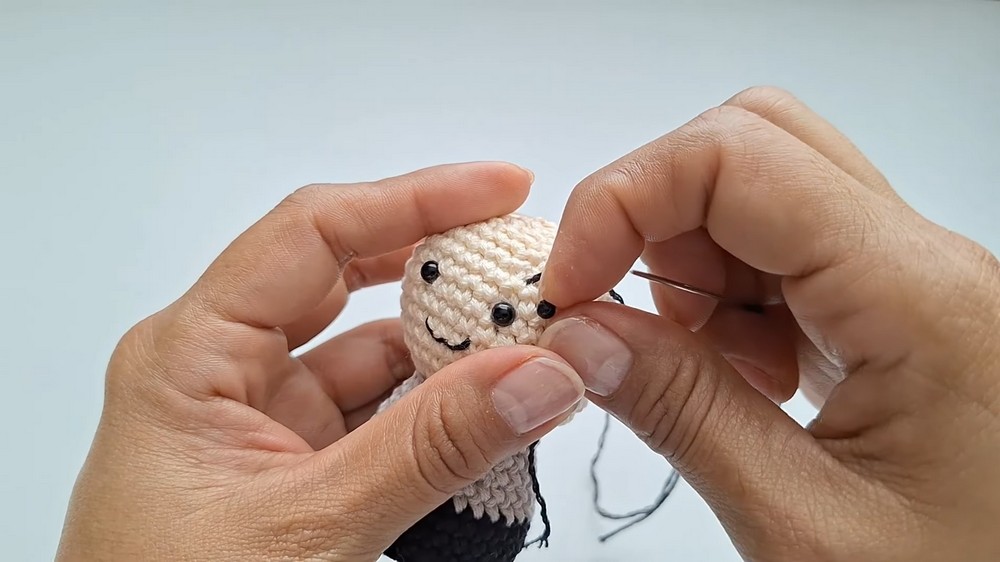
Face Embroidery
- Eyebrows, Mouth, Eyelashes (Optional): Use black yarn separated into thinner strands.
- Embroider above eyes for eyebrows.
- Mouth: embroider in wide W under eyes.
- Fangs: Embroider with thin white yarn below corners of mouth as two small lines.
Assembly
- Sew hair cap onto head, matching widow’s peak to forehead color change.
- Sew ears to each side of the head at mouth-line, at a slight diagonal.
- Attach bow tie at neck (color change between shirt/skin).
- Drape and secure felt cape around neck/back (sew or glue as preferred).
- Weave in all ends and trim.
Pattern Correction
- Stuffing: Be careful not to overstuff head/neck so that safety eyes don’t bulge or distort placement.
- Cape: Trim felt to exact size, glue edges neatly to avoid visible glue stains.
- Hair and ear placement: Center hair’s widow peak and line ears up at identical rounds for symmetry.
- Base insertion: Cut base to fit exactly flat (not too tight) into bottom.
Tips
- Use a stitch marker at the start of each round for accurate counting.
- For clean color changes, always finish the last st of old color with yarn-over in the new color.
- Use tweezers for weaving in tight or hard-to-reach yarn ends.
- Allow glue to dry fully before handling or gifting.
- For a softer look, embroider mouth and features with separated strands for finer lines.
Conclusion
This adorable Mini Vampire Amigurumi is a perfect quick project for Halloween or as a charming gift. Designed with foundation amigurumi skills, it features a removable felt cape, embroidered fangs, and simple hair and bow details—ideal for crafters seeking a small, complete, and clearly structured toy.