
Mini Tulip Pot Crochet Pattern (Free)

The Free crochet Mini Tulip Pot Pattern is a wonderful choice for anyone who enjoys making pretty handmade decorations. The finished tulip looks fresh and cheerful, making it a nice piece for spring displays, gift baskets, classroom decorations, or office desks. You can also place several tulip pots together in different colors to create a charming little flower display that brings extra beauty to your space.

This crochet project is also a thoughtful gift for family, friends, teachers, or anyone who loves flowers. Since it never fades, it becomes a lasting keepsake that can remind someone of a special day or a kind memory. Its cute size makes it easy to place almost anywhere, whether at home or at work.
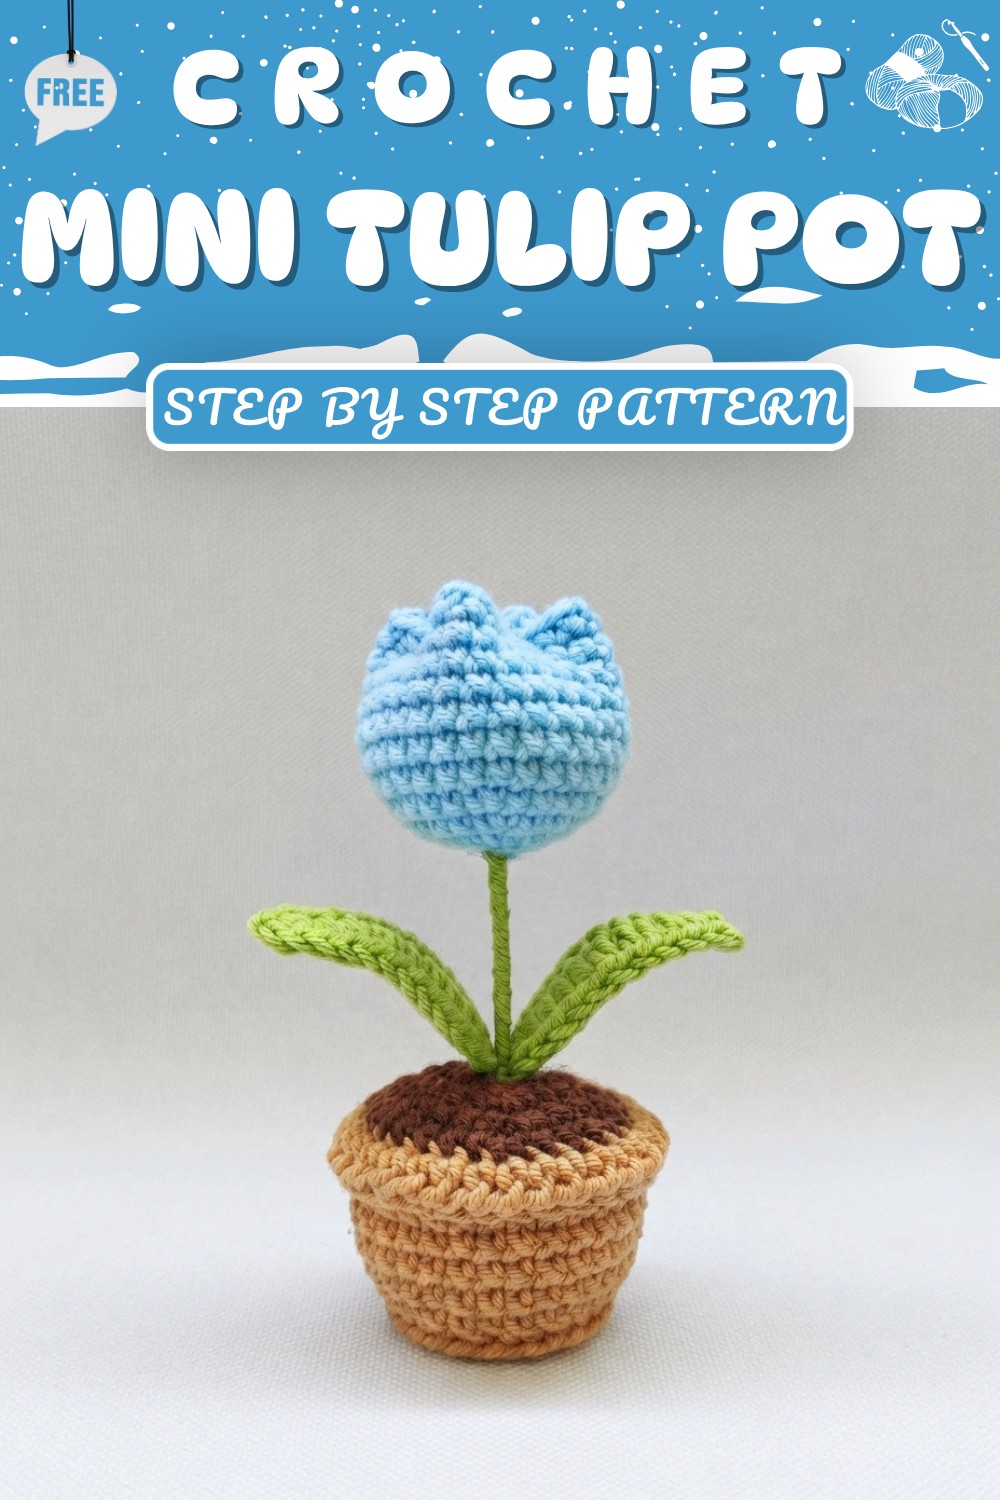
Many people enjoy decorating with small crochet items because they add warmth and personality to a room. This tiny tulip pot does exactly that with its simple style and cheerful look. It is a fun project that creates something you can proudly display or share with someone special.
If you would like to make a sweet flower that stays lovely through every season, be sure to check out the Free crochet Mini Tulip Pot Pattern and enjoy bringing this charming little tulip pot to life.
Crochet Pattern: Mini Tulip Pot
This detailed crochet pattern guides you step-by-step through creating a charming Mini Tulip Pot using a 2.5 mm crochet hook. The project involves crocheting the pot, soil, tulip bud, and leaves, and assembling them with wire stems for a realistic finish. Follow each round carefully to capture the delicate beauty of this tiny tulip.
Quick Overview of the Pattern
- The Pot: Worked in rounds with increasing stitches, finished with half double crochets in the front loops only.
- The Soil: Small insert sewn inside the pot, following a similar stitch increase scheme.
- The Tulip Bud: Worked in rounds with increases shaping the bud, stuffed and sewn closed.
- The Leaves: Crocheted over a 15 cm wire foundation with a mix of single and half double crochets.
- Final Assembly: Inserting stems and wrapping details to create a complete mini tulip.
Notes
- This pattern uses continuous rounds and joining depending on stitch.
- Pay attention to front loop only (FLO) and back loop only (BLO) instructions to create texture.
- Structure is reinforced by wire in the leaves for flexible shaping.
- Stuffings and sewing are essential for a neat finish.
- Gauge is not critical but consistent tension will improve appearance.
Skill Level
- Intermediate: Requires knowledge of basic amigurumi techniques, working in rounds, increases, crochet over wire, and assembly skills.
Materials
- Yarn in colors suitable for pot, soil, tulip bud, and leaves (cotton or acrylic recommended)
- Crochet hook size 2.5 mm
- Fiberfill stuffing and cotton for bud filling
- Thin wire, approximately 15 cm, for leaf foundation
- Small branch or wire (8-10 cm) to insert into bud for stem
- Needle for sewing parts together
- Scissors
Measurements / Sizing
- Finished mini tulip pot approximately 6-8 cm tall, with leaves extending slightly longer due to wire support.
- Wire length for leaves: 15 cm as foundation
- Stem inserted into bud: 8-10 cm
Gauge
Not essential to maintain exact gauge; maintain consistent tension to ensure neat rounds and proportional elements.
Stitch Abbreviations
| Abbreviation | Stitch Name |
|---|---|
| ch | Chain |
| sc | Single Crochet |
| hdc | Half Double Crochet |
| slst or sl st | Slip Stitch |
| inc | Increase (2 sc in the same stitch) |
| BLO | Back Loops Only |
| FLO | Front Loops Only |
| MR | Magic Ring |
Special Stitches
- Inc (Increase): Work 2 sc into one stitch
- Working in Front Loops Only (FLO): Insert hook into front loop of stitch only
- Working in Back Loops Only (BLO): Insert hook into back loop of stitch only
- Crochet Over Wire: Working stitches so that the wire is encased within the yarn stitches, forming a sturdy base for shaping.
Pattern Details
1. The Pot
- Round 1: Create a magic ring (MR). Work 6 sc into the ring. (6 stitches)
- Round 2: Inc in each stitch around to double from 6 to 12 stitches. (12)
- Round 3: 1 sc, 1 inc — repeat 6 times. (18)
- Round 4: 2 sc, 1 inc — repeat 6 times. (24)
- Round 5: Work 24 slip stitches (slst) in back loops only (BLO) around the 24 stitches to create a neat edge and texture. (24)
- Round 6: 3 sc, 1 inc — repeat 6 times. (30)
- Round 7: Work 1 sc in each stitch evenly to build height. (30 stitches per round)
- Round 8: Work 1 sc in each stitch evenly to build height. (30 stitches per round)
- Round 9: Work 1 sc in each stitch evenly to build height. (30 stitches per round)
- Round 10: Work 1 sc in each stitch evenly to build height. (30 stitches per round)
- Round 11: Work 1 sc in each stitch evenly to build height. (30 stitches per round)
- Round 12: Work 1 half double crochet (hdc) in each stitch in the front loops only (FLO) to create a decorative rim. (30)
- Fasten off, leaving a long tail for sewing.


2. The Soil
- Round 1: Create a magic ring and work 6 sc. Leave a small hole in the center for inserting the flower stem later. (6)
- Rounds 2 to 4: Follow the same expansion pattern as the pot (to reach 18 stitches): increase stitches gradually similarly to rounds 2-4 of the pot. (18 stitches total)
- Finish off.
- Assembly: Stuff the pot firmly with fiberfill. Sew the soil piece securely on top inside the pot, allowing the small hole for the flower stem to pass through.
3. The Tulip Bud
- Round 1: Create a magic ring and work 7 sc. (7)
- Round 2: 7 inc, that is 2 sc in every stitch to double to 14. (14)
- Round 3: 1 sc, 1 inc—repeat 7 times. (21)
- Round 4: 2 sc, 1 inc—repeat 7 times. (28)
- Round 5: Work 1 sc in each stitch to build the height of the bud. (28 stitches per round)
- Round 6: Work 1 sc in each stitch to build the height of the bud. (28 stitches per round)
- Round 7: Work 1 sc in each stitch to build the height of the bud. (28 stitches per round)
- Round 8: Work 1 sc in each stitch to build the height of the bud. (28 stitches per round)
- Round 9: Work 1 sc in each stitch to build the height of the bud. (28 stitches per round)
- Round 10: Work 1 sc in each stitch to build the height of the bud. (28 stitches per round)
- Round 11: Work 1 sc in each stitch to build the height of the bud. (28 stitches per round)
- Stuff the bud with cotton firmly to achieve shape. Sew closed neatly.

4. The Leaves
- Foundation: Chain 12 stitches. Use a 15 cm wire and crochet over it for structure.
- Round 1: Crochet over the wire:
- 1 sc into 2nd chain from hook
- 1 hdc into next chain
- 7 hdc into next 7 chains
- 1 sc into last 2 chains - Turning: Chain 2, turn the work.
- Round 2: Work back over the foundation chain:
- 1 sc into the last stitch of previous row
- 8 hdc into the next 8 chains
- 1 sc into the final chain - Fasten off, leaving a tail for assembly.

Final Assembly
- Insert an 8-10 cm branch or wire through the center of the tulip bud to form the stem.
- Wrap the stem securely with green yarn, attaching the leaves as you wrap by sewing or tying them in place for a natural look and added support.

Assembly & Finished Size
- After attaching the soil inside the pot and inserting the stem through the soil hole, ensure stability by adjusting stuffing and position.
- The finished mini tulip pot stands approximately 6-8 cm tall, with leaves extending naturally due to wire support.
- The piece is suitable for decorative purposes, gifting, or as a part of a larger crochet floral arrangement.
Conclusion
Thank you for following this comprehensive crochet tutorial for the Mini Tulip Pot. By combining precise stitch work, creative shaping, and assembly techniques, you have crafted a lovely miniature floral piece filled with charm and detail. Enjoy the process of customizing your tulip with different yarn colors or sizes, and share your beautiful creation proudly.