
Crochet Mini Flower Pot Amigurumi Free Pattern
Refresh your décor with tiny floral charm using the Free Crochet Mini Flower Pot Pattern, perfect for desks, shelves, gifts, and cozy corners.
Some of the sweetest decorations are the ones that take up almost no space. This little flower pot is a cute crochet home accent with a tiny, cheerful look, and the Free Crochet Mini Flower Pot Pattern is perfect for anyone who loves flowers and simple handmade décor.
The finished piece has a small pot with a neat, rounded shape. Little crochet flowers rise from the top, giving it a lively and playful appearance. The yarn has a soft, cozy texture that makes the pot feel warm and welcoming. Its small size is another lovely feature because it can fit easily on a shelf, desk, coffee table, or bedside stand.
Picture it sitting beside a stack of books or near a favorite photo frame. It can also add a sweet touch to a work desk, crochet room, kitchen shelf, or window ledge. Unlike a large decoration, this tiny flower pot does not need much room. It simply adds a little color and charm wherever it sits.

The project is shared through DIY Yarn Crafts, giving the flower pot a friendly handmade style. The simple floral look can suit many types of rooms and may appeal to people who enjoy small crochet decorations. It also works well beside other mini flowers, plants, and cute home pieces.
This tiny pot would make a lovely present for someone who enjoys flowers but does not want a large decoration. It could be a nice birthday gift, housewarming surprise, teacher gift, or small thank you. It can also become part of a collection of handmade home accents.

The Free Crochet Mini Flower Pot Pattern offers a sweet way to add a little flower charm to everyday spaces. With its tiny pot, soft texture, and cheerful flowers, it can bring personality to a shelf while staying simple and easy to display.
Crochet Mini Flower Pot Pattern
This comprehensive crochet pattern will guide you to create a charming mini flower pot decorated with miniature petals, buds, and leaves. Using a combination of single crochets, half-double crochets, double crochets, and wirework, you will assemble a lovely floral display complete with soil inside a textured pot. This pattern emphasizes precise stitch counts and well-structured shaping techniques to deliver an exquisitely detailed miniature crochet project.
Quick Overview Of Pattern
- Phase 1: Build the textured pot using increasing rounds with front and back loop stitches for sculptural detail.
- Phase 2: Crochet the soil piece to fit inside the pot.
- Phase 3: Create flower petals worked over wire for shaping.
- Phase 4: Construct buds by repeating petal steps with different wire lengths.
- Phase 5: Crochet detailed leaves with wire reinforcement.
- Phase 6: Assemble stamens using yarn-wrapped wire, then put together all floral components and secure them on a stem wrapped with yarn.
Notes
- Use stitch markers to track rounds and pattern repeats, especially when working consistent increases or decorative patterns.
- Wire must be flexible enough to shape comfortably, yet sturdy to hold flower and leaf forms firmly.
- Stuff buds lightly with cotton when assembling to enhance volume and realism.
- Keep tension even and consistent, particularly in rounds worked in front or back loops only, which create texture.
- Yarn tails left intentionally long (40cm for soil) help facilitate clean sewing during assembly.
- Glue is recommended for fixing floral parts securely, particularly around the stem wrapping.
Skill Level
This mini flower pot pattern is suitable for intermediate crocheters with familiarity in:
- Magic ring (MR) foundation
- Single crochet (sc), half-double crochet (hdc), and double crochet (dc) stitches
- Stitch increases and decreases
- Working in front loops only (FLO) and back loops only (BLO)
- Basic wire crafting and crocheting with wire
- Joining and assembling multiple pieces
- Yarn wrapping and secure finishing techniques
Materials
- Worsted or DK weight yarn in colors: off-white or terracotta for pot, dark brown for soil, green for leaves and stem, yellow for stamens, and appropriate petal colors.
- Crochet hook size matching yarn, about 3.5 – 4 mm.
- Floral wire: 12 cm, 14 cm, 16 cm, 30 cm lengths as specified.
- Cotton or fiberfill for stuffing buds.
- Tapestry needle.
- Scissors.
- Craft glue.
Measurements / Sizing
- Pot diameter approximately 6–7 cm (2.5 inches)
- Soil diameter matching pot opening
- Flower petal length approximately 7 cm
- Leaf length about 12–14 cm including wire
- Completed assembly height depends on selected stem length (usually 20–25 cm total)
Gauge and Stitch Pattern
- Gauge is moderately flexible; maintain consistent tension to ensure shape integrity.
- Textural detail in the pot works through back loop only (BLO) increases and front loop only (FLO) decorative rounds.
- Petals and leaves shaped around wire provide structural support and realistic curves.
- Sequential increases in pot rounds ensure smooth shaping from base to rim.
Stitch Abbreviations
- ch = chain
- sc = single crochet
- hdc = half-double crochet
- dc = double crochet
- sl st = slip stitch
- inc = increase (2 stitches in same stitch)
- dec = decrease (crochet two stitches together)
- BLO = back loop only
- FLO = front loop only
- MR = magic ring (adjustable loop start)
Special Stitches
- Magic Ring (MR): Adjustable center loop used to begin rounds tightly without a hole.
- Back Loop Only (BLO): Crochet only through the back loop of stitches to create a ridge or texture.
- Front Loop Only (FLO): Crochet through the front loop only for decorative texture and shaping.
- Wire Crochet: Insertion of floral wire to support shaping of petals, buds, and leaves.
- Yarn Wrapped Wire: Wrapping yarn around short wire lengths to create flexible stamens.
The Crochet Pattern!
Phase 1: The Pot
Round 1
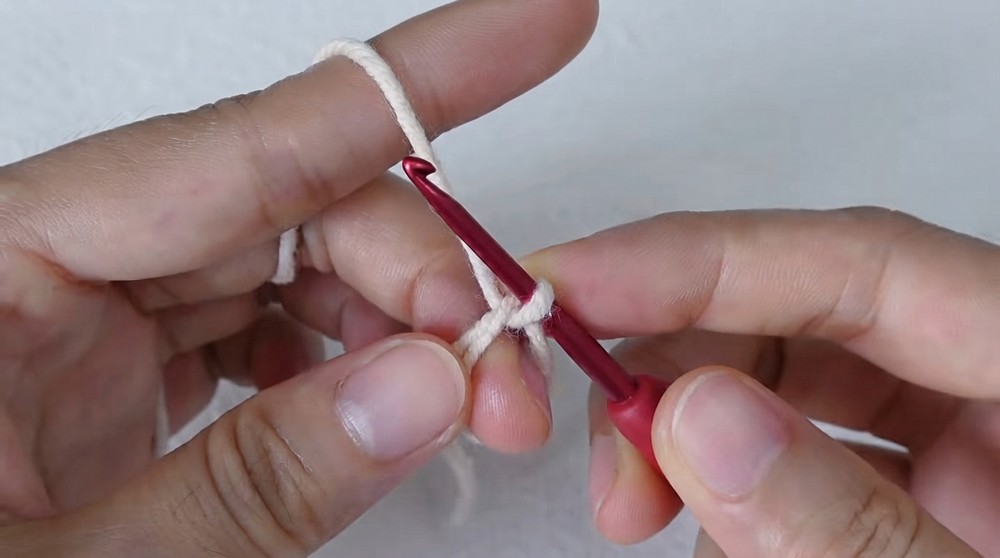
- Begin with a magic ring (MR).
- Work 8 single crochets (sc) into the ring.
- Join round with a slip stitch (sl st). (8 stitches)
Round 2
- Chain 1.
- Work 8 increases (inc) by crocheting 2 sc in each stitch.
- Join with a slip stitch. (16 stitches)
Round 3
- Chain 1.
- 1 sc, 1 inc repeat 8 times.
- Join. (24 stitches)
Round 4
- Chain 1.
- 2 sc, 1 inc repeat 8 times.
- Join. (32 stitches)
Round 5
- Chain 1.
- 3 sc, 1 inc repeat 8 times.
- Join. (40 stitches)
Round 6
- Chain 1.
- Work in back loops only (BLO): 4 sc, 1 inc repeat 8 times.
- Join. (48 stitches)
Rounds 7–14
- Chain 1.
- Work 1 sc in each stitch evenly around.
- Join after each round. (48 stitches per round)
Round 15
- Chain 1.
- 4 sc, 1 decrease (dec) repeat 8 times.
- Join. (40 stitches)
Round 16
- Chain 1.
- Work in front loops only (FLO):
- 1 sc, skip 1 stitch, 4 double crochets (dc) in next stitch, skip 1 stitch,
- Repeat pattern around.
- Join with slip stitch.
Bottom Rim
- Join yarn to unused loops from Round 6.
- Work 1 sc in each loop around to form a neat rim at the base of the pot.
- Join round.

Phase 2: Soil
- Repeat Rounds 1 to 5 of the pot pattern.
- Leave a 40 cm yarn tail to sew this piece to the top of the pot later.

Phase 3: Petals
Row 1
- Chain 7.
- Starting from the second chain from hook, work:
- 1 sc,
- 4 half-double crochets (hdc),
- 3 sc in the last chain.
- Turn work.
- Work 4 hdc,
- Then 1 sc in the last stitch.
- Join with slip stitch.
Round 2
- Use a 16 cm floral wire.
- Crochet around the wire:
- 7 sc,
- chain 2,
- 1 sc into the same stitch,
- Then 1 sc in each remaining stitch.
- Make a total of 5 petals following this sequence.

Phase 4: Bud
- Repeat the same petal steps as above for two bud pieces.
- Use wires of 12 cm and 30 cm length respectively for structure.
- Lightly stuff the buds with cotton before sewing them together to achieve fullness.
Phase 5: Leaves
- Chain 12 to begin leaf base.
- Starting at second chain from hook, work:
- 1 sc,
- 8 half-double crochets (hdc),
- 1 sc,
- 3 sc in the last chain.
- Turn work.
- Work 8 hdc,
- Then 1 sc.
- Use a 16 cm floral wire to crochet around, providing leaf structure.
Phase 6: Assembly
Stamens
- Wrap yellow yarn tightly around several 14 cm wires to form stamens.
Final Construction
- Gather the prepared stamens, petals, buds, and leaves.
- Arrange them appealingly on the main stem.
- Wrap the entire arrangement with green yarn to secure the components together.
- Reinforce the stem wrapping and attachments with craft glue to ensure longevity.

Assembly & Finished Size
When fully assembled, the mini flower pot will measure approximately 6 to 7 cm (2.5 inches) in pot diameter. The total height, including stem and floral components, usually ranges between 20 and 25 cm (8 to 10 inches), depending on the length of your stem wire or branch. The layered petals and curved leaves give a naturalistic impression, adding decorative charm ideal for display or gifting.
Conclusion
This mini flower pot crochet pattern provides a rewarding project blending foundational and intermediate skills such as stitch increases, working in loops only (FLO and BLO), wire crafting, and multi-piece assembly. Its clear progression from pot base to petals, buds, leaves, and final construction offers a comprehensive learning experience. The final handcrafted piece is a versatile and beautiful decorative accessory that showcases your craftsmanship and attention to detail.
