
Mini Crochet Gingerbread Sphere Free Pattern with Easy-to-Follow Instructions
Bring holiday cheer to life with a cozy Crochet Gingerbread Sphere that brightens your décor and gifts with simple instructions.
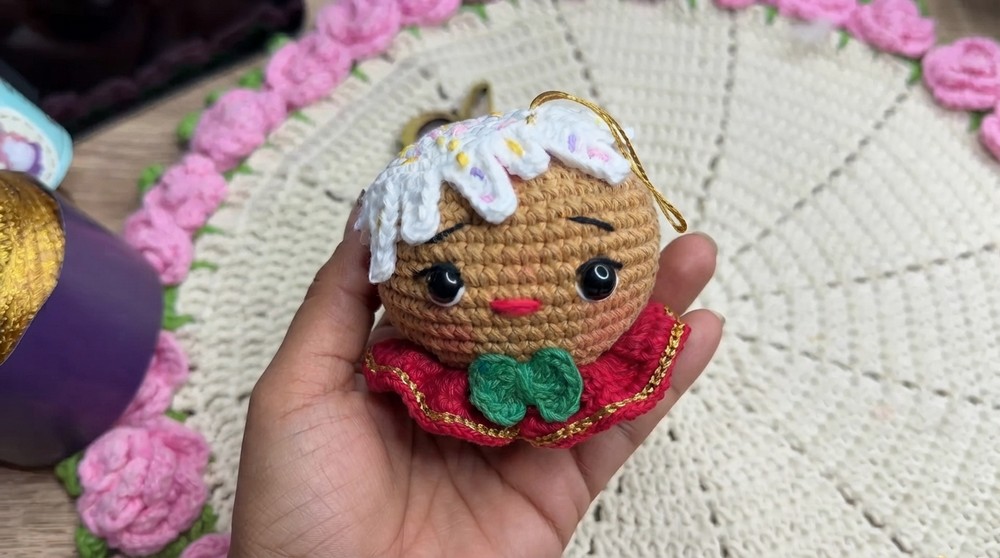
Do you want a fun and happy decoration for the holidays? The Crochet Gingerbread Sphere made by [Shelen Crochet] is a cute, round ornament that looks just like a happy gingerbread cookie. Made with soft yarn and bright colors, this little ball brings a warm and friendly feeling to any room during Christmas time.
Cozy Crochet Gingerbread Sphere Free Pattern with a Fun Holiday Theme
Its smiling face and fun details make it a perfect decoration for your Christmas tree. But don’t stop there—this gingerbread sphere can be used in many different ways. You can hang it on a tree branch, place it on a shelf, or even use it as a cute decoration on a holiday table. It’s also small enough to be tied onto gifts as a special extra touch. Another fun idea is to turn it into a keychain that carries holiday cheer wherever you go.
The simple yet charming design by Shelen Crochet makes it easy for people of all ages to enjoy. It’s bright, friendly, and brings a cozy feeling that fits perfectly with holiday celebrations.
Whether you want to add more cheer to your home or give someone a sweet handmade gift, this sphere is a great choice.
If you want to try something fun and festive this season, the free pattern for the Crochet Gingerbread Sphere by Shelen Crochet is ready for you. It’s a wonderful way to add a little handmade happiness to your holiday decorations.

Chellen Crochet – Gingerbread Cookie Sphere Pattern
Today, we'll craft a delightful Gingerbread Cookie Sphere, complete with “icing,” cheerful embroidered features, and colorful “sprinkle” embroidery. This project is perfect for adding a sweet touch to your holiday décor or giving as a thoughtful handmade gift.
Quick Overview Of Pattern
- Amigurumi Spherical Base: Work the classic amigurumi sphere in soft brown (tobacco) for a gingerbread cookie look.
- Frosting & Sprinkles: Add a wavy white icing cap with playful, embroidered sprinkle “confetti” in various colors.
- Charming Details: Embroider expressive eyes, a red nose, and blushed cheeks. Finish with a festive green bow for extra cuteness.
- Versatile Uses: Hang as an ornament, use as a gift topper, or display in your sweets-inspired home corner.
Notes
- All rounds begin with a chain for height which does not count as a stitch.
- The “false X” stitch is used for density and neatness but you may substitute classic single crochet.
- Maintain tight, even stitches to avoid stuffing peeking through.
- Embroidery is done with strands separated from full plies of yarn for finesse.
- Use quality glue (such as cold silicone) for permanent finishing.
- Colorful sprinkles can be customized to match your favorite palette.
Skill Level
Advanced Beginner to Intermediate:
Familiarity with working in the round, basic shaping (increase/decrease), surface embroidery, and simple sewing/glue assembly.
Materials
- Yarn: #6 Cotton in tobacco (brown), white, black, carmine, flag green, gold, and small amounts in assorted bright colors for sprinkles
- Hook: 2.20 mm
- Stuffing: Pillow filling or polyester fiberfill
- Embroidery needle
- Blush & two small brushes
- Scissors
- Silicone glue or equivalent
- Size 9 mm safety eyes
- Optional: Thread for hanging
Measurements / Sizing
- Approximate finished diameter: 8–9 cm
- With bow and hanging thread: ~10–11 cm
Gauge
Not critical.
After Round 4, your piece should measure about 3 cm across. Work tightly for best stuffing containment.
Stitch Abbreviations
| Abbreviation | Meaning |
|---|---|
| ch | chain |
| sc | single crochet |
| hdc | half double crochet |
| dc | double crochet |
| sl st | slip stitch |
| inc | increase (2 sc in one st) |
| dec | decrease (sc 2 together) |
| MR | magic ring |
| blo | back loop only |
Special Stitches
- False X sc: Insert hook under both loops front-to-back, yo, pull up, yo, pull through two (tight “X” effect).
- Invisible Decrease: Insert hook in front loop of next two stitches, yo, pull through both, yo, pull through two.
- Wavy Icing: Created by chaining, working hdc back along chains, and attaching to base with sc for organic edge.
Crochet Steps
Sphere (Cookie Base – Brown)
- Round 1: MR, ch 1, 6 sc (false X stitch). Join with sl st. (6)
- Round 2: ch 1, 6 inc (12). Sl st.
- Round 3: ch 1, (sc, inc) x6 (18). Sl st.
- Round 4: ch 1, (2 sc, inc) x6 (24). Sl st.
- Round 5: ch 1, (3 sc, inc) x6 (30). Sl st.
- Repeat Rounds 1–5 above in white for icing (reserve for later).
- Round 6: ch 1, (4 sc, inc) x6 (36). Sl st.
- Round 7: ch 1, (5 sc, inc) x6 (42). Sl st.
- Round 8: ch 1, (6 sc, inc) x6 (48). Sl st.
- Rounds 9–16: ch 1, sc in each st (48). Sl st each round.
- Round 17: ch 1, (6 sc, dec) x6 (42). Sl st.
- Round 18: ch 1, (5 sc, dec) x6 (36). Sl st.
- Round 19: ch 1, in blo: (4 sc, dec) x6 (30). Sl st.
- Round 20: ch 1, (3 sc, dec) x6 (24). Sl st.

Face
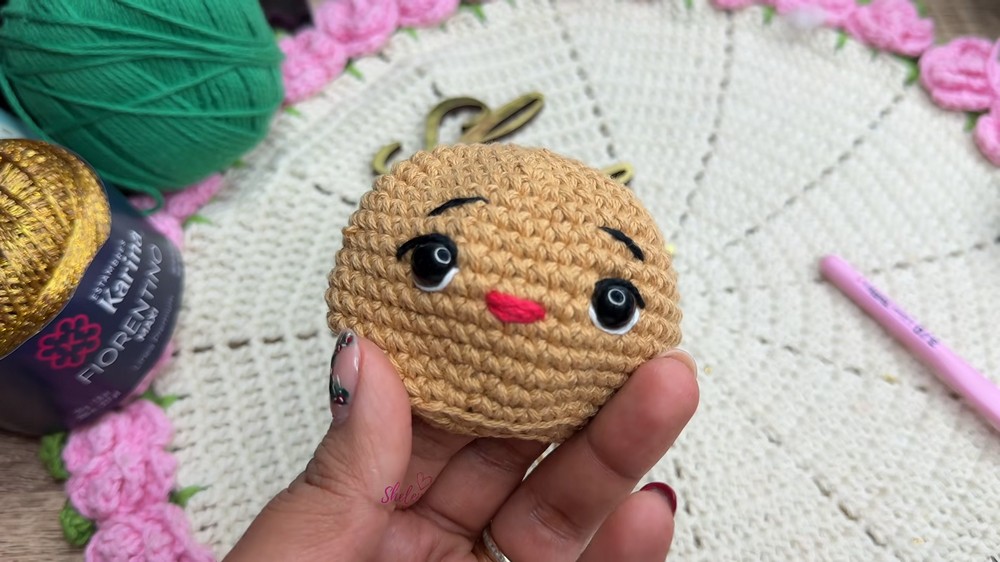
Safety Eyes:
Place between Rounds 12 & 13, 7 stitches apart. Secure safety backs, melt gently with lighter.
White Yarn (2 strands):
Embroider slight “gleam” cornea accent lines on lower half of each eye.
Black Yarn (2 strands):
Embroider eyelid/eyelash (top middle of each eye to one st over), and eyebrows (3 stitches, just above eye).
Red Yarn:
Embroider a rounded nose (line just under eyes, across 2 stitches, 4–5 passes).
Decreasing and Closing
- Round 21: ch 1, (2 sc, dec) x6 (18). Sl st. Start stuffing here, add more as you go.
- Round 22: ch 1, (sc, dec) x6 (12). Sl st.
- Round 23: ch 1, 6 dec (6). Sl st.
Fasten off with long tail; use tapestry needle to weave through last six front loops, draw closed securely.
Collar (Carmine)
- Attach at unused loops from Round 19.
- Round 1: ch 3, 2 dc (all in same st), (3 dc in next st) repeat around. Sl st.
- Round 2: ch 1, sc in each dc. Sl st. Cut yarn, weave in.
- Gold Edge:
- Attach gold yarn, sl st in each sc around.

Icing (White, previously made)
Create wavy effect:
- Attach white icing at start of working round.
- Chain 6, hdc back along 5 ch, sc to next icing base st, sc next base st, (ch 3, hdc 2, sc in base), repeat alternating various lengths: ch 6, ch 7, ch 4,
- ch 8, ch 5 etc. Each time, hdc across, attach with 2 sc in base. Make the drips different in length for “melting” effect.
- Continue around entire “cap.” FO.
Colorful Sprinkles
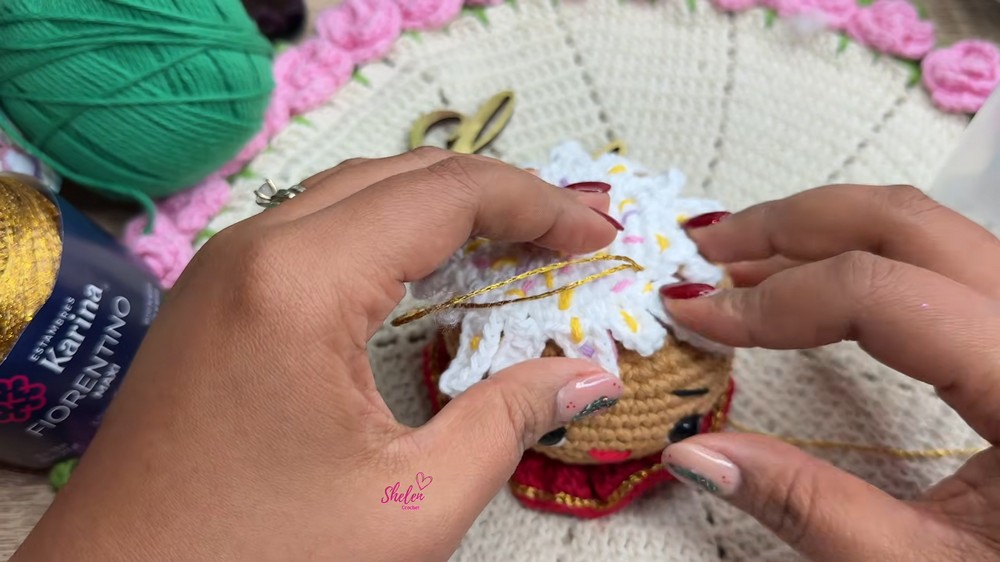
Using needle & various colors (flag green, lilac, yellow, pink, carmine, etc.), embroider short straight lines (“sprinkles”) evenly distributed on the white icing. Go up and down anywhere on the surface; knots and tails can be hidden within the icing piece.
Bow (Flag Green)
- MR, ch 3, 4 dc in ring, ch 3, sl st to ring.
- Ch 3, 4 dc in ring, ch 3, sl st to ring again.
- Pull ring tight, wrap center 2–3 times, knot at back, cut, and secure tail.
- FO with long tail to sew (or glue) to icing.
Assembly & Finished Size
- Attach icing: Decide position (which drip goes front) and use glue to secure all around sphere top. Make sure your gold loop for hanging goes under the icing before fixing final section.
- Attach bow: Center or offset atop, as desired; sew or glue in place.
- Final face details: Add blush to cheeks and nose with brush.
- Sprinkles: Adjust any obscured embroidery; trim ends.
- Thread hanger: Knot and draw 20cm gold thread through icing/cookie top for hanging.
Finished Size:
- Sphere alone: ~8–9 cm
- With bow and loop: ~10–11 cm

Conclusion
Your Gingerbread Cookie Sphere is complete—a sweet, festive, and whimsical addition to your holiday traditions. With its sparkling embroidery, drippy icing, and radiant bow, this ornament is sure to charm children and adults alike. Thank you for crafting with Chellen Crochet. Share your creations, and join us again for more delicious crochet inspiration!