
Lovely Free Crochet Owl Door Weight Pattern for Any Room
Keep doors steady with charm using the Free Crochet Owl Door Weight Pattern, a cute handmade accent perfect for décor, gifts, and functional home use
A quiet night in a cozy home often brings little surprises in the most charming ways. One evening, a gentle breeze caused the door to swing unexpectedly, sending papers tumbling across the floor. That’s when the idea of a functional yet delightful companion came to life, something that could keep doors steady while adding a touch of personality. This is where the Free Crochet Owl Door Weight pattern shines. With its whimsical appeal, it not only anchors doors securely but also brings a warm, handcrafted charm to any room. Perfect for living rooms, bedrooms, or study areas, the owl door weight serves both practical and decorative purposes.
Playful Free Crochet Owl Door Weight Pattern for Cute Home Décor

Its textured crochet stitches create a visually engaging piece, while the weighted filling ensures doors remain stable, preventing sudden slams or drafts. The pattern offers clear, step-by-step guidance, making it approachable for both beginners and experienced crafters, allowing the creation of a personalized home accessory that is both functional and delightful.
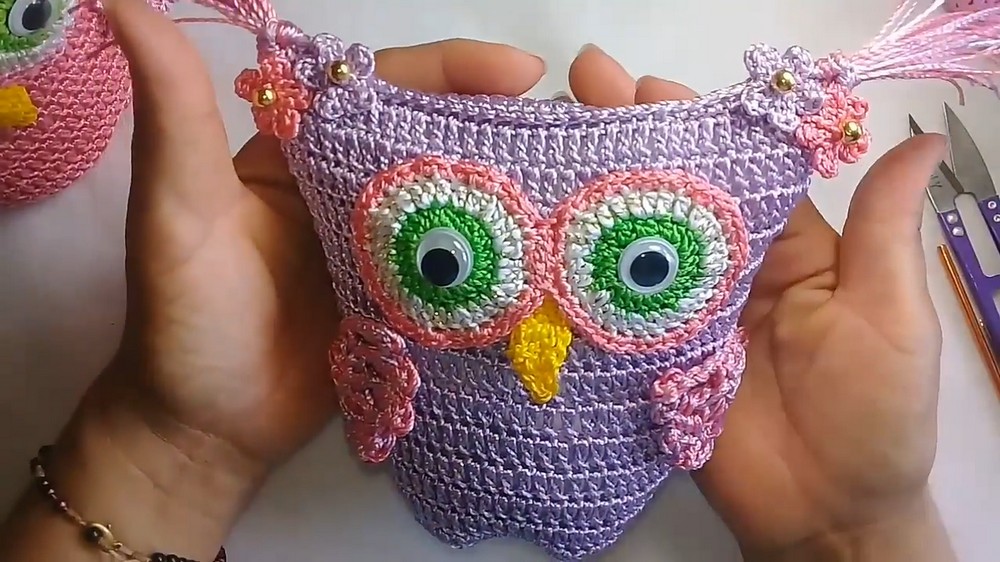
Beyond its utility, the owl’s endearing features, wide eyes, rounded body, and intricate detailing, invite admiration and conversation, making it a small yet impactful accent. This handmade accent transforms an ordinary home item into something memorable, blending usefulness with charm and offering a handcrafted touch to everyday life.
Free Crochet Owl Door Weight Pattern
Finished Size
- Height: Approximately 14 cm (5.5 inches), depending on the size of the bottle used.
- Width: Varies based on your yarn and tension, but the design allows for adjustment.
Materials
Yarn
- Silk Thread (Tex 288 Thick Acrylic Yarn)
- Primary Color: Pink or lilac (used for the owl body).
- Accent Colors: Lime green, white, yellow, and any preferred color for details like the wings and beak.
Tools and Accessories
- Crochet Hooks:
- 1.75 mm Hook: For smaller details like the eye and beak.
- 3.5 mm Hook: For larger portions like the wings (used with two strands held together).
- PET Bottle: 1-liter or 2-liter size (for structural support).
- Tape: Durex or adhesive tape.
- Acrylic Batting or Felt: To line the bottle (optional).
- Fiberfill: To stuff components like the wings, beak, and head.
- Sand: Approximately 500 g (used as the weight for the bottle).
- Other Tools: Scissors, sewing needles, glue, and stitch markers.
- Optional Decorations: Little flowers, bows, or accessories to enhance the owl’s look.
Gauge
Since this doorstop is decorative, exact gauge is not critical. However, maintain consistent tension for clean, tight stitches.
Skill Level
Beginner-Intermediate
- Basic crochet stitches (chains, single crochets, double crochets).
- Familiarity with simple shaping techniques and assembly required.
Key Abbreviations (US Terms)
- ch: Chain
- sc: Single Crochet
- dc: Double Crochet
- inc: Increase (2 stitches in the same stitch)
- sl st: Slip Stitch
- yo: Yarn Over
- [...]: Repeat instructions within brackets
Special Techniques
Magic Ring
- To start components like the eyes and beak without leaving a hole in the center, use the magic ring technique or an alternative (chain 2 and crochet into the second chain).
Closing Techniques
- For small pieces like the beak and wings, close gaps by weaving the yarn tail through the front loop of each stitch and pulling tight.
Pattern Instructions
Step 1: Prepare the Bottle Base
Cut and Prepare the Bottle:
- Cut a 1-liter PET bottle to a height of 14 cm. If using a 2-liter bottle, adjust the pattern by increasing the chains at the start.
- Fill the bottle base with 500 g sand wrapped securely in two plastic bags or containers.
- Cover the bottle with acrylic batting or felt, securing the material using Durex tape to ensure smooth edges.

Step 2: Crochet the Body
Foundation:
- With the primary color (e.g., pink or lilac) and a 1.75 mm crochet hook:
- Ch 70 for a 1-liter bottle. For a 2-liter bottle, adjust the chain length to fit the bottle’s circumference.
- Close into a ring with a sl st into the first ch.
- Rounds 1–13 (Body Base):
- Ch 3, dc in each chain around.
- Work 13 rounds of dc, ensuring a smooth cylindrical shape for the owl body.
- At the end of Round 13, join with a sl st into the top of the starting ch.
Rounds 14–15 (Head):
- Begin shaping the head:
- Round 14:
- Ch 3, dc in the next two stitches, ch 2 (skip 2 stitches), dc 2.
- Continue working [2 dc, ch 2] around.
- Round 15:
- Sl st to the chain space, ch 3, dc twice in the same space, ch 2 to move to the next space.
- Continue working clusters of [2 dc, ch 2] in each space to maintain the separation.
- Round 14:

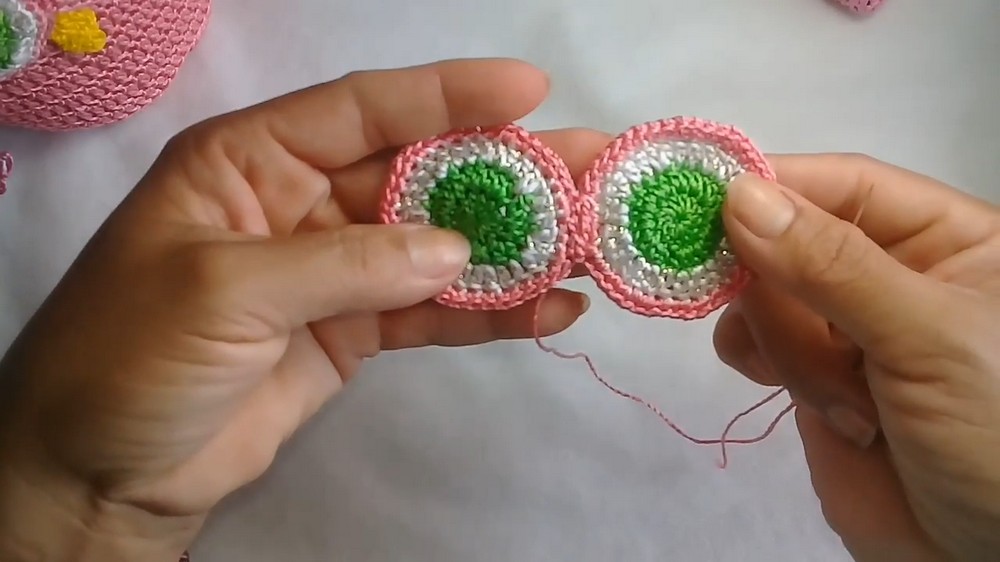
Step 3: Eye
Foundation:
- Use lime green yarn and a 1.75 mm hook:
- Create a magic ring and work 12 dc inside.
- Pull tight to close and join using a sl st.
- Round 2:
- Ch 2, dc twice in each stitch (total: 24 stitches).
- Round 3 (Outer Circle):
- Switch to white yarn and work [1 sc, 1 inc] around to create the outer section of the eye.
Step 4: Beak
- Using yellow yarn:
- Ch 6, skip the first ch, then dc in each chain starting with the second. (5 dc total)
- Row 2:
- Ch 2 and turn, dc across, maintaining the same number of stitches.
- Row 3:
- Reduce stitches: Ch 2, work 3 dc decreases across the row, ending with one stitch left.

Step 5: Wings
Foundation:
- With pink and lilac yarn held together and a 3.5 mm hook:
- Create a magic ring and work 8 dc inside the ring.
- Pull tight and join with a sl st.
- Edging (Peaked Outline):
- Work dc, ch 3 to form a picot at the top of the stitch.
- Continue forming 8 picots across the ring, spacing them evenly.
Step 6: Ears
- Using two strands of yarn, cut 20–25 cm lengths and fold them over six times to create thickness.
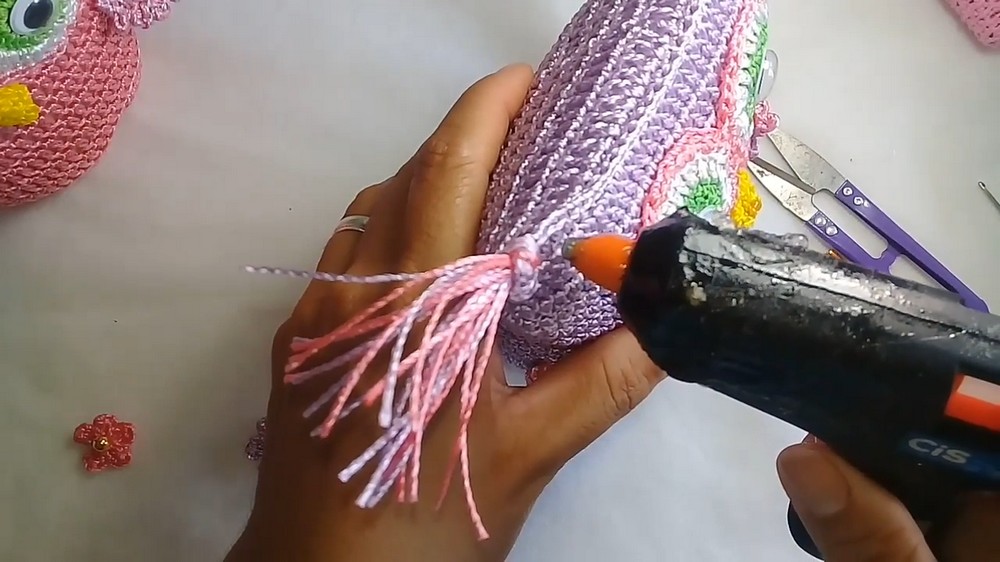
- Insert the folded strands at the ear placement using a hook, pull through, and tie securely. Trim to desired length.
Step 7: Assembly
Attach Parts:
- Position the eyes between Round 3–5 of the body’s face, ensuring symmetry. Sew or glue securely.
- Attach the beak below the eyes. Secure with stitches or glue.
- Place the wings near the curve of the head on either side. Sew securely to prevent them from moving.
- Add decoration: Glue small flowers or bows for added charm.
Customization Ideas
- Colors: Use playful or pastel colors to match your room's aesthetic.
- Accessories: Add buttons, felt appliqués, or bows for extra detail.
- Size: Adjust the starting chain if using larger bottles or for a smaller owl without sand weight.
Conclusion
Congratulations on completing your Crochet Owl Doorstop! This eco-friendly project combines functionality with aesthetic appeal, making it great for gifting or personal use. With its interchangeable parts and customization options, this owl offers endless possibilities for creativity.
Important Remarks
- Washable Yarn: For practicality, ensure all yarn used can withstand gentle washing.
- Safety: Always securely sew or glue parts, especially if gifting to children.
- Durable Base: Use quality tape to protect the bottle and ensure long-lasting results.