
Popular Free Crochet Owl Earrings Pattern To Elevate Your Look
Flap into fun with this quirky Crochet Owl Earring Pattern that’s simple, stylish, and sure to turn heads everywhere you go.
At the height of Carnival festivities, Vanessa found herself drawn to a simple yet meaningful accessory, a pair of owl-shaped earrings. Their charm wasn't merely in their appearance but in the expressive details that could tell a story of whimsy, skill, and vibrant vitality. a skilled tutor offers a delightful pattern on making these charming crochet owl earrings, revealing how such accessories have the power to complement festival attire, serve as thoughtful gifts, or even become a source of supplemental income. These earrings, with their intricate yet approachable design, captivate with their unique character and universal appeal.
Adorable Free Crochet Owl Earrings Pattern That Spark Joy

These earrings can elevate your outfit, serve as thoughtful handmade gifts. The tutor recommends keeping your finished product as vibrant as possible to cater to different tastes while maintaining its whimsical charm. In essence, these earrings are not merely a fashion statement but a labor of love, skill, and creativity, all brought together in a project cherished by crocheters of all levels.
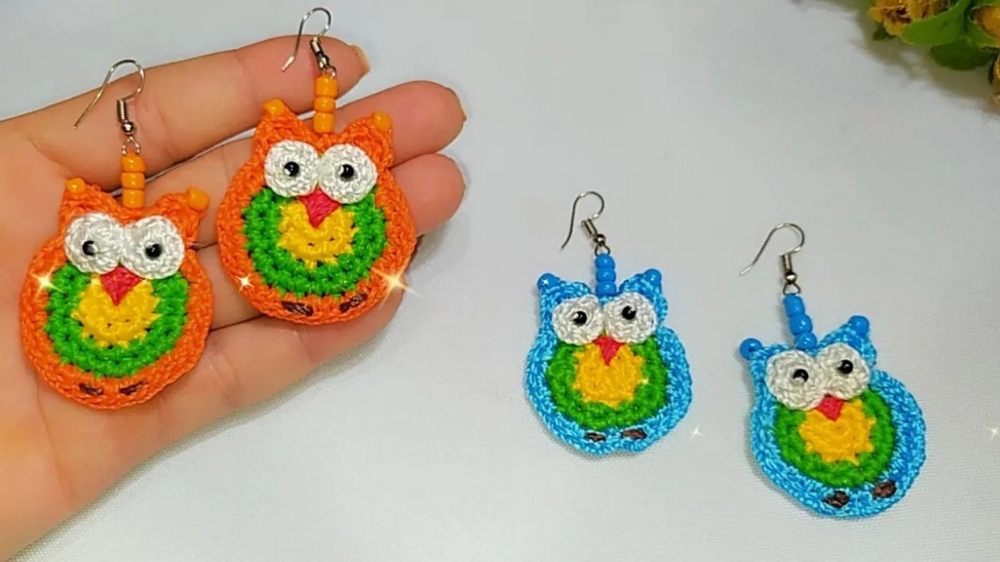
Cute Free Crochet Owl Earrings Pattern
Finished Size
Each earring measures approximately 4 cm (1.6 inches) when using silk thread Tex 288 and a 1.75 mm hook. The size may vary depending on the thread and hook size you choose.
Materials Needed
- Yarn/Thread:
- Tex 288 Silk Thread, 100% polypropylene.
- Base Color: Choose golden-yellow, green, or pumpkin.
- Eye Color: White and black.
- Beak & Feet: Red and brown thread.
- Tex 288 Silk Thread, 100% polypropylene.
- Crochet Hook:
- 1.75 mm crochet hook.
- Beads:
- Small beads for decoration (optional) or as embellishments around the owl.
- Earring Hooks:
- Standard hooks for earrings (available at craft stores).
- Tapestry Needle:
- For weaving in ends, embroidery, and assembling.
- Scissors:
- For cutting yarn.
Gauge
Gauge for this project is not critical; however, using silk thread and a 1.75 mm hook will create a small and neat earring suitable for wearing.
Special Techniques
- Magic Ring (MR):
- Wrap the thread around your finger to create a loop. Start crocheting into this adjustable ring to form a tight center.
- Single Crochet (sc):
- Insert the hook into the stitch, yarn over, pull up a loop, yarn over, and draw through both loops.
- Half Double Crochet (hdc):
- Yarn over, insert the hook into the stitch, yarn over, pull up a loop, yarn over, draw through all loops.
- Slip Stitch (sl st):
- Insert the hook into the stitch, yarn over, and pull through both the stitch and loop on the hook.
- Sealing Thread (Optional for Synthetic Thread):
- Use a lighter to carefully seal thread ends to prevent fraying (ideal for polypropylene threads).
Pattern Instructions
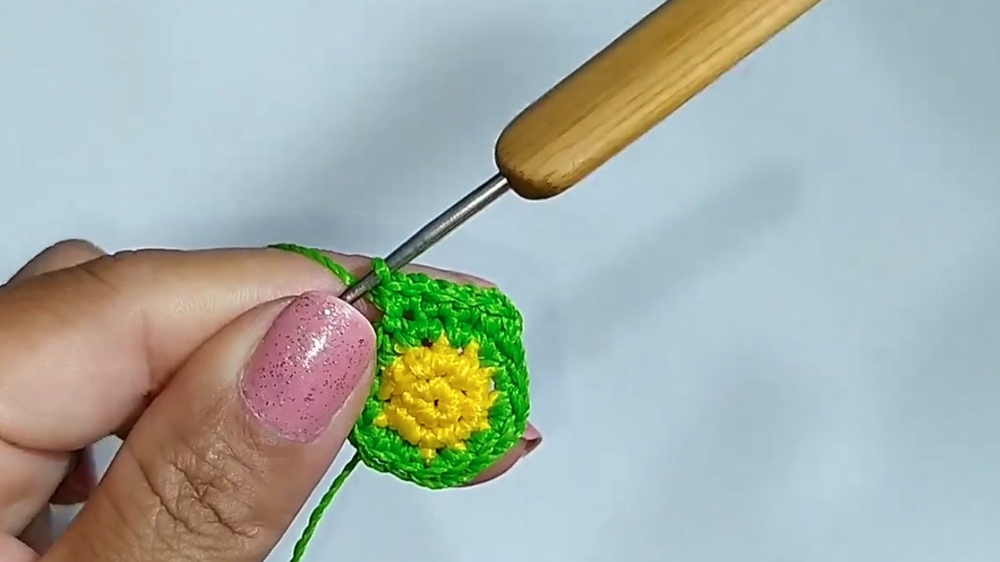
Step 1: Owl Body
- Magic Ring (MR):
- Wrap the thread to form a loop, work 6 single crochets (sc) into the magic ring. Pull the ring tight and close the round with a slip stitch into the first stitch. (6 sts)
- Round 2 (Increase Round):
- Chain 1 (does not count as a stitch). Work 2 sc into each stitch around. Slip stitch to join. (12 sts)
- Round 3:
- Change to a second color thread (e.g., green).
- Start with a slip knot, attach it to any stitch.
- Chain 1. Work: Increase (2 sc in 1 stitch), 1 sc in the next stitch. Repeat this sequence around. Slip stitch to join. (18 sts)
- Round 4:
- Chain 1. Work: Increase (2 sc in 1 stitch), 1 sc each in the next 2 stitches. Repeat this pattern around. Slip stitch to join. (24 sts)
- Fasten off and weave in ends.

Step 2: Outer Decorative Beaded Edge
- Attach Third Color Yarn: (e.g., contrast color like pumpkin)
- With your starting yarn/thread, slip stitch into any stitch in the previous round.
- Thread 2 small beads onto the working thread before beginning the round.
- Final Round (Beaded Edge):
- Work the following sequence in every other stitch:
- sc into the first stitch, hdc into the same stitch, dc into the same stitch.
- Slide a bead into position, secure the bead with a sl st.
- Chain 2, work back into the same stitch following the same sc, hdc, dc pattern.
- Work 2 single crochets in the next stitch (without beads).
- Continue working this combination [sc, hdc, dc + bead] in one stitch + 2 sc in the next stitch until the round is complete.
- Work the following sequence in every other stitch:
- Finalize:
- After completing the round, fasten off and weave in any loose ends securely.

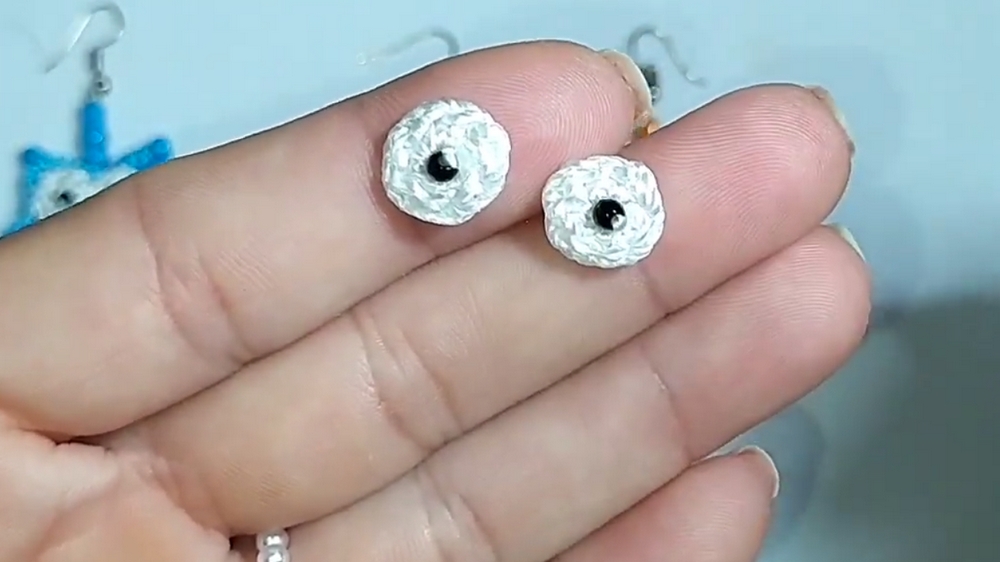
Step 3: Eyes (Make 2)
- White Base:
- Start with a magic ring and work 7 sc into it. Pull tight and join with a slip stitch. (7 sts)
- Fasten off.
- Black Pupils:
- Take a small amount of black thread or sew in black beads in the center of the white base to create the pupil.
- Sew or embroider it symmetrically.
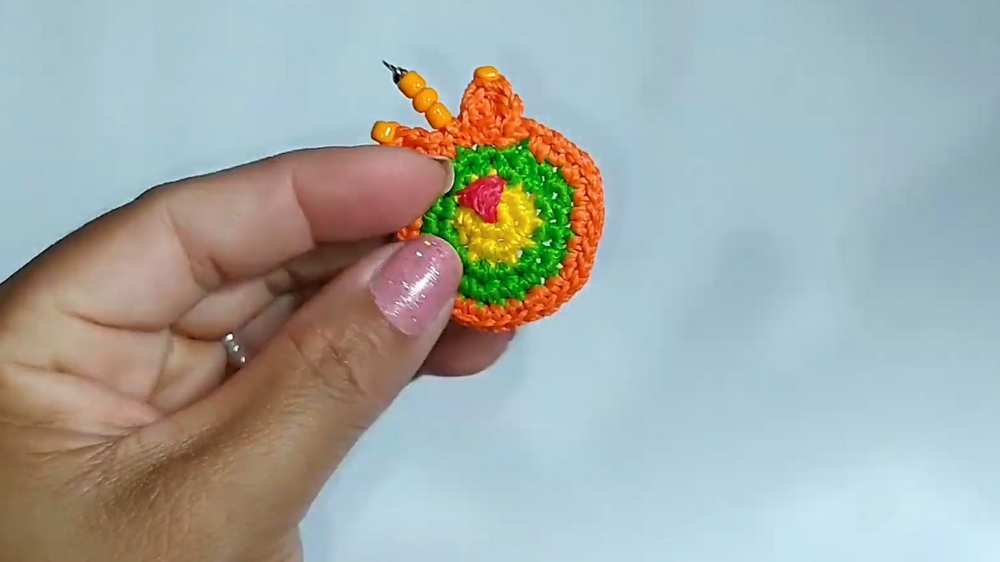
Step 4: Beak
- Magic Ring (MR):
- Use red thread.
- Chain 1 and work 6 sc into the magic ring.
- Pull ring tightly closed and slip stitch to form a small triangle-like base.
- Fasten off, leaving a long thread for sewing onto the body.
Step 5: Feet (Make 2)
- Start:
- Use brown thread and make a magic ring.
- Chain 1, and work 5 sc into the ring. Pull tight to close the ring.
- Fasten off securely, leaving a long tail for sewing.
Step 6: Eyes, Feet, and Beak - Assembly
- Attach Eyes:
- Place the white eye parts symmetrically near the top of the owl body. Sew them securely.
- If using safety eyes or beads, attach them to the center of each white eye.
- Attach Feet:
- Place the brown feet symmetrically at the bottom of the owl body. Sew them securely.
- Attach Beak:
- Position the red beak directly between and slightly below the eyes. Sew securely.
Step 7: Add Earring Hook
- Sew or attach the earring hook using the tapestry needle and consistent stitching.
- Secure tightly to ensure durability while worn.
- Fasten all loose ends and seal if using synthetic thread (optional).
Customization Ideas
- Color Scheme:
- Experiment with different color combinations for the body and edges to create a variety of owl designs.
- Go for metallics, neutrals, or bright tones depending on the look you want.
- Embellishments:
- Add more beads, sequins, or embroidery to make a festive design.
- Decorate the edges with small pearl beads for a refined touch.
- Size Variations:
- Use thicker yarn and a larger hook to create a larger owl for pendants, keychains, or even wall hangings.
Conclusion
Congratulations! Your adorable owl earrings are now complete. These lightweight and handmade accessories are perfect for adding a playful touch to any outfit or gifting as unique and personalized jewelry pieces.
Tips to Maintain the Earrings
- Cleaning: Spot clean with a damp cloth if needed. Avoid full immersion in water.
- Storage: Store in a dry, safe location to maintain their shape.
- Safety: Ensure all loose ends are secured, and beads or embellishments are attached firmly for durability.