
Free Crochet Unicorn Pencil Pattern for Fun Desk Accessories
Turn everyday pencils into magical fun with the Free Crochet Unicorn Pencil Pattern and create adorable handmade toppers full of color and charm.
Bright, playful colors twist into a magical unicorn pencil topper that instantly grabs attention with its rainbow mane, sparkling horn, and whimsical charm. The Free Crochet Unicorn Pencil Pattern turns a simple pencil into a fun, magical accessory that makes every writing session more exciting. You start by creating a snug base that fits perfectly over a pencil, then shape the unicorn’s head, perk up the ears, and add the signature horn before finishing with a flowing, colorful mane that brings personality and magic to life.
Free Crochet Unicorn Pencil Pattern for Personalized Fun

Using basic stitches and a simple structure, this pattern is approachable for beginners yet still enjoyable for experienced crafters who want a quick, fun project. What makes this project truly delightful is its combination of charm and practicality. It’s small, portable, and completely functional, turning an everyday pencil into a whimsical treasure.

You can play with bright, bold colors for a classic unicorn look, or go soft and pastel for a trendy, modern vibe. Perfect as a handmade gift, a school accessory, or a cheerful desk companion, this pattern lets you bring a little handmade magic into your daily routine. With minimal materials and a short crafting session, you’ll end up with a finished piece that’s fun, quirky, and utterly adorable, spreading smiles wherever it goes.
Unicorn Pen Topper Crochet Pattern
Materials
- Yarn (4 mm thickness):
- Peach, flesh, or pale yellow (face)
- White (ears and base)
- Yellow (horn)
- Pink, blue, purple/lilac (hair/mane)
- Black (nose embroidery)
- Hook: 3.5 mm crochet hook
- Stuffing: Synthetic/polyester filling
- Decorations:
- 2 tiny movable eyes (or black yarn for embroidered eyes)
- Thin sewing thread (for eyelashes, optional)
- Ribbon (~30 cm, any color for the bow)
- Fabric marker
- Yarn needle (for sewing/embroidery)
- Scissors
- Silicone glue/glue gun (for attaching pieces and eyes)
- Blush or rouge (for ear details, optional)
- Pins (for placement, optional)
Key Abbreviations (US Terms)
| Abbreviation | Meaning |
|---|---|
| MR | Magic ring |
| ch | Chain |
| sc | Single crochet |
| hdc | Half double crochet |
| inc | Increase (2 hdc in same stitch) |
| dec | Decrease (hdc2tog) |
| sl st | Slip stitch |
| st(s) | Stitch(es) |
| FO | Fasten off |
Special Notes
- The face and base are worked in rounds, in spiral (do not join with sl st unless specifically instructed).
- Use a stitch marker to track the first stitch of each round when working in spiral.
- Stuff the face lightly as you work, before closing.
- All color and decoration choices may be customized.
Pattern
Face
With peach/flesh yarn:
- Rnd 1: MR, ch 1, 6 hdc in ring. Pull ring tight. (6)
- Rnd 2: Ch 1, 6 hdc around. Join with sl st. (6)
- Rnd 3: Ch 1, 6 hdc around. Join with sl st. FO. (6)

Top of Head
With white yarn:
- Attach yarn to any stitch.
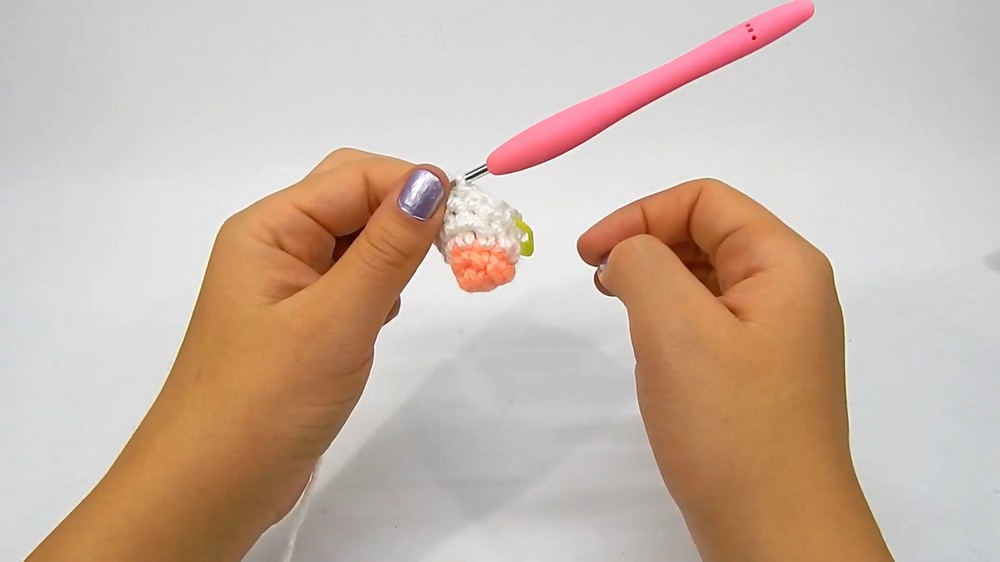
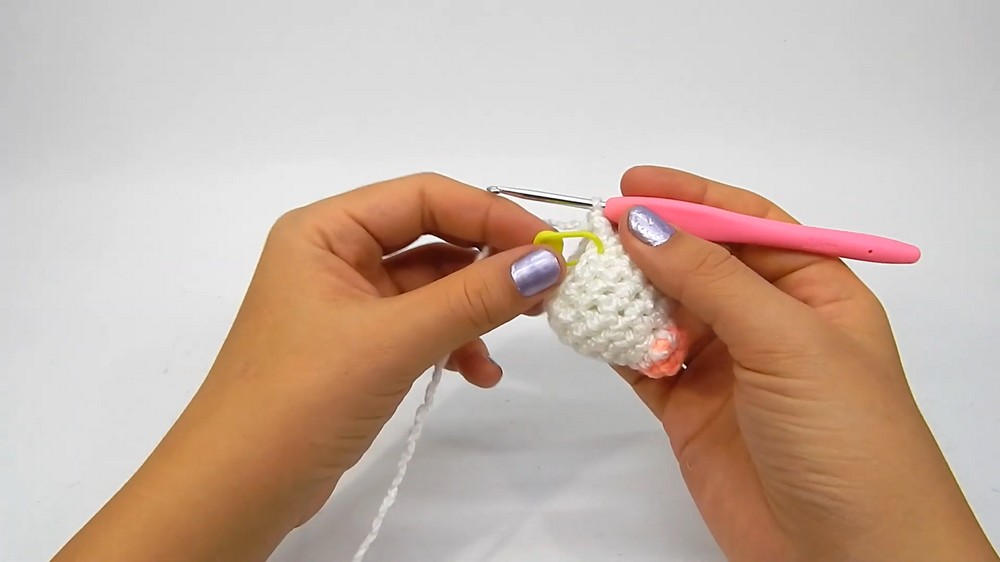
- Rnd 1: Ch 1, 2 hdc in first st, 2 hdc in next (inc x2), then 2 inc (4 hdc in last 2 sts), then 2 hdc in next two sts (inc x2). (Total 10 hdc)
- Do not join. Begin working in spiral.
- Rnd 2: (hdc, inc) around (alternating 1 hdc, 2 hdc in next st). Use stitch marker.
- Rnd 3: 4 hdc, 4 inc, 4 hdc.
- First 4 sts: 1 hdc each.
- Next 4 sts: inc each (2 hdc in each st—gives 8 hdc).
- Last 4 sts: 1 hdc each.
- Rnd 4: (3 hdc, inc) around—repeat three times.
- Rnd 5: hdc in each st around (work even).
Face Details
- Embroider nose: With black thread, make two tiny stitches in the peach part, centered and spaced side-by-side near the tip.
- Placement: Increases should be positioned to the top; nose stitches at the lower part of the face.
- Movable eyes: Attach with glue, slightly above and to the sides of the nose.
- Eyelashes (optional): Use thin sewing thread. Cut three strands, glue to the back edge of each eye; trim as desired.
Shaping & Decreases
- Rnd 6 (white): (3 hdc, dec) around.
- Dec made as hdc2tog: Yarn over, insert in next stitch, pull up loop; yarn over, insert in following stitch, pull up loop; yarn over, pull through all loops.
- Begin stuffing the face now. Add more stuffing as you close off the top.
- Rnd 7: (2 hdc, dec) around.
- Rnd 8: (hdc, dec) around.
- Rnd 9: dec in each st around until closed.
- FO. Thread yarn needle, weave through remaining stitches, pull tight to close and secure.
Base (for attachment to pen)
With white yarn:
- MR, ch 1, 6 hdc in ring. Join with sl st.
- Ch 1, 6 hdc around, join with sl st. FO.
- Attach yarn and, working only in back loops, hdc around in spiral as many rounds as needed to cover the top of your pen (approx. 5 rounds).
- Use stitch marker to track beginning of round.
Horn
With yellow yarn:
- MR, ch 1, 6 hdc in ring. Join with sl st.
- Ch 1, (hdc, dec) around.
- FO. Weave through remaining stitches and pull tight to form a pointed tip.
- Attach to center top of head.
Ears (Make 2)
With white yarn:
- MR, ch 1, 3 hdc in ring. Pull tight. Ch 1, 3 hdc. FO.
- Shape ear into a point with fingers or a skewer.
- Make two; attach to top of head beside horn.
Hair/Mane
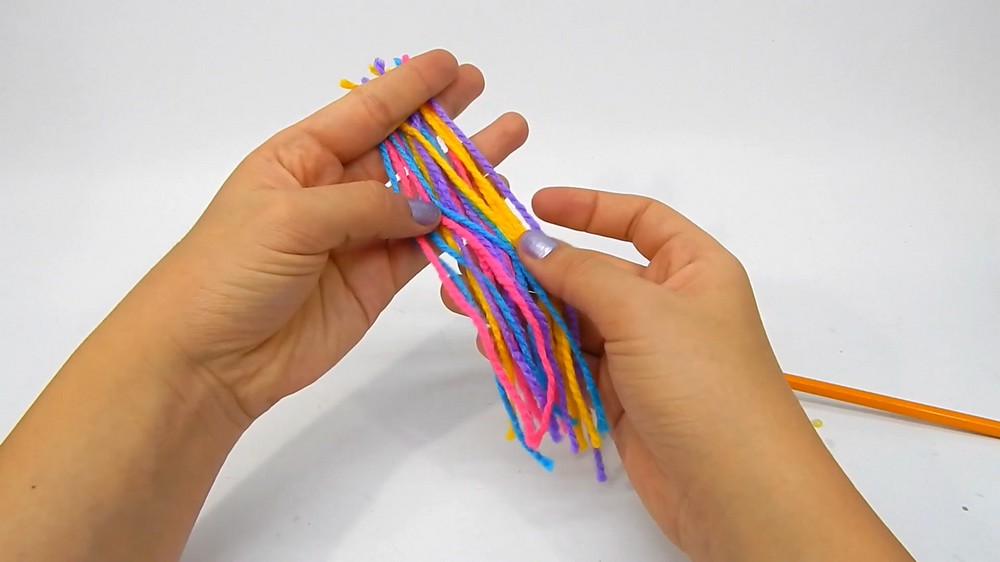
With pink, blue, yellow, purple:
- Cut pieces ~18 cm long (or as desired).
- Use 2 strands per color. Fold strands in half, insert via yarn needle behind horn and ears, pull through loop to attach.
- Continue adding strands in a line down the back for a vibrant mane.
Bow
- Cut ribbon ~30 cm.
- Tie around neck area, secure with a knot and bow.
- Trim ends at an angle; optionally use a lighter to seal ribbon ends.
Additional Details
- Paint or embroider ear centers with blush or rouge, as desired.
- Add "appetites" (decorations) to horn or ears for extra flair.
Final Assembly
- Attach base firmly to underside of face.
- Attach horn to center of top; attach ears beside horn.
- Glue movable eyes; add eyelashes as desired.
- Attach hair strands in a row behind horn and ears.
- Tie ribbon around neck and embelish ears as preferred.
- Insert completed topper onto pen.

Conclusion
You have created a cheerful and customizable Unicorn Pen Topper—perfect for gifting or personalizing your stationery! Each section can be adapted for your color preferences and styling.
Pattern Correction & Tips
- The face is created by alternating increases and maintaining symmetry.
- Attach decorations only after basic assembly to avoid glue mishaps.
- Use spiral rounds for a seamless look—mark rounds for consistency.
- If desired, make the base longer to completely cover your pen.
- For neatness, secure and hide all loose yarn ends inside the topper.
- Tip: Use vibrant yarn colors or mix strands for a rainbow effect! For classroom sets or gifts, personalize each unicorn’s mane and bow.