
Free Crochet Halloween Pumpkin Pattern for Seasonal Decor
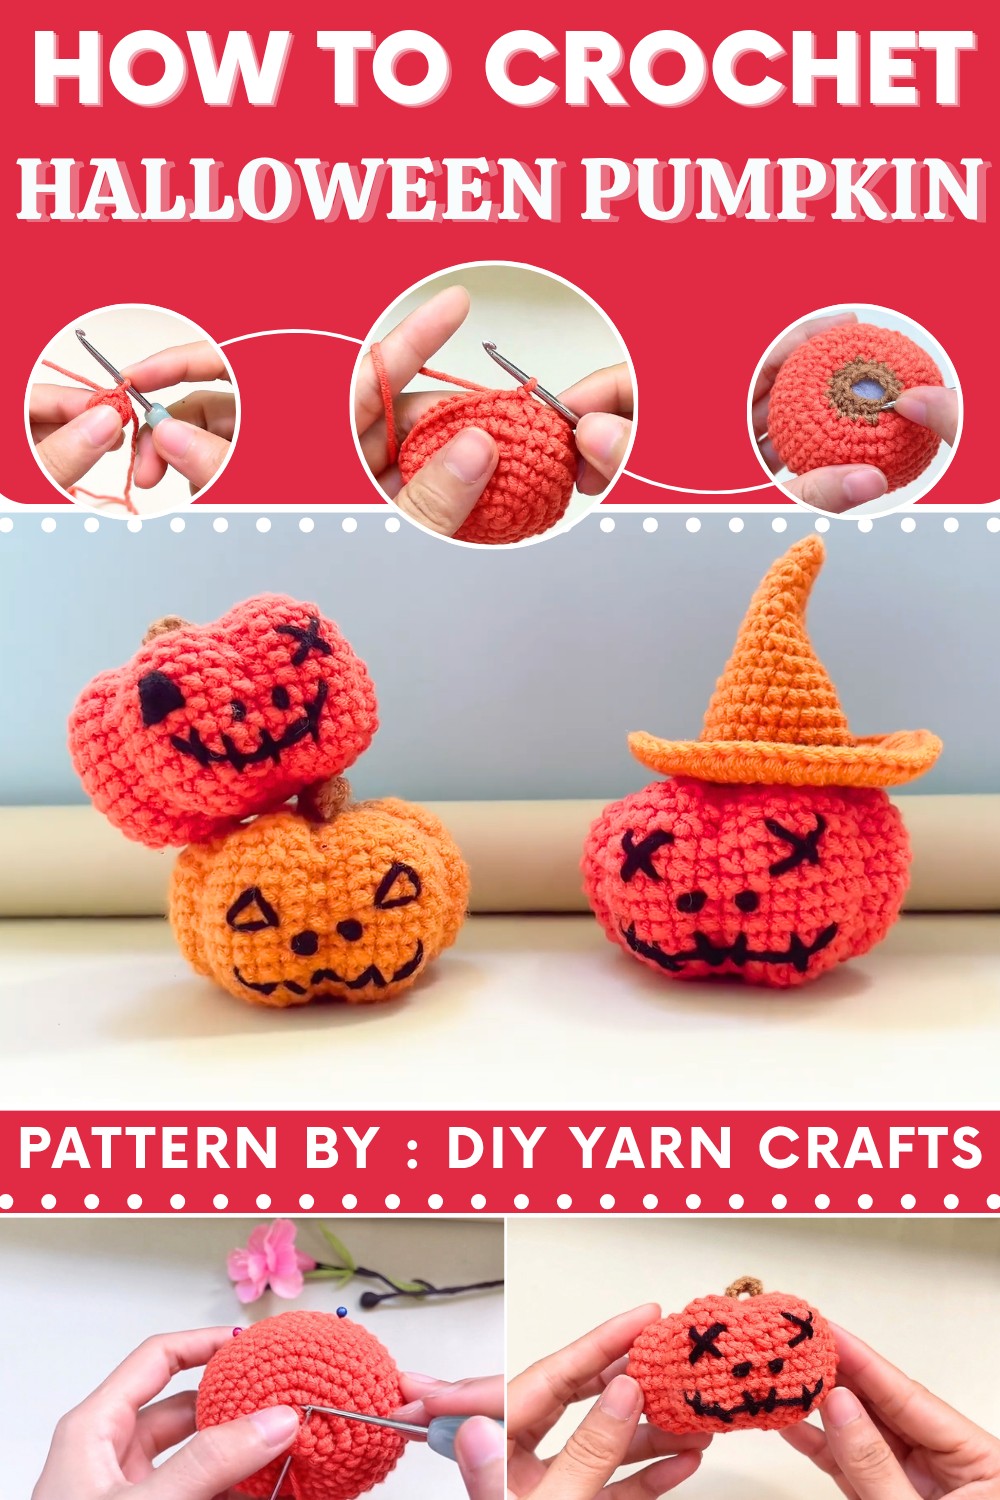
This little pumpkin is more than just a decoration — it’s a cozy and playful way to celebrate Halloween. Its round shape and happy expression give it a welcoming look that kids and grown-ups will love. You can use it to brighten up your home, as part of a Halloween centerpiece, or even as a unique gift for friends who enjoy handmade project.
The Free crochet Halloween pumpkin Pattern by DIY Yarn Crafts is designed to be simple and fun. Whether you are new to crocheting or have some experience, this pattern guides you through making your own festive pumpkin with ease. It’s a quick project that fills your space with Halloween happiness.

Making this adorable pumpkin is easy and enjoyable thanks to DIY Yarn Crafts’ clear and simple instructions. No matter if you’re just beginning to learn crochet or have been crocheting for a while, this pattern is designed to be friendly and quick. You’ll have a festive pumpkin ready to display in no time, adding a handmade touch to your Halloween celebrations.

If you’re ready to bring a warm, handmade flair to your Halloween, this pumpkin pattern is a great way to start. Don’t miss out—check out the Free crochet Halloween pumpkin Pattern and create your own cute seasonal decoration today!
Halloween Pumpkin Amigurumi Crochet Pattern
Create a charming Halloween pumpkin amigurumi using 5 ply cotton yarn and a 2.5 mm crochet hook. This step-by-step crochet pattern will guide you through each round, from forming the pumpkin body to adding the stem, shaping, and the signature pumpkin face embroidery.
Quick Overview of Pattern
- Crochet the pumpkin body in continuous joined rounds, increasing and decreasing to shape a spherical pumpkin.
- Use single crochet (sc) stitches primarily, with increases and decreases to shape.
- Add stem and leaf details with brown yarn.
- Stuff the pumpkin before closing the top.
- Sculpt the pumpkin with yarn to form distinct segments.
- Embroider the pumpkin’s face using black yarn.
Notes
- Work in joined rounds, slip stitching to join each row.
- Use a 2.5 mm crochet hook with 5 ply cotton yarn for optimal stitch definition.
- Maintain consistent tension throughout for a smooth finish.
- Stuff firmly but not overly tight to maintain shape and softness.
- Leave long yarn tails for closing and shaping.
- For shaping, use a contrasting yarn and a needle to create six pumpkin segments.
Skill Level
Intermediate — Familiarity with magic ring, single crochet, increases, decreases, and slip stitches is recommended. Basic embroidery skills will be helpful for the face feature.
Materials
- 5 ply cotton yarn in orange (for pumpkin body)
- Brown yarn (for the stem)
- Black yarn (for embroidery)
- 2.5 mm crochet hook
- Fiberfill stuffing
- Yarn needle or tapestry needle
- Scissors
- Stitch markers (optional)
Measurements / Sizing
Approximate pumpkin size: about 10 cm (4 inches) in diameter after stuffing and shaping.
Gauge
Gauge is not critical for this amigurumi but maintaining even tension with 2.5 mm hook and 5 ply cotton will result in a neat finished piece.
Stitch Abbreviations
- sc = single crochet
- inc = increase (2 sc in same stitch)
- dec = decrease (single crochet two stitches together)
- ch = chain
- sl st = slip stitch
- mr = magic ring
Special Stitches
- Magic ring: a technique to start crocheting in the round without a hole.
- Increase: 2 single crochets in one stitch.
- Decrease: single crochet two stitches together.
- Slip stitch: joining stitches or rounds.
The Pattern
Pumpkin Body
Row 1:
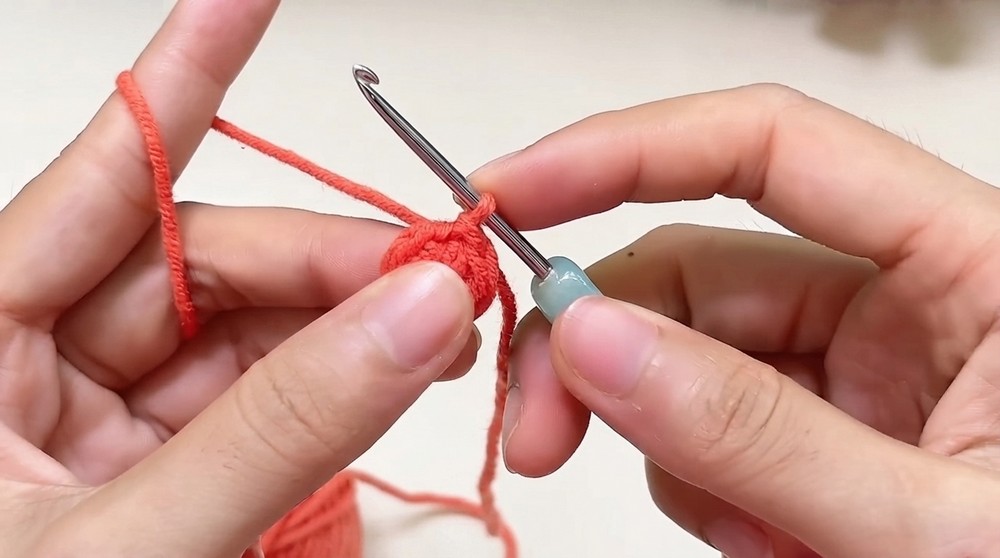
Create a magic ring. Work 8 single crochets (sc) into the ring. Slip stitch (sl st) to join. (8 sc)
Row 2:
Ch 1. Work 8 increases (2 sc in each stitch) around. Sl st to join. (16 sc)
Row 3:
Ch 1. 1 sc, 1 inc — repeat 8 times. Sl st to join. (24 sc)
Row 4:
Ch 1. 2 sc, 1 inc — repeat 8 times. Sl st to join. (32 sc)
Row 5:
Ch 1. Sc 32 times around. Sl st to join. (32 sc)
Row 6:
Ch 1. 3 sc, 1 inc — repeat 8 times. Sl st to join. (40 sc)
Row 7:
Ch 1. Sc 40 times each row. Sl st to join each row. (40 sc)

Row 8:
Ch 1. Sc 40 times each row. Sl st to join each row. (40 sc)
Row 9:
Ch 1. Sc 40 times each row. Sl st to join each row. (40 sc)
Row 10:
Ch 1. Sc 40 times each row. Sl st to join each row. (40 sc)
Row 11:
Ch 1. Sc 40 times each row. Sl st to join each row. (40 sc)
Row 12:
Ch 1. Sc 40 times each row. Sl st to join each row. (40 sc)
Row 13:
Ch 1. Sc 40 times each row. Sl st to join each row. (40 sc)
Row 14:
Ch 1. Sc 40 times each row. Sl st to join each row. (40 sc per row)
Decreasing to Shape
Row 15:
Ch 1. 3 sc, 1 dec — repeat 8 times. Sl st to join. (32 sc)
Row 16:
Ch 1. Sc 32 times around. Sl st to join. (32 sc)
Row 17:
Ch 1. 2 sc, 1 dec — repeat 8 times. Sl st to join. Finish off and fasten off yarn. (24 sc)
Stem and Finishing
Row 18:
Attach brown yarn. Ch 1. 1 sc, 1 dec — repeat 8 times. Sl st to join. (16 sc)
Stuffing:
Begin filling the pumpkin firmly with fiberfill stuffing.

Row 19:
Ch 1. Make 8 decreases in total (dec 8 times). Sl st to join. Leave a long tail (~60 cm) for closing the top.
Closing:
Weave the yarn tail through the front loops of remaining stitches, then pull tight to close the hole. Secure and weave in ends.
Leaf/Stem Detail:
Insert hook into the top loop, ch 8. Work 7 slip stitches (sl st) back down the chain. Fasten off.

Shaping and Embroidery
Sculpting:
Take a 60 cm long piece of the same orange yarn and a sewing needle. Divide the pumpkin into six equal segments by passing the needle vertically through the top and bottom of the pumpkin at each division. Pull the yarn tightly to create characteristic indentations of pumpkin ribs. Knot to secure.
Face Embroidery:
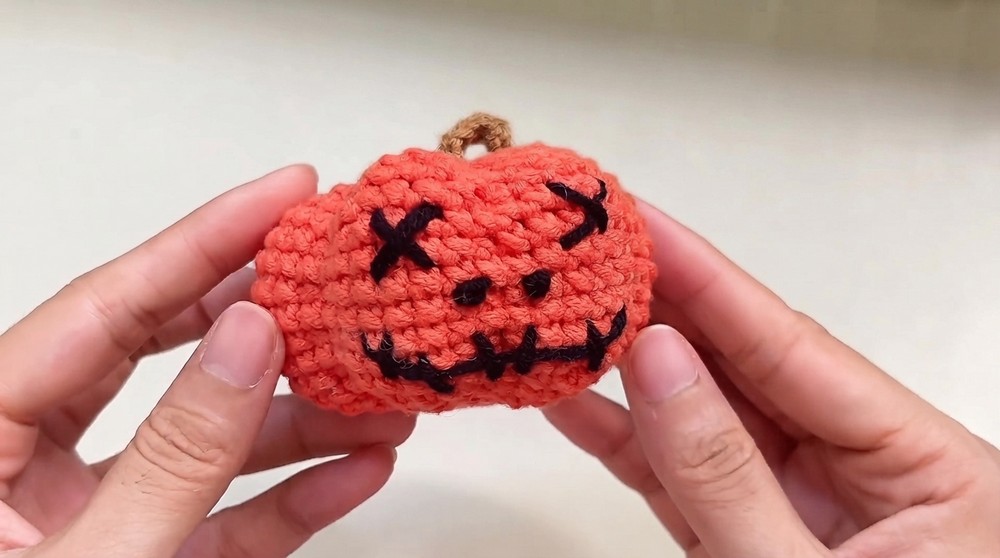
Using black yarn, embroider the eyes, nose, and mouth as desired. Traditional shapes such as triangles for eyes and nose and a jagged smile for the mouth work well.
Assembly & Finished Size
- Ensure the pumpkin is fully stuffed and securely closed before sculpting.
- Embroidery should be done after sculpting for better positioning.
- Finished pumpkin measures approximately 10 cm in diameter.
- The stem and leaf detail add an organic touch to the top.
Conclusion
This Halloween Pumpkin amigurumi pattern offers an enjoyable crochet project suitable for intermediate crocheters. Each step methodically builds the pumpkin’s body, adds charming stem and leaf details, and finishes with embroidery — all culminating in a delightful seasonal decoration. Working with fine 5 ply cotton yarn and a small 2.5 mm hook ensures your pumpkin has excellent stitch definition and durability. Sculpting the pumpkin with yarn yields an authentic pleated pumpkin texture, while custom embroidery personalizes its spooky charm.
Celebrate the Halloween spirit by gifting these pumpkins or adding them to your festive décor. The detailed instructions equip you with every stitch and step needed to crochet a perfectly shaped, well-stitched pumpkin amigurumi.