
Free Crochet Earrings Pattern to Use for Everyday Style
Style your look effortlessly with this Free Crochet Earrings Pattern, a chic accessory that adds charm, elegance, and uniqueness to any outfit
In a bustling marketplace filled with vibrant textiles and shimmering jewelry, artisans have long sought ways to personalize their adornments, blending tradition with contemporary flair. Earrings, in particular, serve as a subtle yet powerful expression of individual style, capable of transforming even the simplest outfit into a statement. The appeal of crochet earrings lies not only in their unique textures and intricate details but also in their versatility, they can be lightweight, colorful, and customized to match any mood or occasion. Handmade accessories like these make thoughtful gifts and can be tailored to showcase personal taste, from delicate floral motifs to bold geometric shapes. Their lightweight construction ensures comfort, while their eye-catching appeal instantly draws attention, making them an ideal finishing touch for any ensemble.
Pretty Crochet Earrings Pattern That Goes with Any Look

These crochet earrings offer a fresh way to accessorize, capable of enhancing both casual and formal outfits. Their lightweight nature means they won’t pull on ears, making them comfortable for prolonged wear. The step-by-step instructions guide enthusiasts from the initial loop to the final attachment, ensuring a satisfying experience and a professional-looking product.
Whether worn alone or paired with other jewelry, their intricate details and vibrant colors make a striking addition to any wardrobe. Handmade crochet earrings celebrate individuality and artistry, providing an affordable yet elegant way to express personal style. They are perfect for everyday wear, special occasions, or as personalized gifts that convey thoughtfulness and creativity.

The process begins with selecting a variety of vibrant yarns and small hooks, setting the stage for a quick yet satisfying project that results in wearable art. The pattern starts with forming a simple loop or magic ring, which becomes the foundation for the main body of the earring. Using single, half-double, or double crochet stitches, the initial rounds build a sturdy base, gradually increasing to shape the desired form.
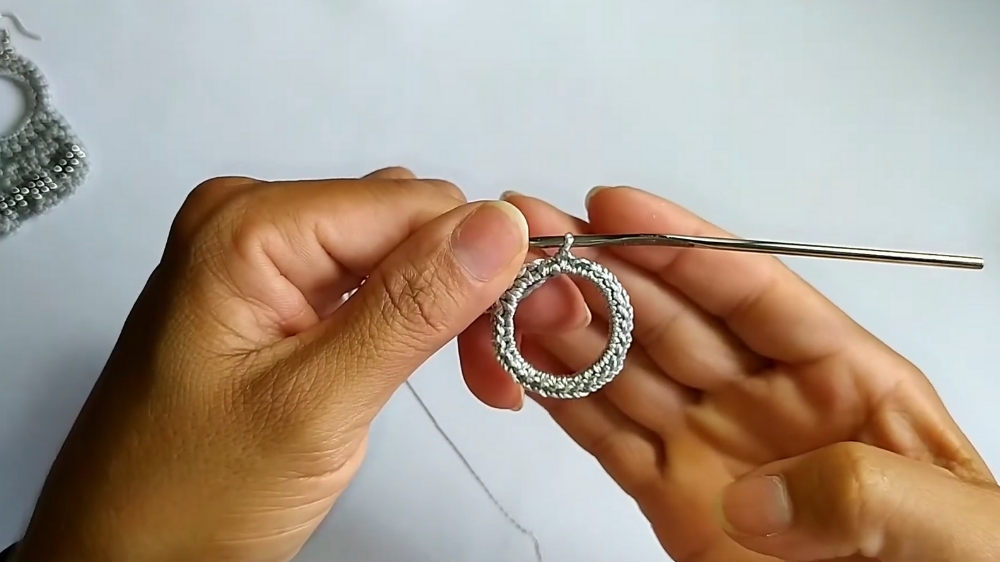
The geometric or floral motifs are then shaped by working in rounds or rows, with instructions guiding you to crochet symmetrical or asymmetrical designs.
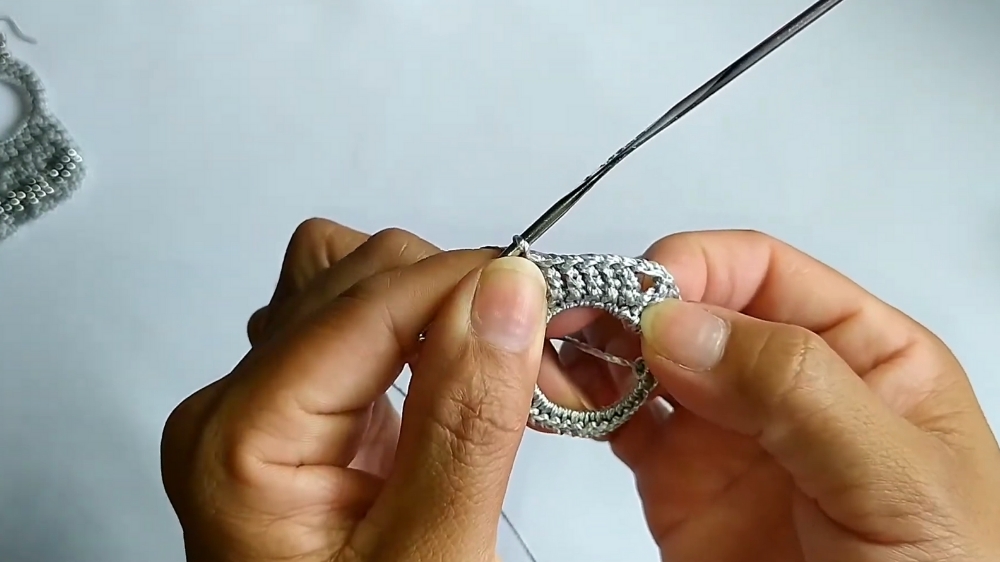
Once the main body is completed, the pattern proceeds to attach a small metal or crochet loop at the top, which connects to earring hooks—these are secured with jump rings or slip stitches for durability.

Midway through, the pattern introduces decorative elements such as beads or layered stitches, adding texture and visual interest.

Finishing touches include trimming loose ends, adding embellishments like tiny charms or beads, and ensuring the stitches are even for a polished look. The entire process emphasizes neatness and precision, resulting in earrings that are both beautiful and resilient.
Materials
- Thick silk thread: The specific type used is 'tecto 288' in the color 'cinta'.
- Crochet hook: Size 1.75 mm.
- Pair of earring hooks (anzol).
- A hoop: The creator makes her own with 8 cm of wire, bending the ends with pliers.
- Lighter.
- Needle and nylon thread: For attaching the beads.
- Small beads (miçangas).
Tutor's Suggestions
- The wire used for the hoop can be found at a construction store and is very cheap.
- When covering the wire hoop, make sure the stitches are tight so the wire doesn't show through.
Special Features
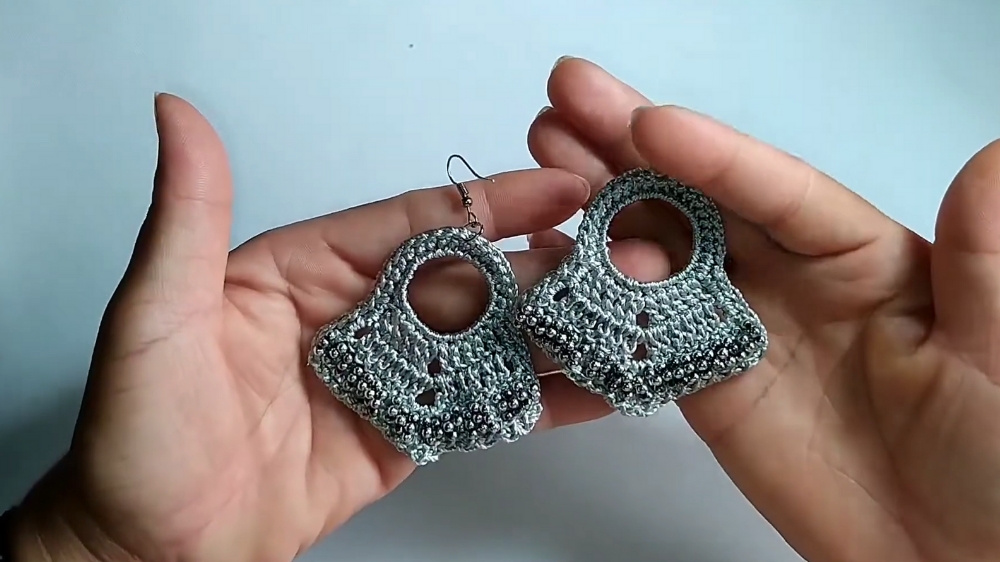
The unique design of the earring includes a simple shell stitch along the bottom and a beaded detail along the front.
Level of Difficulty
The project is very easy and beautiful at end. The steps are straightforward, and the creator walks through each one in detail.
Step-by-Step Instructions
The tutorial on how to make an easy and beautiful crochet earring. The creator, shares her excitement about the project and hopes viewers will enjoy it. Here is a step-by-step Details of the earring tutorial.
Conclusion
The tutorial concludes with the finished earring and a final look at the back, which is neat and tidy with no loose threads. The creator thanks the viewers and wishes them well.