
Festive Crochet Gnome Pattern Perfect for Seasonal Decor
Fresh charm arrives with this Crochet Gnome Pattern shaping a balanced character suited for shelves, gardens, and serene home decor accents.

Miniature Crochet Gnome Pattern Small Yet Eye-Catching
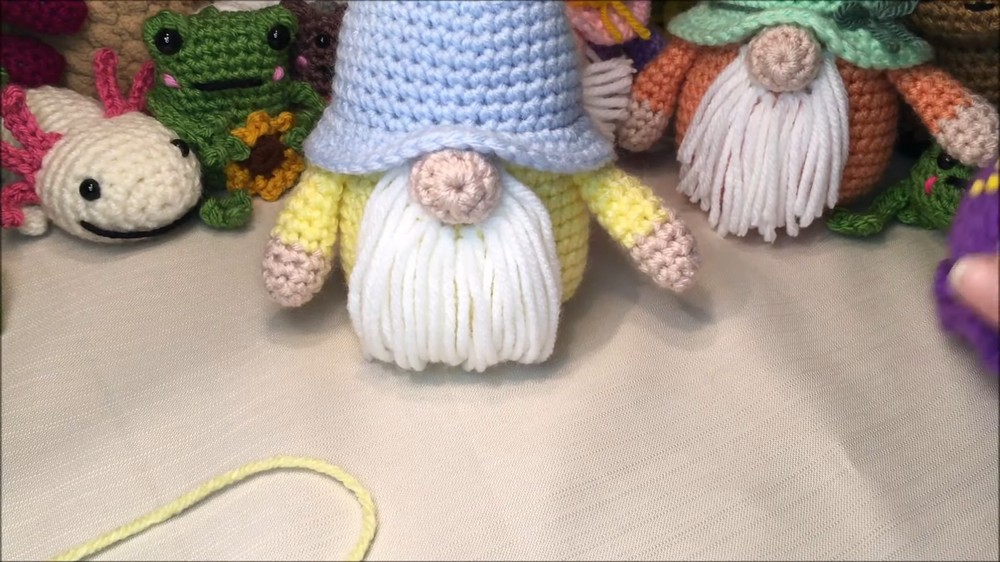
A delightful sense of personality shines through this decorative figure, making it a charming addition to a variety of interiors. The Crochet Gnome Pattern presents a rounded silhouette, tall pointed hat, and simple facial details that give it a friendly and appealing look. It fits beautifully on shelves, mantels, tabletops, or entryways, adding warmth and character to seasonal displays and everyday décor. Its compact proportions allow easy placement while keeping the overall arrangement visually balanced. The textured surface enhances depth and visual interest, creating a cozy and inviting presence.

It supports flexible color choices, allowing the look to complement festive décor, soft neutral settings, or lively interior styles. The finished piece suits special occasions and home styling alike, adding a meaningful touch that feels personal and refined. Its balanced form and gentle details create a timeless visual appeal, offering a cheerful accent that enhances everyday spaces with warmth, character, and a welcoming presence all year round.
Materials Needed
To make your crochet gnome, you will need the following:
- Medium-weight yarn (#4) - Choose colors based on your preferred theme.
- Crochet Hook - 4.25 mm, suitable for the listed yarn weight.
- Scissors - For cutting the yarn.
- Stuffing - Polyester fiberfill for stuffing the body and hands.
- Stitch Marker - To track your rounds or rows accurately.
- Tapestry Needle - For weaving in ends and attaching pieces.
- Optional Decorations - Butterfly patterns, bows, or themed accents (e.g., leaves, snowflakes, hearts).
Step-by-Step Instructions
1. Start with the Hat
- Begin at the top of the hat using a magic loop or preferred method. For Row 1, work 6 single crochets into the loop and use a stitch marker to track your rows.
- Continue increasing stitches gradually in every other row as the hat expands:
- Row 3: Increase to 8 stitches.
- Row 5: Increase to 10 stitches.
- Row 7: Increase to 12 stitches.
- Follow the pattern to increase stitches until Row 19.

2. Create the Brim and Transition to the Body
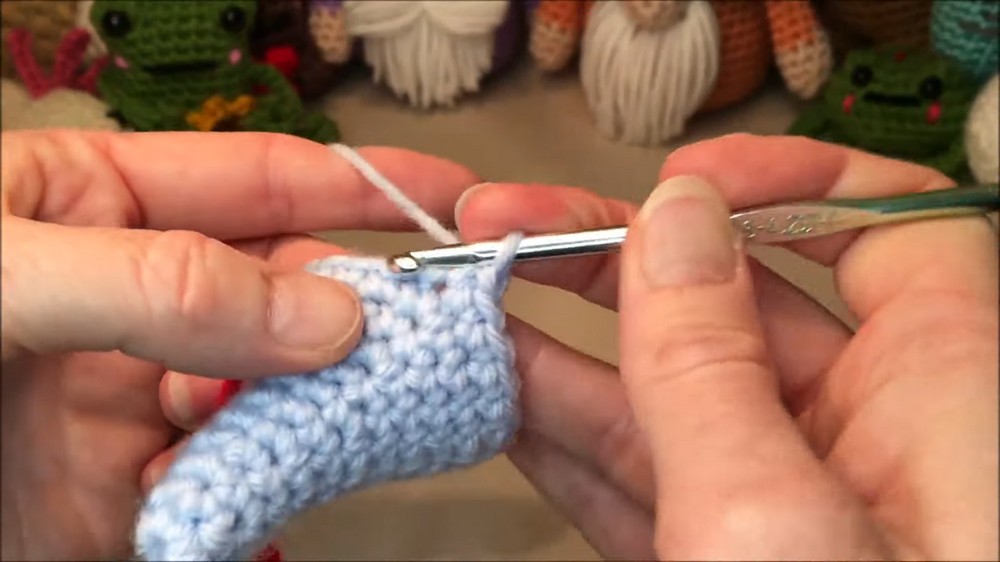
- For Row 25, crochet through the front loops only to create a distinct brim on the hat.
- Once the brim is complete, move on to the base of the body (Row 28), working in the back loops for the first row to secure the body to the brim.
3. Crochet the Arms
- Start with the hand color and crochet 8 single crochets into a magic loop for Row 1.
- Continue with the hand in the same color for Rows 2–4, crocheting 8 single crochets in each row.
- Transition to the body yarn color on Row 5 and crochet Rows 5–10 with 8 single crochets in each row. This creates the arm.
- Add stuffing to only the hand part (not the arm) to ensure the arms don’t stick out awkwardly. Flatten the open end and crochet it shut with 3 single crochets.
4. Connect the Arms to the Body
- Attach the arms to the body in Row 29, crocheting through both the arm stitches and the body stitches simultaneously for a secure hold.
- Continue with Rows 30–39, crocheting 36 single crochets per row to shape the body.

5. Stuff the Body
- Gradually stuff the body as you work, ensuring that the bottom is stable and slightly flatter for easy display.
6. Close the Body
- Decrease the body’s circumference:
- Row 40: 4 single crochets, 1 decrease (repeat for a total of 30 stitches).
- Row 41: 3 single crochets, 1 decrease (repeat for a total of 24 stitches).
- Row 42: 2 single crochets, 1 decrease (repeat for a total of 18 stitches).
- Row 43: 1 single crochet, 1 decrease (repeat for a total of 12 stitches).
- Row 44: Decrease across for a total of 6 stitches.
- Slip stitch to close the bottom and securely weave in the ends.

7. Add the Nose
- Use skin-colored yarn to crochet the nose:
- Start with 10 single crochets into a magic loop for Row 1.
- Work Rows 2–4 with 10 single crochets per row, then add light stuffing to form a rounded nose.
- Position the nose under the brim and sew it securely to the body.
8. Add the Beard (Optional)
- Prepare the yarn strands for the beard by wrapping the yarn around your hand about 15 times, then cutting the loops into equal sections (approx. 7.5 inches).
- Fold each strand in half and attach them under the nose by inserting a hook into a stitch, pulling the loop through, and tying with a simple knot.
- Add more yarn as required around the nose to create a full beard. You can even experiment by brushing the yarn to create a textured look or separating strands for a finer effect.
9. Decorate Your Gnome
- Use embroidery floss or yarn to create optional decorations:
- Butterflies: Attach the wings using yarn loops to create a layered effect. For the body, use a long stitch to connect the wings.
- Alternative Themes: Use charms or seasonal accents like leaves, snowflakes, hearts, or clovers to customize your gnome for holidays and special events.
- Finish by tying or sewing on a decorative bow or other accessories where the beard and hat meet.
Special Features
- Continuous Construction: The hat, arms, and body are crocheted together, eliminating the need for complex attachment. This makes the design solid and sturdy.
- Customizable Design: You can alter colors or decorations to create various gnome themes, such as Christmas, Halloween, Spring, or other holidays.
- Beginner-Friendly Format: The step-by-step crochet-along format ensures clarity, with each stitch worked in real-time alongside a pattern guide displayed at the top of the screen.
- Versatility: The base design can transform into various characters or adopt countless themes, depending on your creativity.
Level of Difficulty
The project is rated beginner to intermediate. While basic skills like single crochet and working in the round are fundamental, the incorporation of techniques such as increasing, invisible decrease, working in the front/back loops, attaching pieces, and embroidering (for details like butterflies) makes this a great project for building skills.
Tutor’s Suggestions
- Use Stitch Markers: Place a stitch marker at the start of each row to keep track of stitches and ensure accuracy.
- Stuff Gradually: Add stuffing as you go to maintain a firm, stable shape without overstuffing.
- Handle Color Changes Carefully: When transitioning colors (like for the hands or beard), tie the new yarn tightly to the old color and ease into the new stitch.
- Pin for Precision: The tutor recommends pinning the nose, beard, or other decorations in place before attaching them to avoid uneven alignment.
- Ensure Limb Placement: Position the arms near the seam, ensuring the knotted strands face forward for a clean and stable look.
Uses
- Holiday Decorations: Create themed gnomes for Christmas, Halloween, Valentine’s Day, or other occasions.
- Unique Gifts: Handmade gnomes make wonderful gifts for friends or family, especially when customized with tailored decorations.
- Festive Decor: Use as table centerpieces, shelf decorations, or festive accents for your home or workspace.
- Crochet Practice: This project provides excellent practice for working in the round, increasing, and attaching pieces seamlessly.
Pro Tip
When crafting the beard, consider brushing out the yarn strands with a pet or wire brush to create texture. This enhances the overall look of the gnome and makes the beard appear fluffier. For a unique touch, you can shape the beard using scissors after attaching it to the gnome.
Conclusion
This creative gnome crochet tutorial combines fun and simplicity, allowing you to craft whimsical, themed decorations for numerous occasions. The detailed guidance from the tutor ensures that even beginners will enjoy success, and the seamless design makes the assembly process stress-free. Whether you’re making an Easter bunny, Christmas elf, or autumn gnome, the options are limitless! Get creative with decorations and colors to bring your own unique take to this adaptable project.