
Cute Crochet Snake Amigurumi Free Pattern Made Playfully Safe
Playful curves highlight this Crochet Snake Amigurumi Pattern, guiding a friendly coiled figure suited for gifts and creative decor spaces.

Wildform Crochet Snake Amigurumi Pattern Inspired by Nature Lines
Generating a delightful and colorful toy becomes a breeze with the Crochet Snake Amigurumi pattern, a project that brings a sense of accomplishment to beginners and experts alike.
The design features a flexible, winding body that is perfect for draping over shelves or coiling into cute shapes, making it a versatile decorative piece for any room. One of its best features is the ability to personalize the length and color palette, allowing you to match specific nursery themes or personal styles.
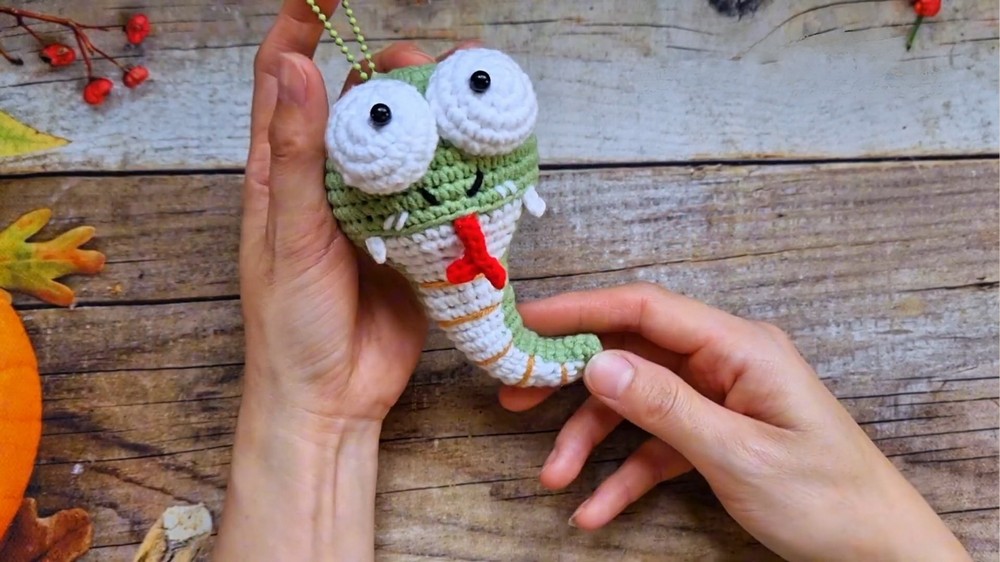
Snake Keychain Crochet Free Pattern
Finished Size
- Height: Approximately 10–12 cm.
- Width: Varies depending on yarn type and tension.
Materials
- Yarn:
- 125g yarn (Recommended: Cotton or Acrylic in at least two colors, one primary body color and one accent color).
- Suggested Colors: White (for accents), blue or green (for body).
- Crochet Hook: 2.5mm hook.
- Safety Eyes: Approx. 6 mm.
- Stuffing: Polyfiber stuffing for the head and body.
- Stitch Marker: Optional, for marking rows.
- Scissors: For cutting yarn.
- Hot Glue Gun/Glue: Optional for attaching eyes or tongue.
- Darning Needle: For sewing parts (tongue, tail, fangs).
- Keyring clasp: To attach to the head.
Gauge
Gauge is not crucial for amigurumi, but keep stitches tight enough to prevent stuffing from showing:
- Single Crochet (SC): ~6 stitches per inch using medium yarn and 2.5mm hook.
Special Techniques
- Magic Circle: Used to create a tight and neat start for crocheted pieces.
- Invisible Decrease: Works through front loops of two stitches for seamless decreases.
- Color Changes: Switch thread seamlessly using instructions in relevant rounds.
Tips for Success
- Tension: Keep your stitches tight for a sturdy structure.
- Customization: Add decorative patterns if desired (stripes, spots).
- Small quantities: Limit stuffing in smaller parts like the tail or eyes to avoid bulging shapes.
- Organize: Use stitch markers to keep track of rounds, especially for increases and decreases.
Pattern Instructions
1. Head
Using your primary body color.
- Round 1: Make a magic circle, then crochet 6 single crochet (sc) into the circle. Tighten the circle. (6 stitches).
- Round 2: Increase in each stitch: Crochet 2 sc in each stitch around. (12 stitches).
- Round 3: [1 sc, 1 INC] repeat around. (18 stitches).
- Round 4: [2 sc, 1 INC] repeat around. (24 stitches).
- Round 5: [3 sc, 1 INC] repeat around. (30 stitches).
- Round 6–12: Work 42 sc evenly for 6 rounds.
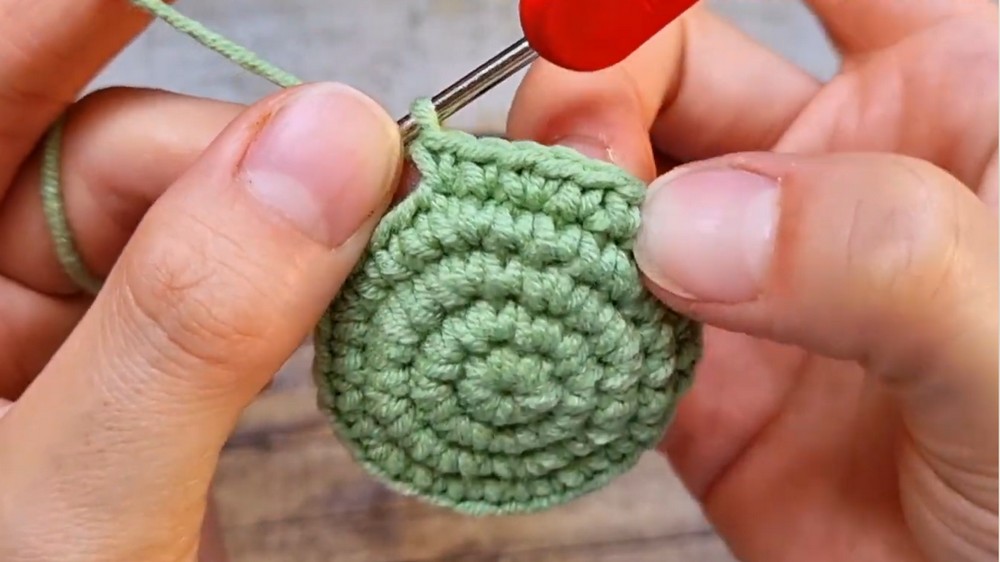
Stuff the head firmly using polyfiber stuffing before you continue.
2. Neck Transition
- Round 13: Switch to color B (e.g., contrasting white thread). Crochet into the inner loops to create surface texture. [5 sc, 1 INC] repeat around. (42 stitches).
- Round 14–16: Maintain 42 sc rows to give depth to the head.
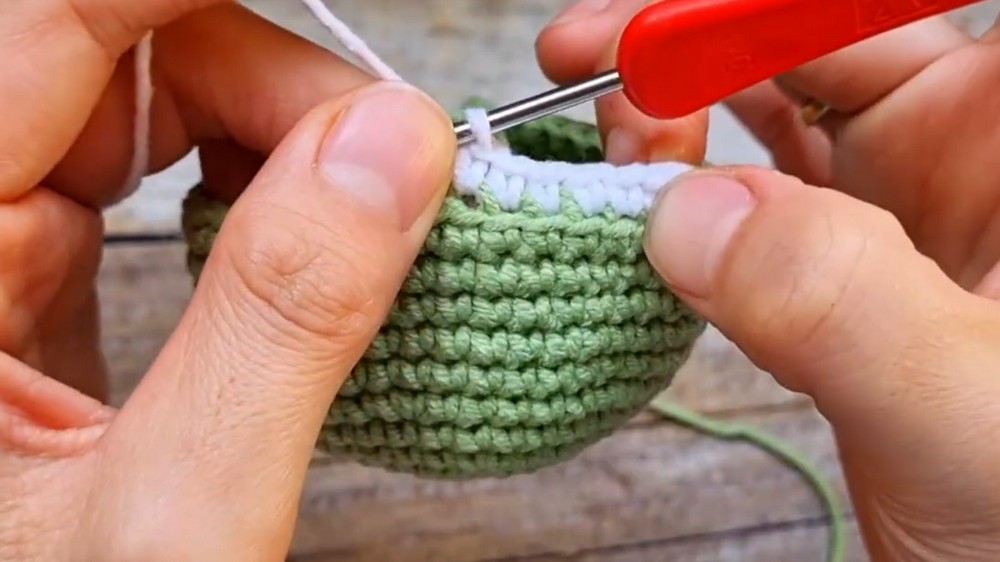
3. Body
Switch back to color A to begin forming the snake’s body.
- Rounds 17–18: Begin decreasing stitches: [5 sc, 1 DEC] repeat around. (36 stitches).
- Rounds 19–26: Alternate 2 rows of 36 sc with 1 row that decreases stitches slightly. Repeat pattern (e.g., [4 sc, 1 DEC]). Work until 24 stitches.
4. Tail
When shaping the tail:
- Gradually decrease stitches for each round:
- Start: [4 sc, 1 DEC] – reduces to 18 stitches.
- Next rows: [3 sc, 1 DEC] – reduces to 12 stitches.
- Complete the tail by crocheting until you reach 6 stitches.
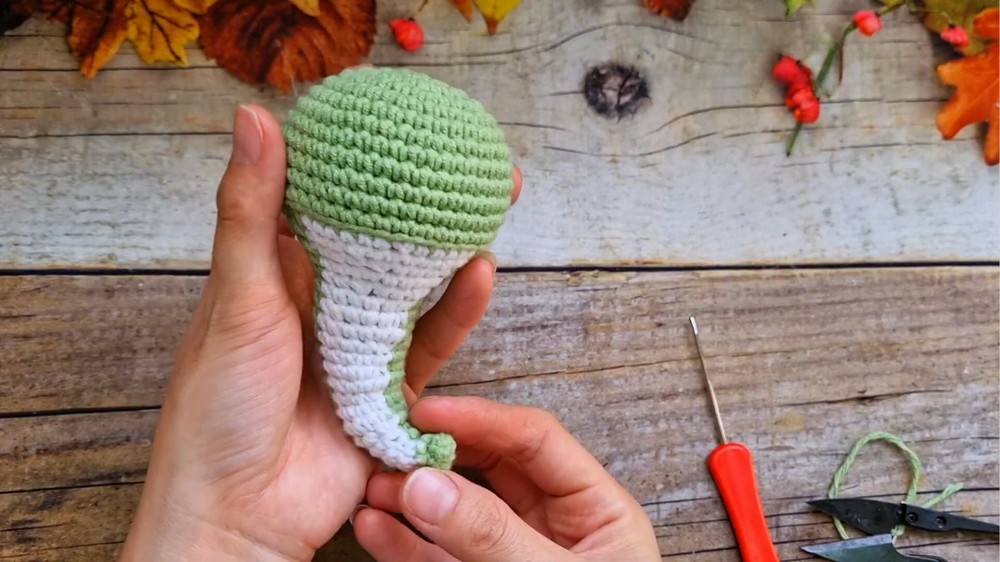
Thread a darning needle and sew closed the tail’s opening. Optionally curl the tail using threaded yarn as described in the transcription.
5. Eyes
Using color B (white):
- Round 1: Crochet 6 sc into a magic circle. Tighten the circle. (6 stitches).
- Round 2: [1 sc, 1 INC] repeat around. (12 stitches).
- Round 3: [2 sc, 1 INC] repeat around. (18 stitches).
- Rounds 4–5: Work 18 sc evenly for two rows.
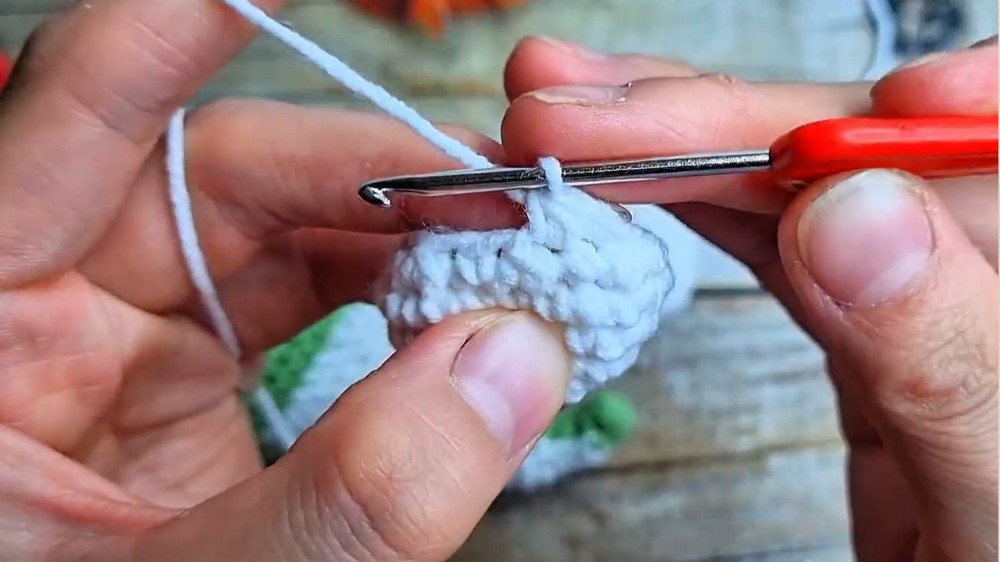
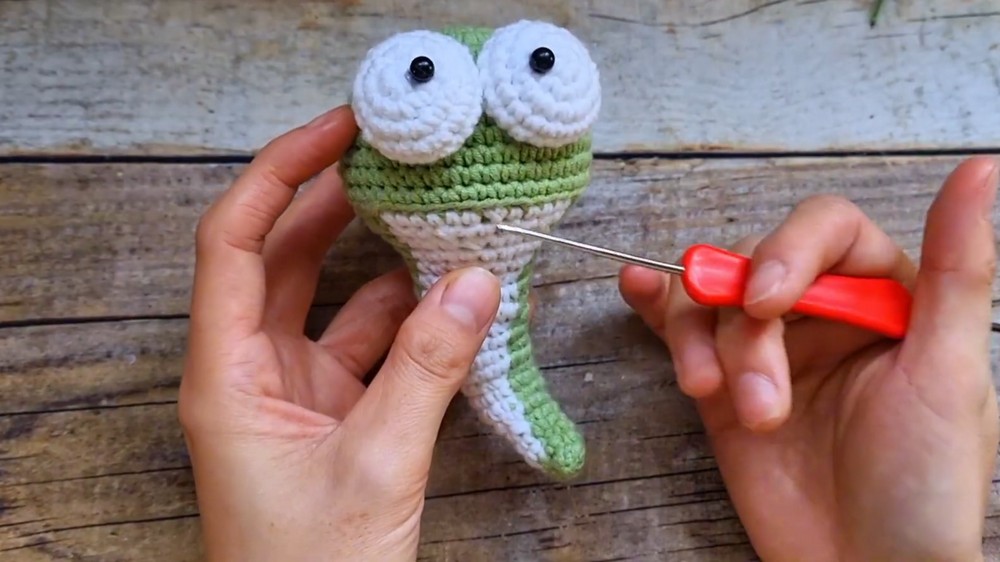
Flatten slightly and glue or sew bulging safety eyes into the center of each crocheted eye patch. Align and attach them securely to the snake's head using glue or sewing.
6. Tongue
Using red thread:
- Chain 7, slip stitch into the second chain from the hook. Repeat and finish.
- Attach tongue securely to the base of the snake’s head.
7. Fangs
Using color B:
- Chain 3, slip stitch into the second chain from the hook. Finish with decreasing stitches.
- Attach fangs symmetrically to either side of the mouth for a realistic look.
8. Decorative Body Patterns
Using contrast color (e.g., white):
- Insert your needle between stitches and add horizontal decorations onto the snake’s body. These can mimic stripes or veins and alternate every 2–3 rows. Work section by section for clean spacing.
Customization Ideas
- Colors: Experiment with vibrant or pastel colors for the body. Add striped designs for uniqueness.
- Keychain Variations: Make smaller snakes, or crochet multiple snakes that coil together around one ring.
- Glitter Yarn: For a shiny or metallic design that stands out!
- Add accessories: Tiny bow ties, hats, or facial expressions can make your snake look adorable.
Conclusion & Final Remarks
Congratulations, your snake keychain is complete! With its cute bulging eyes, curling tail, and decorative patterns, it’s an ideal gift or stylish accessory for daily use.
Be sure to add a sturdy keyring to its head so it works perfectly as a keychain. If using glue for details, allow the glue to fully dry before using. Adjust the tail’s curl and any decorative elements to match your preferences.