
Easy Free Crochet MINI ICE CREAM Pattern for Children’s Toys
Crochet your own mini ice cream with this free pattern, a fun and simple way to make cute decorations or tiny handmade gifts everyone will love.
Tiny, colorful crochet treats always bring a bit of happiness to my day. One of my favorite small projects to crochet is a playful little dessert that’s fun and quick to make. The Free Crochet MINI ICE CREAM Pattern lets you create an adorable miniature ice cream amigurumi perfect for anyone who loves cute and simple yarn projects.
Free Crochet MINI ICE CREAM Pattern that's a Cute Amigurumi

This mini ice cream features a soft, rounded scoop sitting on top of a textured cone. You can choose any colors to match your favorite flavors, from creamy vanilla to strawberry pink or chocolate brown. The yarn feels smooth and cuddly, while the cone’s ridges add a nice touch of detail. Its small size makes it ideal as a keychain, a cute decoration for shelves or bags, or a tiny toy to brighten your day.

Great for beginners, this pattern mainly uses single crochet stitches, which are easy to learn and work quickly. The clear instructions make it a relaxing and enjoyable project, whether you’re new to crochet or just want a fast, rewarding make.
The Free Crochet MINI ICE CREAM Pattern is perfect as a sweet handmade gift, a charming decoration, or a delightful collectible. If you enjoy creating quick, simple projects with lots of personality, this small yarn treat is a great fit for you. Give it a go, and enjoy every stitch of this cute little crochet delight.

Amigurumi Ice Cream Keychain Crochet Pattern
In today’s pattern, we’ll be learning how to crochet an adorable little ice cream amigurumi, perfect for keychains, gifts, or even selling. This ice cream cone comes together quickly, uses minimal yarn, and can be customized in the colors of your choice. The frilled edge adds a cute touch that makes this ice cream truly stand out. Let’s get started on this fun, beginner-friendly project!
Quick Overview Of Pattern
- Ice cream is crocheted from the top down, beginning with a magic ring.
- The ice cream scoop is worked in rounds with simple increases.
- Features a frilled (ruffled) edge, achieved with special stitches in the front loops.
- The cone section is worked directly onto the scoop base and shaped with decreases.
- Minimal sewing: threads are woven in at the end.
- Stuffing is added before the final closure.
- Keychain ring can be attached for personalization and utility.
- Quick to make—perfect for gifts or using up yarn scraps.
Notes
- All instructions are in US crochet terms.
- Pattern calls for six-strand cotton yarn, but any smooth yarn will work.
- Choose colors you love for your scoop and cone. Pinks, browns, yellows, or pastels all work wonderfully.
- Be sure to stuff the amigurumi before the last round.
- The frilled edge is worked only in the front loop for a decorative finish.
- If your stitches are tight, use a smaller hook to keep the stuffing inside.
- Weaving in tails neatly makes for a tidy, professional look.
Skill Level
Beginner – Lower Intermediate
- Basic amigurumi skills: magic ring, single crochet, increasing, decreasing, working in the round, color change, front loop/back loop stitches, and simple assembly.
Materials
- Yarn: 6-strand cotton yarn or similar, small quantities in:
- Color A: for ice cream (e.g., pink)
- Color B: for cone (e.g., pumpkin or tan)
- 2.5 mm crochet hook (or size to match yarn)
- Yarn needle/tapestry needle (for sewing ends)
- Stitch marker
- Scissors
- Polyester fiberfill or stuffing (silicone fleece)
- Optional: keychain ring
Measurements / Sizing
- Finished ice cream measures about 2–2.5 inches (5–6.5 cm) tall.
- Size may vary depending on yarn and hook used.
Gauge
- Gauge is not critical for this small amigurumi, but keep stitches close and tight to prevent stuffing from showing.
Stitch Abbreviations
- MR – magic ring
- ch – chain
- sc – single crochet (half point)
- inc – increase (2 sc in same stitch)
- dec – decrease (single crochet 2 together)
- dc – double crochet (stick/rod)
- sl st – slip stitch
- st(s) – stitch(es)
- FLO – front loop only
Special Stitches
- Front Loop Only (FLO):
For a designated round, insert your hook only into the front loop of each stitch rather than under both loops. This creates a ridge, useful for adding frilled or ruffled looks. - Frill Motif:
In the FLO: sc, (3 dc in next st), sc to create each wave/ruffle. - Amigurumi Decrease (Invisible Decrease):
Insert hook into the front loop of the next two stitches, yarn over, pull through, yarn over, pull through remaining loops.
The Crochet Pattern
Ice Cream Scoop (Color A)
Round 1:
Start with a MR.
Ch 1 (does not count as a stitch), work 8 sc into the ring.
Pull tail to close. (8 sts)
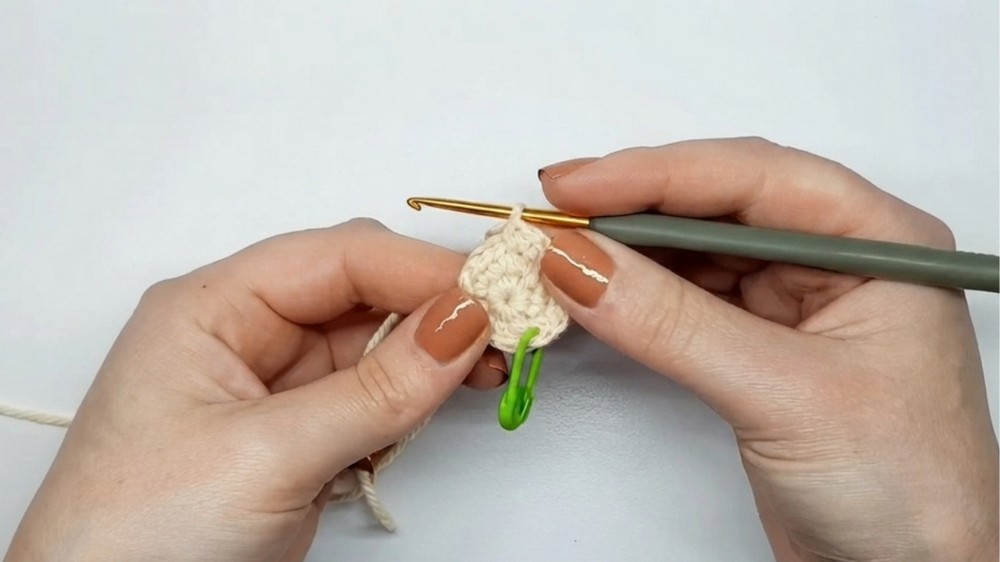
Round 2:
Inc in each st around. (2 sc in each st) (16 sts)
Place stitch marker in first st to denote round start.
Round 3:
(Sc 1, inc) repeat around. (24 sts)
Round 4:
Sc in each st around. (24 sts)
Rounds 5–7:
Repeat round 4: Sc in each st around. (24 sts per round)
Scoop Frill (Worked in Front Loops, Color A)
Round 8: (FLO for this round ONLY)
(Sc 1, in next st work [sc 1, 3 dc, sc 1]), repeat sequence all the way around to create 12 ruffles or frills.
Finish the round with a sl st to the first st. Fasten off the pink yarn.
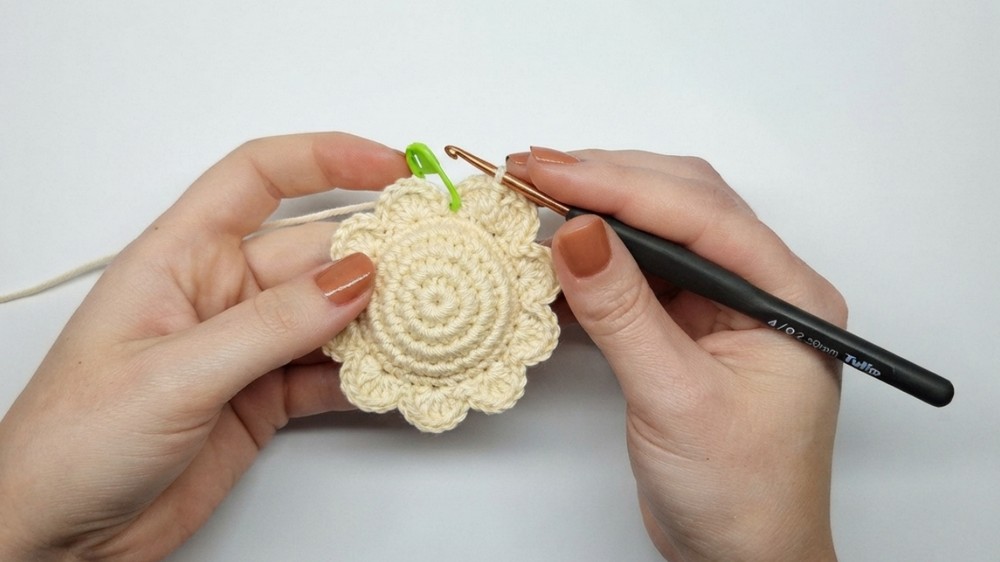
Attach Cone Color (Color B)
Round 9:
Join color B by inserting hook into any unused back loop from round 7.
Ch 1. Sc in each st around, working only in the remaining back loops. (24 sts)

Round 10:
Sc in next 6 sts, dec 1 — repeat 3 times around. (21 sts)
Round 11:
Sc in each st around. (21 sts)
Round 12:
Sc in next 5 sts, dec 1 — repeat 3 times around. (18 sts)
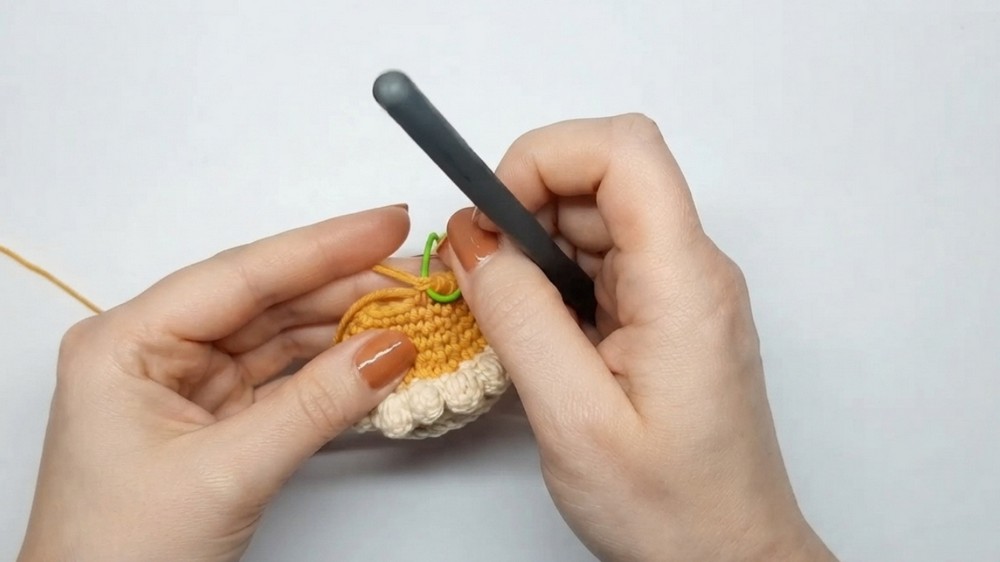
Round 13:
Sc in each st around. (18 sts)
Round 14:
Sc in next 4 sts, dec 1 — repeat 3 times around. (15 sts)

Round 15:
Sc in next 3 sts, dec 1 — repeat 3 times around. (12 sts)
Begin stuffing the amigurumi at this stage, adding a little at a time for a rounded, firm finish.
Round 16:
Sc in next 2 sts, dec 1 — repeat 3 times around. (9 sts)
Round 17 (Final):
(Sc 1, dec 1) — repeat 3 times around. (6 sts)
Fasten off, leaving a long tail for closing.

Assembly & Finished Size
- Thread the yarn tail through a tapestry needle.
- Weave the needle through the front loops only of the final round, gently pull to close the cone tip.
- Tie a knot to secure and weave the tail through the cone to hide.
- Weave in any remaining yarn tails neatly inside the project.
- If desired, attach a keychain ring to the top center of the ice cream with leftover yarn.
- Finished ice cream should measure about 2–2.5 inches tall with a neat frilled scoop and a pointed cone base—stuffed firmly but not overfilled.
Conclusion and Ending Words
Your charming amigurumi ice cream keychain is complete! This project is a wonderful way to use up yarn scraps and produce quick gifts or stock for a crochet fair. The frilly top adds a whimsical touch, and you can personalize it with your favorite colors or even add a face for extra personality.