
Easy Crochet Tulip Pot Free Pattern with Floral Displays
Brighten your space with this charming Crochet Tulip Pot which is an easy and delightful way to add color and warmth to any room or gift.
This project is a fun way to add flowers to your home all year long. The Crochet Tulip Pot has bright tulips made with yarn that look nice on any table or shelf. It can also be a nice gift for friends or family. The flowers are a lovely detail that brightens up any space, giving a cheerful look without needing real plants.
Fun Crochet Tulip Pot Free Pattern for Shelves
The pot itself feels soft and thick because of the yarn and stitches, giving it a nice shape. It is easy to do even for people new to crochet, as only a few simple stitches are used. The combination of soft yarn and tight stitches helps the pot keep its form well. This makes it both pretty and useful for holding small items or simply as decoration.
Channel Credit:
This pattern is based on a YouTube tutorial by DIY Yarn Crafts. Full credit goes to the creator for the idea and clear instructions. Please visit their channel to watch the complete video and support their work.

To make the Crochet Tulip Pot, you need medium-weight yarn and a crochet hook. These materials are easy to find at most craft stores. The finished pot is small to medium in size — just right for desks, shelves, or windowsills. It adds a splash of color without taking up much space.
This project is quick to complete, usually taking a few hours from start to finish. It fits nicely into a weekend’s free time and offers a satisfying result. The pot also makes a thoughtful homemade gift for someone who likes bright, handmade items.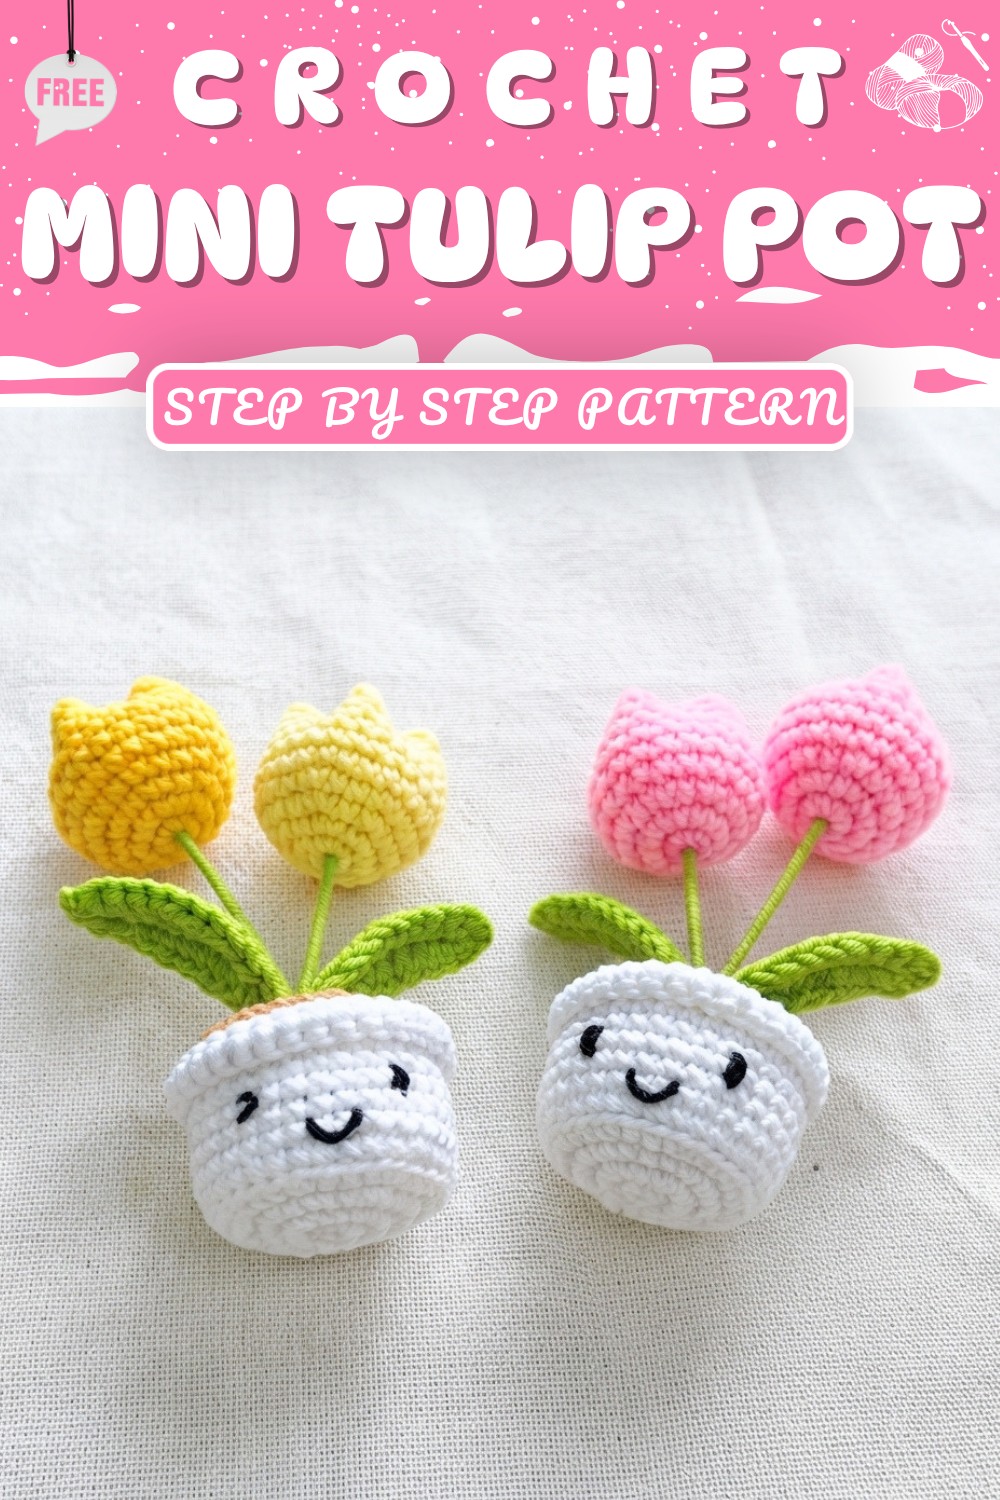
Mini Tulip Pot Crochet Pattern
In this pattern, I will show you how to crochet a beautiful mini tulip pot in a very simple and easy way. These are the materials you are going to need.
Pattern Highlights
Pot
- Made in the round, starting with a magic ring.
- Rows 1–4 shape the base; row 5 creates a sharp edge by working in back loops only.
- Rows 6–11 build upward for the pot’s height.
- Row 12 uses front loops only to make a rim detail.
- Row 13 finishes the pot.
Soil
- Crocheted as a disc, starting with eight single crochets in a magic ring.
- A small center hole is left to insert the flower stem.
- Worked in the round, then fastened off with a long tail for sewing to the pot.
Tulip Bud
- Bud is worked from the base up in the round.
- Standard increases for shaping, then straight rounds for the bud’s length.
- Finished with a slip stitch and long yarn tail for sewing.
- Cross stitch sewn at the top for a realistic finish.
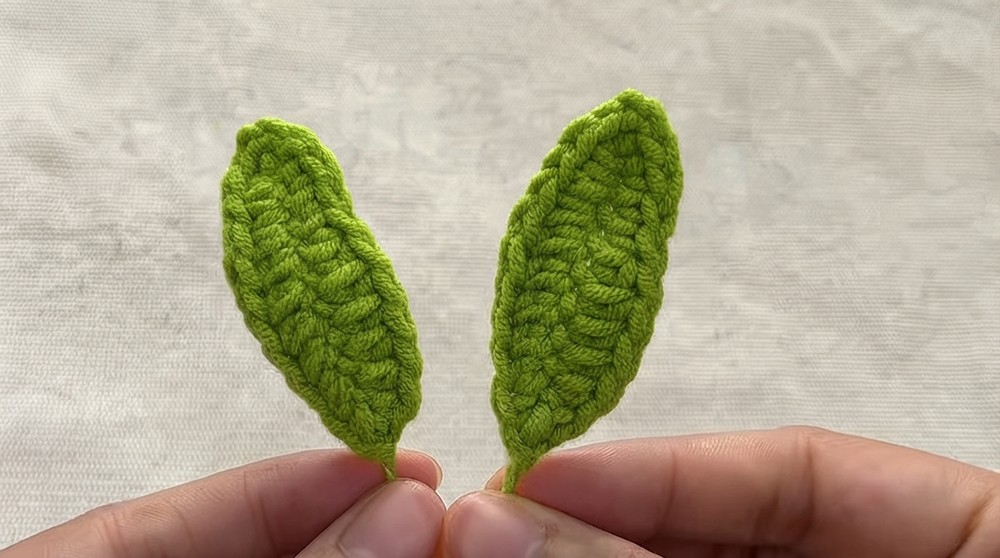
Leaves
- Leaves are crocheted around a 16 cm piece of wire.
- Leaf is formed with a foundation chain, then single and half double crochets are worked along the chain and back.
- A combination of chain, slip stitch, and final yarn wrapping secures the leaf and wire.
Stem/Branch
- Flower stems are made from 10 cm wire, wrapped with green yarn.
- Leaves and multiple flowers can be tied to the main stem and wrapped together for a realistic look.
Notes
- The pattern is worked in both continuous rounds and joined rounds; follow chain and slip stitch instructions closely.
- Use a stitch marker to keep track of the start or end of each round.
- Use a small amount of stuffing for the tulip bud and the pot.
- Wrap wire tightly with yarn for a neat, cohesive look.
- Crocheting over the yarn tails as you work will minimize finishing work.
- When making multiple tulip buds, consistently count stitches and rounds for a uniform appearance.
Skill Level
Beginner to Advanced Beginner
This pattern is accessible to anyone familiar with the basics of crochet—single crochet, increases, crochet in the round, and working into back/front loops.
Materials
- Yarn in desired colors (flower bud, pot, leaves, soil, and stem/branch)
- Crochet hook suitable for your yarn weight (size was not specified, but a typical 2.5–3.5 mm works well for amigurumi)
- Stitch marker
- Embroidery/craft scissors
- Embroidery needle
- Pillow stuffing/fiberfill
- Green floral wire (16 cm for leaves, 10 cm for flower stems)
- Craft glue suitable for yarn
- Optional: Additional yarn colors for variety in flowers
Measurements / Sizing
- Pot diameter: ~3.5–4 cm
- Pot height: ~3–3.5 cm
- Tulip bud: ~3 cm high
- Leaves: ~6–7 cm long (depends on wire length)
- Total finished height: ~10–12 cm with stem
Gauge
Gauge is not crucial. The final size will mostly depend on your yarn, hook, and tension. Tight, dense stitches produce the best results for amigurumi, so stuffing does not show.
Stitch Abbreviations
| Abbreviation | Stitch Name |
|---|---|
| ch | Chain |
| sl st | Slip stitch |
| sc | Single crochet |
| hdc | Half double crochet |
| inc | Increase (2 sc in one st) |
| FLO | Front loops only |
| BLO | Back loops only |
| st(s) | Stitch(es) |
Special Stitches
- Magic Ring: Form a loop, work required stitches into the ring, then pull tight to close.
- Increase (inc): Work two single crochet stitches in the same stitch.
Pot Pattern
Rnd 1:
Make a magic ring. Work 8 sc in the ring. Pull tight and join with sl st to first sc. Ch 1.

Rnd 2:
Inc in each st around (8 increases, 16 sts total). Join with sl st to first sc. Ch 1.
Rnd 3:
(Sc in next st, inc in next st) repeat around (24 sts). Join with sl st to first sc. Ch 1.
Rnd 4:
(Sc in next 2 sts, inc in next st) repeat around (32 sts). Join with sl st to first sc. Ch 1.
Rnd 5 (BLO):
Sc in back loop only of each st around (32 sts). Join with sl st to first sc. Ch 1.
Rnd 6–11:
Sc in both loops around (32 sc per round). Join with sl st to first sc. Ch 1 at end of each round.
Rnd 12 (FLO):
Sc in front loop only of each st around (32 sts). Join with sl st to first sc. Ch 1.
Rnd 13:
Sc in both loops of each st around (32 sts). Join with sl st to first sc. Fasten off, weave in ends.

Soil Pattern
Rnd 1:
Make a magic ring. Work 8 sc in the ring. Leave a small center hole. Join with sl st to first sc.
Continue in standard amigurumi increases (no full instruction in transcript):
Shape into a flat disc slightly smaller than the pot top. Leave a long tail for sewing.

Tulip Bud Pattern
Rnd 1:
Magic ring. 6 sc in ring. Use stitch marker to mark end.
Rnd 2:
Inc in each st around (12 sts).
Rnd 3:
(Sc in next st, inc in next st) repeat around (18 sts).
Rnd 4:
(Sc in next 2 sts, inc in next st) repeat around (24 sts).
Rnd 5–10:
Sc in each st around (24 sts per round).
Finish:
Slip stitch, ch 1, fasten off leaving a long tail for sewing. Stuff the bud.
Sew a cross stitch at the top using a contrasting or matching color.

Leaf Pattern
Prepare 16 cm green wire.
Ch 12.
Working over the wire:
- Sc in second ch from hook.
- Hdc in next ch, then six more hdc (total 7 hdc).
- 3 sc (brings you to the tip).
- Ch 2, sc in same spot (creates point).
- Sc down opposite side for two stitches, hdc for seven stitches.
- Sc at last ch.
Finish by slip stitching to first st, ch 1, cut yarn.
Wrap remainder of yarn around any exposed wire.
Make two leaves in total.
Assembly & Finished Size
- Stuff pot with fiberfill.
- Sew soil disc onto top of pot, closing the opening.
- Thread twisted wire (wrapped with green yarn) through center hole in soil for the flower stem.
- Attach leaves: Position wire leaves along the stem, and wrap tightly with green yarn, adding glue as you go.
- Attach tulip bud: Glue and sew the finished bud to the top of the stem.
- Finish: Tidy yarn ends, shape leaves and flower, adjust stem for balance.
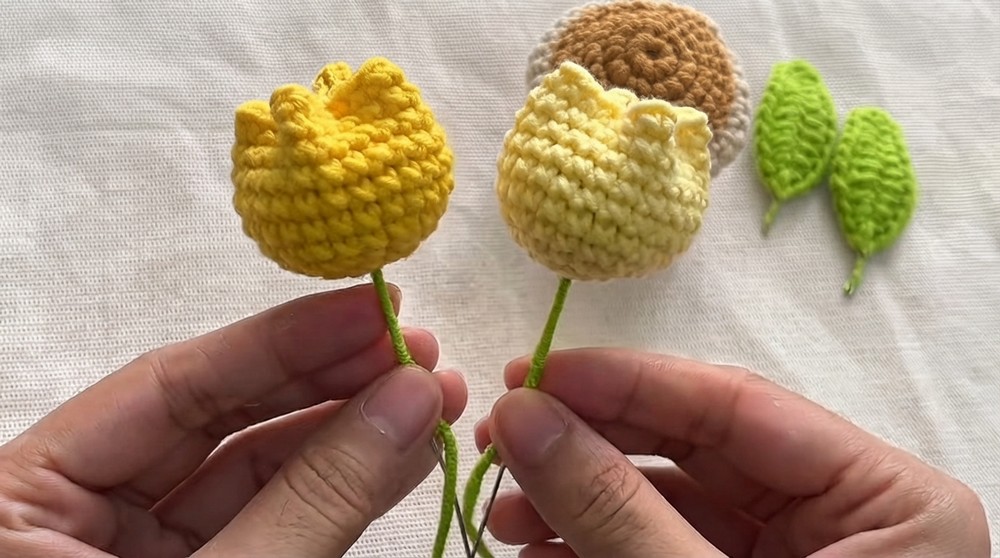
Final size: Approx. 10–12 cm tall (with stem), pot approx. 4 cm wide.

Conclusion
This project combines several essential crochet and assembly skills, making it a perfect practice in three-dimensional crochet. Your adorable tulip pot is ready to brighten any space or make a charming handmade gift. Remember to experiment with yarn colors for a variety of blooms. Thank you for following this tutorial, and happy crocheting!