
Easy Crochet Graduation Bouquet Free Pattern +Instructions
Enjoy your graduation by creating a charming Crochet Graduation Bouquet that adds vibrant color and heartfelt celebration to your special day.
Adding a personal touch to a special day makes it even more memorable. The Crochet Graduation Bouquet, created by Shelen Crochet, is a lovely and lasting choice that stands out from regular flowers.
Free Crochet Graduation Bouquet Pattern with a Floral Design
This project uses soft yarn flowers with layered petals and gentle curves, giving the bouquet a nice texture and shape. The flowers have a fun, slightly rounded look that feels both real and cozy.
Each flower and leaf is made separately and then put together to form the bouquet. You can change the sizes and colors to match your style or the graduate’s favorite colors.
Using cotton or cotton-blend yarn works best because it keeps the stitches clear and helps the flowers hold their form. To keep the stems firm and easy to arrange, a bit of floral wire inside each one is helpful.
The idea behind this bouquet came from wanting a special gift that lasts longer than fresh flowers.
It’s great for graduations but can also be used as decoration for parties, as a thoughtful gift for teachers or friends, or even as a keepsake to display at home or in an office. This project is a great way to add your own touch, letting you play with colors and shapes to make a bouquet that feels special and unique.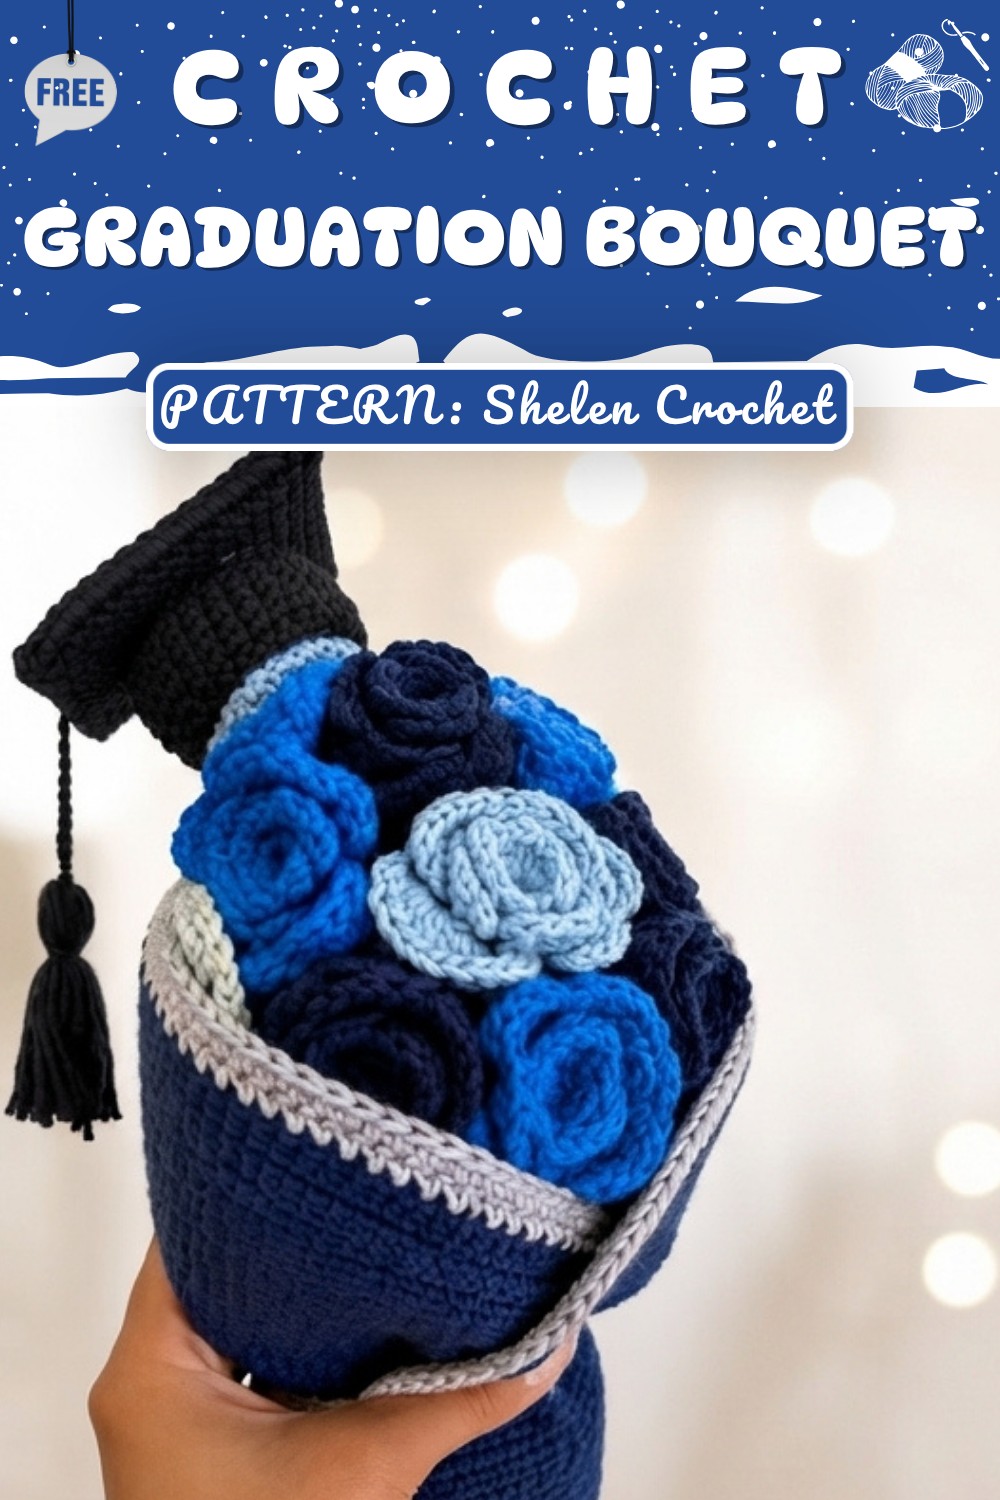
Made by Shelen Crochet
20 cm Graduation Bouquet Doll Pattern
In today's project, you will create a beautiful 20 cm graduation bouquet doll, featuring personalized face details, lush layered hair, a bouquet with floral accents, and classic graduation accessories. This design follows foundational tutorials for the 20 cm graduate model and builds upon them with step-by-step instructions for unique finishing touches.
Quick Overview of Pattern
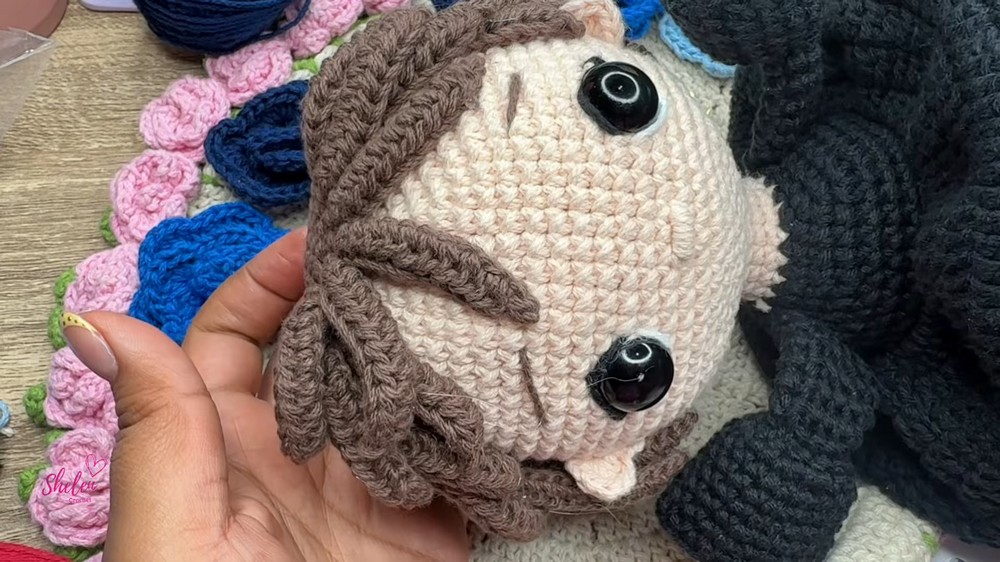
- Customized Facial Embroidery:
- Subtle white eye dots, short boyish eyelashes, classic embroidered nose, and thicker eyebrows.
- Three-Dimensional Ears:
- Crochet and embroidery combination for natural, proportional placement.
- Layered, Textured Hair:
- Multiple chained strands glued for full, tousled effect, with a methodical placement.
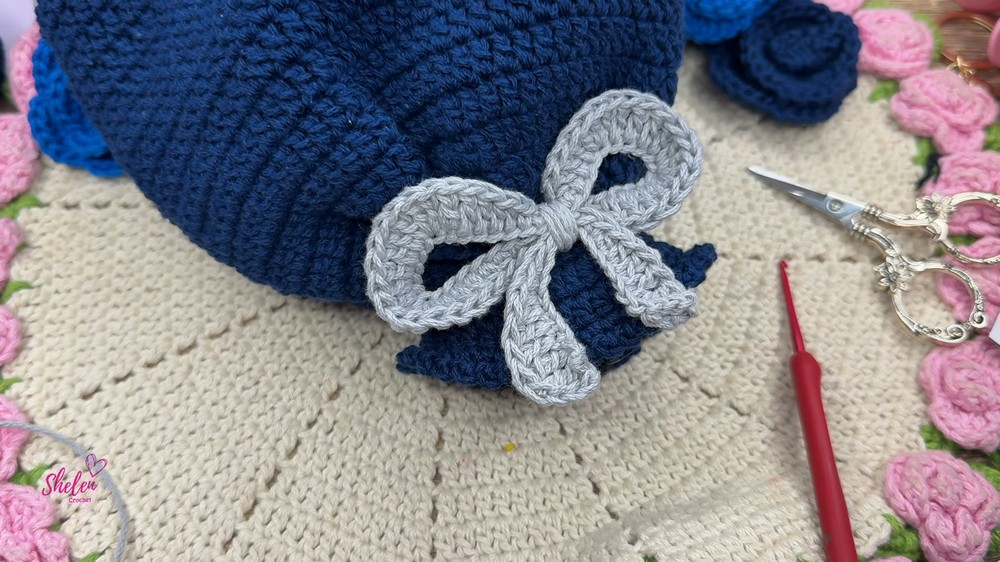
- Bouquet Edge & Decorative Bow:
- Special grey edge technique and a fabric bow placed for charm and balance.
- Bouquet Flowers:
- 8 crocheted flowers in royal blue, bluish, and navy attached at the “back” for bouquet fullness.
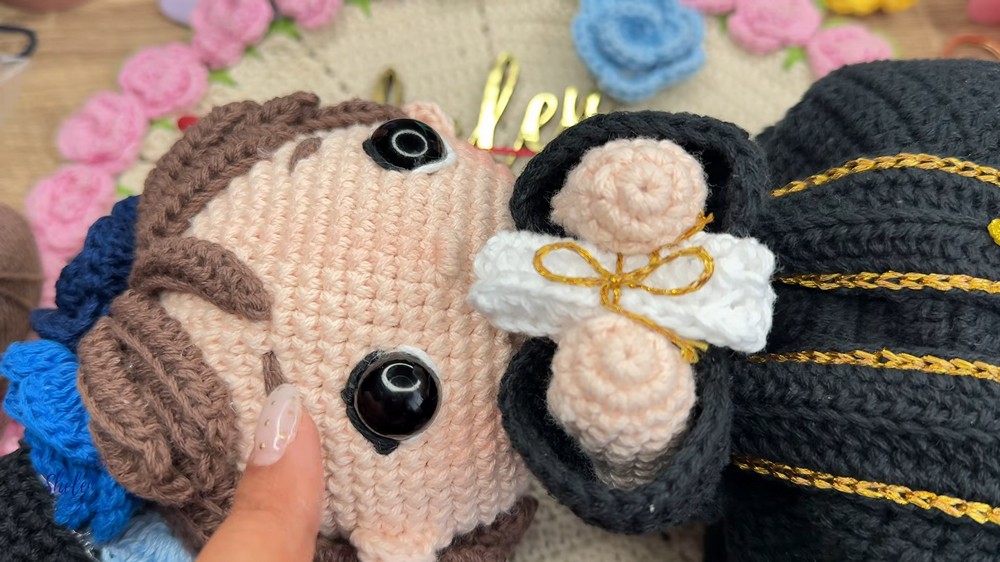
- Graduate Accessories:
- Mortarboard, stole, and diploma added after base assembly and attached with cold silicone glue.
- Personalized Touches:
- Foam/printed numbers and name for the stole, easily removable and adaptable for any graduate.

Notes
- The body and foundational garment of the doll follow the referenced 20 cm graduate pattern (see original video for body/dress construction).
- Face and hair details are applied before final assembly to ensure neatness.
- All bouquet, accessory, and embellishment steps make use of cold silicone glue for strong, quick bonds.
- Foam numbers or letters may be temporarily, lightly glued for later changes or personalization.
- Adjust flower count or placement for your desired bouquet density; colors are flexible for customization.
Skill Level
Intermediate:
Ability to work amigurumi in the round, attach small pieces, embroider facial details, and assemble multiple components confidently.
Materials
- 50g flesh color yarn
- 50g royal blue yarn
- 100g black yarn
- 50g brown yarn
- 50g bluish color yarn
- 100g navy blue yarn
- 50g fog / grey yarn
- Small amounts: gold, white yarn
- 2.5mm crochet hook
- Pillow stuffing
- 20 cm stick (for bouquet stem)
- 7 x __ cm cardboard (see main tutorial for exact size)
- Size 18 silicone safety eyes
- Embroidery needle
- Scissors
- Foam/printed letters and numbers (2 cm), silicone glue
- Blush powder and brush
Measurements / Sizing
- Total Height: Approx. 20 cm (excluding bouquet stick)
- Stole: Approx. 40 cm long x 3 cm wide
- Numbers/Letters: 2 cm high (for stole)
Gauge (and Stitch Pattern)
- Gauge: Standard tight amigurumi fabric; for head/hair cap, 36 sc circumference after 6 rounds should equal approx. 4–5 cm in diameter.
- Main stitches: Single crochet (sc) in spirals and rows, occasional half double crochet (hdc), and double crochet (dc) for ear shaping and hair.
Stitch Abbreviations
| Abbreviation | Meaning |
|---|---|
| ch | chain |
| sc | single crochet |
| hdc | half double crochet |
| dc | double crochet |
| sl st | slip stitch |
| inc | increase |
| MR | magic ring |
Special Stitches
- Bouquet Edge Join:
Work single crochets alternately through front and back loops of the foundation to join and reinforce the skirt edge. - Layered Hair Strands:
Chain desired strand length; sl st in 2nd ch, sc, then hdc in all remaining stitches, ending with a sl st to base.
Glue strands closely in layers for fullness. - Invisible Decrease:
For neat decreases in amigurumi: hook into front loops of next 2 stitches, yo, pull through both, yo, pull through remaining 2 loops.
Assembly & Finished Size
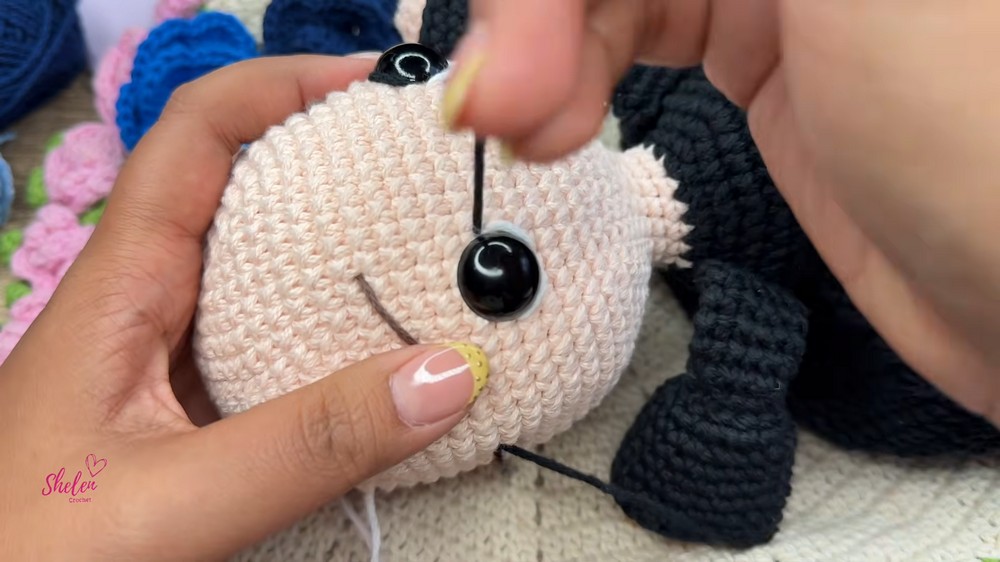
1. Embroider Face
- Place safety eyes securely.
- Using white yarn, embroider tiny dot at outer edge for eye shine.
- With black yarn, embroider a short, close eyelash (boyish, subtle).
- Embroider the nose and thick eyebrows (two passes recommended for masculinity).
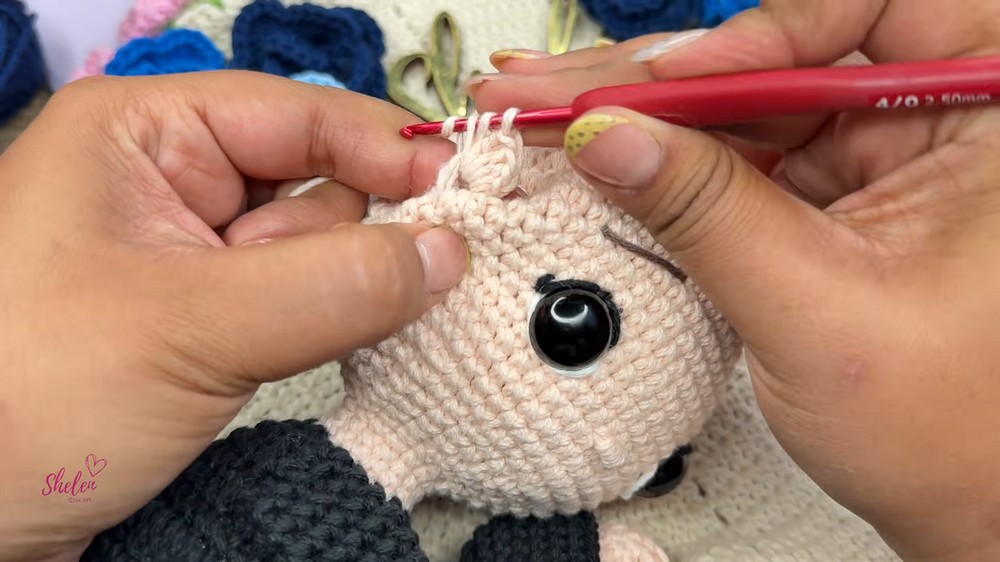
2. Crochet and Attach Ears
- Count five stitches out from the eye for ear placement.
- Embroider three vertical lines for inner ear reference.
- Crochet: ch 1, sc, hdc, 2 dc, hdc, sc, sl st.
Attach, fasten off, and repeat for other ear.
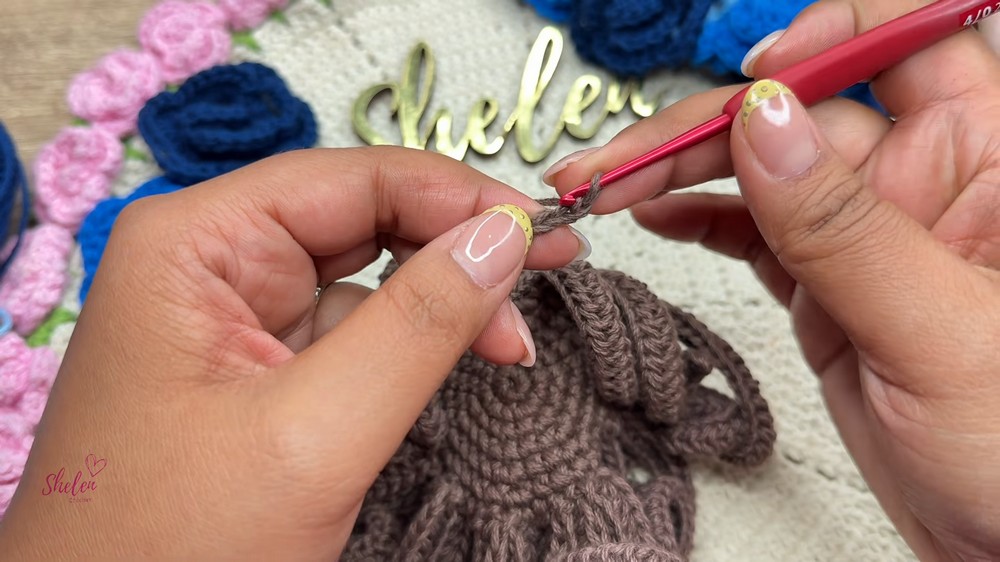
3. Create Hair Cap and Strands
- Cap Base: MR, ch 1, 6 sc.
Increase to 12 sc (6 inc), then to 18 (sc, inc), to 24 (2 sc, inc), to 30 (3 sc, inc), to 36 (4 sc, inc). - Strands:
- 9 of 12 ch (short fringe, front)
- 2 of 15 ch (sides)
- 2 of 20 ch (sides/back)
- 23 of 22 ch (fullness at crown and back)
- Work: sl st in 2nd ch, sc, all others hdc, sl st to cap.
- Glue hair behind ear, then center, then sides, layering for a natural, slightly tousled effect.

4. Construct Skirt Edge and Bow
- Attach gray yarn inside edge of skirt.
Alternate front/back loop sc join around.
Sl st, ch 2, hdc in each stitch for finishing. - Bow: Use 20 cm graduate doll pattern; glue just above bouquet.
5. Make & Attach Flowers
- Crochet 8 small flowers using blues (royal, bluish, navy blue).
Arrange mostly at the back for fullness, glue in place.
6. Assemble Accessories
- Attach mortarboard (see accessories tutorial) atop flowers, glue well.
- Place stole around upper part of bouquet/doll, glue at neck/shoulders and back.
Temporarily tack numbers and name using silicone glue—keep light for easy change. - Roll diploma, glue closed, and secure into hands or with sleeves.
7. Final Details
- Apply blush in small, subtle amounts on cheeks.
- Re-pass eyebrows with two extra embroidery lines for masculine look.
- Adjust all loose glue, threads, and floof hair as needed for tidy appearance.
Conclusion
Congratulations on finishing your 20 cm graduation bouquet doll! With careful facial embroidery, thoughtfully placed layered hair, and a full, flowered bouquet, your graduate is both festive and personalized. Accessories like the mortarboard, stole, and diploma—and easy-to-change name/year—make this a commemorative piece for any celebration. Thank you for crafting along; may your creations always bring joy, pride, and inspiration!