
Free Mini Tulip Pot Crochet Pattern for Spring Home Decor

This charming crochet project combines fun and creativity with a cozy handmade feel. The delicate tulips bring a touch of nature indoors without the need for watering or sunlight, making it a lasting decoration that stays beautiful all year. Whether as a cute desk companion or a colorful gift, this mini tulip pot suits any space and occasion.

The Free crochet Mini Tulip Pot Pattern by DIY Yarn Crafts is designed to be easy and enjoyable for everyone, no matter your crochet skill level. Beginners will find it beginner-friendly, while more experienced crocheters will appreciate its quick and satisfying result. Creating this sweet flower pot is a wonderful way to add personal charm to your home or crochet a thoughtful present.

If you want to enjoy the beauty and joy of springtime flowers anytime you like, this free crochet pattern is a great place to start. Check out the Free crochet Mini Tulip Pot Pattern and bring a little handmade sunshine into your life soon!
Mini Tulip Pot Free Crochet Pattern
This pattern guides you through creating a charming Mini Tulip Pot using a 2.5 mm crochet hook and 5-ply yarn. The project combines basic crochet techniques, including rounds worked in single crochet and half double crochet, with simple wirework for shaping leaves and stems. The finished product makes a delightful miniature decoration or handmade gift.
Quick Overview of Pattern
- The Pot: Worked in rounds with increases and texture created by working in back or front loops.
- The Soil: Crocheted separately following the initial pot rounds and sewn inside; designed with opening for inserting the flower.
- The Tulip Bud: Made using rounds with incremental increases, stuffed, and closed with cross-stitching at the top.
- The Leaves: Constructed flat from a chain foundation, combined with wire for structural support and shaping.
- Assembly: Wrapping wire stem with yarn, gluing elements, and securing leaves and bud in place.
Notes
- Work in joined rounds unless specified; slip stitch (sl st) to join each round.
- Back loops only (BLO) and front loops only (FLO) techniques are used to add texture and shape.
- Use stuffing firmly but avoid overstuffing to maintain shape.
- Wire incorporated in the leaves for flexibility and support.
- Hot glue and yarn wrapping used for neat assembly.
- Leave yarn tails for sewing and closing tubes.
Skill Level
Intermediate — Requires knowledge of magic ring, working in rounds, increases, decreases, half double crochet, working in BLO/FLO, and basic assembly including wire handling and simple embroidery.
Materials
- 5 ply yarn in:
- Pot color (e.g., terracotta or brown)
- Green yarn for leaves and stem wrapping
- Tulip color for bud (any preferred)
- Crochet hook: 2.5 mm
- 15 cm floral wire for leaves stem
- Fiberfill stuffing
- Yarn needle
- Hot glue gun and glue sticks
- Scissors
- Stitch marker (optional)
Measurements / Sizing (Approximate)
- Pot diameter: about 3–4 cm
- Tulip bud height: approximately 4 cm
- Leaf length: about 6–7 cm
- Overall height with stem: approximately 10 cm
Note: Sizes may vary with tension and yarn used.
Gauge and Stitch Pattern
- Gauge is not critical but consistent tension is recommended.
- Stitch pattern mainly single crocheted rounds with strategic increases.
- Incorporation of BLO and FLO rounds adds subtle texture variation.
Stitch Abbreviations
- ch = chain
- sc = single crochet
- hdc = half double crochet
- inc = increase (2 sc or hdc in same stitch)
- dec = decrease (not used explicitly here)
- sl st = slip stitch
- BLO = back loops only
- FLO = front loops only
- mr = magic ring
Special Stitches
- Magic ring (mr): technique to start a round with tightly closed center.
- BLO (Back Loops Only): crochet into only the back loop of each stitch, creating a ridge or textured line.
- FLO (Front Loops Only): crochet into only the front loop of each stitch for texture.
The Pattern — Step by Step
1. The Pot
Round 1:
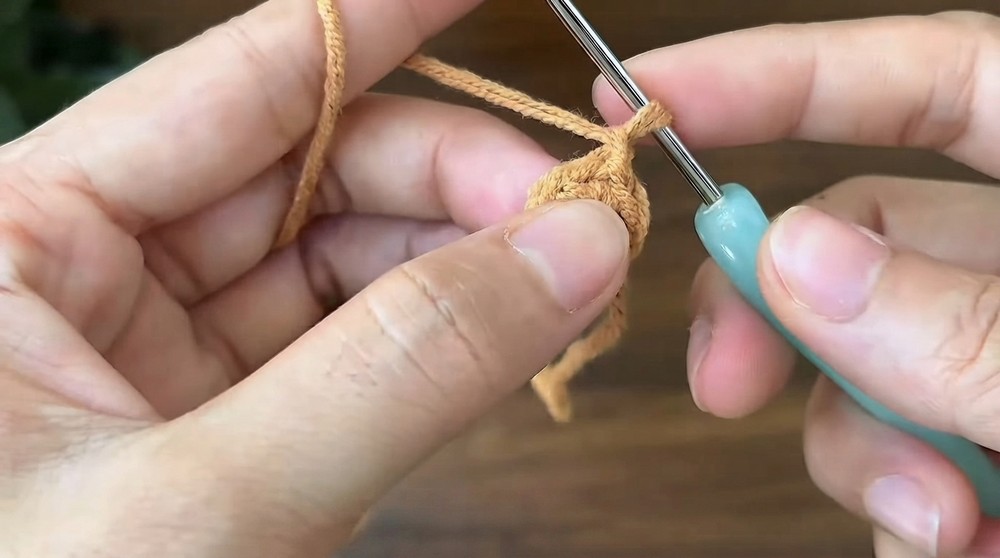
Create a magic ring. Make 6 single crochets (sc) into the ring. Join with a slip stitch (sl st), chain 1.
Round 2:
Increase in every stitch around (2 sc in each stitch) — 12 sc total. Join with sl st, chain 1.
Round 3:
1 sc, 1 inc (increase = 2 sc in one stitch) — repeat 6 times, totaling 18 sc. Join with sl st, chain 1.
Round 4:
2 sc, 1 inc — repeat 6 times, totaling 24 sc. Join with sl st, chain 1.
Round 5:
Work in back loops only (BLO): 24 sc. Join with sl st, chain 1.
Round 6:
3 sc, 1 inc — repeat 6 times, totaling 30 sc. Join with sl st, chain 1.
Round 7:
Work 30 sc in each round. Join with sl st, chain 1 after each.
Round 8:
Work 30 sc in each round. Join with sl st, chain 1 after each.
Round 9:
Work 30 sc in each round. Join with sl st, chain 1 after each.
Round 10:
Work 30 sc in each round. Join with sl st, chain 1 after each.
Round 11:
Work 30 sc in each round. Join with sl st, chain 1 after each.
Round 12:
Work 30 half double crochets (hdc) in front loops only (FLO). Join with sl st and fasten off.
2. The Soil
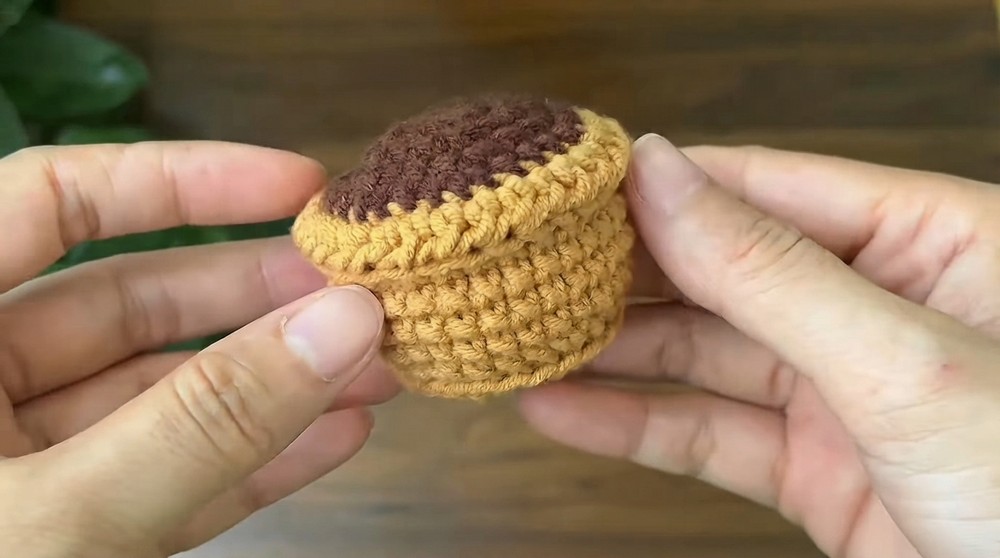
Work following the same pattern as Rounds 1 through 4 of the pot (i.e., magic ring to 2 sc, 1 inc rounds).
- When tightening the magic ring on Round 1, leave a small hole to later insert the tulip flower stem.
- Stuff the soil piece lightly.
- Sew the soil securely into the bottom of the pot, ensuring the hole is properly aligned for flower insertion.
3. The Tulip Bud
Round 1:
Make a magic ring and 7 single crochets into it.
Round 2:
Work 7 increases around (2 sc in each stitch) — total 14 sc.
Round 3:
1 sc, 1 inc — repeat 7 times, total 21 sc.
Round 4:
2 sc, 1 inc — repeat 7 times, total 28 sc.
Round 5:
Work 28 sc in each round.
Round 6:
Work 28 sc in each round.
Round 7:
Work 28 sc in each round.
Round 8:
Work 28 sc in each round.
Round 9:
Work 28 sc in each round.
Round 10:
Work 28 sc in each round.
Round 11:
Work 28 sc in each round.
Finishing:
Join with sl st, chain 1, and fasten off leaving a long tail. Stuff the bud firmly. Sew a cross-stitch across the top opening to close neatly.

4. The Leaves
- Make a slip knot and chain 12.
- Place a 15 cm piece of floral wire under your crochet hook, positioning it at the center near the base of the chain.
Row 1:
Starting from the 2nd chain from the hook:
- 1 sc
- 1 half double crochet (hdc)
- 7 hdc
- 2 sc
Chain 2, then continue working down the other side of the chain foundation with:
- 1 sc
- 8 hdc
- 1 sc
- Finish with a slip stitch.
- Wrap yarn tightly around the wire end to secure the leaf to the wire.

5. Assembling
- Wrap the wire stem completely with green yarn while applying small amounts of glue to fix the yarn and prevent unraveling.
- Secure the tulip bud to the top of the wire stem using hot glue.
- Tie the leaves onto the stem at desired position and continue wrapping the stem to cover all exposed wire.
- Use glue generously during wrapping to ensure durability.
Assembly & Finished Size
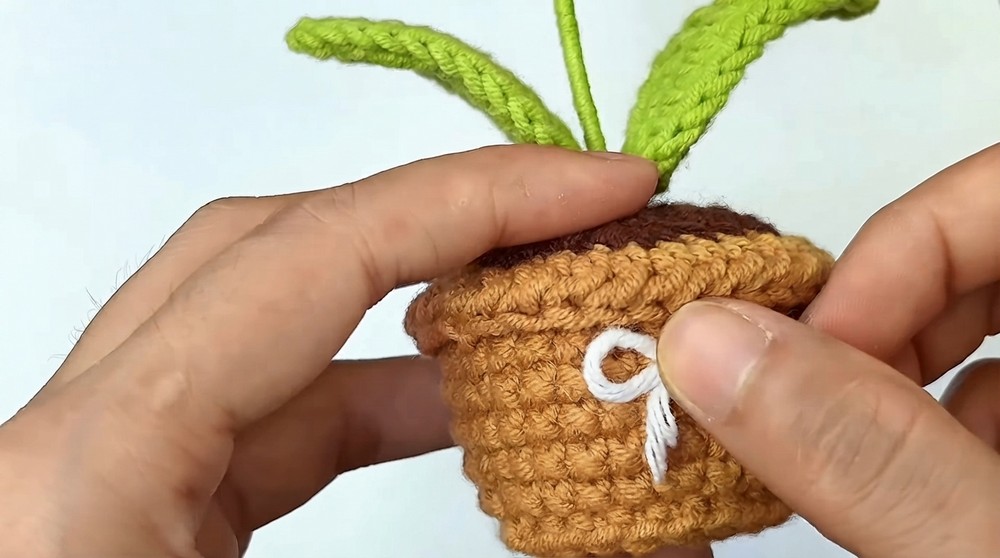
- The fully assembled mini tulip pot stands approximately 10 cm tall.
- The pot base measures roughly 3 to 4 cm in diameter.
- The tulip bud adds about 4 cm in height.
- Leaves give a natural aspect, measuring around 6–7 cm wide with flexible wire support.
- The yarn wrapping and glue provide a secure bond, making the finished piece both decorative and durable.
Conclusion
This comprehensive crochet pattern for a Mini Tulip Pot combines useful amigurumi techniques with creative wirework and embroidery. The stepwise instructions build a realistic miniature floral pot featuring intricate stitch texture in the pot’s body, a separate soil piece for dimension, and a delicate tulip bud crowned with elegant leaves reinforced by wire for shaping.
Working with a fine 2.5 mm hook and 5-ply yarn, this project refines skills including magic ring foundation, distinct rounding increases, back/front loop texturing, and handling wire for mixed-media projects. The final sewn assembly with stuffing and wrapping adds polish and longevity to the design.
Perfect as a gift, desktop ornament, or decorative accent, this Mini Tulip Pot exemplifies patience and attention to detail, rewarding crocheters with a charming, tactile creation. It inspires combining crochet with simple crafting materials to elevate amigurumi artistry.
We encourage you to enjoy every stitch of this rewarding project. Should you need assistance with any stage, or want tutorials on wire wrapping or embroidery, please reach out!