
Free Crochet Carrot Amigurumi Pattern for Seasonal Gifts
Learn how to crochet a cute and vibrant carrot amigurumi that's perfect for gifting, seasonal decor, or fun toys, all while practicing your crochet skills easily.

Not every crochet project needs to be complicated or time-consuming to be beautiful, and the Crochet Carrot Amigurumi is proof of that. This simple yet charming design is perfect for beginners or anyone looking for a quick craft session.
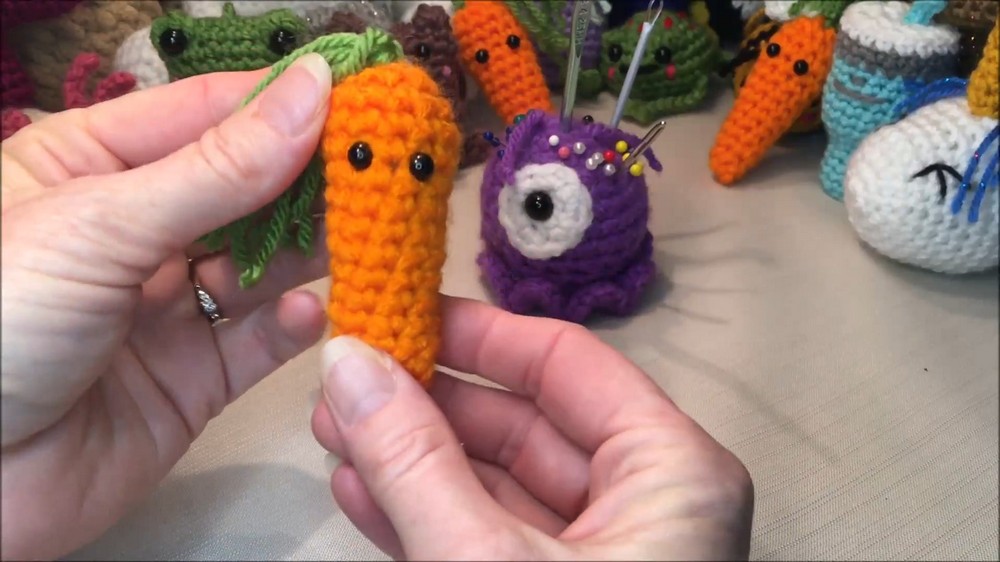
Its vibrant orange body, complemented by a playful green leafy top, makes it an eye-catching addition to Easter baskets, children’s toys, or decorative shelves. Despite its simplicity, it’s full of personality, with safety eyes and the option to add additional details like a smile or cheeks.
How to Crochet Carrot Amigurumi Free Pattern
Materials
- Yarn: Medium Worsted weight (#4); Orange (carrot) and Green (tops)
- Hook: 4.25 mm (G)
- Safety Eyes: 6 mm (or embroidery/yarn for facial features)
- Stuffing: Polyester fiberfill
- Tapestry/Darning Needle
- Stitch Marker
- Scissors
Abbreviations (US Terms)
- MR – Magic Ring
- ch – chain
- sc – single crochet
- inc – increase (2 sc in one stitch)
- dec – decrease (sc two together)
- sl st – slip stitch
- st(s) – stitch(es)
- rep – repeat
Special Notes
- Worked in continuous rounds; do NOT join unless stated.
- Use a stitch marker to keep track of the first stitch of each round.
- Stuff firmly but take care not to stretch the stitches.
- Insert safety eyes and embroider the face before closing.
Pattern
Carrot Body (Orange)
Begin at the carrot tip (bottom):
- Round 1: Make MR, work 6 sc in ring. (6)
- Round 2: Sc in next 2 st, inc in next st around. (8)
- Round 3: Sc in each st around. (8)
- Round 4: Sc in each st around. (8)
- Round 5: Sc in each st around. (8)
- Round 6: Sc in next 3 st, inc in next st around. (10)
- Round 7: Sc in each st around. (10)
- Round 8: Sc in each st around. (10)
- Round 9: Sc in each st around. (10)
- Round 10: Sc in next 4 st, inc in next st around. (12)
- Round 11: Sc in each st around. (12)
- Round 12: Sc in each st around. (12)
- Round 13: Sc in each st around. (12)
- Round 14: Sc in each st around. (12)

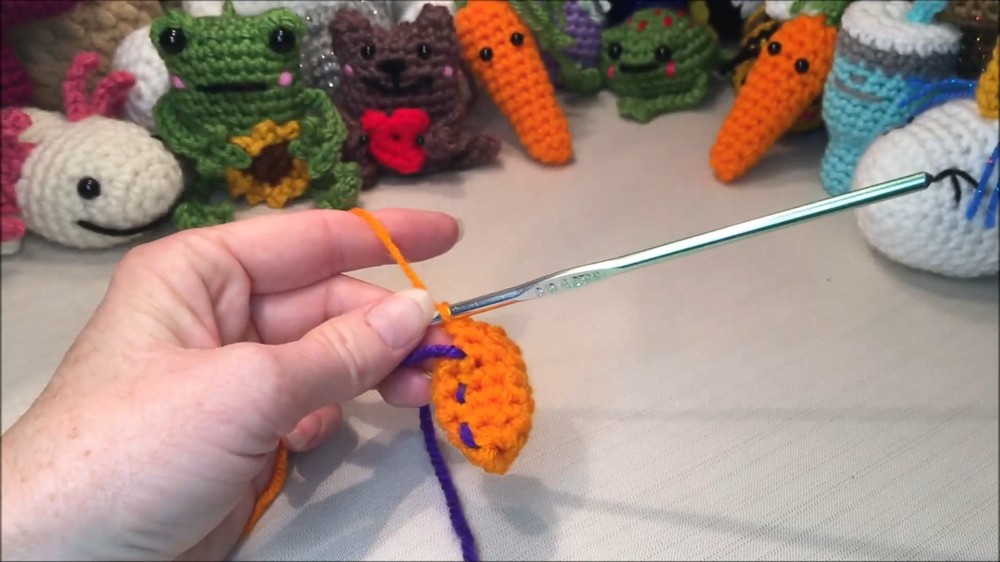
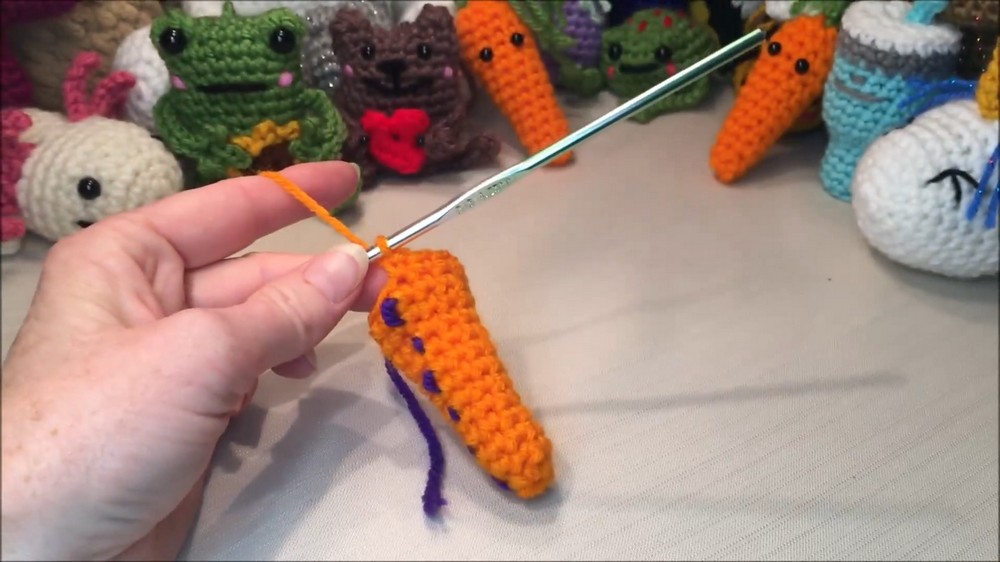
Pause here:
- Stuff the carrot firmly, reaching all the way to the tip.
- Insert safety eyes between rounds 3 and 4, 1-2 stitches apart.
- Embroider mouth/cheeks as desired.
- Round 15: dec in next st around (invisible or standard decrease). (6)
- Finish off: Sl st, leave tail for closing.
Closing the Top
- Add any remaining stuffing.
- Thread tail onto the needle and weave through front loops only of each stitch, pull tight to close hole.
Carrot Tops (Green)
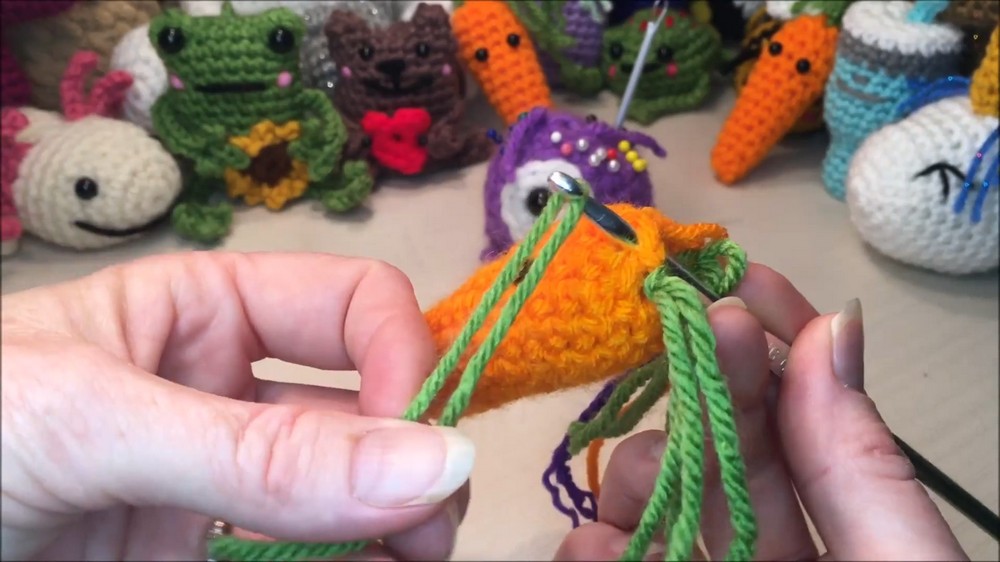
- Cut 6 pieces of green yarn, each about 6 inches (15 cm) long.
- For each top: Fold yarn in half. Insert hook from inside through one of the remaining top stitches, pull loop through, and pull the yarn tails through the loop to secure (like a fringe/latch knot).
- Repeat for all 6 stitches; adjust and trim to desired length.
Finishing
- Draw remaining tail through the carrot center and out elsewhere; pull gently to hide the knot inside, trim excess.
- Shape as desired.
Conclusion
You have completed a cute mini carrot amigurumi!
Perfect for decorations, baskets, or as an addition to other amigurumi (such as bunnies). This pattern is easy to adapt for slightly larger or smaller carrots—just add or subtract a round or two.
Pattern Corrections & Tips
- Correction: The pattern counts continuous rounds and never joins unless closing.
- Tip: Use invisible decreases for a neater finish.
- Tip: Add facial details before closing the top.
- Tip: Carrot tops are best attached before fully closing the hole—they sit neater when pulled tight.
- Tip: For a hanger, leave a green strand long and knot it as a loop.
- If you wish to add a basket or bunny: Check the creator’s channel for coordinating accessories.