
Free Crochet Frankenstein Pattern for Not-So-Scary Surprise
Build a charming green monster with this Crochet Frankenstein Pattern, an incredibly fun way to spruce up your spooky seasonal collection.

Easy Free Crochet Frankenstein Pattern to Spark Your Halloween Decor
Sophisticated stitching transforms basic green yarn into a legendary holiday icon that brings a touch of vintage charm to any modern home. This Crochet Frankenstein Pattern features bold shapes and distinctive details that result in a sturdy plush figure perfect for a spooky autumn display or a festive mantel. Beyond looking great the process of making this classic character offers a peaceful and relaxing break that helps improve your skills and focus.

This finished project has a high-quality professional look making it a wonderful gift or a special keepsake for anyone who loves unique decorations. Its soft surface and funny bolted accents provide a great feel that children and adults both enjoy. By choosing this design you get a timeless piece of decor that adds a friendly and spirited personality to your space.
Materials
-
Yarn: Medium weight (Number 4) yarn in green (skin), a chosen shirt color, gray (pants), and black (hair/accents).
-
Hooks: 4.25 mm crochet hook.
-
Safety Eyes: 12 mm eyes.
-
Fill: Polyester fiberfill stuffing.
-
Tools: Stitch marker, tapestry needle, and scissors.
Step-by-Step Pattern
Arms (Make 2)
-
Row 1 (Green): 6 single crochet (sc) in a magic ring [03:02].
-
Row 2: 6 increases (12 stitches) [03:38].
-
Rows 3-4: 12 sc around.
-
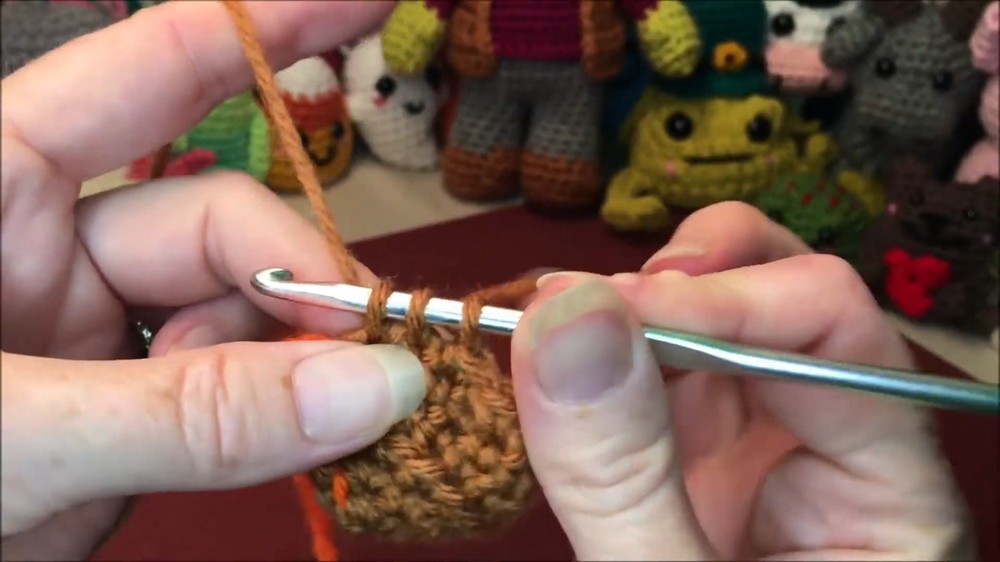
Row 5: 1 thumb cluster (three double crochet cluster), 11 sc (12 stitches) [06:32].
-
Row 6: (1 sc, 1 dec) around (8 stitches). Change to shirt color [08:32].
-
Rows 7-14: 8 sc around for 8 rows. Fasten off and sc 3 across the top to close [10:23].

Legs and Torso (Starting with Shoe Color)
-
Rows 1-5: Follow standard increase patterns to 18 stitches, using back loops for the sole [18:02].
-
Row 6: (1 sc, 1 dec) around (12 stitches). Change to pant color [23:52].
-
Rows 7-12: 12 sc around for 6 rows. Fasten off the first leg; keep the second leg attached to join [25:52].
-
Row 13 (Joining): Sc across both legs (24 stitches total) [30:55].
-
Rows 14-17 (Pant Color): Increase to 30 stitches and sc around [33:48].
-
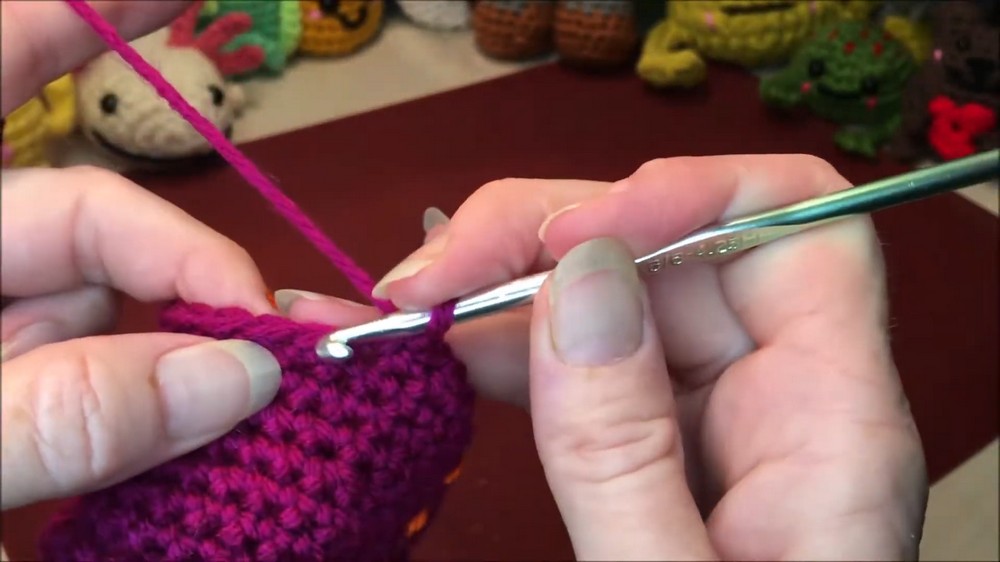
Row 18: Change to shirt color and sc 30 [40:22].
-
Row 19: Work in the front loops only to create a shirt ridge [42:53].
-
Row 20: Work in the back loops of Row 18 (30 stitches) [45:28].
-
Rows 21-27: Sc and decrease down to 18 stitches [47:48].
-
Row 28: Crochet the arms onto the sides of the body [58:11].
Head and Face
-
Row 29: Change to green and increase in every stitch (36 stitches) [01:03:52].
-
Rows 30-40: Increase and sc to form the head shape [01:06:46].
-
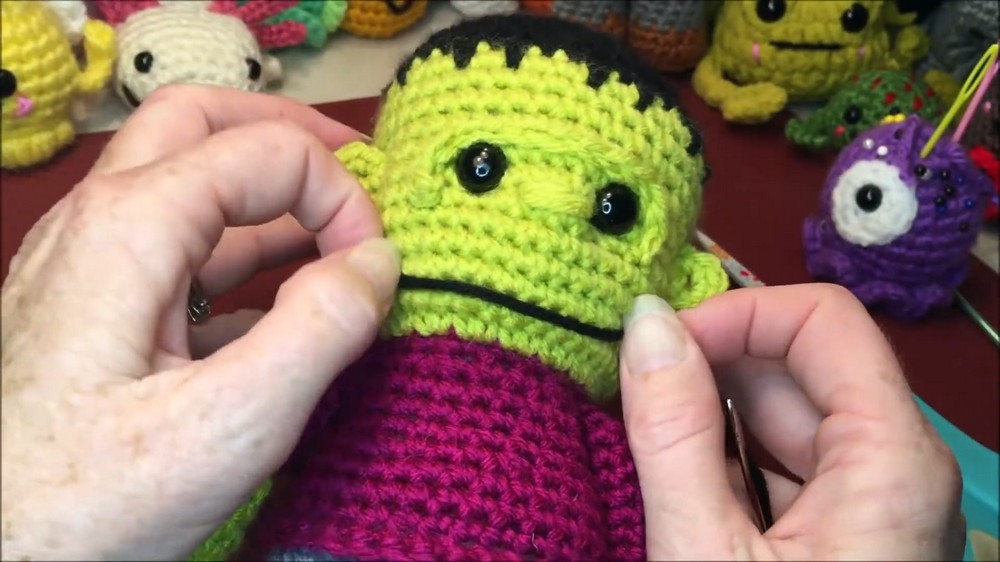
Row 41 (Hair): Change to black. Work a "drop stitch" pattern (alternating sc into the current row and sc into the row below) to create a jagged hairline [01:32:12].
-
Facial Details: Insert 12 mm eyes between rows 33 and 34 (of the head) [01:44:47].
Embroider a green nose, a black brow ridge (a separate chain of 13), and a black scar [02:08:52]. -
Bolts (Make 2): Chain 3, work a 3-dc cluster in the 2nd chain, and slip stitch down. Attach to the sides of the neck [02:32:47].

Accessories
-
Vest: Crochet a separate piece using half double crochets, featuring armholes and increases to give it a jacket-like flare [02:43:51].
Special Features
-
Jagged Hairline: The "drop stitch" technique in Row 41 gives Frankenstein a realistic, messy hairline without extra sewing [01:33:06].
-
No-Sew Construction: The legs, body, and arms are integrated as you go, ensuring a sturdy and durable toy [00:16].
Level of Difficulty
This project is Intermediate. While the basic shapes are simple, the "drop stitch" hair and the multiple components (brow, bolts, vest) require careful stitch counting and detail work.
Tutor's Suggestions
-
Arm Stuffing: Stuff the hands firmly but the upper arms lightly to ensure they hang naturally against the body [01:15:32].
-
Head Shaping: As you stuff the head, push the filling out to the sides rather than keeping it perfectly round to give him a more square, monster-like appearance [01:53:43].
-
Eye Placement: Pull the facial threads firmly to indent the eyes and ears slightly, which adds a professional, sculpted look to the face [02:27:27].
Uses
-
Holliday Decor: Perfect as a shelf sitter or mantle decoration for Halloween.
-
Child's Toy: When made with safety eyes and secure knots, it becomes a soft, huggable monster.
Conclusion
By following these steps, you create a character-rich Frankenstein monster with minimal sewing. This project provides a great opportunity to practice advanced shaping and decorative crochet techniques.
Pro-Tip
For an extra "monster" touch, use sparkly or metallic gray yarn for the neck bolts to make them stand out against the green skin [02:39:22].