
Cute Pucca Amigurumi Free Crochet Pattern with Playful Charm
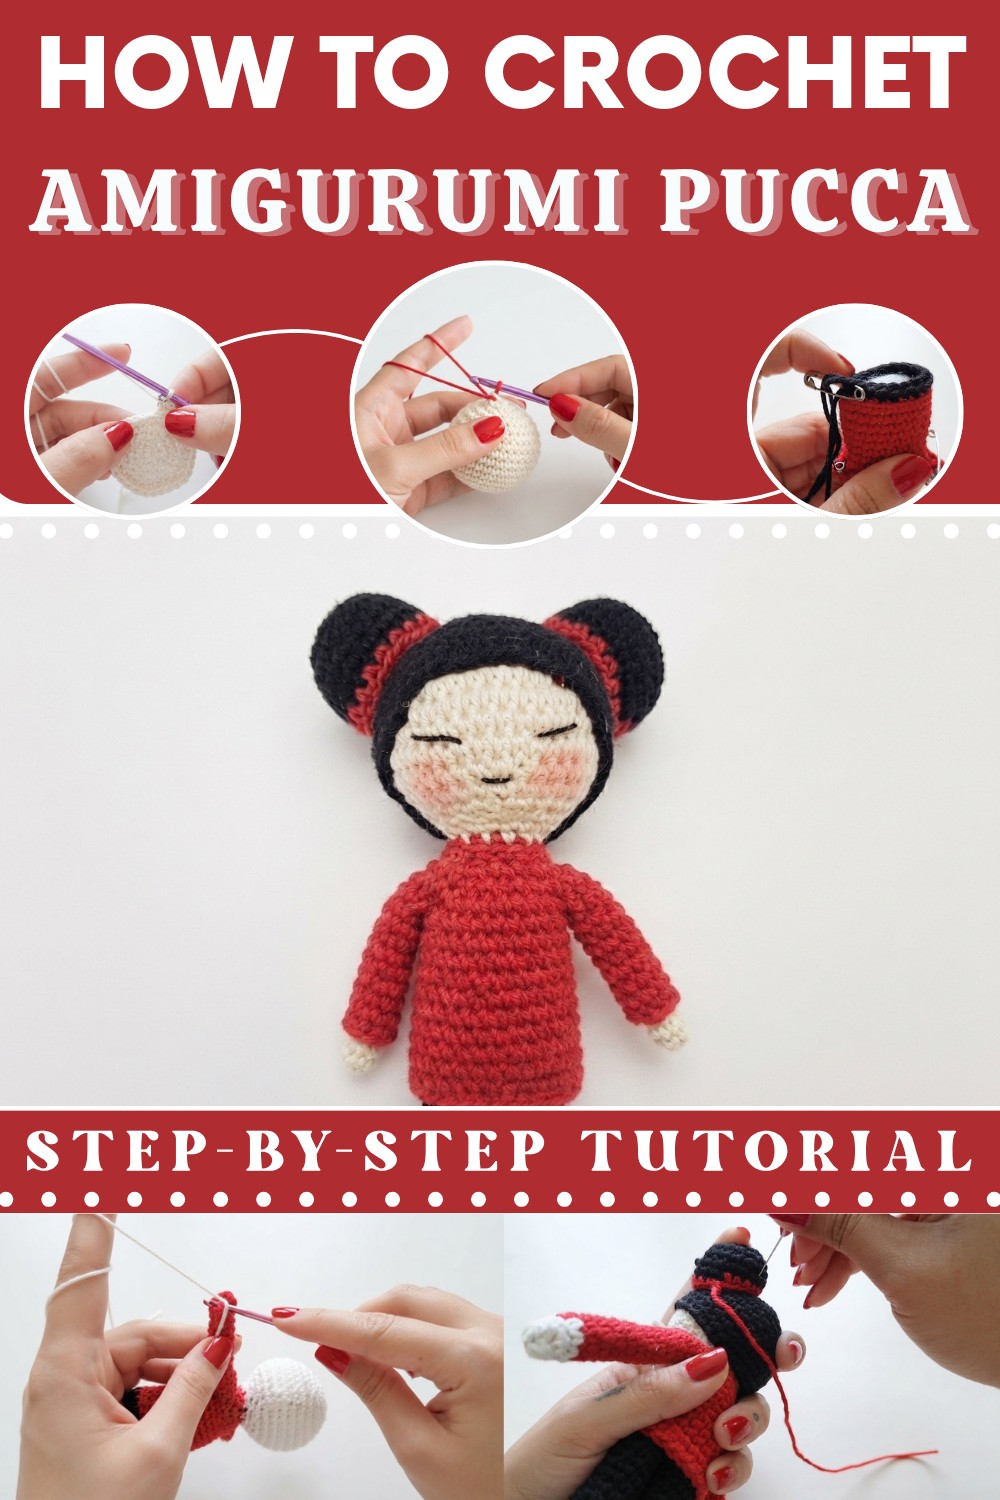
Add cartoon fun to your crochet collection with this Crochet Pucca Amigurumi Free Pattern to stitch a lovable doll full of charm and joy.
Need a crochet project inspired by a cheerful cartoon character? This adorable doll is a wonderful choice for anyone who enjoys playful amigurumi with a classic look. From the very beginning, its sweet smile and recognizable hairstyle make it stand out in any handmade collection. Whether you crochet it as a gift, a collectible, or a cute room decoration, it is sure to catch everyone's attention.
Simple Crochet Pucca Amigurumi Pattern That Everyone Will Love
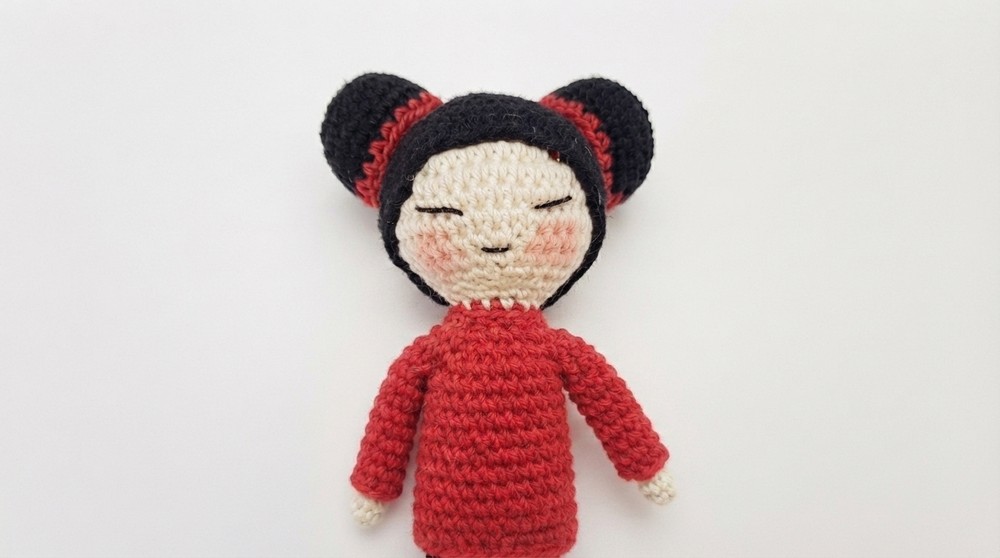
The Crochet Pucca is a fun project for anyone who loves amigurumi, crochet dolls, cartoon crochet, mini crochet projects, and handmade gifts. To begin with, the doll features a round face, signature twin hair buns, a simple embroidered expression, and a traditional outfit that gives it an instantly recognizable appearance. In addition, its compact size makes it easy to display on shelves, desks, nursery tables, or corners.
Moreover, the familiar black and red colors give the doll its classic style. Meanwhile, cotton yarn creates smooth and even stitches, whereas quality acrylic yarn keeps the finished doll soft, lightweight, and durable. As a result, the doll looks neat while remaining comfortable to hold and display.
Furthermore, this project is suitable for beginners, while experienced crocheters can also enjoy it as a quick and relaxing make. Besides that, it uses familiar amigurumi techniques such as working in continuous rounds, shaping with increases and decreases, and maintaining even stitch tension to achieve a tidy finish.
Likewise, the completed doll pairs beautifully with other crochet cartoon characters, anime inspired amigurumi, mini crochet dolls, and cute keychains. In the same way, it makes a thoughtful handmade gift for birthdays, holidays, and cartoon fans. Finally, the Crochet Pucca Pattern is a charming project that adds personality, fun, and handmade beauty to every crochet collection while encouraging you to continue with the full pattern.
Crochet Pucca Pattern
This pattern guides you to create a cute amigurumi Polka doll using simple crochet stitches and color changes. The doll is made in parts starting with the head, which is worked in rounds with increases and decreases to shape it nicely, followed by color switching to form the body and shirt. Arms and legs are crocheted separately and attached with stitch markers to create clear partitions, and you have the option to add pipe cleaners or wires inside for better structure and poseability.

The hair is worked similarly to the head, with additions to create two buns for a charming look. This project is suitable for beginners who know basic single crochet, increases, and decreases, as well as for those looking to practice working in rounds and adding texture by working in back loops only. With this pattern, you will end up with a small doll about nine to ten inches tall that is soft, firm, and perfect for display or gifts.
Quick Overview of Pattern
- Crochet the head starting with a magic ring, working in continuous rounds with increases
- Change colors to create the shirt and work the body
- Work arm and leg partitions integrated into the body rounds
- Crochet arms and legs separately with shaping and wire or pipe cleaner for structure
- Finish with a textured hairpiece including buns
- Optional facial features and blush
Notes
- The pattern uses continuous rounds with a stitch marker to track rounds
- Shaping uses standard increases (2 sc in one stitch) and invisible decreases
- Working in back loops only is applied for texture on the shirt’s black yarn section
- Pipe cleaners or wires are optional but recommended for poseable limbs
- Firm stuffing provides better shape and stability
- Facial features can be sewn or glued according to preference
Skill Level
Beginner to Intermediate: The pattern involves basic crochet stitches: single crochet (sc), increase (inc), invisible decrease (inv dec), working in rounds, and joining techniques. Familiarity with magic ring and stitch markers is helpful.
Materials
- Black cotton yarn
- Red cotton yarn
- Skin tone cotton yarn
- Toy stuffing
- 3 mm crochet hook
- Yarn needle
- Safety pin or stitch marker
- Cosmetic blush (optional)
- Pipe cleaner or wire (optional for limbs)
Measurements / Sizing
- Finished Polka doll height: approximately 9-10 inches (depending on tension)
- Head diameter: about 3 inches
- Arm and leg length: about 3-4 inches each
Gauge & Stitch Pattern
- Gauge is not critical, but consistent tension is recommended for even shaping.
- The shirt section uses back loop only single crochet to create texture.
- Body and limbs are worked in rounds with single crochet.
Stitch Abbreviations
- ch = chain
- sc = single crochet
- inc = increase (2 sc in same stitch)
- inv dec = invisible decrease (crochet two stitches together invisibly)
- st(s) = stitch(es)
- sl st = slip stitch
Special Stitches
- Magic Ring: Begin rounds by crocheting 6 sc into an adjustable loop, then pull tight to close hole.
- Invisible Decrease: Insert hook through the front loops of next two stitches, yarn over, pull through loops softly for seamless decrease.
The Crochet Pattern
Head
Round 1:
- Using skin tone yarn, make a magic ring, ch 1, and make 6 sc into the ring. Pull tight. (6 sts)
- Place stitch marker to track rounds.
Round 2:
- Increase in every stitch around (2 sc in each st). (12 sts)
Round 3:
- 1 sc, inc around. (18 sts)
Round 4:
- 2 sc, inc around. (24 sts)
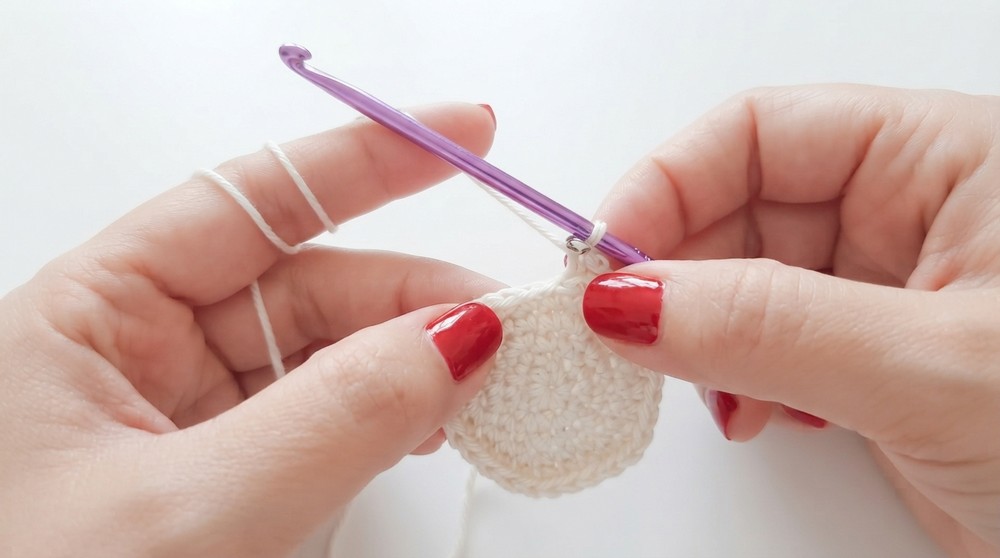
Round 5:
- 3 sc, inc around. (30 sts)
Round 6:
- 4 sc, inc around. (36 sts)
Rounds 7-10:
- Sc in each stitch around. (36 sts per round)
Round 11:
- 4 sc, inv dec around. (30 sts)
Round 12:
- 3 sc, inv dec around. (24 sts)
Round 13:
- 2 sc, inv dec around. (18 sts)
- Add stuffing firmly.
Round 14:
- 1 sc, inv dec around. (12 sts)
Round 15:
- Sc all around. (12 sts)
Color Change – Shirt Start
Round 16:
- Switch to red yarn.
- 1 sc, inc around. (18 sts)
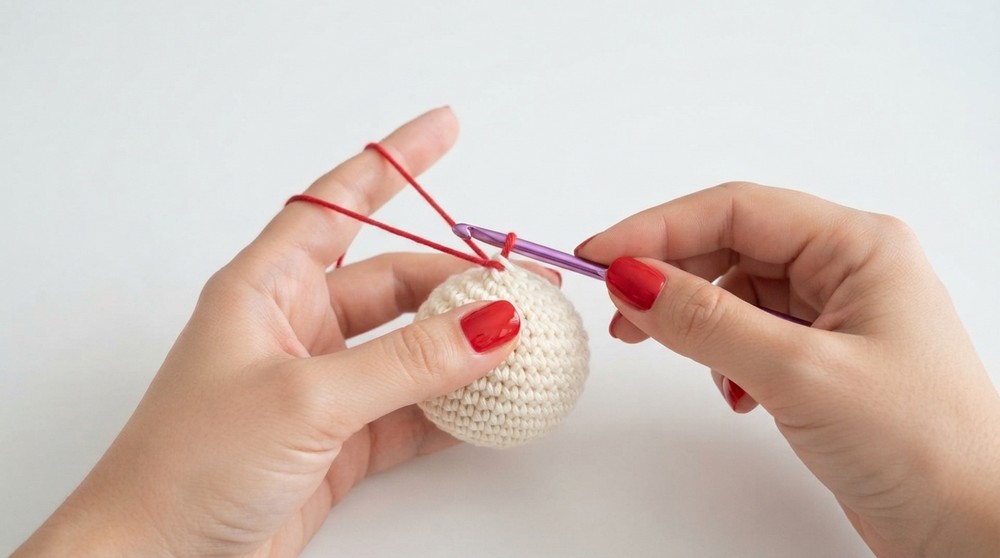
Round 17:
- 2 sc, inc around. (24 sts)
Round 18:
- 3 sc, inc around. (30 sts)
Round 19:
- 4 sc, inc around. (36 sts)

Arm Partition
- Fold the work showing the stitch marker at the side.
- Mark 4 stitches from the increase on both sides, for 8 stitches in total, then mark another 5 stitches near last increase.
- Add 3 sc stitches (to make 8 total) between the 5.
- Place stitch markers accordingly to divide the arm sections.
Body
Round 1:
- Sc all around. (20 sts)
Rounds 2-8:
- Sc all around for 7 rounds. (20 sts each round)
Color Change – Shirt Texture
Round 9:
- Switch to black yarn.
- Work sc in back loop only around. (20 sts)
- Fasten off red yarn.
Stuffing the Body
- Add toy stuffing firmly into the body.
Leg Partition
- Mark the last stitch, count 10 stitches on each half of the round (for leg separation).
- Remove stitch marker and mark at 5 stitches on each side.
- Start leg sections.
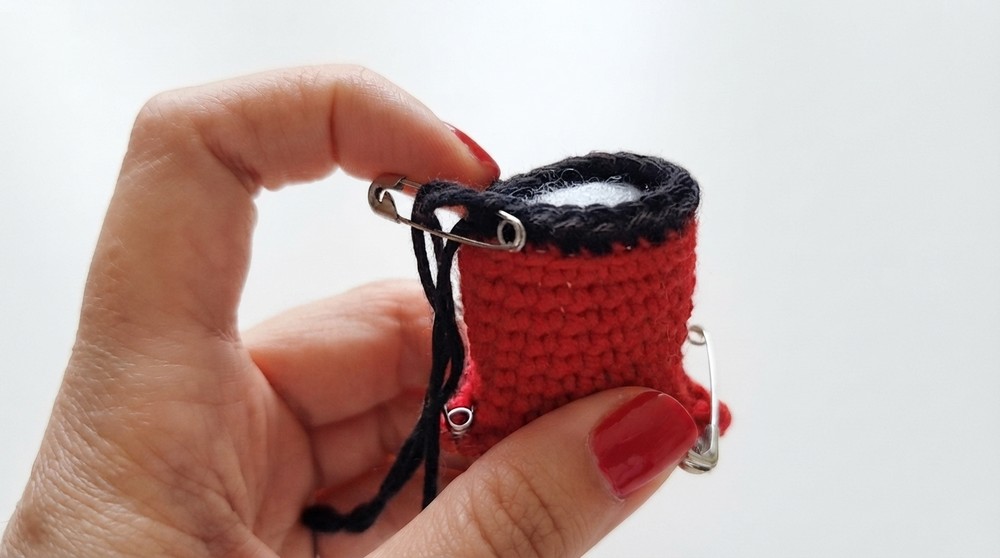
Legs
Each leg:
- Round 1: Sc 10 stitches.
- Rounds 2-15: Sc all around in each leg for a total of 15 rounds.
- Add pipe cleaner or wire if desired for structure, stuff firmly with toy stuffing.
Arms
Round 1:
- Attach yarn at arm section.
- Chain 1 (not counted).
- Sc 8 stitches around the arm opening.
- Place stitch marker.
Rounds 2-10:
- Sc all around for 9 rounds (total 10 rounds).
Color Change – Skin Tone
Rounds 11-12:
- Switch back to skin tone yarn.
- Sc all stitches around for 2 rounds.
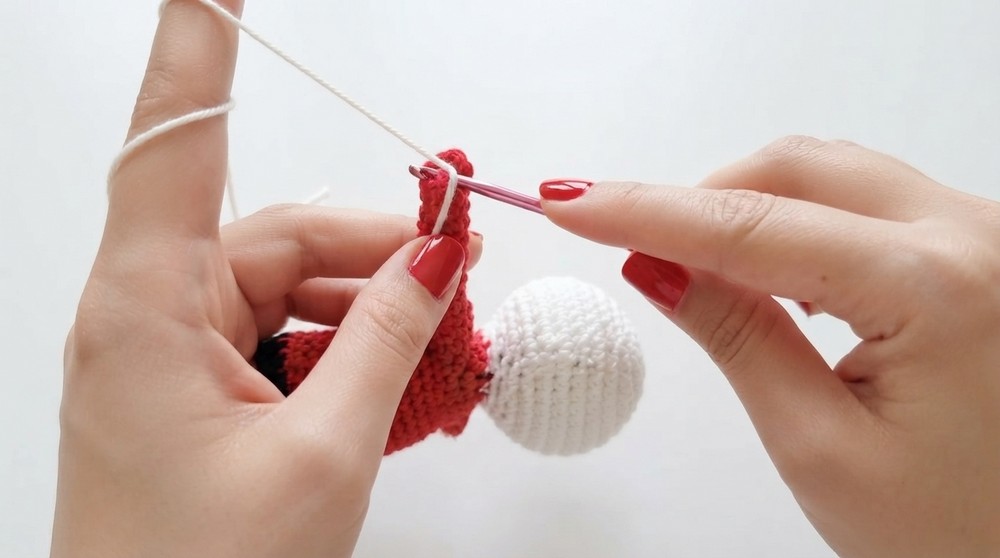
Stuffing Arms and Adding Wire
- Add pipe cleaner/wires inside arms for stiffness.
- Stuff arms lightly to firm shape.
- Close openings by stitching back and forth with needle.
Final Arm and Shirt Details
- Work a round of sc in front loops only using red yarn for shirt detailing.
- Fasten off carefully after finishing rounds.
Hair
- Using black yarn, crochet hair as done in head:
- Round 1: 6 sc in magic ring.
- Round 2: Increase in every stitch.
- Round 3: 1 sc, inc around.
- Round 4: 2 sc, inc around.
- Round 5: 3 sc, inc around.
- Round 6: 4 sc, inc around.
- Then 6 rounds sc around.
- Sew hair securely on head.
- Make two buns starting with magic ring (6 sc), increasing similarly, finishing with rounds of sc in black and a red round on top.
- Attach buns on the head using pins or sewing.
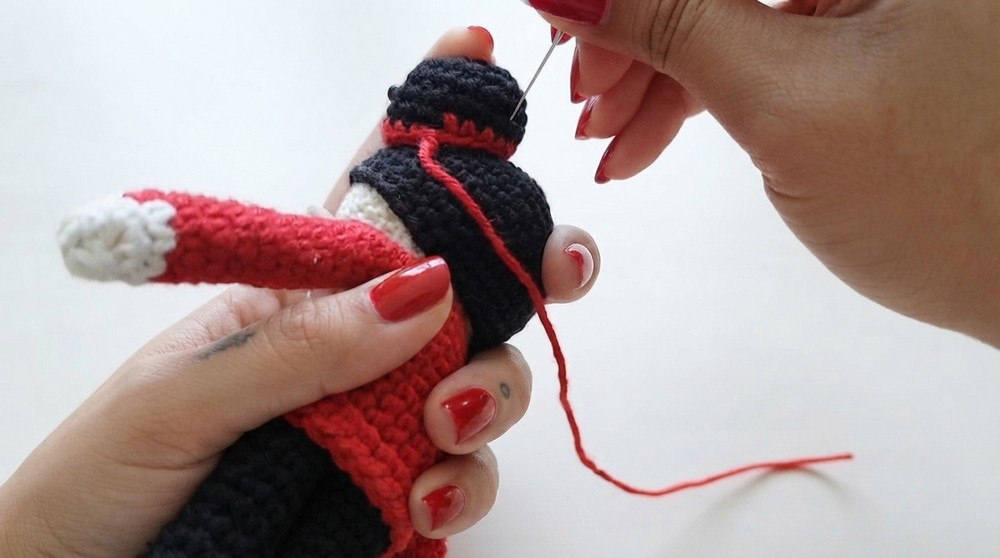
Finishing Touches
- Add cosmetic blush lightly on cheeks (optional).
- Use beads or embroidered yarn for eyes and facial details.
- Add final shaping and weave in all ends securely.
Assembly & Finished Size
- The completed Polka doll stands approx. 9-10 inches tall.
- Arms and legs are poseable if pipe cleaners/wire are included.
- Hair and buns add distinctive character.
- Firm stuffing provides a solid but soft doll.
Conclusion
You’ve now completed your very own amigurumi Pucca This pattern, combining basic crochet techniques with simple shaping and color changes, offers a fun and rewarding project. You can customize colors or add accessories to personalize. If you enjoyed this tutorial, please give it a thumbs up, subscribe, and click the bell to receive updates on new patterns.