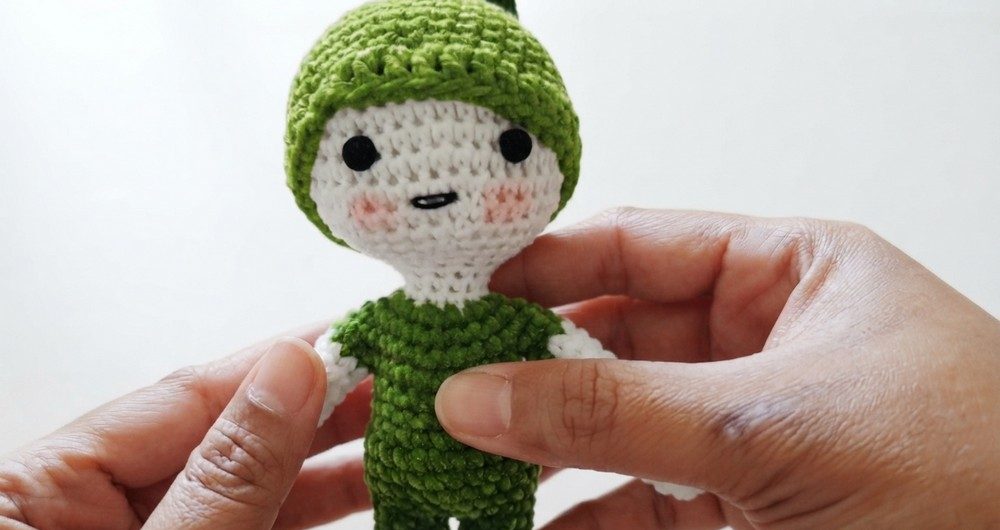
Cute Peter Pan Free Crochet Pattern with Storybook Charm
Add a storybook favorite to your crochet collection with this Adorable Crochet Peter Pan Free Pattern to enjoy handmade stitch.
Creating storybook-inspired amigurumi is a wonderful way to combine creativity with classic characters. This crochet Peter Pan doll pattern lets you recreate the beloved hero with his signature green outfit and iconic hat using simple crochet techniques. Although the finished doll features plenty of charming details, the instructions are easy to follow, making the project suitable for both beginners and experienced crocheters. As each piece comes together, you'll see the familiar Peter Pan character take shape one stitch at a time.
Adorable Crochet Peter Pan Free Amigurumi Pattern That Sparks Adventure
Visually, the finished doll is incredibly charming and full of character. It stands as a sweet reminder of childhood wonder, featuring wide eyes that seem ready for a new journey. Moreover, the way the shirt fringe sits at the waist adds a realistic detail that makes the figure stand out. You can almost imagine him preparing to fly off to Neverland at any moment. Consequently, his friendly expression is guaranteed to bring a smile to anyone's face, making him an ideal companion for a bookshelf or a cherished gift for a friend.
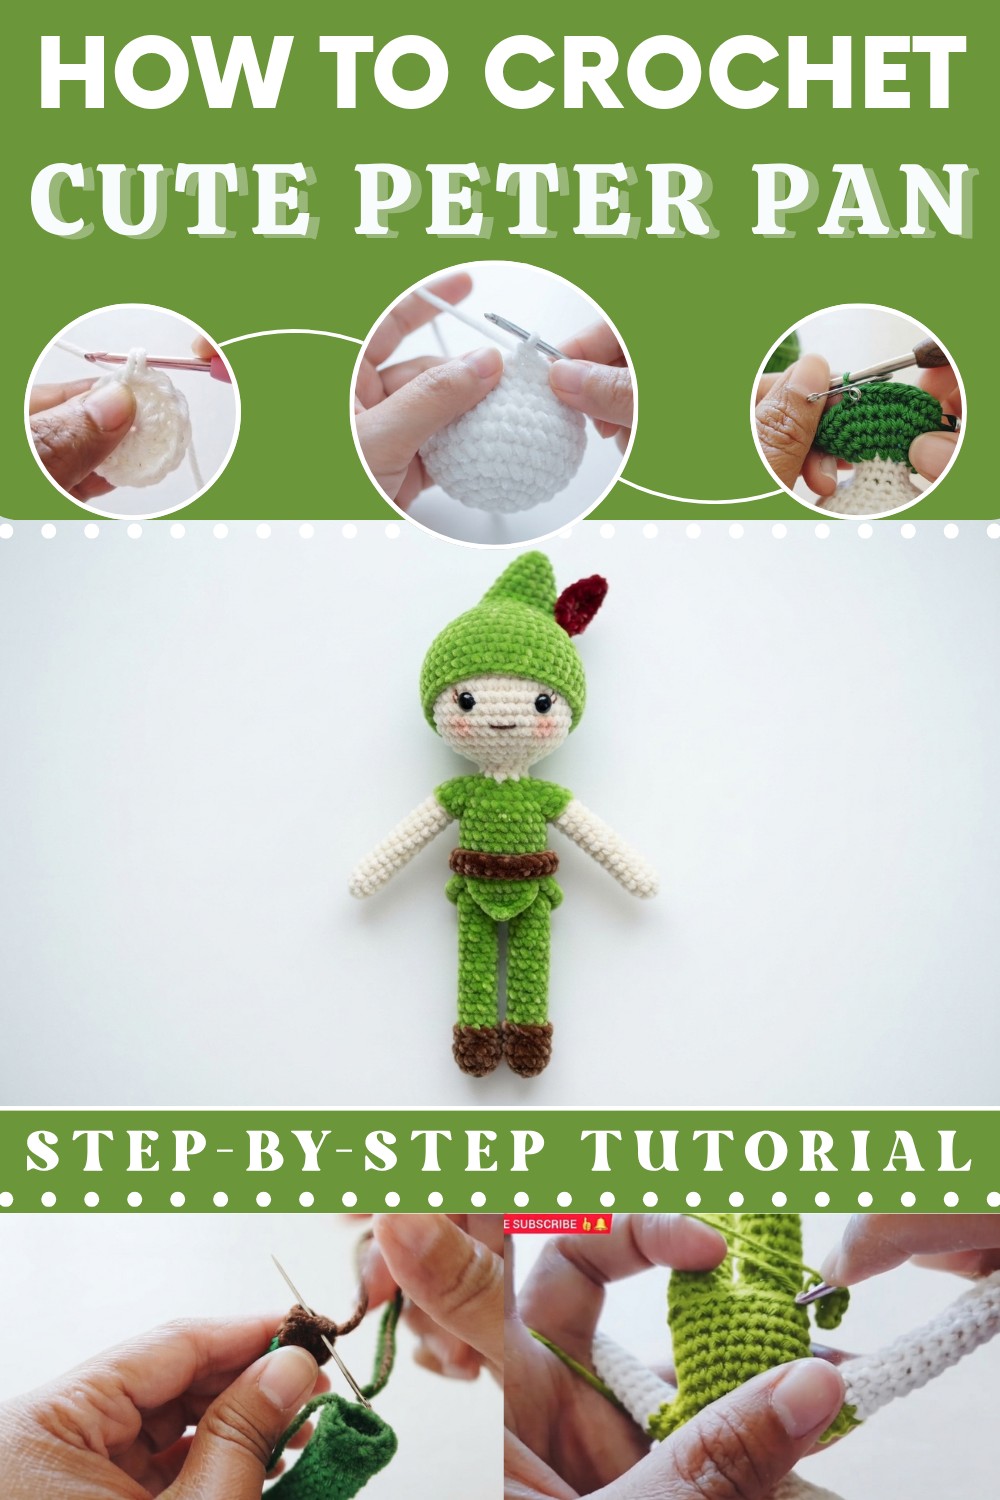
Beyond the visuals, there are several benefits to choosing this pattern. First, it serves as an excellent way to practice color transitions, such as switching from skin tone to green and brown. This helps you refine your skills without ever feeling overwhelmed by complexity. Additionally, the process offers a soothing, rhythmic activity that helps you unwind after a long day. Furthermore, seeing the final character emerge from simple loops provides a deep sense of personal accomplishment.

Finally, it is a fantastic way to utilize leftover scraps of yarn, giving purpose to those colorful bits you have collected. Ultimately, this doll is just as delightful to display as it is to work on. Since you can complete it in a few sittings, it is a perfect weekend project. Why not pick up your hook today and start your own magical adventure? You will certainly enjoy every moment spent bringing this little hero to life.
Crochet Peter Pan Pattern

Notes
- Stitch markers are crucial for marking beginnings of rounds and arm partitions.
- Work in continuous rounds unless otherwise specified, avoiding slip stitches except where called for.
- Invisible decrease is used for neat shaping during decreasing rounds.
- Pipe cleaners are optional but recommended for poseability.
- Yarn tails should be woven in and hidden for a professional finish.
- The hair and heart motifs follow similar patterns to the head and smaller amigurumi parts.
Skill Level
Suitable for intermediate crocheters familiar with:
- Magic ring / magic circle starts
- Single crochet and increases/decreases (including invisible decreases)
- Working in rounds, both continuous and joined
- Working in back loop only and front loop only stitches
- Various stitch types: slip stitch, half double crochet, double crochet
- Basic sewing of parts
Materials
- Brown acrylic yarn (for shoes and belt)
- Skin tone yarn (cotton or acrylic for head, limbs, legs)
- Green yarn (cotton or acrylic for body, hair, and shirt)
- Orange yarn (for nose/beak - optional in this pattern if making additional accessories)
- Black yarn (for lips)
- Pipe cleaners (optional for arms and legs)
- Toy stuffing (fiberfill or sisal)
- Two safety eyes for the doll’s face
- Needle (for sewing and weaving in ends)
- Safety pin (used as stitch marker)
- 3 mm crochet hook
Measurements / Sizing
- Finished doll height approximately 15-20 cm depending on yarn thickness and tension.
- Wingspan (shirt bottom triangles) roughly 6 cm wide.
- Belt length adjustable to doll’s waist circumference (approx. 22-25 chains).
Gauge and Stitch Pattern
- Gauge is not critical but maintain consistent tension for typical amigurumi density.
- Main stitch used: single crochet (sc) in spiral rounds unless otherwise specified.
- Back loop only and front loop only single crochet used for texture and shaping.
- Half double crochet (hdc), double crochet (dc), and slip stitch (sl st) used for decorative shirt bottom triangles.
Stitch Abbreviations
- ch = chain
- sc = single crochet
- st(s) = stitch(es)
- inc = increase (2 sc in one stitch)
- dec = invisible decrease
- MR = magic ring (magic circle)
- sl st = slip stitch
- hdc = half double crochet
- dc = double crochet
- BLO = back loop only
- FLO = front loop only
Special Stitches
- Magic Ring (MR): Start with adjustable ring for a tight center.
- Invisible Decrease: Insert hook in front loops of two stitches, yarn over, pull through both loops, then finish typically for a neat decrease.
- Working in Back Loop Only (BLO): Insert hook only in the back loop of a stitch for texture.
- Working in Front Loop Only (FLO): Insert hook only in the front loop of a stitch for shaping
The Crochet Pattern
Head and Neck (Skin Tone Yarn)
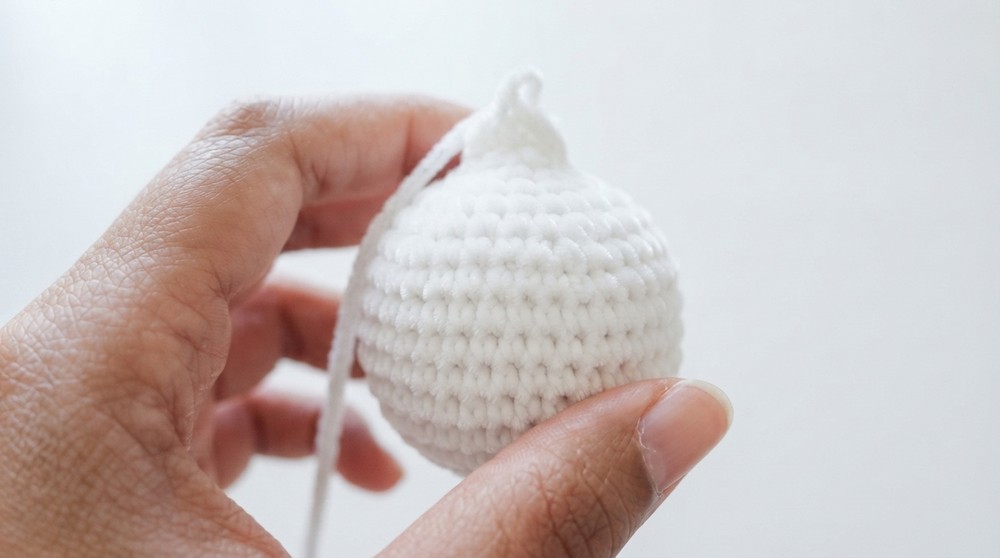
- Round 1: MR, ch 1, 6 sc in ring. (6 sts)
- Round 2: Inc in every stitch. (12 sts)
- Round 3: 1 sc, inc repeat around. (18 sts)
- Round 4: 1 sc in next 2 sts, inc repeat around. (24 sts)
- Round 5: 1 sc in next 3 sts, inc repeat around. (30 sts)
- Round 6: 1 sc in next 4 sts, inc repeat around. (36 sts)
- Round 7: 1 sc in next 5 sts, inc repeat around. (42 sts)
- Rounds 8 - 12: 1 sc in each stitch around. (42 sts each)
- Round 13: 1 sc in next 5 sts, dec repeat around (invisible decrease). (36 sts)
- Round 14: 1 sc in next 4 sts, dec repeat around. (30 sts)
- Round 15: 1 sc in next 3 sts, dec repeat around. (24 sts) Add toy stuffing.
- Round 16: 1 sc in next 2 sts, dec repeat around. (18 sts) Add more stuffing.
- Round 17: 1 sc, dec repeat around. (12 sts) Add more stuffing.
- Rounds 18 - 20 (Neck): 1 sc in each stitch around. (12 sts)

Body (Green Yarn)
- Round 21: Change to green yarn, 1 sc, inc repeat around. (18 sts)
- Round 22: 1 sc in next 2 sts, inc repeat around. (24 sts)
- Round 23: 1 sc in next 3 sts, inc repeat around. (30 sts)
- Round 24: 1 sc in next 4 sts, inc repeat around. (36 sts)

Arm Partition & Body Straight
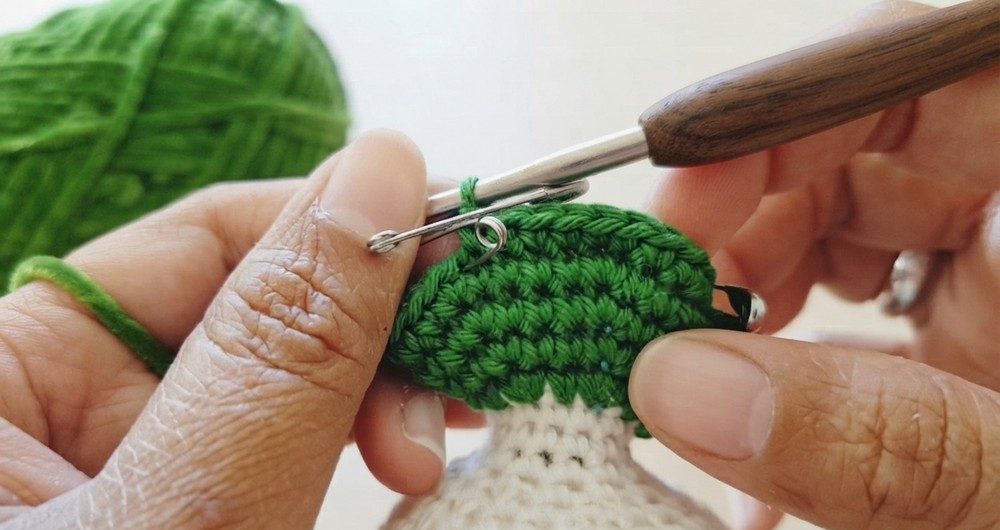
- Divide body stitches, place markers: each arm partition covers 8 stitches; body section between markers has 20 stitches.
- Round 25: 1 sc in each stitch around in body section only. (20 sts)
- Rounds 26 - 29: Continue 1 sc in each stitch. (20 sts each round)
- Round 30: 1 sc in back loop only (BLO) around. (20 sts) Add toy stuffing.
Legs (Skin Tone Yarn)
- Divide 20 stitches into 2 legs of 10 stitches each.
- Leg Rounds 1 - 15: 1 sc around for 15 rounds on each leg (10 sts per leg).
Shoes (Brown Yarn)
- Change to brown yarn.
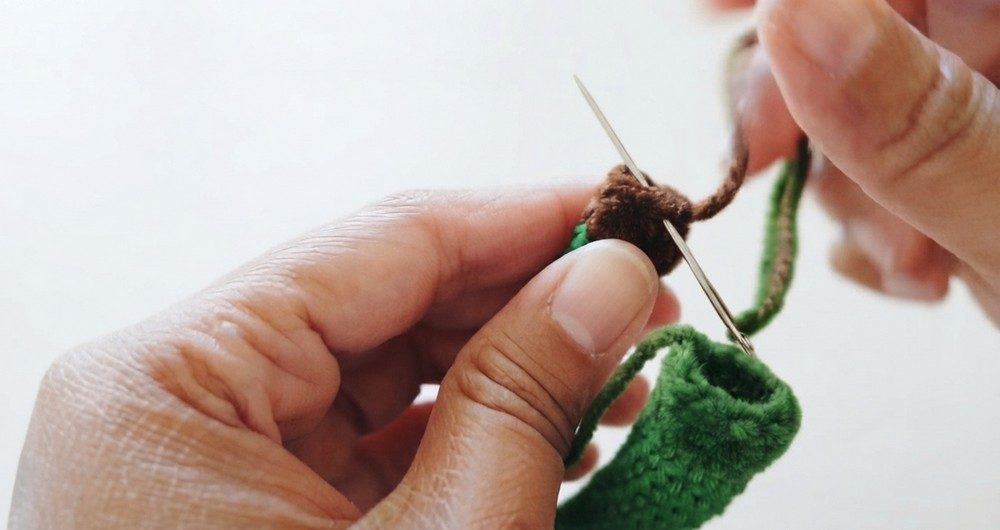
- Rounds 1 - 2: 1 sc around each leg. Add pipe cleaners (optional).
Arms (Skin Tone Yarn)
- Make arms separately, starting with 8 stitches.
- Rounds 1 - 12: 1 sc around for 12 rounds. Add pipe cleaners (optional).
Shirt Bottom Triangles (Green Yarn - worked on front loops only)
- Repeat the following for 5 triangles across front loops:
- Chain 5
- Slip stitch from second chain of hook
- 1 sc, 1 hdc, 1 dc in consecutive stitches
- Slip stitch in the next stitch to anchor
- Repeat this triangle pattern until 5 triangles are formed.
- Fasten off after 5th triangle and weave in ends.
Belt (Brown Yarn)
- Chain 23 (adjust length to doll’s waist)
- Row 1: Single crochet starting from second chain, 22 sc total.
- Sew ends and attach belt to doll waist.
Hair (Green Yarn)
- Round 1: MR, 6 sc in ring.
- Round 2: Increase round (inc in each st).
- Rounds 3 - 7: Increase rounds growing to 42 sts total.
- Last Round: 1 slip stitch, 40 double crochet (dc), 1 slip stitch to end round.
- Fasten off and sew hair onto head.

Peter Pan’s Heart (Optional)
- Round 1: MR, 6 sc in ring.
- Round 2: Increase round.
- Rounds 3 - 4: 1 sc in each stitch.
- Round 5: One increase and then 3 rounds of sc.
Assembly & Finished Size
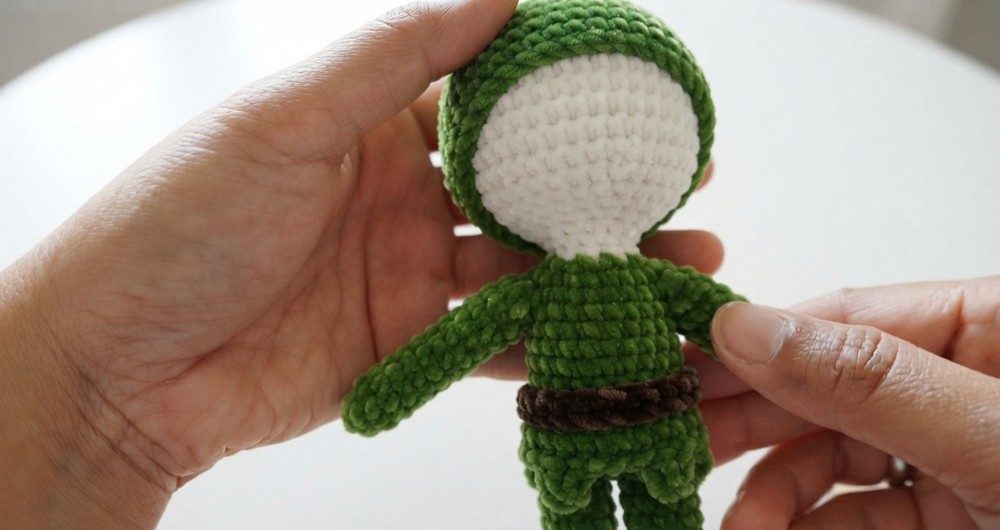
- Sew hair onto the head securely.
- Attach doll safety eyes.
- Sew arms and legs firmly on appropriate positions.
- Attach belt and position shirt bottom triangles.
- Stuff firmly but allow flexibility.
- Add facial features with black yarn or embroidery.
- Finished doll height approximately 15–20 cm.
Conclusion and Ending Words
Congratulations on making your amigurumi Peter Pan! This fun and intricate crochet project allows you to explore various stitches and shaping techniques, resulting in a charming collectible figure. Feel free to customize colors and accessories to make your doll unique.
Quick Overview Of Pattern
- Start by crocheting the head and neck with skin tone yarn using a magic ring and single crochet rounds with increases and decreases for shaping.
- Change yarn to green for the body, increasing and then shaping the arm partitions.
- Crochet the legs with skin tone yarn, add brown yarn for shoes, and optionally insert pipe cleaners for structure.
- Crochet the arms separately and add pipe cleaners as desired.
- Create the triangular bottom of Peter's shirt using front loop stitches and various crochet stitches.
- Crochet the belt from brown yarn rows.
- Make the hair using green yarn, following increases and decorative double crochet stitches.
- Crochet Peter Pan’s heart motif separately.
- Assemble by sewing the parts together, adding facial details, and finishing touches