
Cute Free Crochet Chick Easter Amigurumi Pattern With Smile
Create the cutest crochet chick Easter with this no-sew amigurumi pattern that's easy, fun, and full of creative possibilities.

It’s hard to believe how such a simple project can bring so much joy, but that’s exactly what this crochet chick Easter amigurumi pattern does. At first glance, it might seem a bit tricky to create, especially with details like tiny wings and a perfectly round body.
Cute Crochet Chick Easter Amigurumi Pattern With Spring Vibes
This delightful design features a no-sew body and an adorable appearance, including tiny feet, a tuft of hair, and a sweet, stitched beak that gives the chick a playful yet charming personality.
Not only is it a fun crochet to make, but it’s also perfect for various uses. Whether you want to gift it as a handmade Easter present, use it as a festive decoration, or simply add it to your amigurumi collection, this little chick is guaranteed to bring smiles.
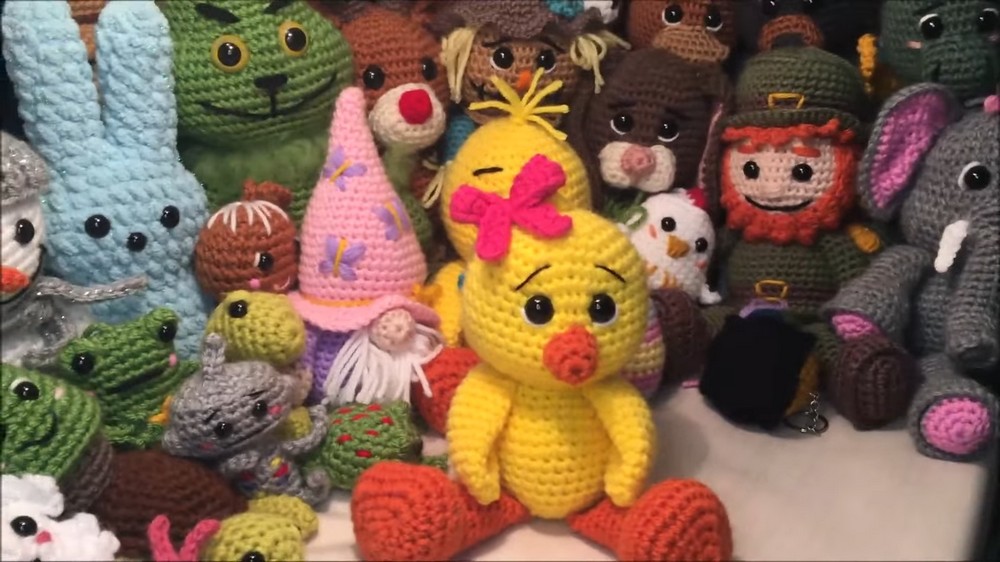
Crochet Pattern for the Cute Little Chick
Finished Size
Approximately 5–6 inches tall when made with the recommended yarn and hook size.
Materials
- Yarn:
- Main Body and Wings: Medium (#4) weight yarn in yellow or desired base color.
- Legs and Beak: Medium-weight (#4) yarn in orange or a contrast color.
- Hair Tuft and Bow: Optionally use scraps of yarn in your color choice.
- Crochet Hook: 4.25 mm.
- Safety Eyes: 14 mm or desired size. You can also replace these with embroidered or felt eyes for a softer look.
- Stuffing: Polyester fiberfill for plump, defined shaping.
- Notions:
- Yarn/tapestry needle for sewing and embroidery.
- Stitch markers to track rounds.
- Scissors.
- Optional Embellishments: Scraps of white yarn for eye accents and black/contrasting color for eyebrows.
Gauge
Gauge is not critical for this pattern, but working tightly enough to prevent stuffing from showing will give ideal results. Adjust tension if needed.
Abbreviations (US Terms)
- MR – Magic ring
- ch – Chain
- sl st – Slip stitch
- sc – Single crochet
- hdc – Half double crochet
- inc – Increase (2 sc in the same stitch)
- dec – Decrease (single crochet two stitches together)
- st(s) – Stitch(es)
- (...) – Instructions in parentheses are to be repeated per round or as specified
- x N – Repeat the instructions N times
Pattern Overview
The pattern is divided into the following sections:
- Wings
- Legs
- Body and Head
- Details (including tuft of hair, beak, and face accents)
- Bow
Special techniques like magic ring, invisible decrease, and attaching parts while crocheting are introduced for seamless integration.
Pattern Instructions
1. Wings (Make 2)
Round 1:
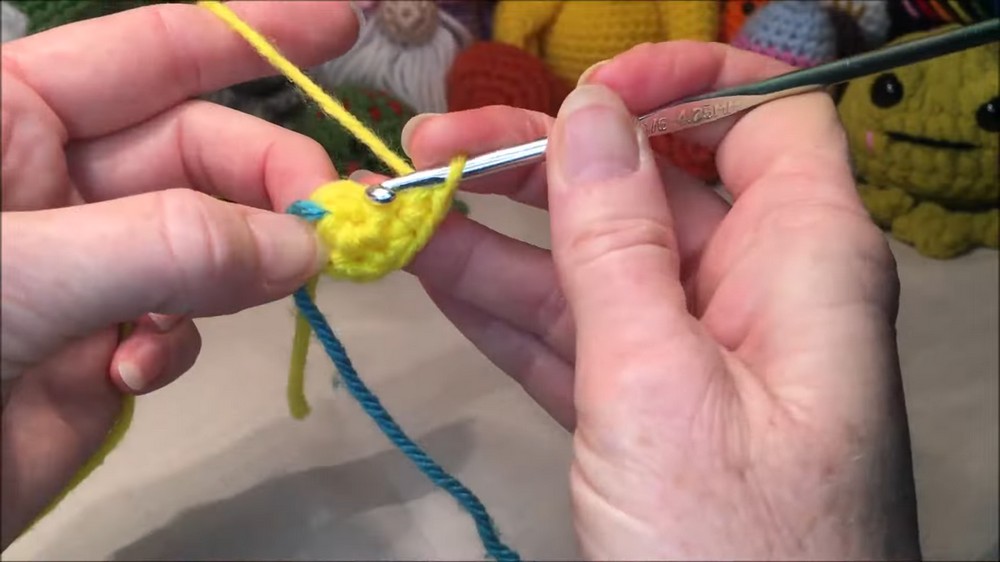
- Create a magic ring (MR), ch 1, and work 6 sc into the MR. (6 sts)
- Pull the tail to close the ring.
Round 2:
- (sc 1, inc) 3x. (9 sts)
Round 3:
- (sc 2, inc) 3x. (12 sts)
Rounds 4–10:
- Sc in each stitch around for 7 rounds. (12 sts per round)
Round 11:
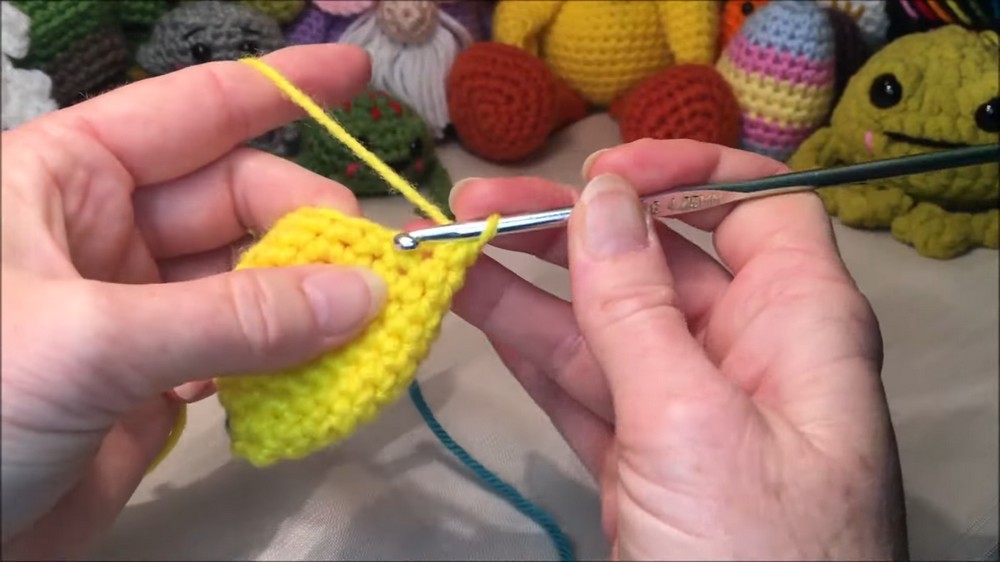
- Fold the wing in half and crochet 4 sc across the flattened edge to close. Leave a medium tail for sewing.
Tips:
Ensure the closed wing is slightly curved. Adjust tension for better shape retention.
2. Legs and Toes (Make 2)
Each leg includes toes and base shaping, worked continuously without joining rounds.
Toes (Make 3 per leg):
- Round 1: MR, ch 1, 4 sc into the MR. (4 sts)
- Rounds 2–3: Sc in each stitch. (4 sts)
- Slip stitch to close, leaving a short tail for sewing.
Leg Base:
- Round 1: MR, ch 1, 6 sc into the MR. (6 sts)
- Round 2: Work 6 inc (12 sts).
- Round 3: Shape by adding increases: (3 sc, dec) into 9 sts.
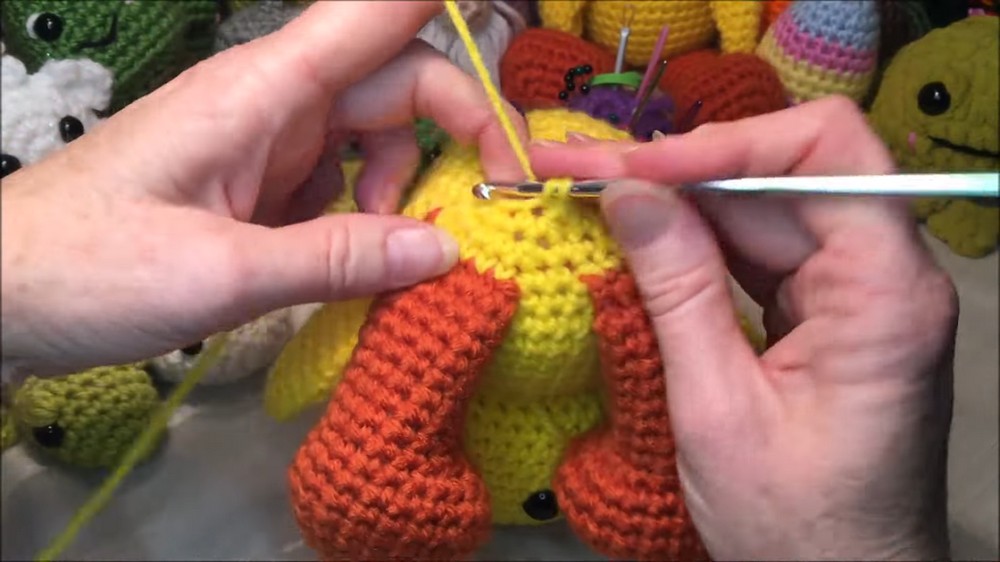
Evenly attach toes to the base, spacing them naturally across the shaping. Fill lightly with stuffing.
3. Body and Head (Worked as One Piece)
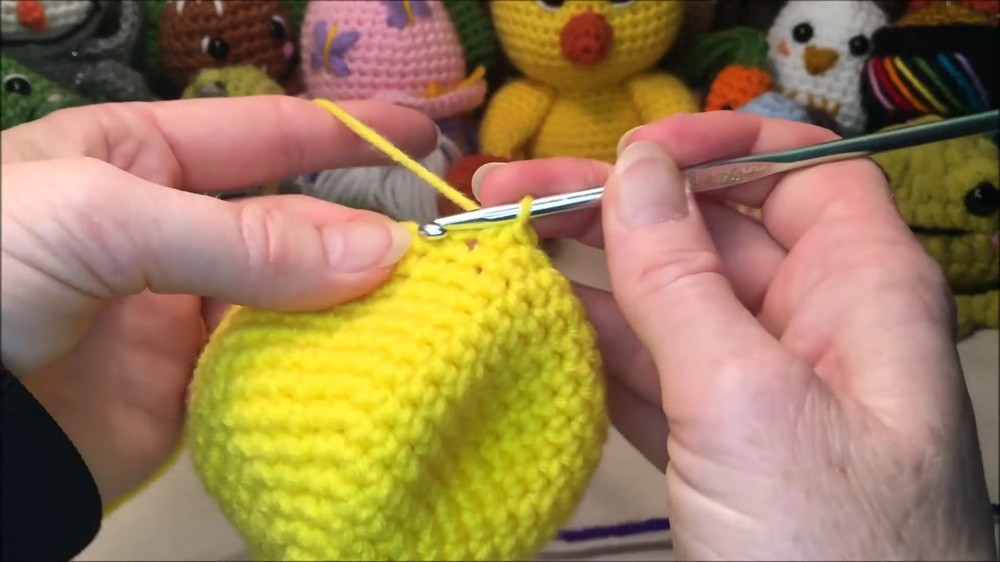
The chick’s body and head are crocheted continuously, starting at the top of the head and working downward.
Head Section:
- Round 1: MR, ch 1, 6 sc into the MR. (6 sts)
- Round 2: (inc) 6x. (12 sts)
- Round 3: (sc, inc) 6x. (18 sts)
- Round 4: (sc 2, inc) 6x. (24 sts)
- Round 5: (sc 3, inc) 6x. (30 sts)
- Rounds 6–11: Sc in each stitch around for 6 rounds. (30 sts)
Body Shaping:
- Round 12: (sc 3, dec) across. (24 sts)
- Round 13: (sc 2, dec) across. (18 sts)
- Round 14–18: Sc in each stitch.
- Insert the safety eyes between rounds 9 and 10, ensuring symmetry.
Adding Wings (Round 19):
- Sc 3, attach one wing by working through 4 sts on the chick's body, then sc 4, attach the second wing through 4 sts, sc 3. (18 sts)
Body Section:
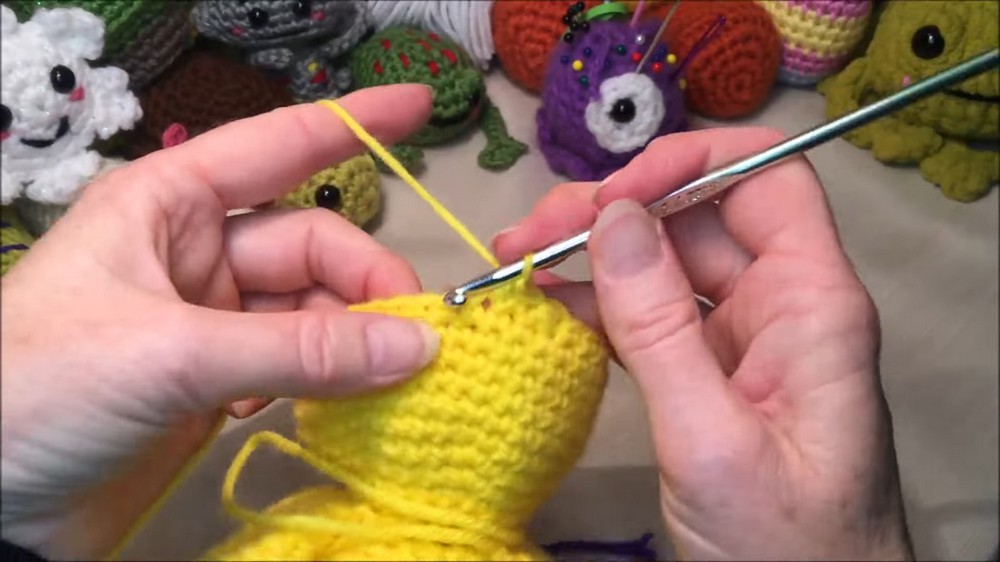
- Rounds 20–29: Sc in each stitch. (18 sts)
Stuffing Between Rounds:
Stuffing should be firm to prevent a misshapen body. Shape carefully using your hands during stuffing.
Final Rows:
- Round 30: (sc 4, dec) across rows for shaping.
- Round 35: Close gently with 6 sl sts. Weave-in tail ends and flatten base.
4. Details
Tuft of Hair:
Cut 2–3 strands of matching or contrasting yarn. Fold in half and insert into the top center of the head using a slip knot. Tighten and trim to desired length.
Beak:
- Round 1: MR, ch 1, 6 sc into the MR. (6 sts)
- Round 2: (sc, inc) 3x. (9 sts)
- Round 3: Sc around. (9 sts)
- Leave a long tail for sewing onto the body just under the eyes. Optionally, add minimal stuffing for shaping.
Eye Accents and Eyebrows:
Use scraps of white to add accent lines on the sides or bottom of the eyes. For eyebrows, split black yarn or use embroidery floss. Place 2 short lines above the eyes for expression.
5. Bow (Optional)
Foundation:
- Create a long chain of 31 and work hdc into the second chain from hook. (30 hdc)
- Fold into a bow shape, secure the center with wrapped yarn, and sew directly to the head or neck.
Customization Ideas
- Color Palettes: Use pastel colors for springtime vibes or bold designs for personalized gifts.
- Decorative Additions: Add felt flowers, beads, or mini props like carrots and eggs for Easter.
- Size Variations: Create larger chicks using bulky yarn and a larger hook (6 mm or more).
Conclusion
Congratulations on completing your adorable crocheted chick! This endearing piece serves as a delightful gift, decoration, or fun collectible. With its customizable elements, you can make each chick unique to suit any occasion or theme.
Important Remarks
- Shape Carefully: Don’t rush while stuffing to maintain an evenly rounded look.
- Adjust Design: Experiment with colors and facial features to personalize expressions.
- Final Touch: Use embroidery, felt, or accessories for thoughtful customization.