
Cute Crochet Amigurumi Christmas Cat Free Pattern For Winter Decor
Celebrate the holidays with this Crochet Amigurumi Christmas Cat Free Pattern featuring a cute kitty and cheerful festive details.
Here is a cute and festive idea for the holiday season: Crochet Amigurumi Christmas Cat. This little cat has a friendly, human-like face with big eyes and a sweet smile, which makes it feel warm and approachable. It wears holiday accessories such as a Santa hat or scarf, adding charm and character.
Festive Crochet Amigurumi Christmas Cat Free Pattern With Holiday Charm
The colors used often include bright reds, whites, and greens. These cheerful shades highlight the Christmas spirit and make the cat stand out among other decorations. The quality of yarn greatly affects the final look, so choosing soft and vibrant yarn helps the cat look neat and lively.
This amigurumi cat Desgin By DynamisCreations uses simple stitches like single crochet, along with increases and decreases, to shape its body. The stuffing inside gives it a soft but firm feel, which is good for holding and displaying. Since the stitching is straightforward, even beginners can follow the steps without difficulty.
Besides being a festive ornament, this Christmas cat brings joy to any space it is placed in. It can also serve as a thoughtful gift during the holidays. Its size allows it to be used as a small decoration on shelves, desks, or even as a charm on bags.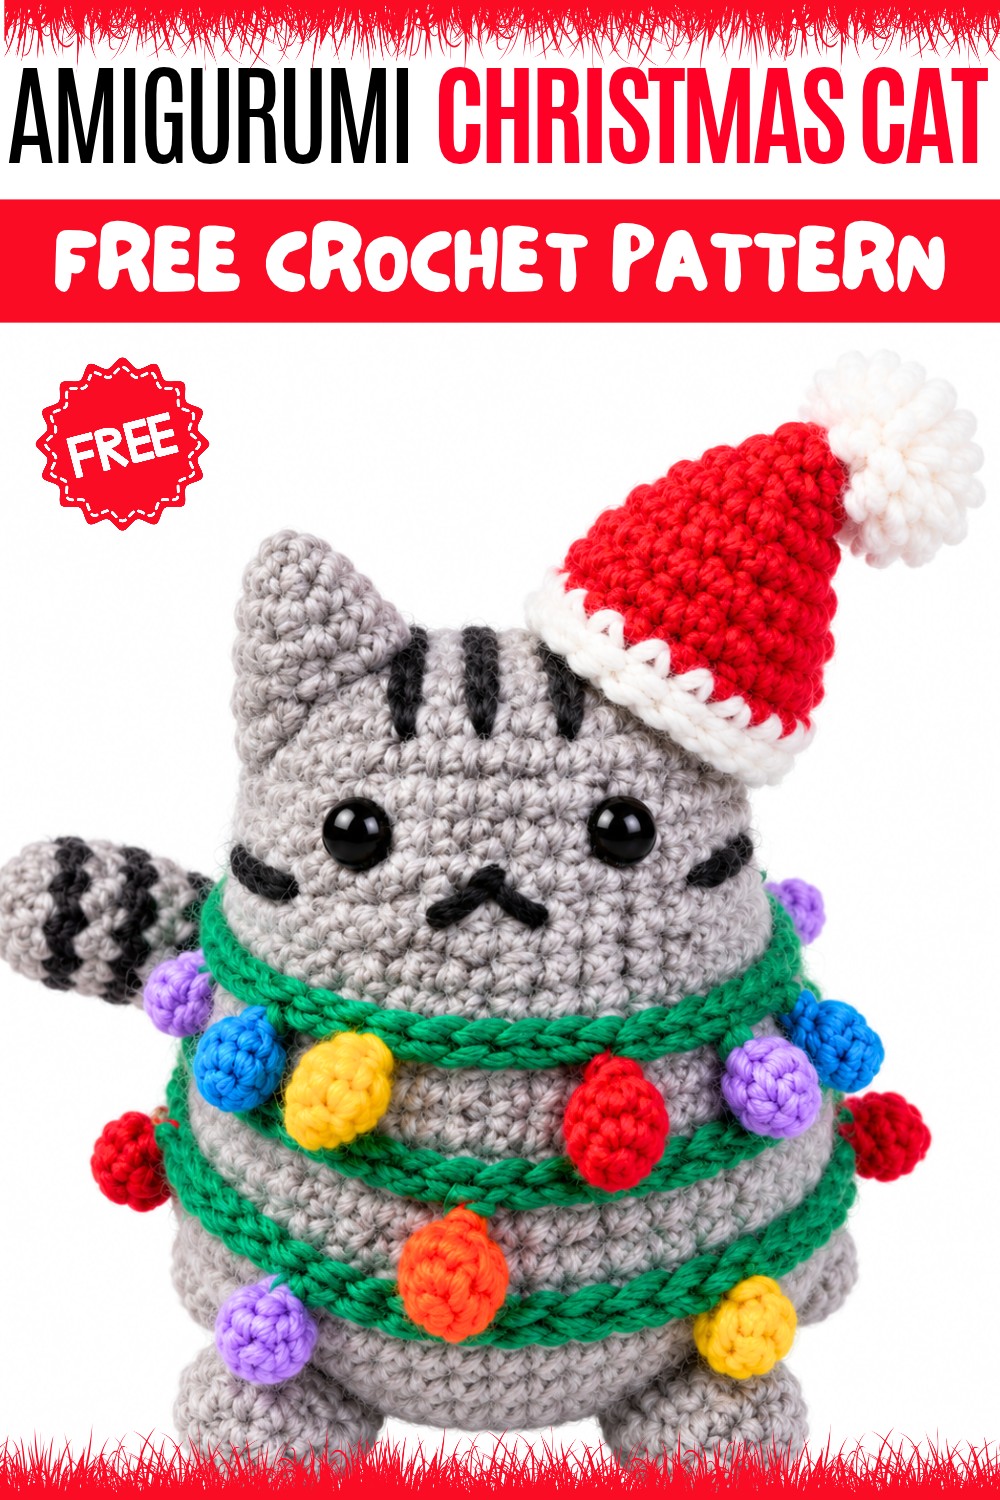
In short, Crochet Amigurumi Christmas Cat is a lovely project with bright colors and a warm personality. It suits those who appreciate cute, simple designs for the holiday season, making festive times extra cheerful.
About the Pattern
This Christmas Cat crochet pattern is a whimsical, festive project that blends classic amigurumi construction with charming seasonal details. The pattern is constructed in four distinctive parts to create a cat with alert ears, a plump body, striped tail, and playful features, all finished with a string of colorful holiday light bulbs. The cat is designed with joined ears, a seamless body and head, straightforward limbs and tail, and cheerful embroidery, resulting in a playful holiday keepsake or a thoughtful gift.

Key Pattern Details
The structure follows a logical sequence to ensure accurate shaping and effortless assembly:
- The ears are crocheted first and serve as the starting point to shape the head.
- Body and head are worked as one continuous form, with methodical increases and decreases for realistic shaping.
- Feet and tail are worked separately in the round for compact structure.
- Assembly and decoration involve embroidery for expressive features and a string of yarn “lights” for added Yuletide character.
Important Notes
- This amigurumi is crocheted in continuous spirals unless otherwise indicated, so mark the start of each round.
- Tight stitches are important; adjust hook size to avoid gaps and to keep stuffing inside.
- Assemble limbs and embellishments only after all crocheted pieces are made, ensuring optimal symmetry and positioning.
- Color changes for the tail require alternating after every two rounds to create stripes.
Difficulty Level
The project is suitable for advanced beginners to intermediate crocheters. It combines the essentials of amigurumi with basic color changes and embroidery. Familiarity with magic ring, increases, and decreases will make the process smoother.
Supplies Needed
- Worsted weight yarn in gray, black, green, and multiple colors for the lights
- Crochet hook appropriate for yarn (often 2.5–3.5mm)
- Tapestry needle for sewing and embroidery
- Polyester stuffing
- Safety eyes
- Scissors
Size & Measurements
The completed Christmas Cat typically stands around 15–18 cm (6–7 inches) tall, including the head and body, and about 8 cm (3 inches) across at the widest part. The striped tail and feet are proportionate, designed for stability and charm.
Gauge & Stitch Details
- Gauge is not critical for amigurumi but a tight, dense fabric is required so stuffing does not show.
- Typical gauge: 8–9 SC and 8–9 rows = 2 inches.
- Main stitches: single crochet (SC), chain (CH), half double crochet (HDC), slip stitch (SLST).
- Magic ring used to start the ears, feet, and tail.
Crochet Abbreviations
- SC: Single Crochet
- INC: Increase (2 SC in next stitch)
- DEC: Decrease (SC 2 together)
- CH: Chain
- HDC: Half Double Crochet
- SLST: Slip Stitch
- St(s): Stitch(es)
- MR: Magic Ring/Circle
Special Stitch Guide
- Magic Ring (MR): For small round pieces, make an adjustable loop, work the required number of stitches into it, then pull closed.
- Increase (INC): 2 SC in same stitch.
- Decrease (DEC): SC 2 together, reducing stitch count.
Complete Crochet Pattern
1. Ears (Make 2)
Work the ears first, as they form the starting point for the head.
- Round 1: MR, 4 SC
- Round 2: INC in every other stitch; [1 SC, 1 INC] around to reach 6 SC
- Round 3: INC in every other stitch; [1 SC, 1 INC] around to reach 9 SC

Make two ears. Do not cut yarn on the second ear; proceed directly to body and head construction.
2. Body & Head
Join ears and begin working down into the body:
- Join the Ears: Chain 4
- Round 1: SC around first ear (9 SC), SC along one side of chain (4 SC), SC around second ear (9 SC), SC along other side of chain (4 SC). Total: 26 SC
- Round 2: SC in each stitch around
- Round 3: Increase evenly to 30 SC
- Rounds 4–13: Work even, 30 SC in each round
- Round 14: Increase evenly to 36 SC
- Rounds 15–17: Work even, 36 SC in each round
- Round 18: Increase evenly to 42 SC
- Rounds 19–24: Work even, 42 SC in each round
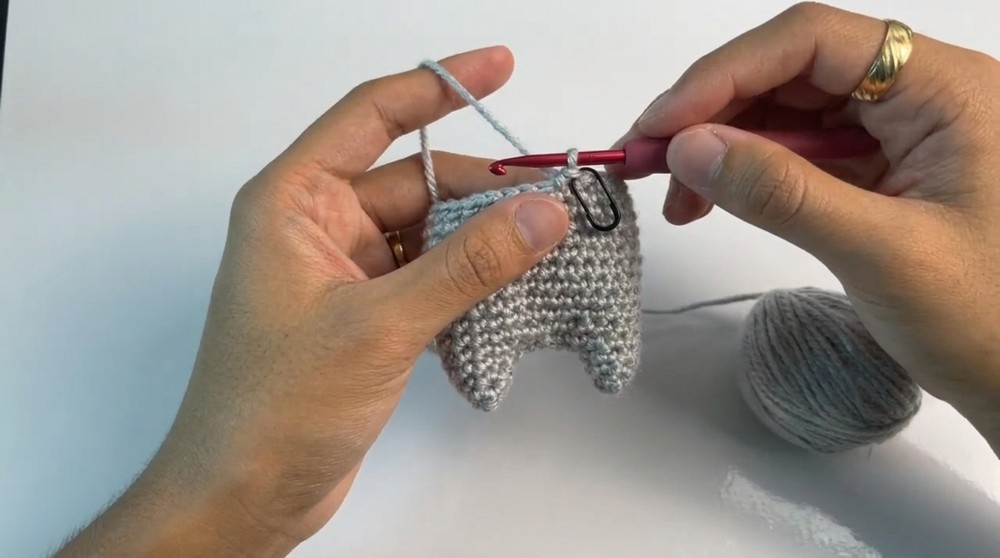
Start shaping the base:
- Decrease to 36: DEC every four stitches; [4 SC, DEC] repeat around
- Decrease to 30: DEC every three stitches; [3 SC, DEC] repeat around
- Decrease to 24: DEC every two stitches; [2 SC, DEC] repeat around
Before final shaping, do the following:
- Face: Position safety eyes between appropriate rounds .
- Stuffing: Fill with polyester stuffing for desired firmness.
Continue to close:
- Decrease all the way around: [SC, DEC] repeat until closed .
3. Feet and Tail
Feet (Make 2)
- Start: MR
- Work SCs in the ring to form a small oval/round foot, increasing and working even for desired size .
- Finish: Close and leave a long tail for sewing.
Tail
- Start: MR, 6 SC into ring
- Increase: 2 SC in each stitch around for 12 SC
- Stripes: Alternate 2 rounds of black yarn with 2 rounds of gray yarn.
- Continue: Maintain color alternation in 2-round increments
- Finish: Tail should be long enough to curve around the cat’s body; stuff lightly and close.

4. Assembly & Decoration
Assembly
- Sew feet to underside of body so cat sits upright .
- Attach tail to lower back, letting it curve playfully to the side or front.
Embroidery (35:32)
- Use tapestry needle and yarn to add mouth, whiskers, and nose for expression.
Decorative Lights
- Green Yarn String: Chain a length to drape around cat .
- Bulbs: For each bulb:
- Chain 2,
- Work 1 HDC into first chain,
- SLST to finish bulb shape .
- Make several bulbs in different colors and attach to string at intervals.
- Place lights over cat, tacking if desired for security.
Joining & Final Size
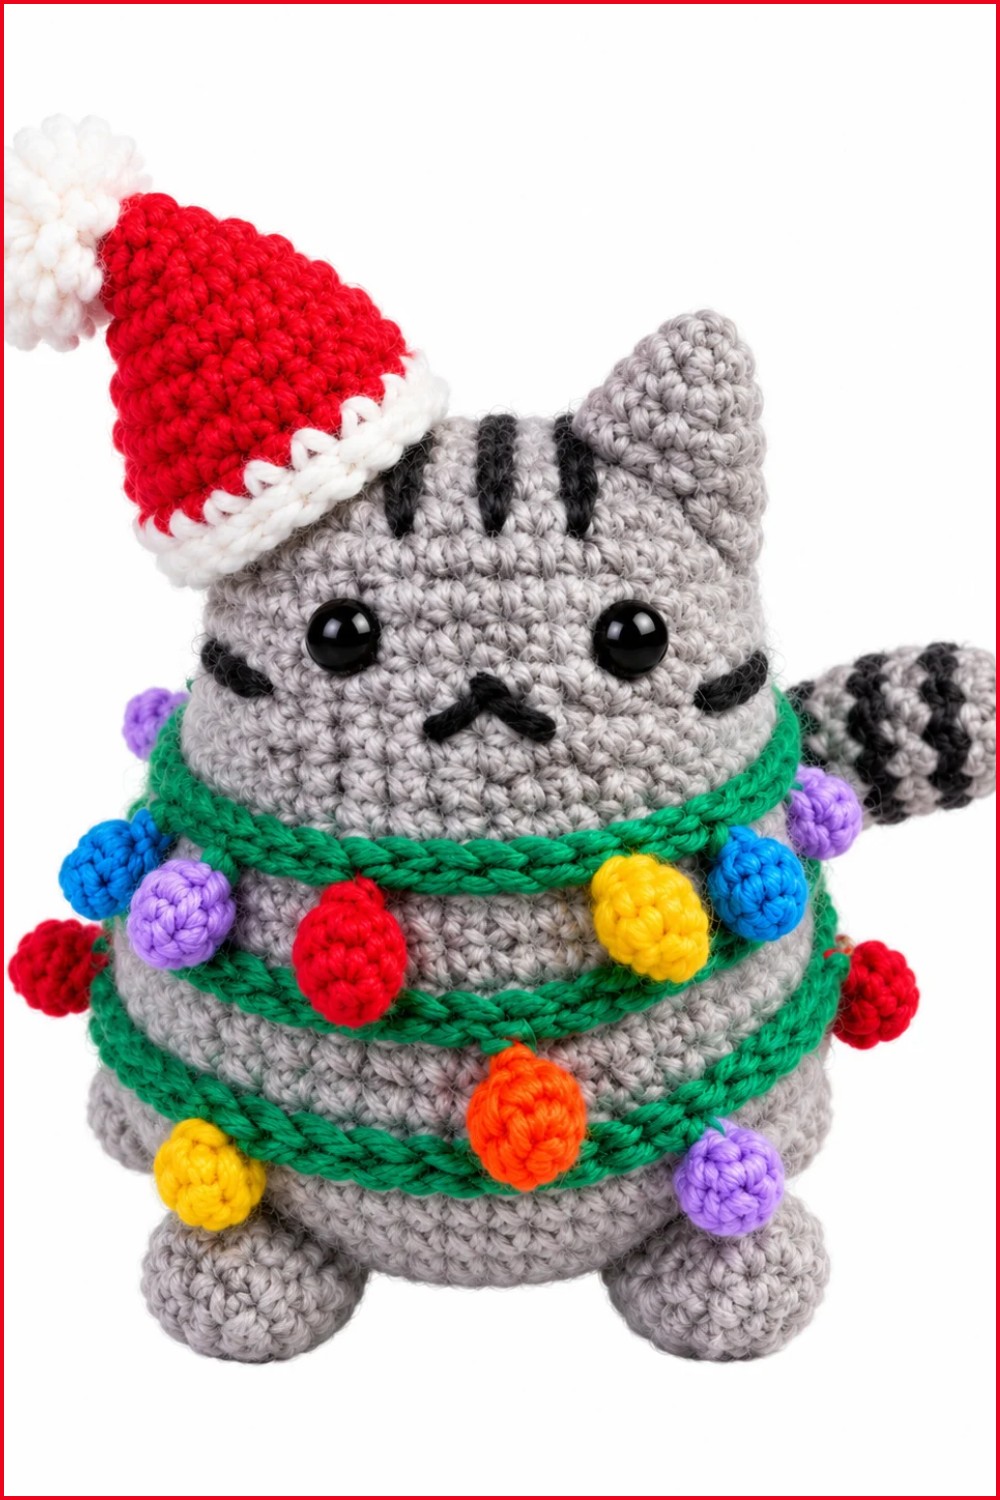
All elements are joined firmly to the body for durability. The completed Christmas Cat stands approximately 15–18 cm tall, with a gentle plumpness and playful stance emphasized by its curved tail, bright lights, and embroidered facial features.
Final Words
This Christmas Cat pattern captures the festive spirit in a soft, squishy form, making it an instant holiday favorite. The combination of sturdy shaping, thematic embellishments, and careful color changes guides crafters to a satisfying, joyful amigurumi project. From magical ears to glowing deco-lights, each step encourages attention to proportion and detail, ensuring a delightful and memorable seasonal creation.